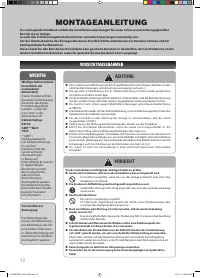
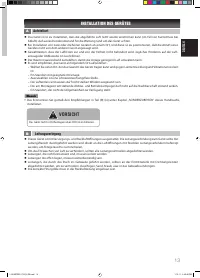
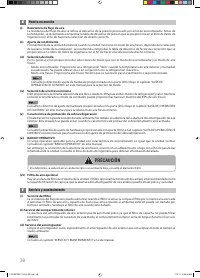
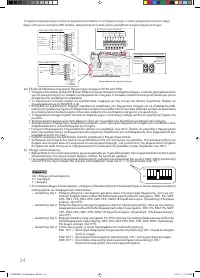
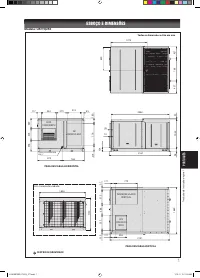
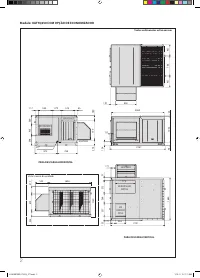
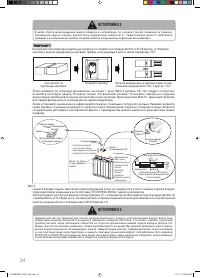
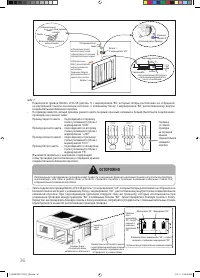
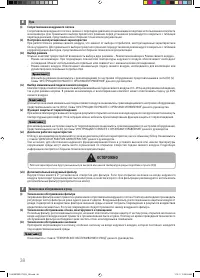
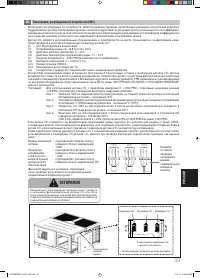
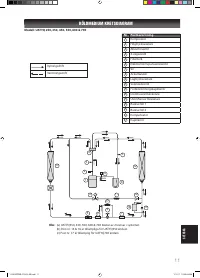
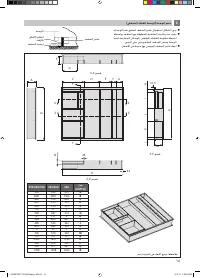
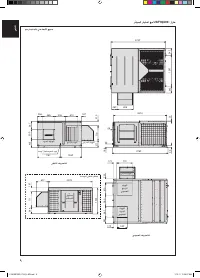
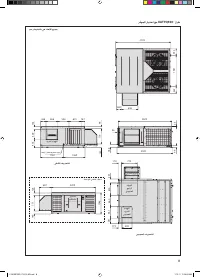
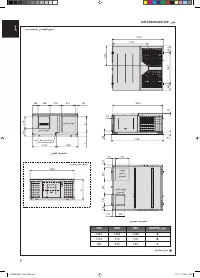
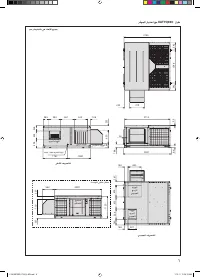
Кондиционеры Daikin UATYQ-CY1 - инструкция пользователя по применению, эксплуатации и установке на русском языке. Мы надеемся, она поможет вам решить возникшие у вас вопросы при эксплуатации техники.
Если остались вопросы, задайте их в комментариях после инструкции.
"Загружаем инструкцию", означает, что нужно подождать пока файл загрузится и можно будет его читать онлайн. Некоторые инструкции очень большие и время их появления зависит от вашей скорости интернета.


29
ENGLISH
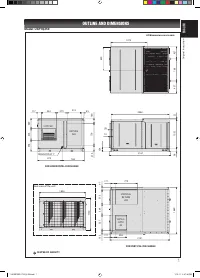
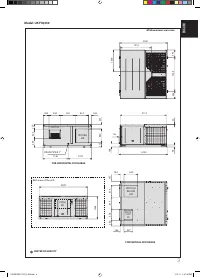
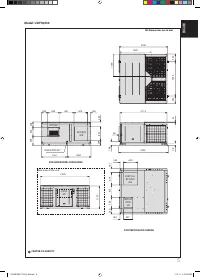
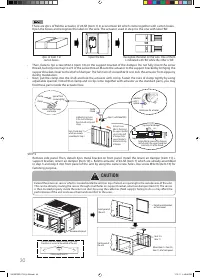
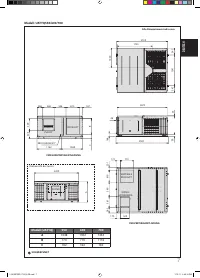
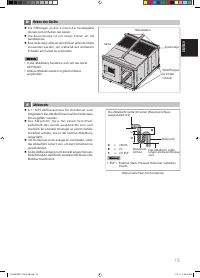
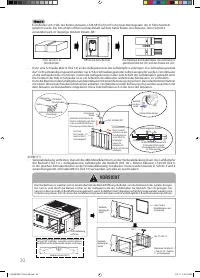
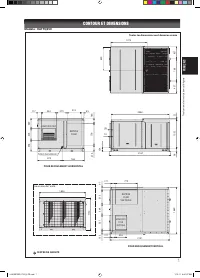
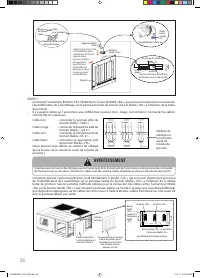
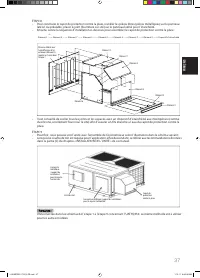
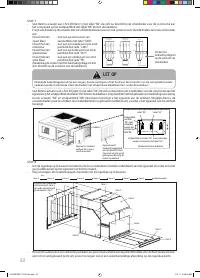
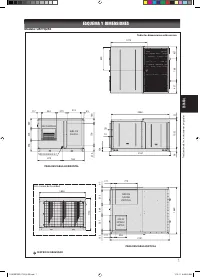
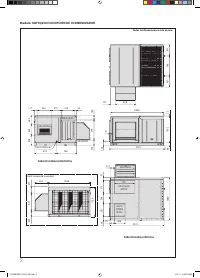
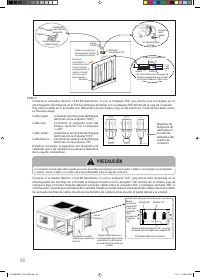
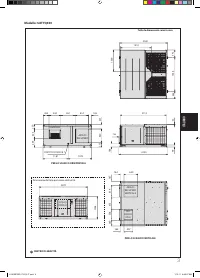
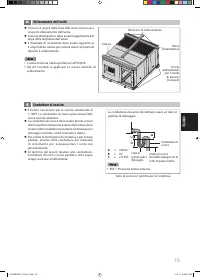
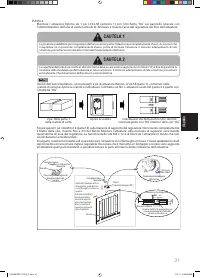
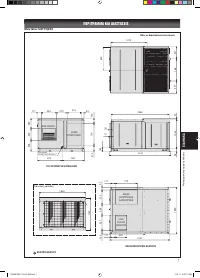
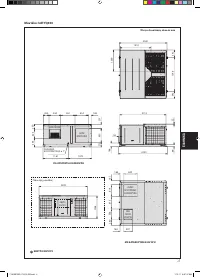
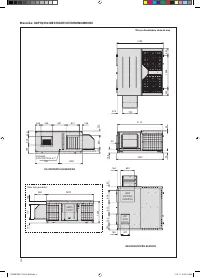
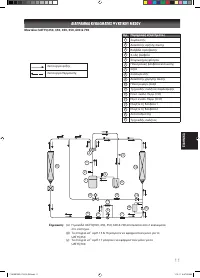
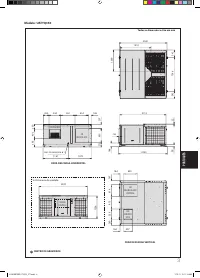
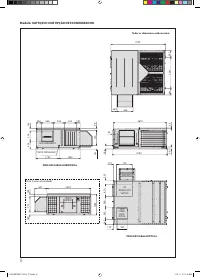
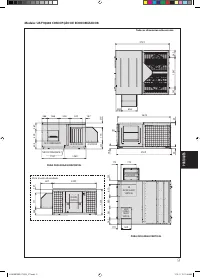
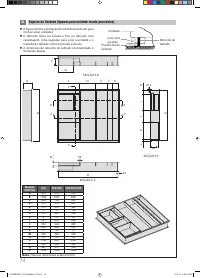
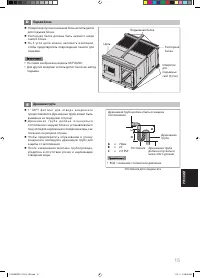
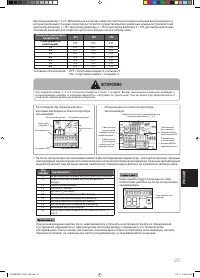
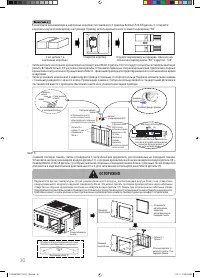
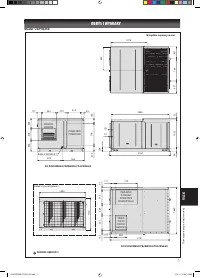
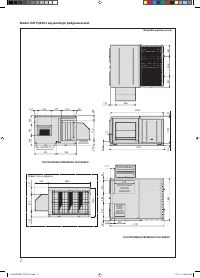
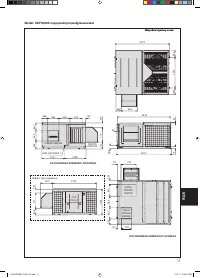
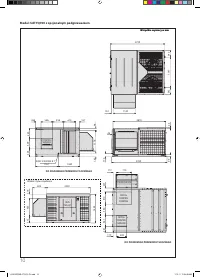
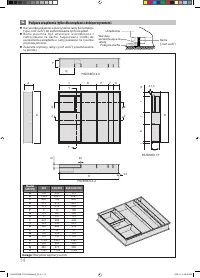
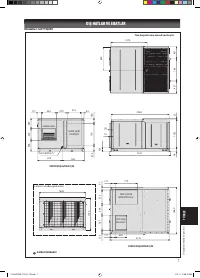
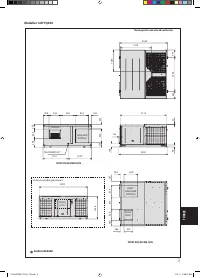
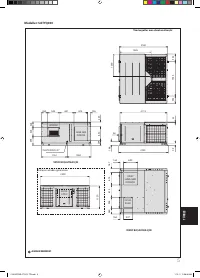
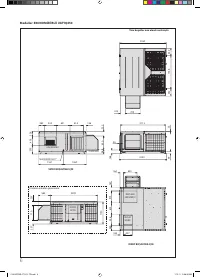
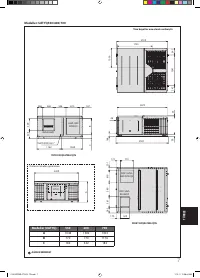
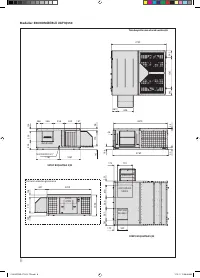
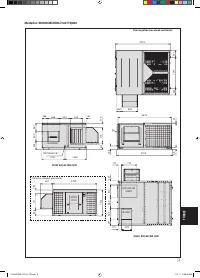
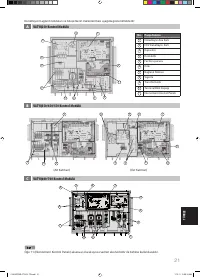
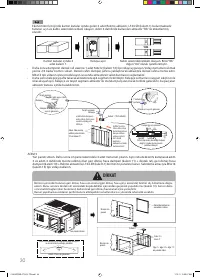
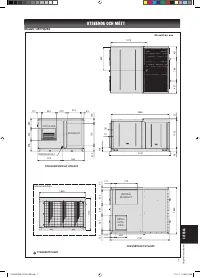
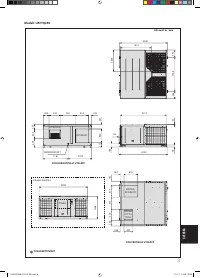
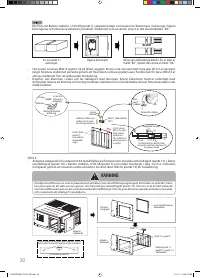
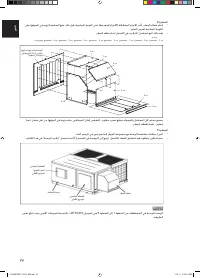
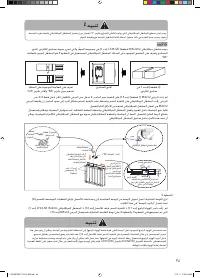
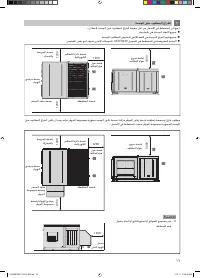
(iii) Location for installation
Follow the recommendations given in part (A) under chapter “INSTALLATION OF THE UNIT” in this manual. In
addition, there is a need to consider the installation condition around the kit whereby:
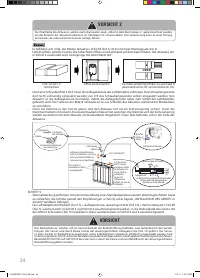
The clearance of the rain hood from the fl oor shall always have no snow nor water accumulation.
The fresh air inlet does not face prevailing wind direction.
The outdoor air shall be always clean and no odor, complies with the limit of concentration for several
contaminants set by local standards, and does not exceed the threshold limit value ( TLV ) for toxicity specifi ed
by local standards.
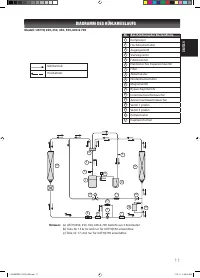
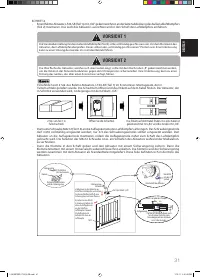
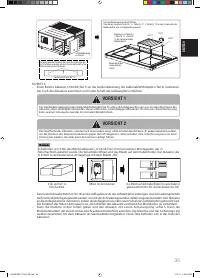
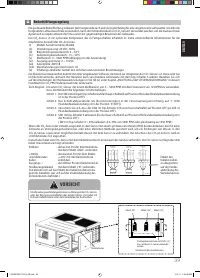
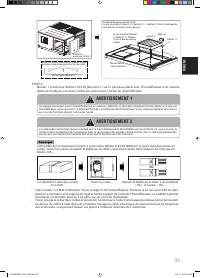
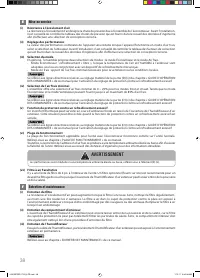
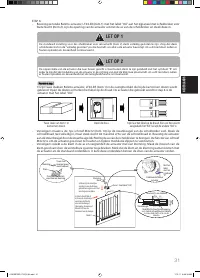
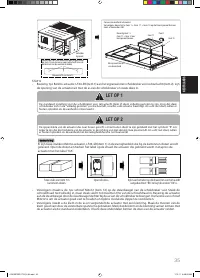
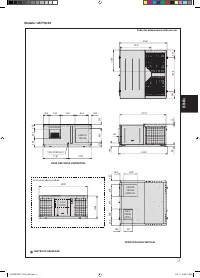
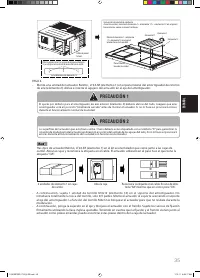
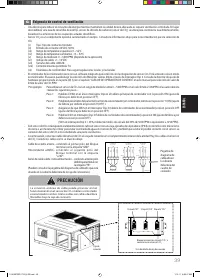
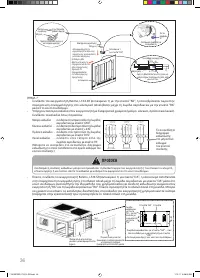
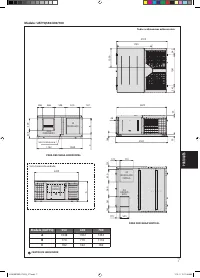
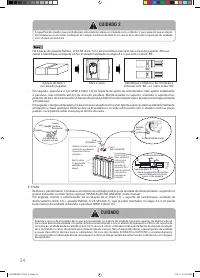
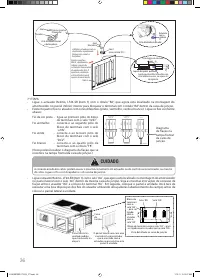
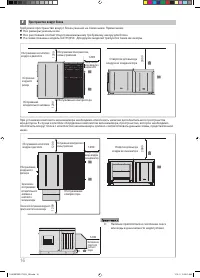
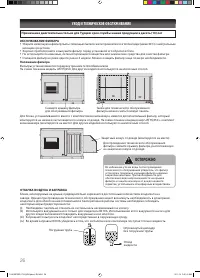
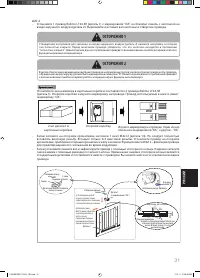
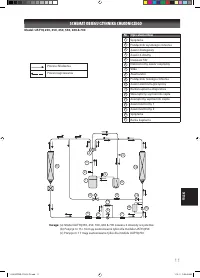
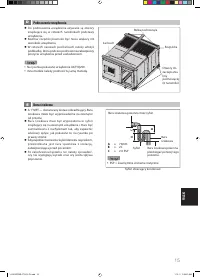
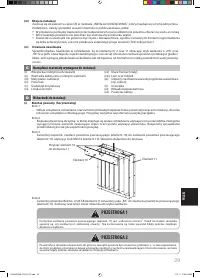
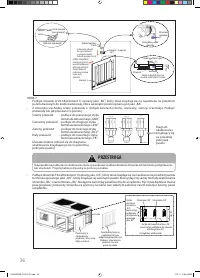
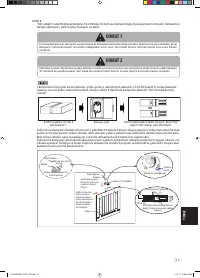
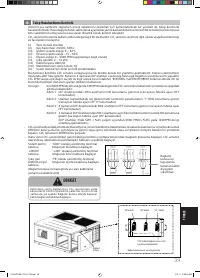
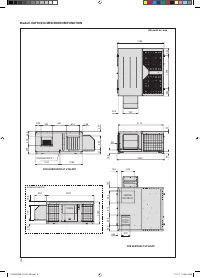
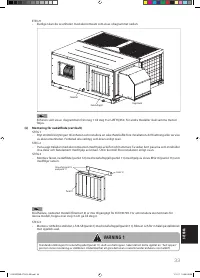
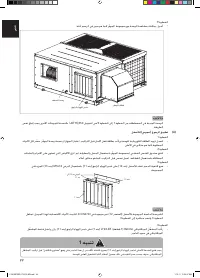
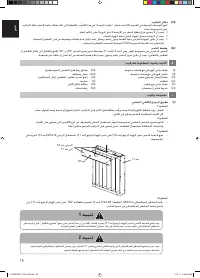
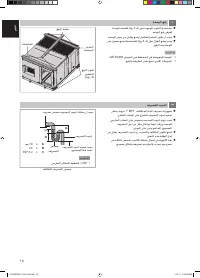
(iv) Damper
Function
Check the two dampers in the economizer kit, which are item 2 and item 11 by turning the shaft of damper +90°
and -90° (fully opened to fully closed or vice versa). The damper turning shall be smooth and easy. Any damages
or abnormalities shall inform to authorized service division.
ü
ü
ü
C
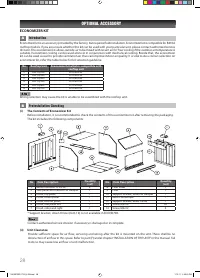
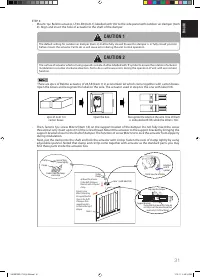
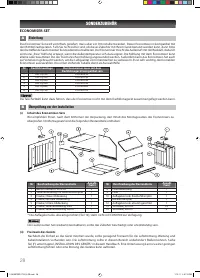
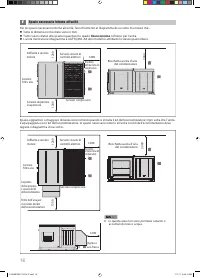
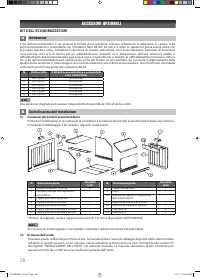
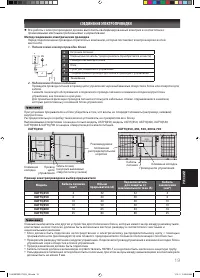
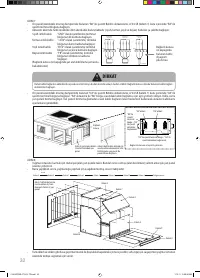
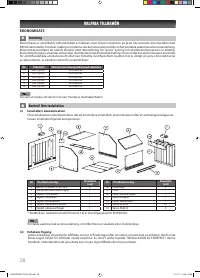
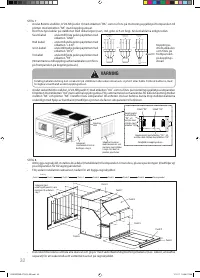
Tools And Materials Required For Installation
(i)
Electric screwdriver with assorted sockets
(ii)
Electric driller with assorted sockets
(iii) Small
fl at blade screwdriver
(iv) Cutter
(v)
Philip type screwdriver
(vi) Measurement tape or ruler
(vii) Adjustable spanner (small size)
(viii) Crowbar and hammer
(ix) Weather-proof sealant (such as silicone)
(x) Gasket
(xi) Safety lockout tag
(xii) Cable
tie
D
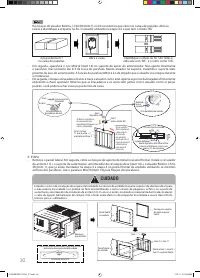
Installation Guidelines
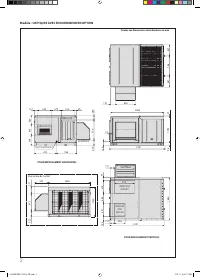
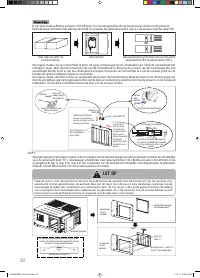
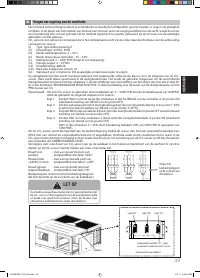
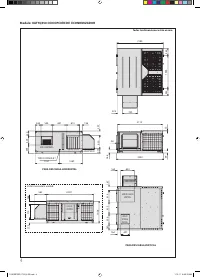
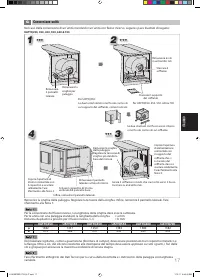
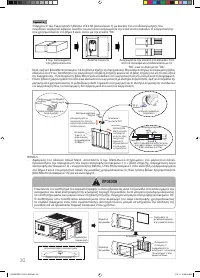
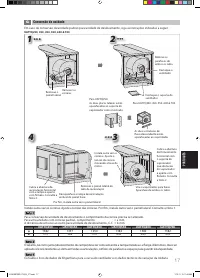
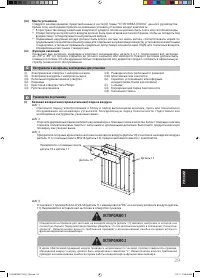
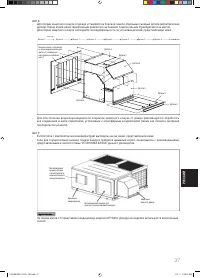
(i)
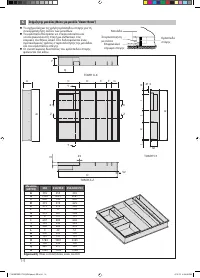
Side return (horizontal) application
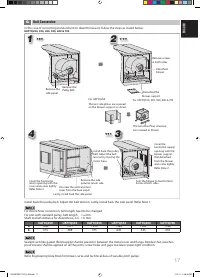
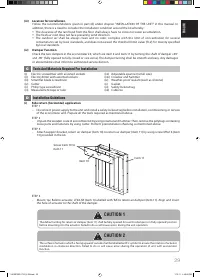
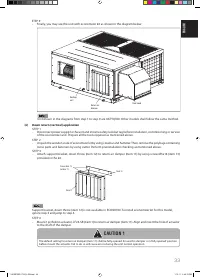
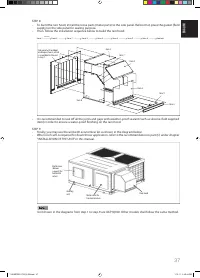
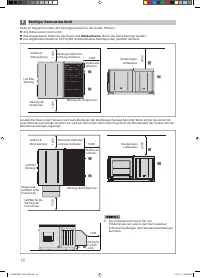
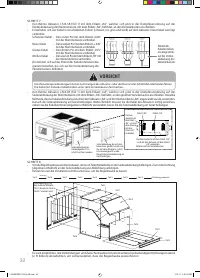
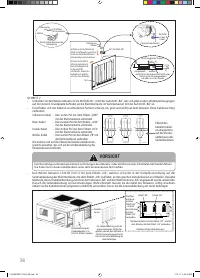
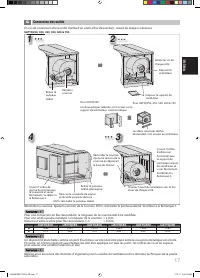
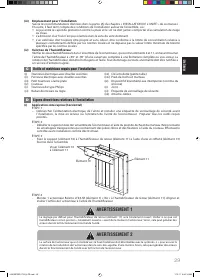
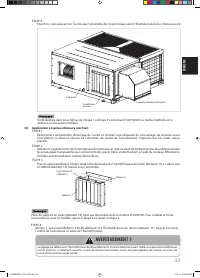
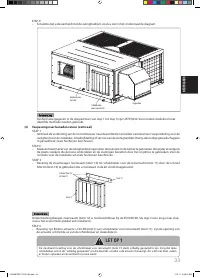
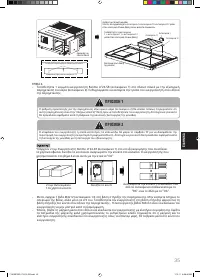
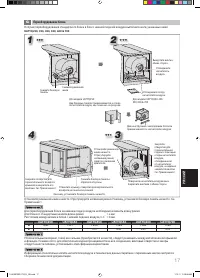
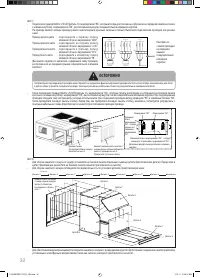
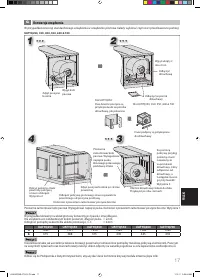
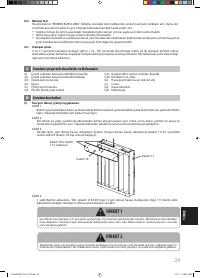
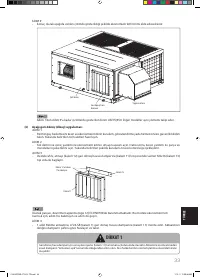
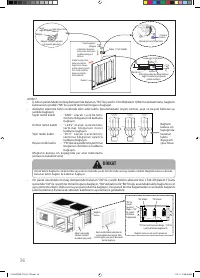
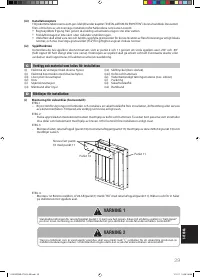
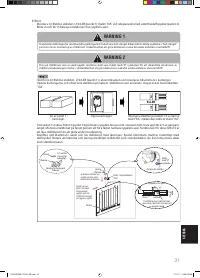
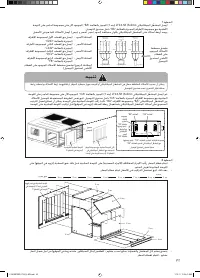
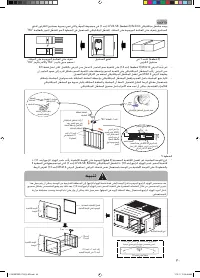
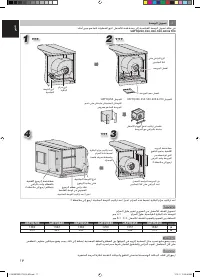
STEP 1
– Disconnect power supply to the unit and install a safety lockout tag before installation, commisioning or service
of the economizer unit. Prepare all the tools required as mentioned above.
STEP 2
-
Unpack the wooden crate of economizer kit by using crowbar and hammer. Then, remove the polybags containing
loose parts and fasteners by using cutter. Perform preinstallation checking as mentioned above.
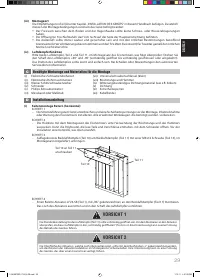
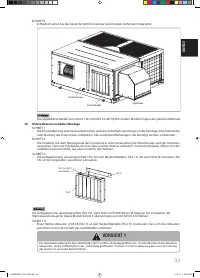
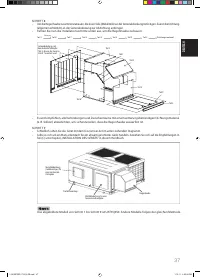
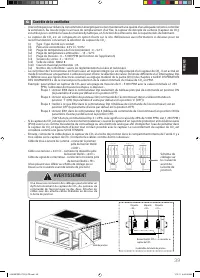
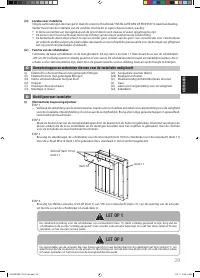
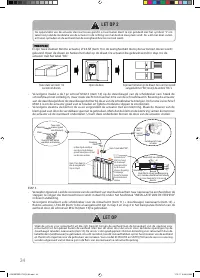
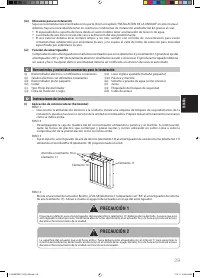
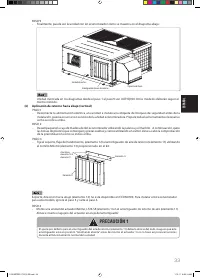
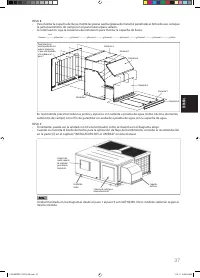
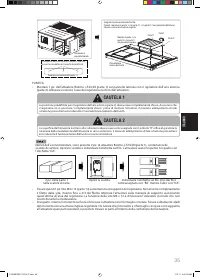
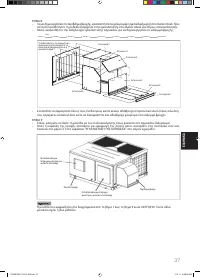
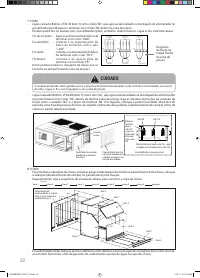
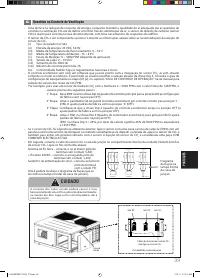
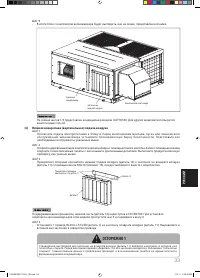
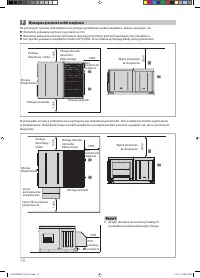
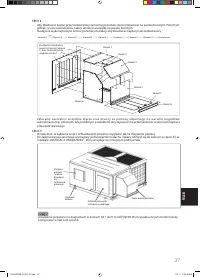
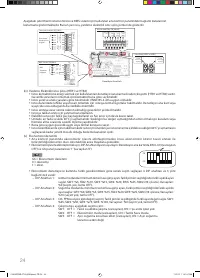
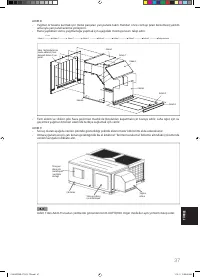
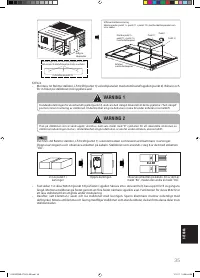
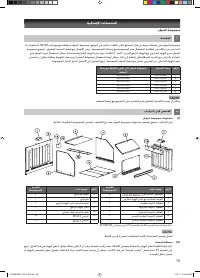
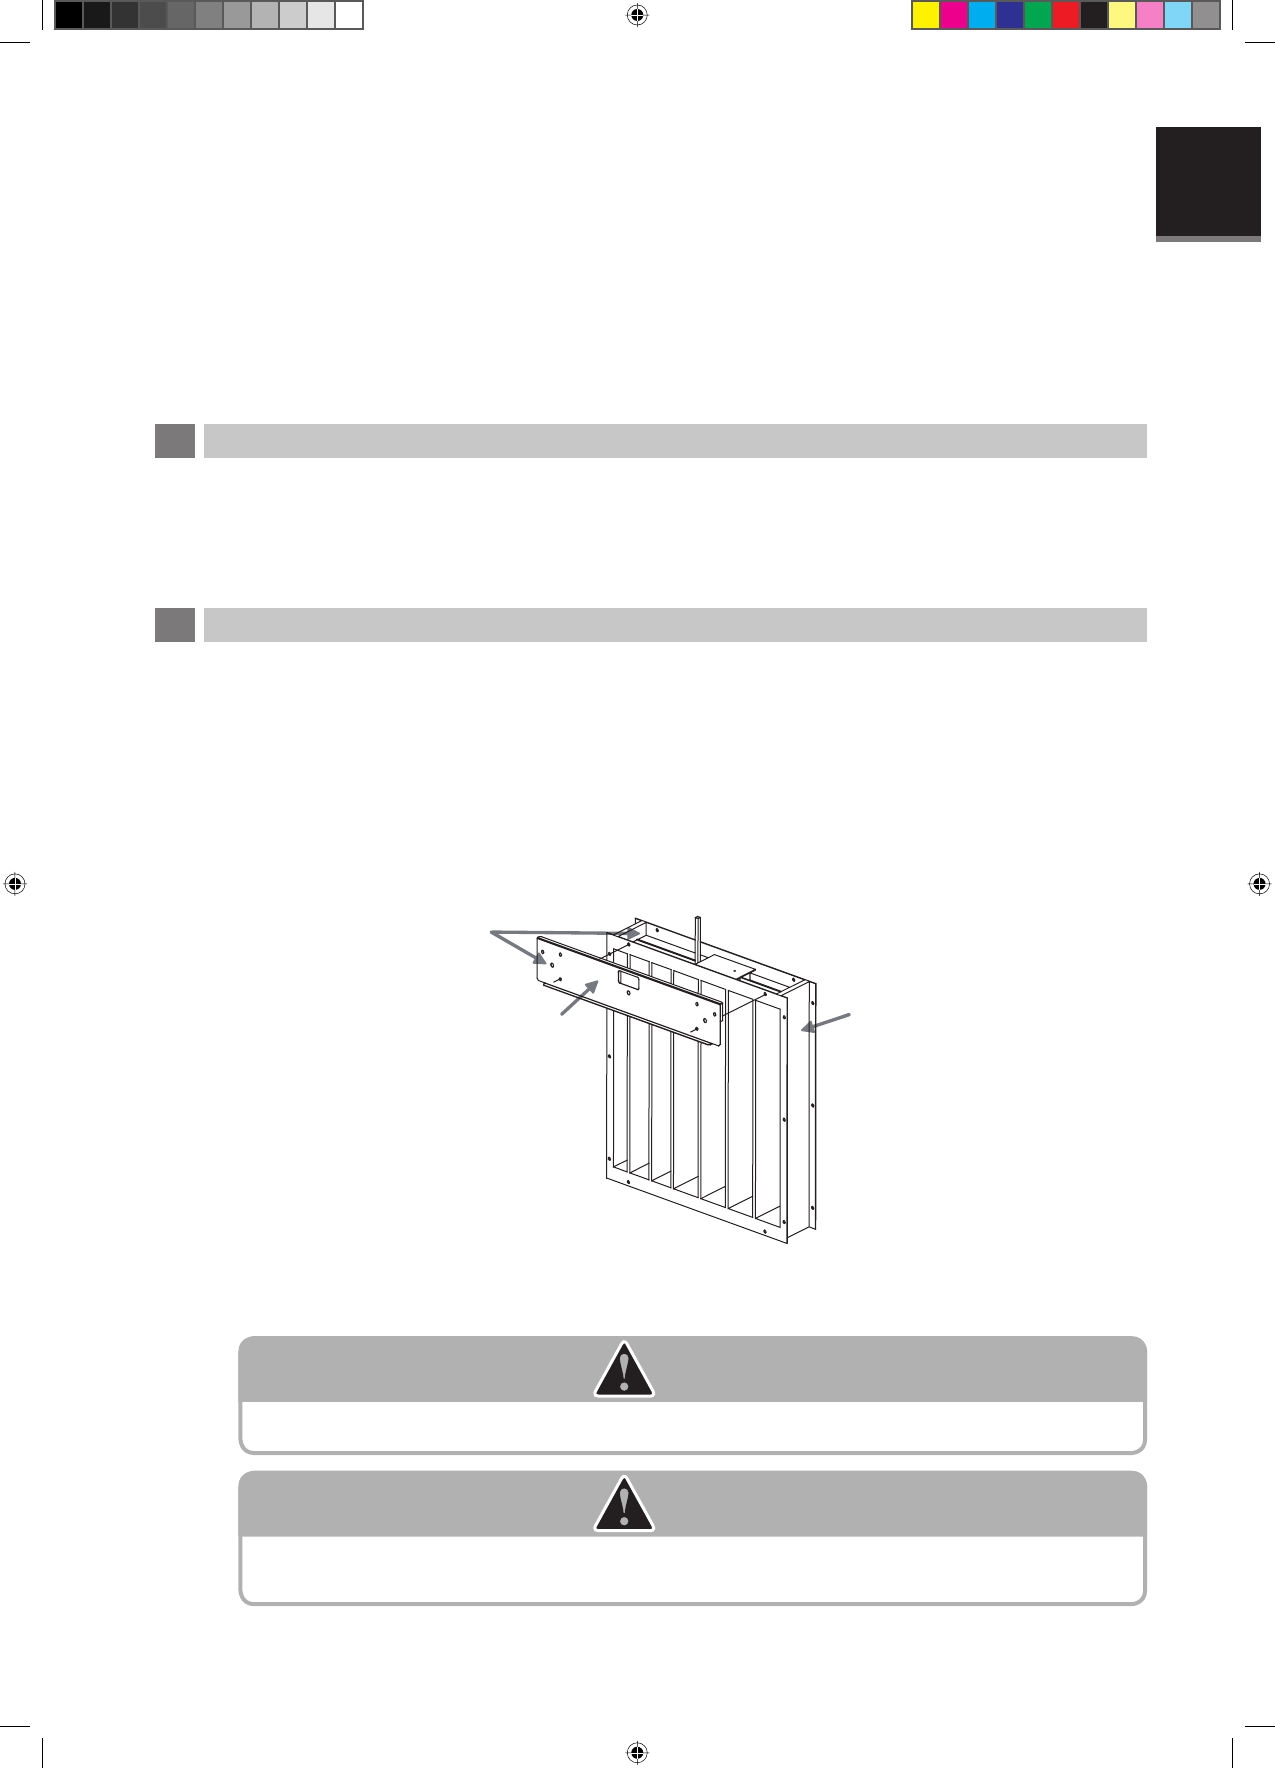
STEP 3
-
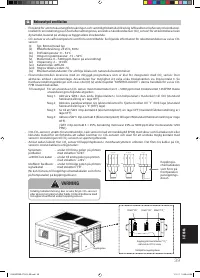
Attach support bracket, return air damper (item 10) to return air damper (item 11) by using screw M5x16 (item
13) provided in the kit.
Screw item 10 to
item 11
Item 10
Item 11
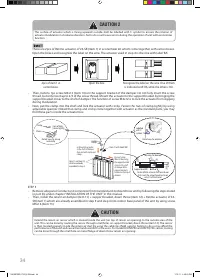
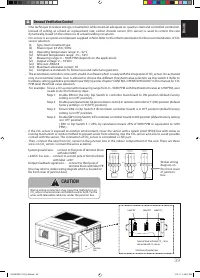
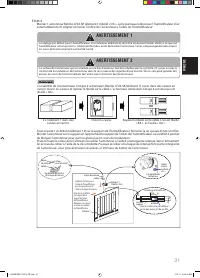
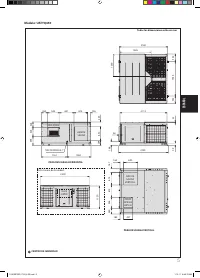
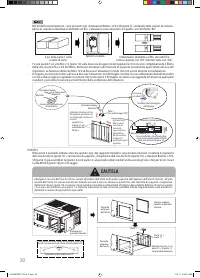
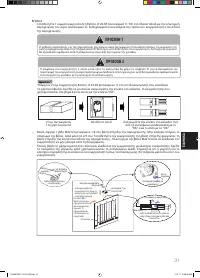
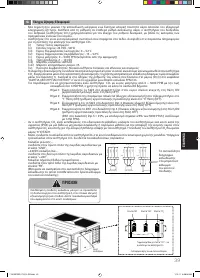
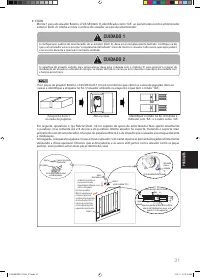
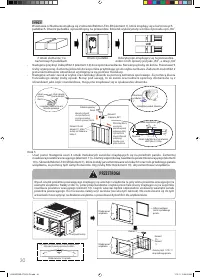
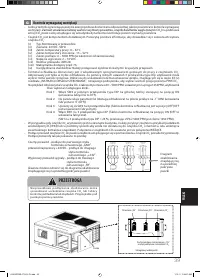
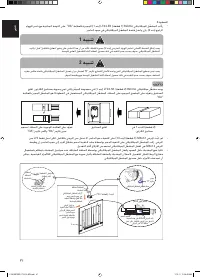
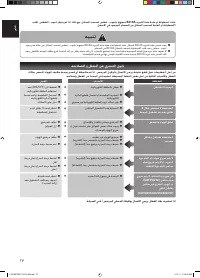
STEP 4
-
Mount 1pc Belimo actuator, LF24-SR (item 1) labelled with ‘RA’ to return air damper (item 11). Align and insert
the hole of actuator to the shaft of the damper.
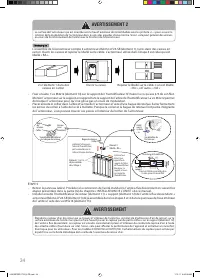
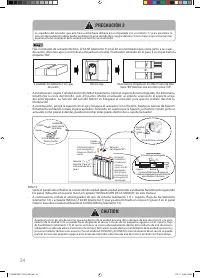
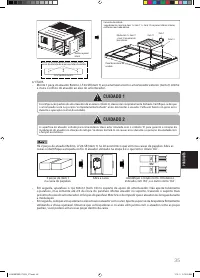
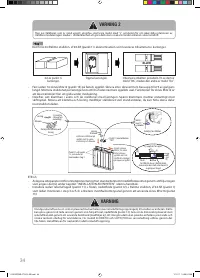
CAUTION 1
The default setting for return air damper (item 11) shall be fully opened. Ensure this damper is in ‘fully opened’ position
before mounting it to the actuator. Failed to do so will cause errors during the unit operation.
CAUTION 2
The surface of actuator which is facing upward/ outside shall be labelled with ‘L’ symbol to ensure the rotation of actuator
modulation in clockwise direction. Failed to do so will cause errors during the operation of unit with economizer
function.
1 IM 5RTBR-0710(2)-EN.indd 29
1 IM 5RTBR-0710(2)-EN.indd 29
1/10/11 3:39:05 PM
1/10/11 3:39:05 PM


