Хлебопечки Zelmer BM1000(Часть 2) - инструкция пользователя по применению, эксплуатации и установке на русском языке. Мы надеемся, она поможет вам решить возникшие у вас вопросы при эксплуатации техники.
Если остались вопросы, задайте их в комментариях после инструкции.
"Загружаем инструкцию", означает, что нужно подождать пока файл загрузится и можно будет его читать онлайн. Некоторые инструкции очень большие и время их появления зависит от вашей скорости интернета.


139
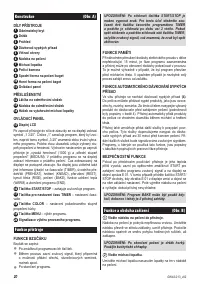
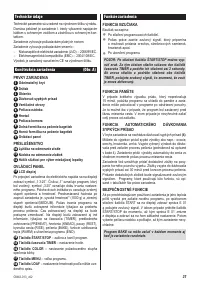
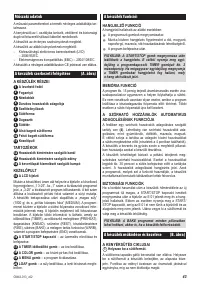
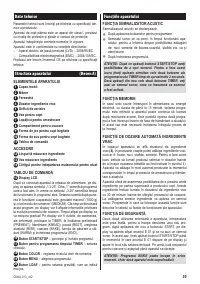
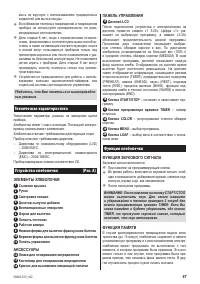
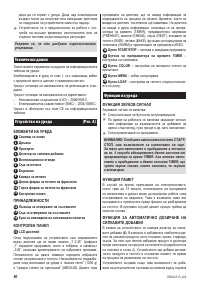
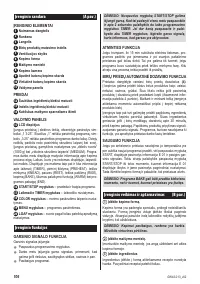
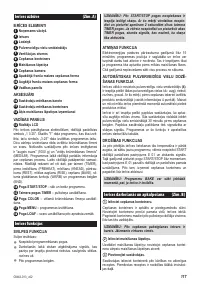
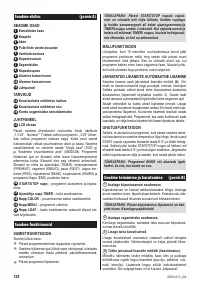
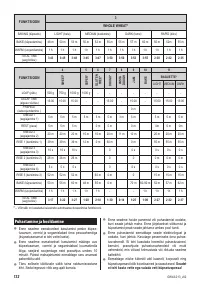
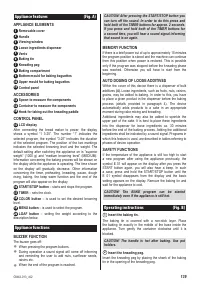
Appliance features
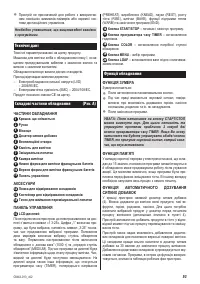
(Fig. A)
APPLIANCE ELEMENTS
1
Removable cover
2
Handle
3
Viewing window
4
Loose ingredients dispenser
5
Vents
6
Baking tin
7
Kneading peg
8
Baking compartment
9
Bottom mould for baking baguettes
10
Upper mould for baking baguettes
11
Control panel
ACCESSORIES
12
Spoon to measure the components
13
Container to measure the components
14
Hook for taking out the kneading paddle
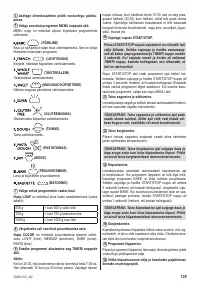
CONTROL PANEL
15
LCD display
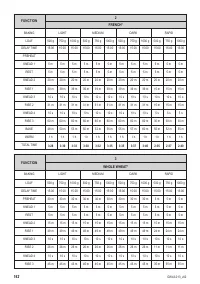
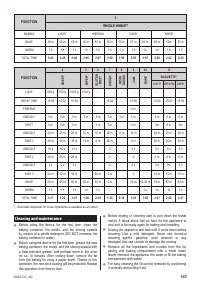
After connecting the bread maker to power, the display
shows a symbol “1 3:25”. The number “1” indicates the
selected program, the symbol “3:25” indicates the duration
of the selected program. The position of the two markings
indicates the selected browning level and the weight. The
default setting after switching the appliance on is “superior
weight” (1000 g) and “medium browning level” (MEDIUM).
Information concerning the baking process will be shown on
the display while the appliance is operating. The time shown
on the display will gradually decrease. Other information
concerning the timer, preheating, kneading, pause, dough
rising, baking, the keep warm function and the end of the
program will also appear on the display.
16
START/STOP button
– starts and stops the program.
17
TIMER
– sets the clock.
18
COLOR button
– is used to set the desired browning
level.
19
MENU button
– is used to select the program.
20
LOAF button
– setting the weight according to the
description below.
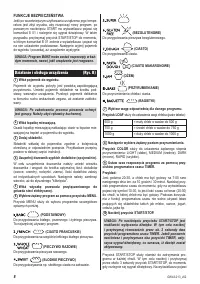
Appliance functions
BUZZER FUNCTION
The buzzer goes off:
When pressing the program buttons.
●
During operation a sound signal will come off informing
●
and reminding the user to add nuts, sunlower seeds,
raisins etc.
When the end of the program is reached.
●
CAUTION! After pressing the START/STOP button you
can turn off the sound. In order to do this press and
hold both of the TIMER buttons for approx. 2 seconds.
If you press and hold both of the TIMER buttons for
a second time, you will hear a sound signal informing
that sound is on again.
MEMORY FUNCTION
If there is a brief power cut of up to approximately 15 minutes
the program position is stored and the machine can continue
from this position when power is restored. This is possible
only if the program was stopped before the kneading phase
was reached. Otherwise you will have to start from the
beginning.
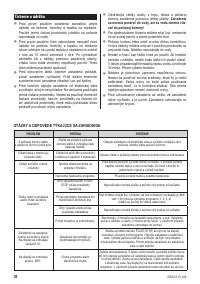
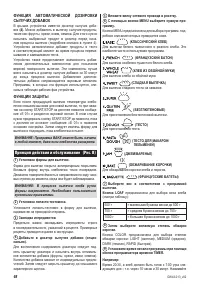
AUTO DOSING OF LOOSE ADDITIVES
Within the cover of this device there is a dispenser of bulk
additives
(4)
. Loose ingredients, such as fruits, nuts, raisins,
grains, may be added to baking. In order to this, you have
to place a given product in the dispenser before the baking
process (details provided in paragraph 4). The device
automatically adds products to a cake in an appropriate
moment during cake mixing and kneading.
Additional ingredients may also be added to sprinkle the
upper part of the cake. It is best to place these ingredients
into the dispenser for loose ingredients ca. 30 minutes
before the end of the baking process. Adding the additional
ingredients shall be indicated by a sound signal. Programs in
which this feature is used, are described in tables referring to
phases of device operation.
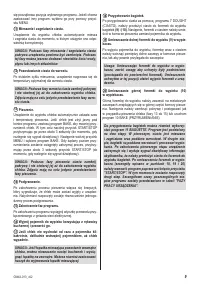
SAFETY FUNCTIONS
If the temperature of the appliance is still too high to start
a new program after using the appliance previously, the
symbol E 01 will appear on the display after you press the
START button again, you will also hear a beep. In such
a case, press and hold the START/STOP button until the
E 01 symbol disappears from the display and the basic
setting appears on the display. Remove the baking tin and
wait for the appliance to cool.
CAUTION! The BAKE program can be started
immediately even if the appliance is still hot.
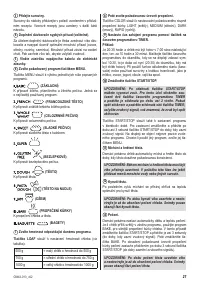
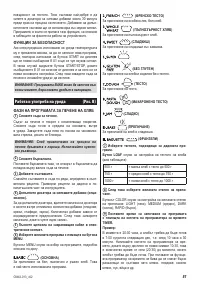
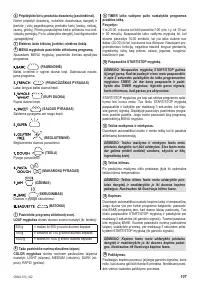
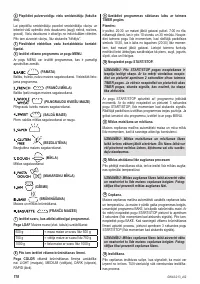
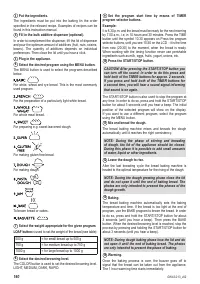
Operating instructions
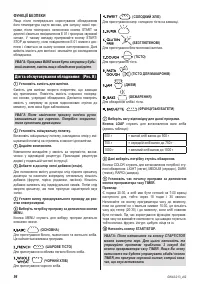
(Fig. B)
1
Insert the baking tin.
The baking tin is covered with a non-stick layer. Place
the baking tin exactly in the middle of the base inside the
appliance. Turn gently the container clockwise until it is
blocked.
CAUTION! The handle is hot after baking. Use pot
holders.
2
Insert the kneading peg.
Insert the kneading peg by placing the shank of the baking
tin in the opening of the kneading peg.
GW43-013_v02
Содержание
- 61 ЭЛЕМЕНТЫ ХЛЕБОПЕЧКИ; Функции хлебопечки; ФУНКЦИЯ ЗВУКОВОГО СИГНАЛА
- 62 ВНИМАНИЕ: Программа BAKE может быть начата
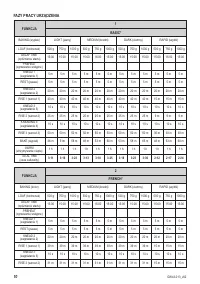
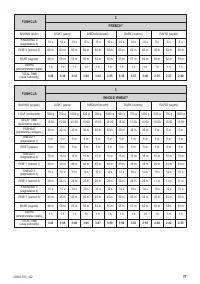
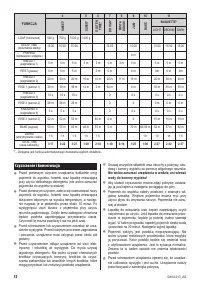
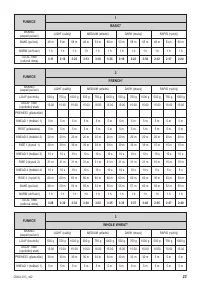
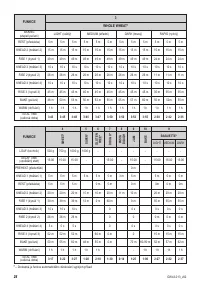
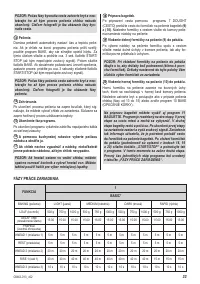
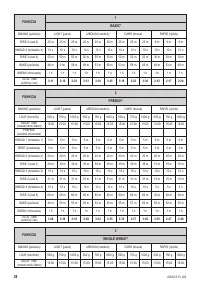
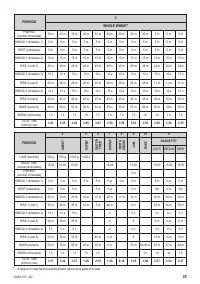
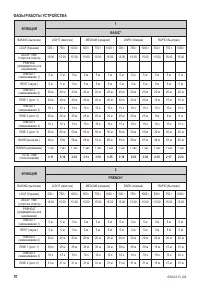
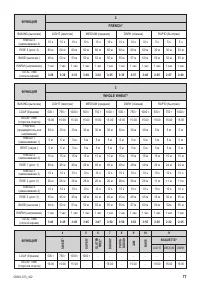
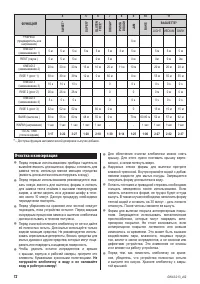
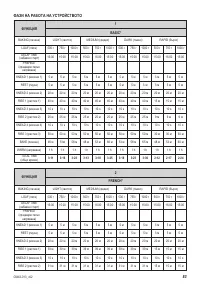
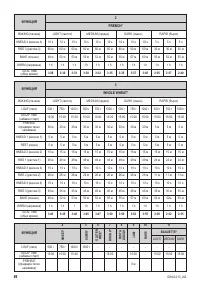
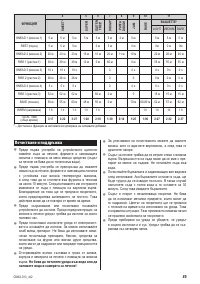
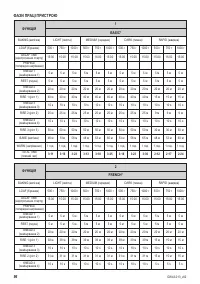
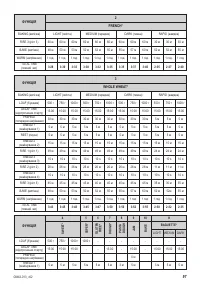
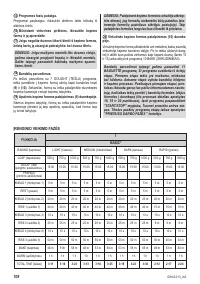
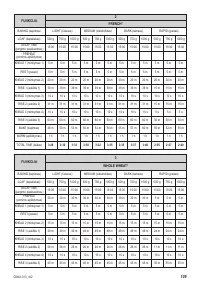
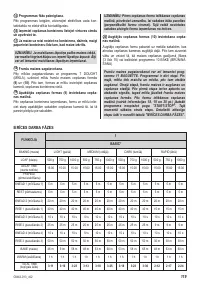
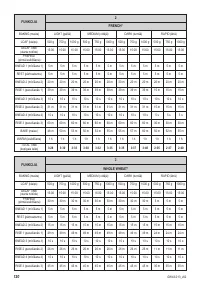
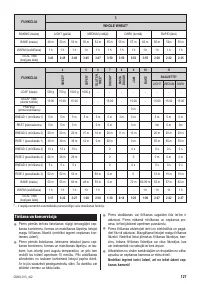
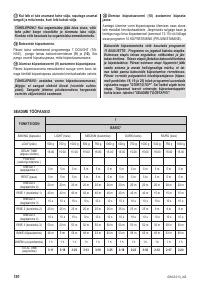
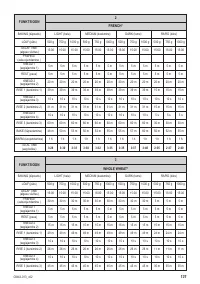
- 64 ФАЗЫ РАБОТЫ УСТРОЙСТВА; ФУНКЦИЯ
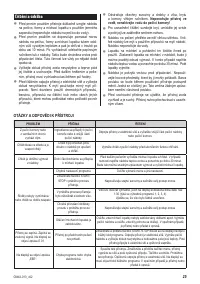
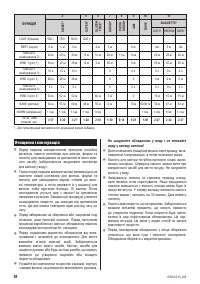
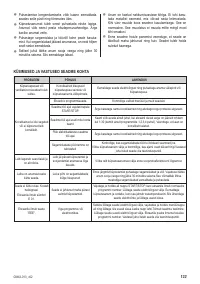
- 66 Очистка и консервация; Не
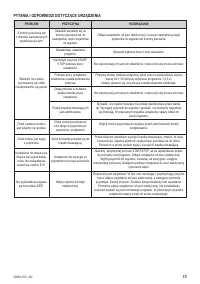
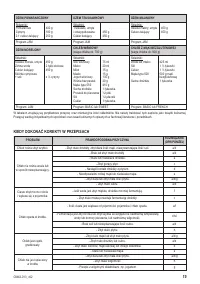
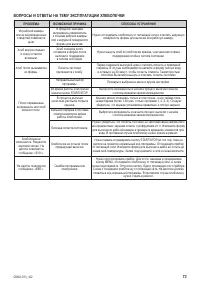
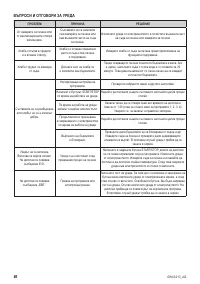
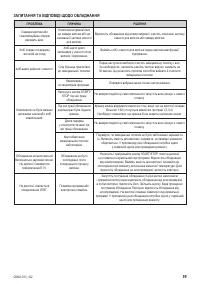
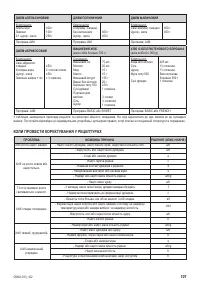
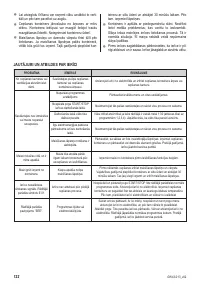
- 67 ВОПРОСЫ И ОТВЕТЫ НА ТЕМУ ЭКСПЛУАТАЦИИ ХЛЕБОПЕЧКИ
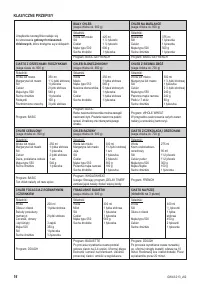
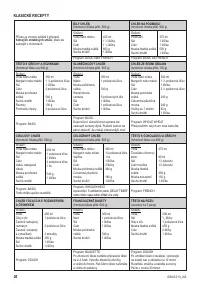
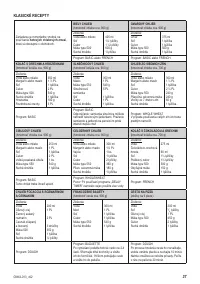
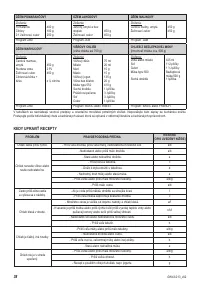
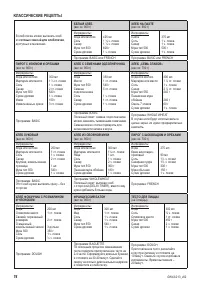
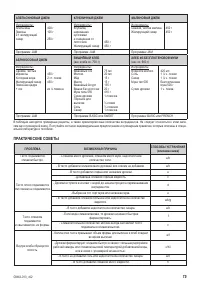
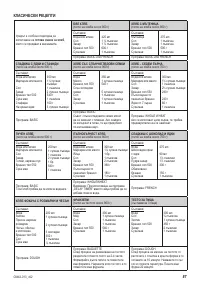
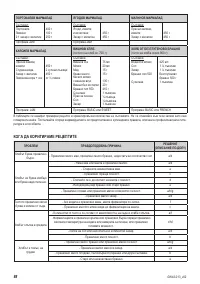
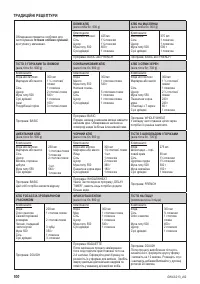
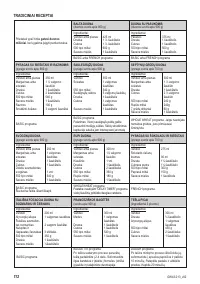
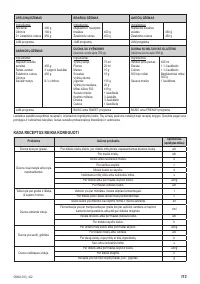
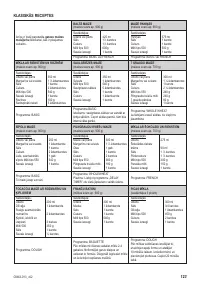
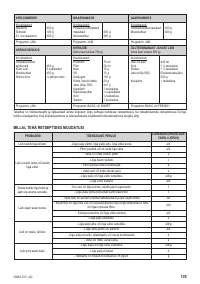
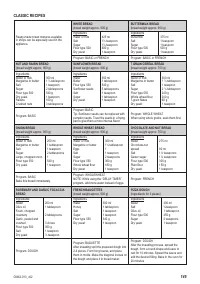
- 68 KЛАССИЧЕСКИЕ РЕЦЕПТЫ
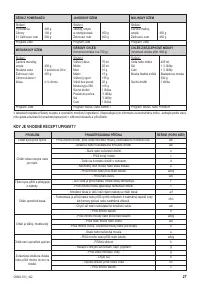
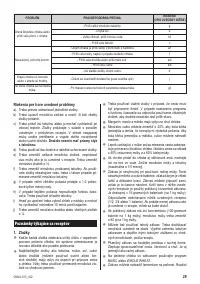
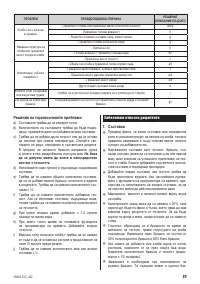
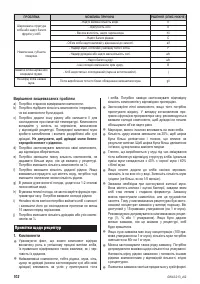
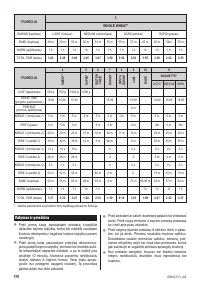
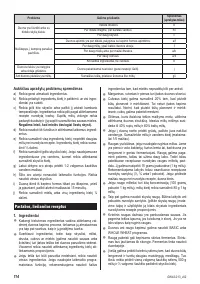
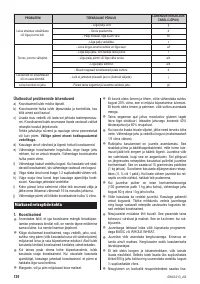
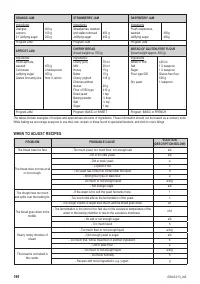
- 69 ПРАКТИЧЕСКИЕ СОВЕТЫ
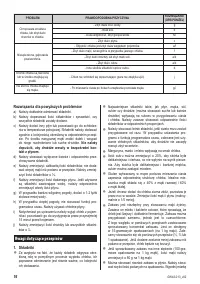
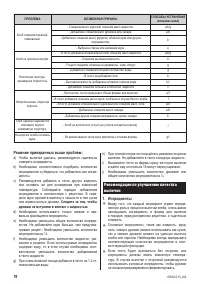
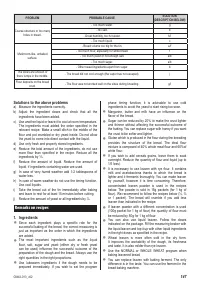
- 70 Решение приведенных выше проблем:; Следите за тем, чтобы
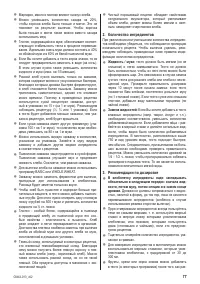
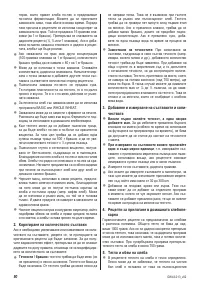
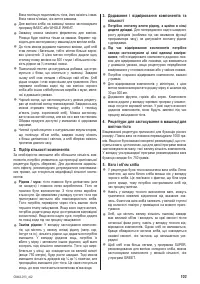
- 71 В хлебопечку ингредиенты надо закладывать
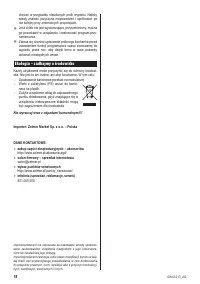
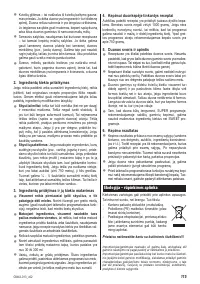
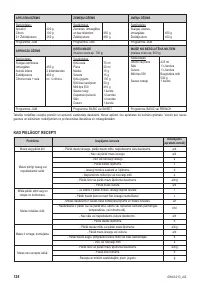
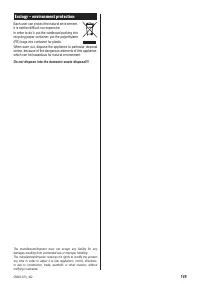
- 72 Экология – забота о окружающей среде; Не выбрасывайте прибор вместе с коммуналь; Рецепты для выпечки в хлебопечке


