Кондиционеры Daikin AHQ-C - инструкция пользователя по применению, эксплуатации и установке на русском языке. Мы надеемся, она поможет вам решить возникшие у вас вопросы при эксплуатации техники.
Если остались вопросы, задайте их в комментариях после инструкции.
"Загружаем инструкцию", означает, что нужно подождать пока файл загрузится и можно будет его читать онлайн. Некоторые инструкции очень большие и время их появления зависит от вашей скорости интернета.


1-10
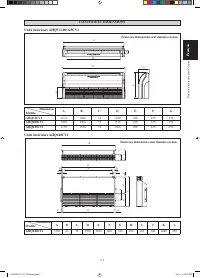
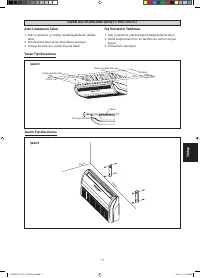
D
A
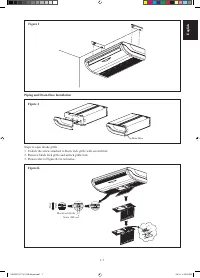
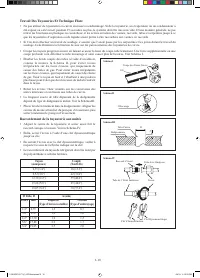
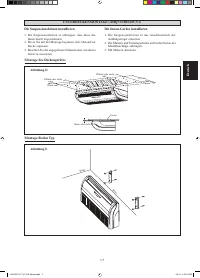
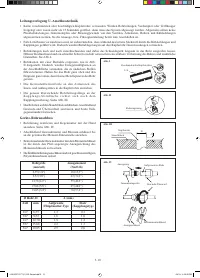
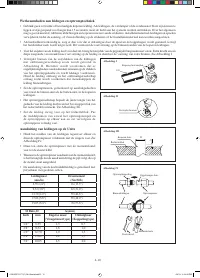
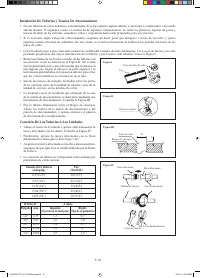
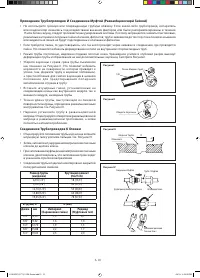
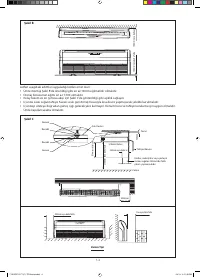
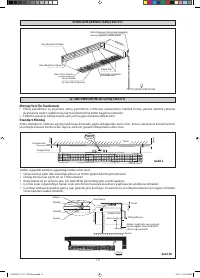
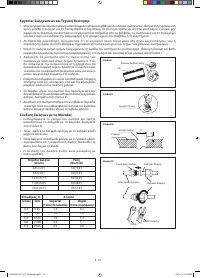
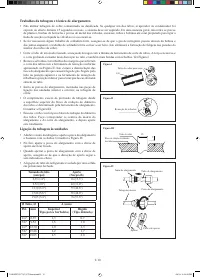
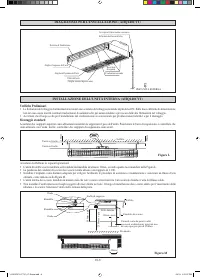
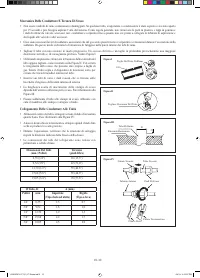
Piping Works And Flaring Technique
Do not use contaminated or damaged copper tubing. If any pipings, evaporator or condenser had been exposed or had been
opened for 15 seconds or more, the system must be vacuumed. Generally, do not remove plastic, rubber plugs and brass
nuts from the valves,
fi
ttings, tubings and coils until it is ready to connect suction or liquid line into valves or
fi
ttings.
If any brazing work is required, ensure that the nitrogen gas is passed through coil and joints while the brazing work is
being done. This will eliminate soot formation on the inside walls of the copper tubings.
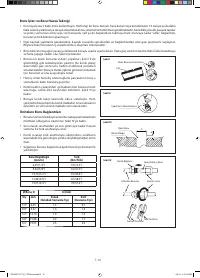
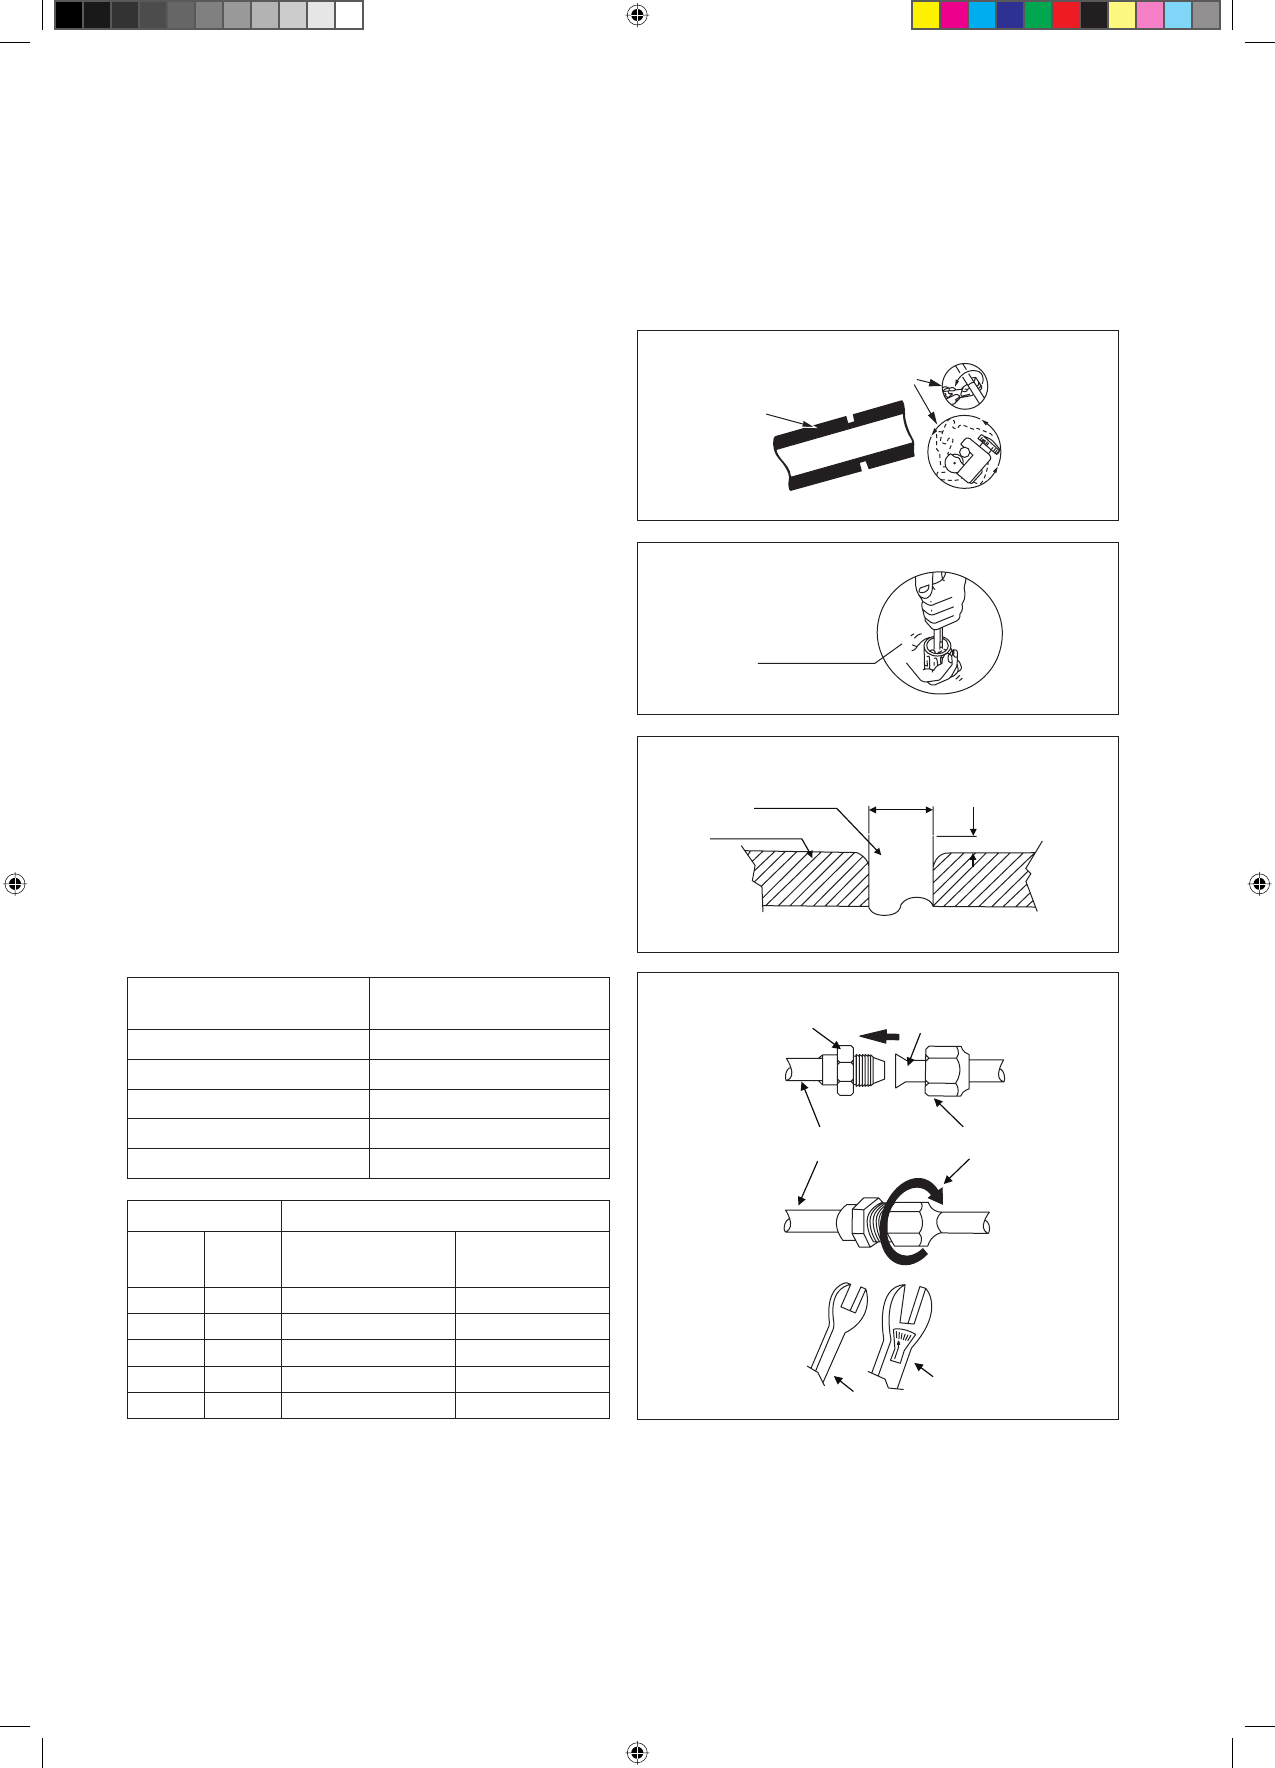
Cut the pipe stage by stage, advancing the blade of the pipe cutter slowly. Extra force and deep cut will cause more distortion
on the pipe and thus extra burr. See Figure I.
•
•
•
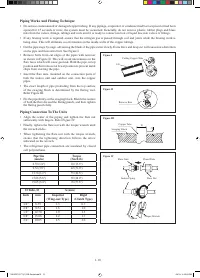
Cutting Copper Tube
Figure II
Figure I
Remove Burr
Figure III
Copper Tube
Swaging Block
Spanar
Torque Wrench
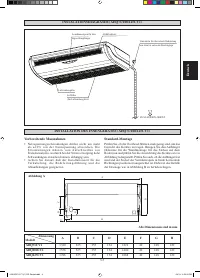
Indoor Piping
Flare Nut
Flared Tube
Flare Joint
Figure IV
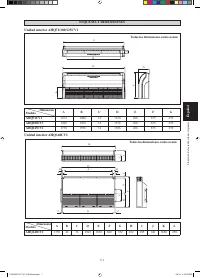
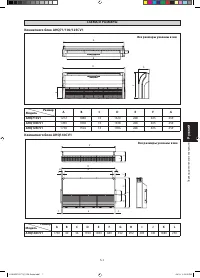
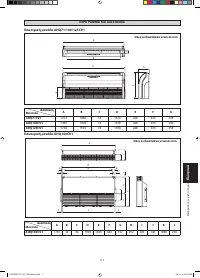
Ø Tube, D
A (mm)
Inch
mm
Imperial
(Wing-nut Type)
Rigid
(Clutch Type)
1/4"
6.35
1.3
0.7
3/8"
9.52
1.6
1.0
1/2"
12.70
1.9
1.3
5/8"
15.88
2.2
1.7
3/4"
19.05
2.5
2.0
Pipe Size
(mm/in)
Torque
(Nm/ft-lb)
6.35 (1/4")
18 (13.3")
9.52 (3/8")
42 (31.0")
12.70 (1/2")
55 (40.6")
15.88 (5/8")
65 (48.0")
19.05 (3/4")
78 (57.6")
1/4t
Remove burrs from cut edges of the pipes with remover
as shown in Figure II. This will avoid unevenness on the
fl
are faces which will cause gas leak. Hold the pipe on top
position and burr remover at lower position to prevent metal
chips from entering the pipe.
Insert the
fl
are nuts, mounted on the connection parts of
both the indoor unit and outdoor unit, into the copper
pipes.
The exact length of pipe protruding from the top surface
of the swaging block is determined by the
fl
aring tool.
Refer Figure III.
Fix the pipe
fi
rmly on the swaging block. Match the centers
of both the
fl
are die and the
fl
aring punch, and then tighten
the
fl
aring punch fully.
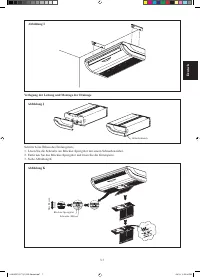
Piping Connection To The Units
Align the center of the piping and tighten the
fl
are nut
suf
fi
ciently with
fi
ngers. Refer Figure IV.
Finally, tighten the
fl
are nut with the torque wrench until
the wrench clicks.
When tightening the
fl
are nut with the torque wrench,
ensure that the tightening direction follows the arrow
indicated on the wrench.
The refrigerant pipe connection are insulated by closed
cell polyurethane.
•
•
•
•
•
•
•
•
1 IM 5CEY-0711(1)-EN-Siesta.indd10 10
1 IM 5CEY-0711(1)-EN-Siesta.indd10 10
4/3/13 3:25:53 PM
4/3/13 3:25:53 PM
Содержание
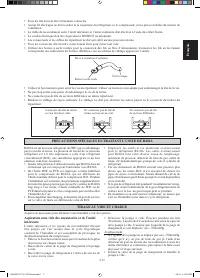
- 64 МЕРЫ ПРЕДОСТОРОЖНОСТИ; ВHИMAHИE; РУКОВОДСТВО ПО УСТАНОВКЕ; ПPEДУПPEЖДEHИE
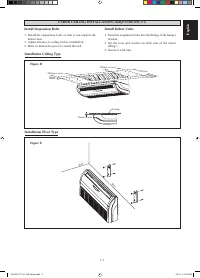
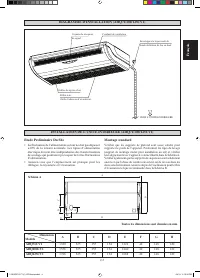
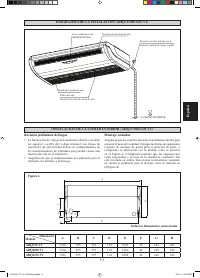
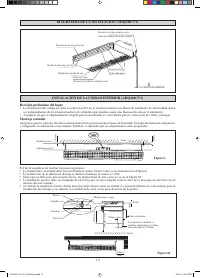
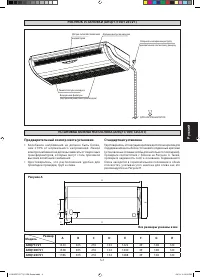
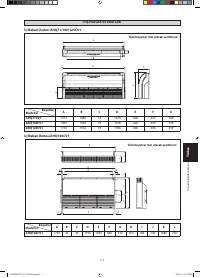
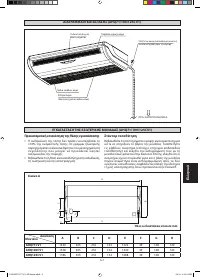
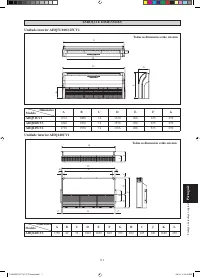
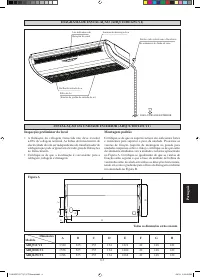
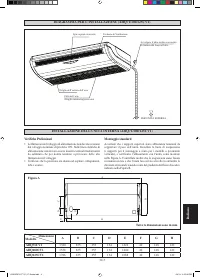
- 65 Предварительный осмотр места установки; Рисунок A
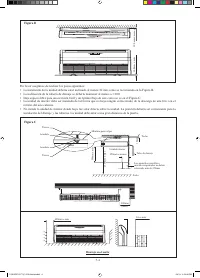
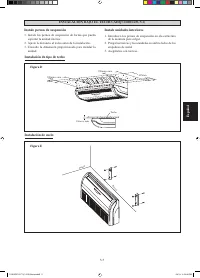
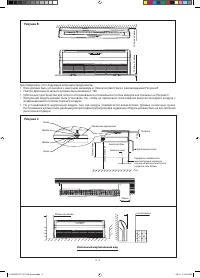
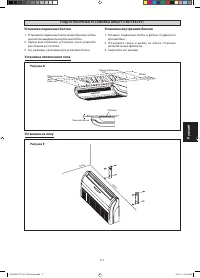
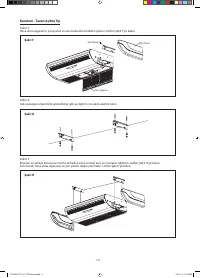
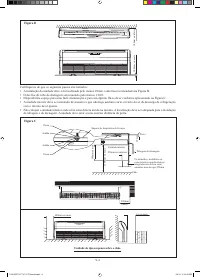
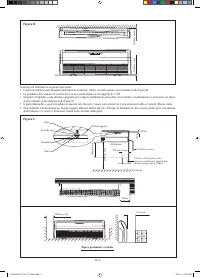
- 66 Рисунок B; Удостоверьтесь, что следующие операции предприняты:; Рисунок C; Напольный вертикальный вид
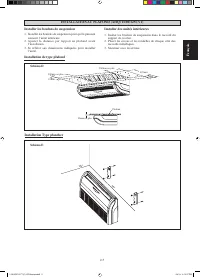
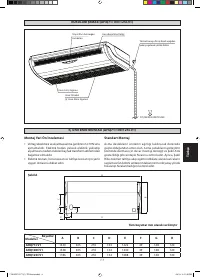
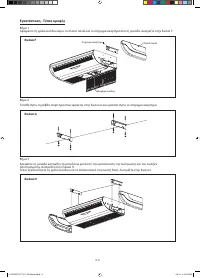
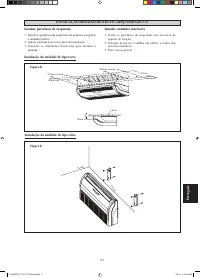
- 67 Установка подвесных болтов; Рисунок D; Установка внутренних блоков
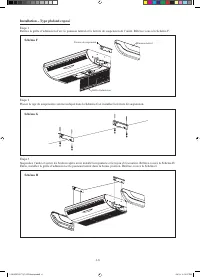
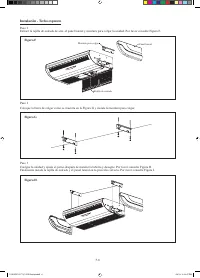
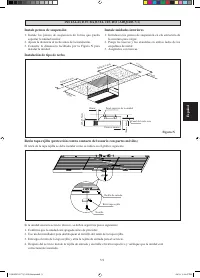
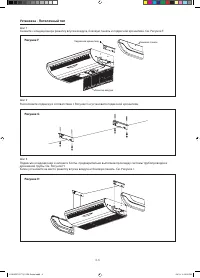
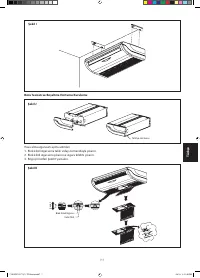
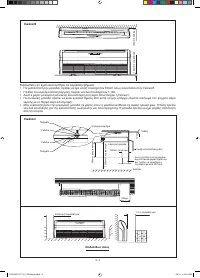
- 68 Установка - Потолочный тип; Рисунок F
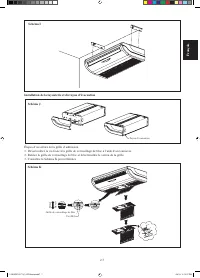
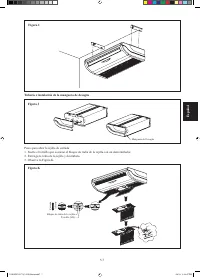
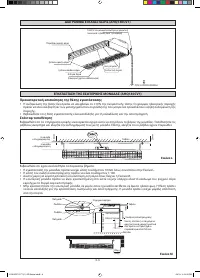
- 69 Рисунок I; Открытие решетки впуска воздуха; Рисунок K; Pисунок J
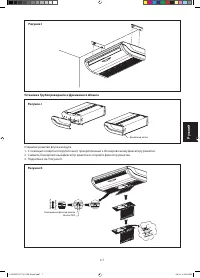
- 70 Рисунок L; Рисунок M
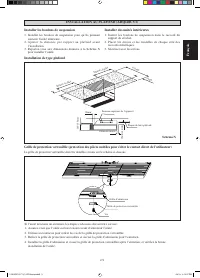
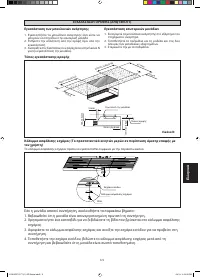
- 71 Рисунок N
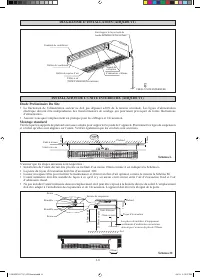
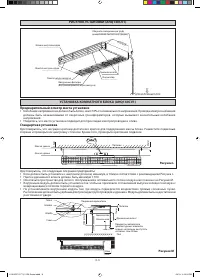
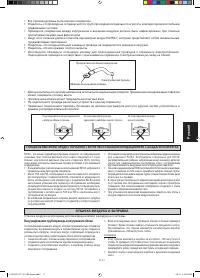
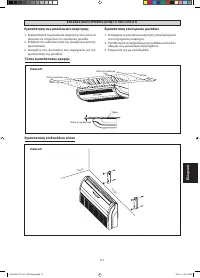
- 72 Соединение Трубопроводов К блокам
- 73 Прикрепите изоляционный рукав; Вакуумирование трубопровода и внутреннего блока; Осторожно


