Кондиционеры Daikin FWG-AT - инструкция пользователя по применению, эксплуатации и установке на русском языке. Мы надеемся, она поможет вам решить возникшие у вас вопросы при эксплуатации техники.
Если остались вопросы, задайте их в комментариях после инструкции.
"Загружаем инструкцию", означает, что нужно подождать пока файл загрузится и можно будет его читать онлайн. Некоторые инструкции очень большие и время их появления зависит от вашей скорости интернета.


1-4
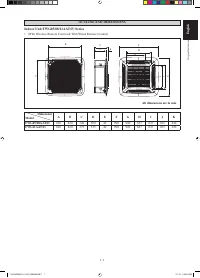
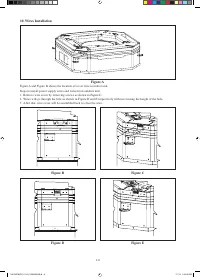
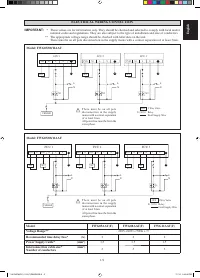
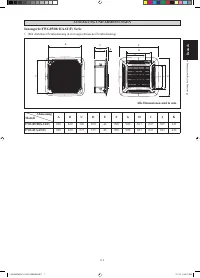
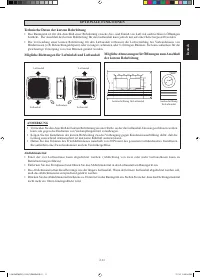
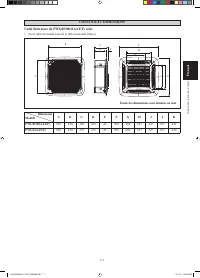
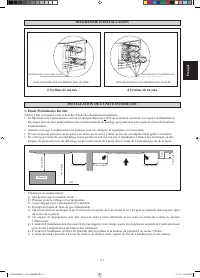
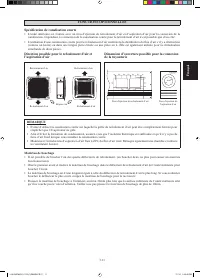
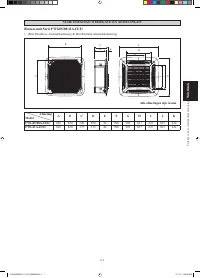
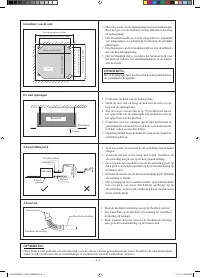
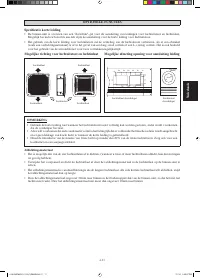
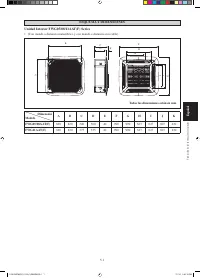
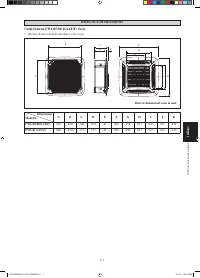
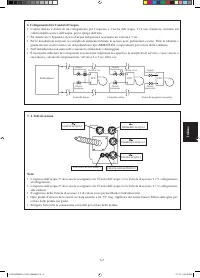
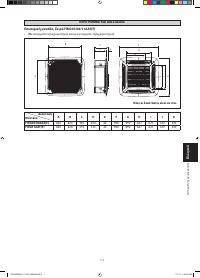
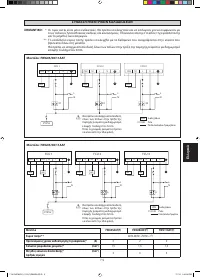
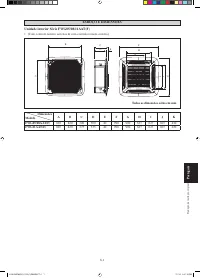
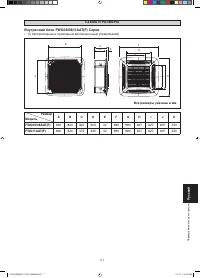
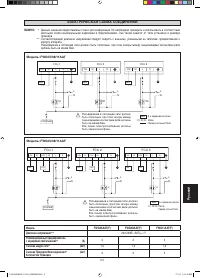
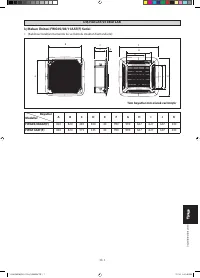
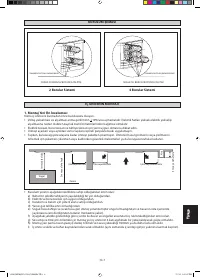
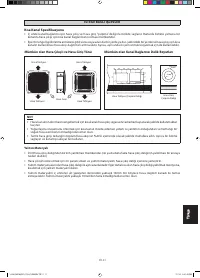
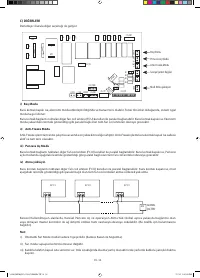
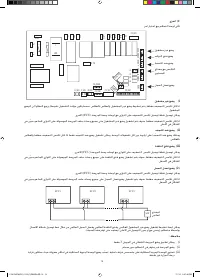
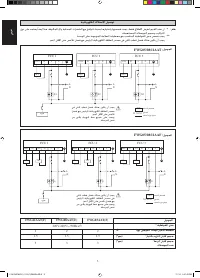
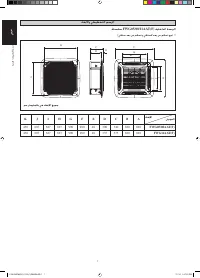
Unit size 820mm
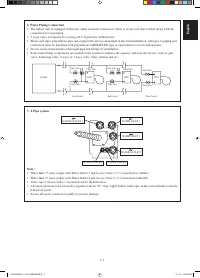
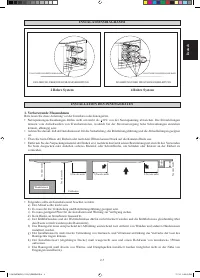
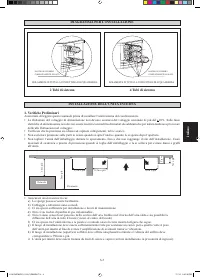
Piping Direction
Ceiling Opening Site = 890mm
Ceiling Opening Site = 890mm
Hanging Rod Site = 790mm
Unit size 820mm
Unit
Hanging Rod Site = 621mm
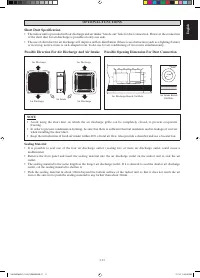
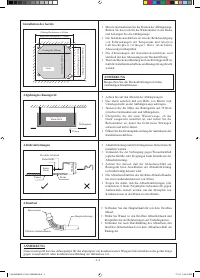
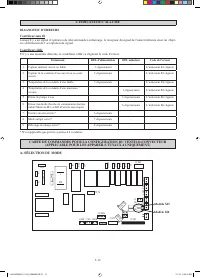
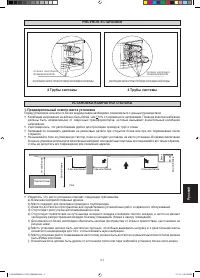
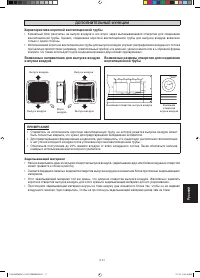
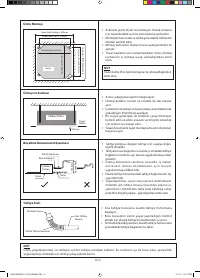
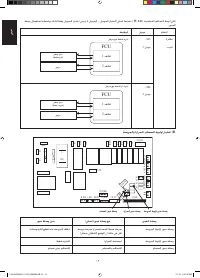
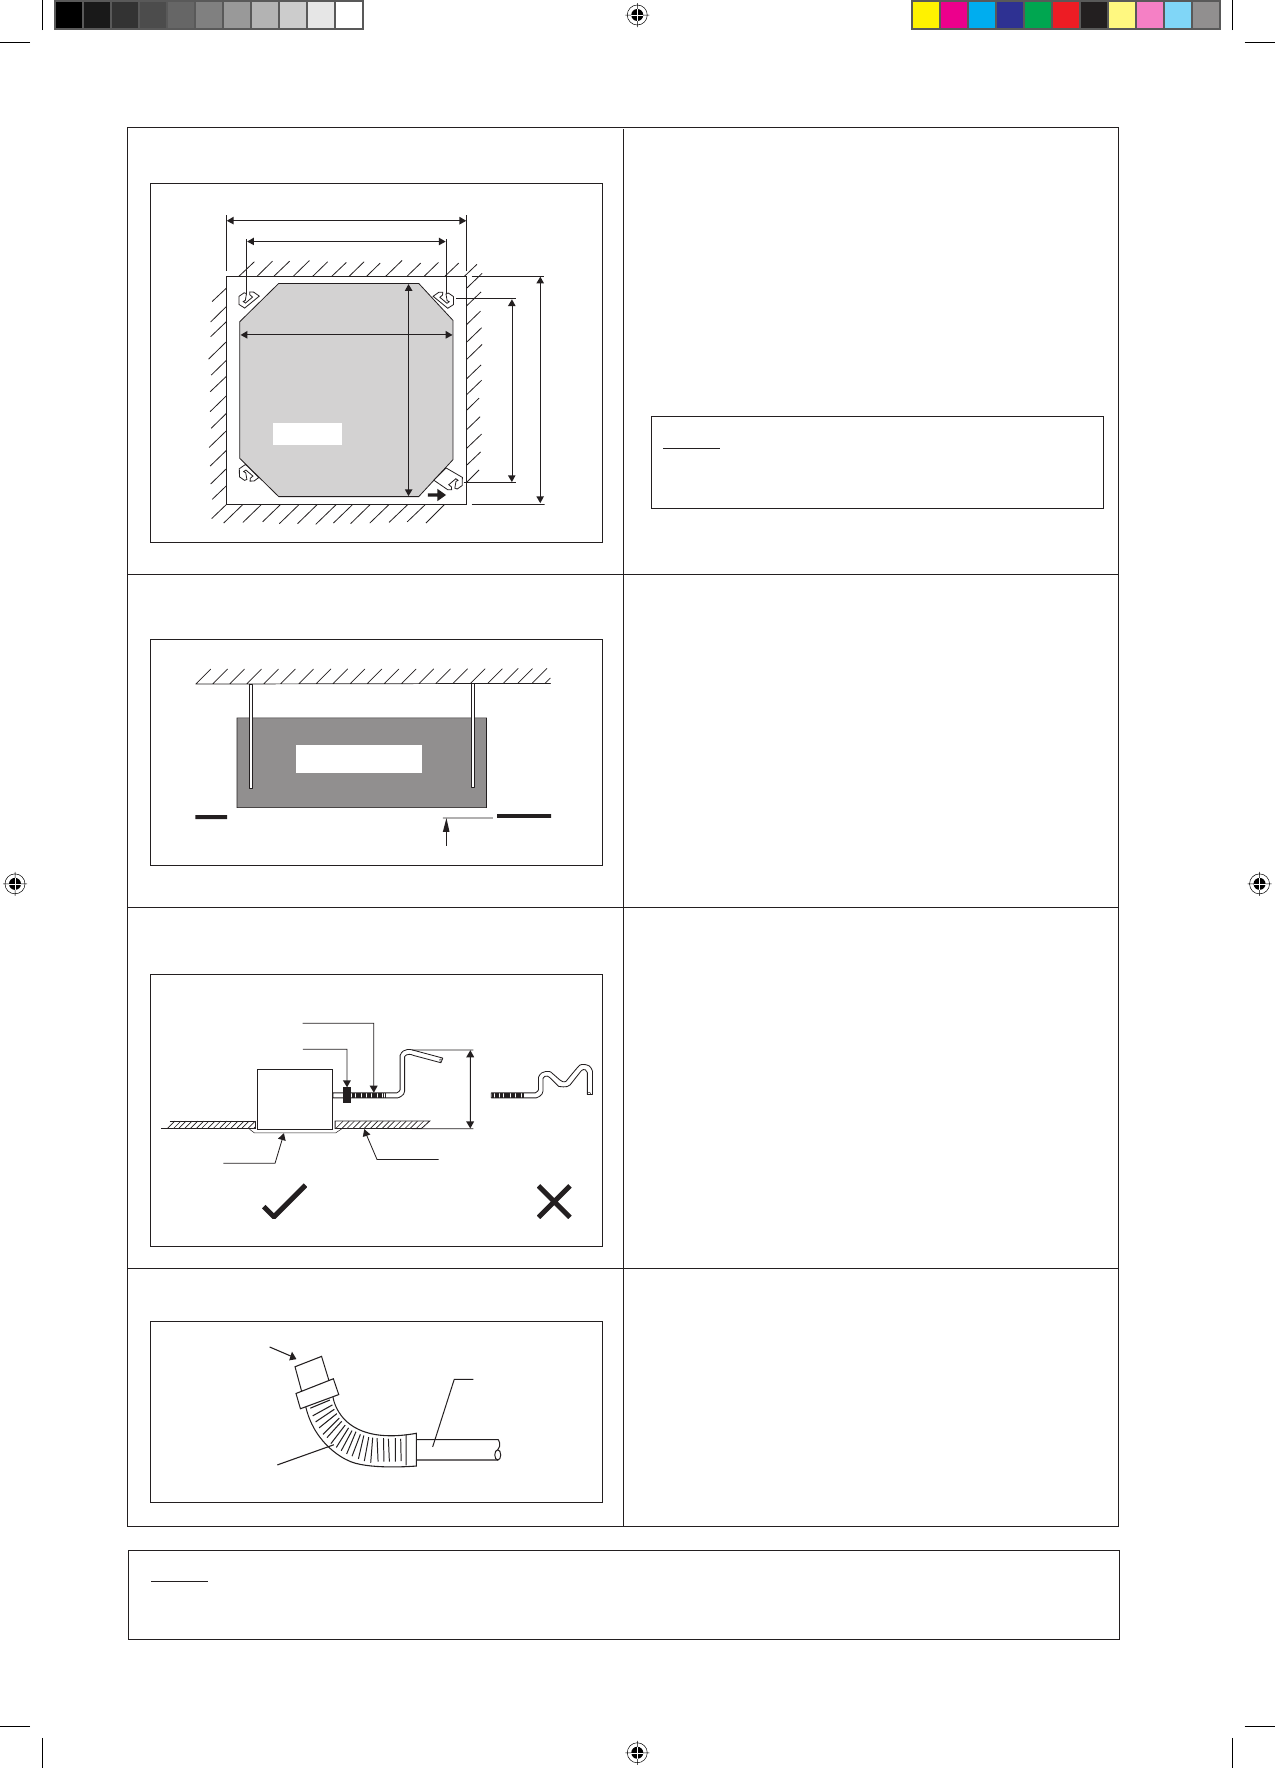
Indoor Unit
Ceiling
Board
35.0 mm
35.0mm
Indoor Unit
Ceiling
Board
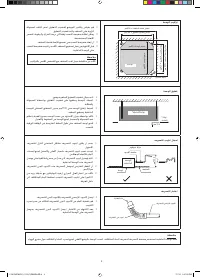
Feed Water
Flexible Drain Hose
Main Drain Pipe
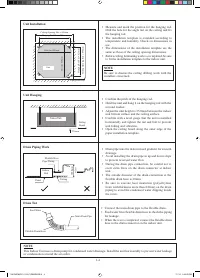
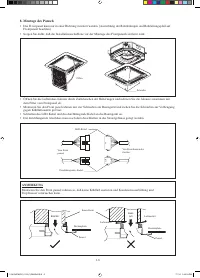
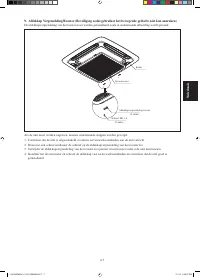
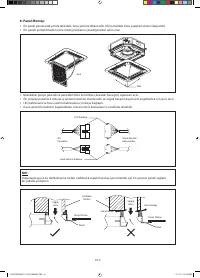
NOTE
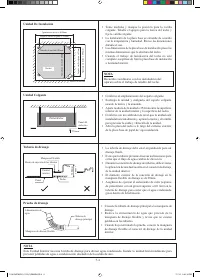
This Indoor Unit uses a drain pump for condensed water drainage. Install the unit horizontally to prevent water leakage
or condensation around the air outlet.
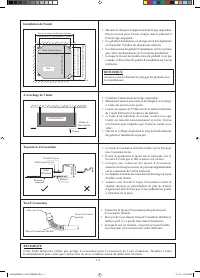
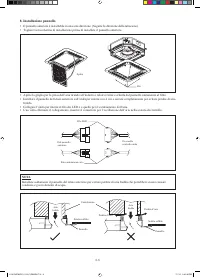
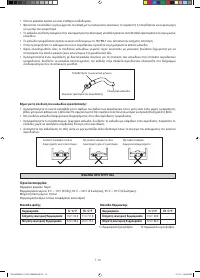
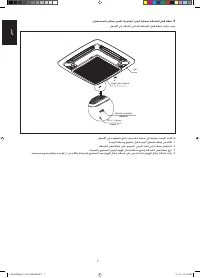
NOTE
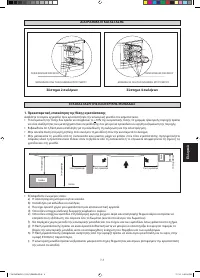
Be sure to discuss the ceiling drilling work with the
installers concerned.
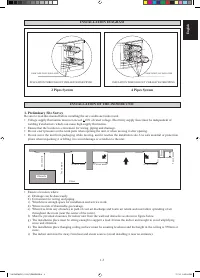
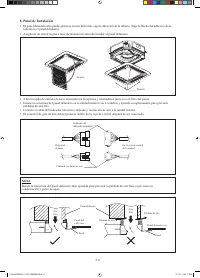
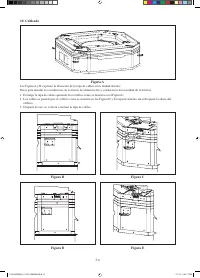
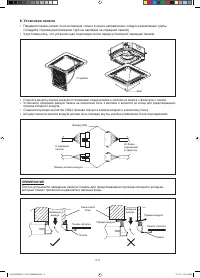
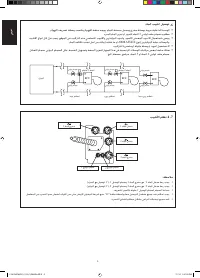
Measure and mark the position for the hanging rod.
Drill the hole for the angle nut on the ceiling and fix
the hanging rod.
The installation template is extended according to
temperature and humidity. Check on dimensions in
use.
The dimensions of the installation template are the
same as those of the ceiling opening dimensions.
Before ceiling laminating work is covmpleted, be sure
to fit the installation template to the indoor unit.
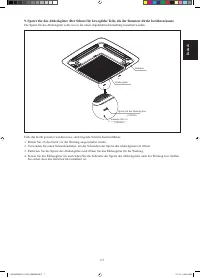
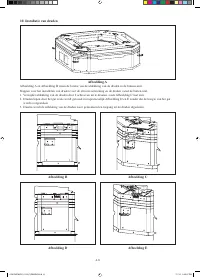
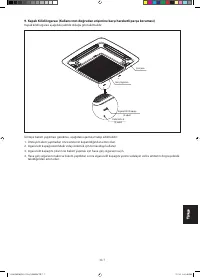
•
•
•
•
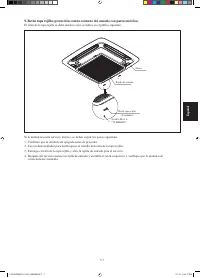
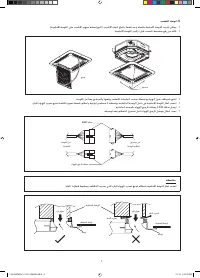
Confirm the pitch of the hanging rod.
Hold the unit and hang it on the hanging rod with the
nut and washer.
Adjust the unit height to 35.0mm between the indoor
unit bottom surface and the ceiling surface.
Confirm with a level gauge that the unit is installed
horizontally and tighten the nut and bolt to prevent
unit failing and vibration.
Open the ceiling board along the outer edge of the
paper installation template.
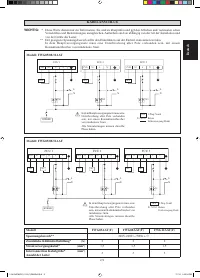
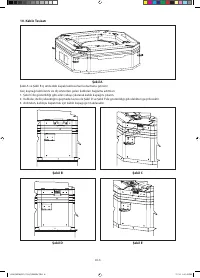
•
•
•
•
•
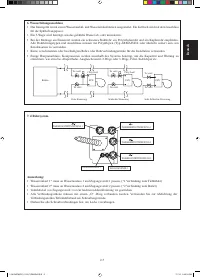
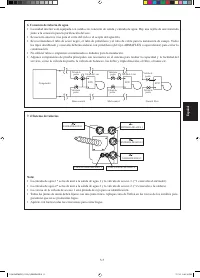
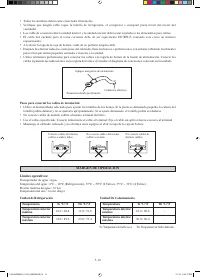
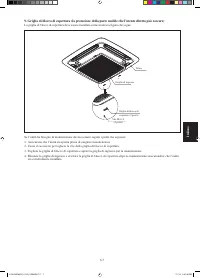
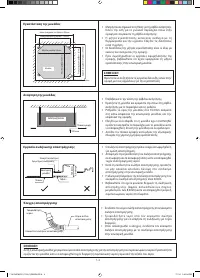
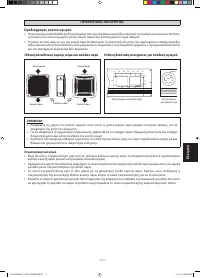
Drain pipe must be in downward gradient for smooth
drainage.
Avoid installing the drain pipe in up and down slope
to prevent reversed water flow.
During the drain pipe connection, be careful not to
exert extra force on the drain connector at indoor
unit.
The outside diameter of the drain connection at the
flexible drain hose is 20mm.
Be sure to execute heat insulation (polyethylene
foam with thickness more than 8.0mm) on the drain
piping to avoid the condensed water dripping inside
the room.
•
•
•
•
•
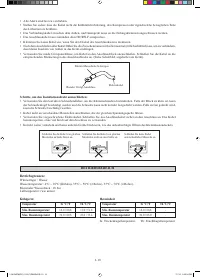
Connect the main drain pipe to the flexible drain.
Feed water from flexible drain hose to check the piping
for leakage.
When the test is completed, connect the flexible drain
hose to the drain connector on the indoor unit.
•
•
•
Unit Installation
Unit Hanging
Drain Piping Work
Drain Test
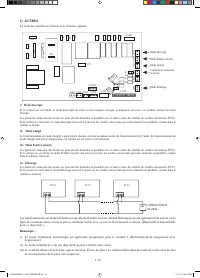
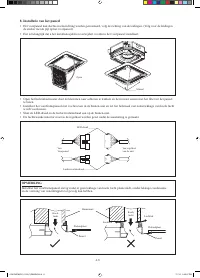
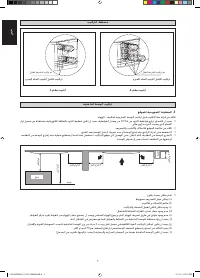
Pipe Clamp
Ceiling
700.0mm
or less
Panel
Flexible Hose
Indoor
Unit
1 IM-CKEW(DC)-1013(1)DAIKIN-EN.i4 4
1 IM-CKEW(DC)-1013(1)DAIKIN-EN.i4 4
7/1/14 2:39:05 PM
7/1/14 2:39:05 PM
Содержание
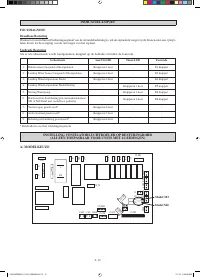
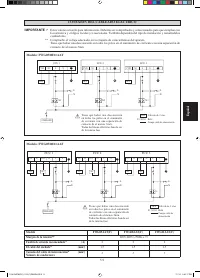
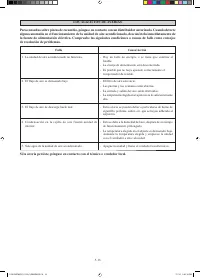
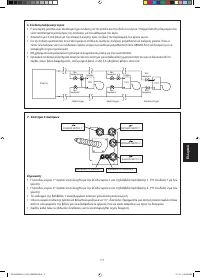
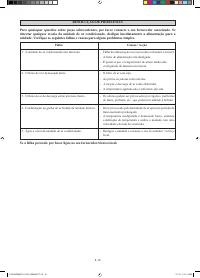
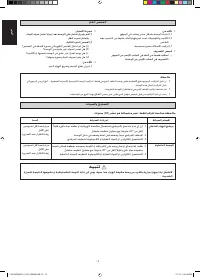
- 132 МЕРЫ ПРЕДОСТОРОЖНОСТИ; ВHИMAHИE; Удостоверьтесь, что сливные трубы соединены надлежащим образом.; Если сливные трубы не соединены надлежащим образом, это может; Остерегайтесь контакта с этими местами.; Если этого не сделать, при включении питания вентиляторы; РУКОВОДСТВО ПО УСТАНОВКЕ; ПPEДУПPEЖДEHИE
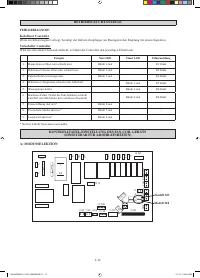
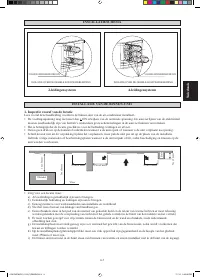
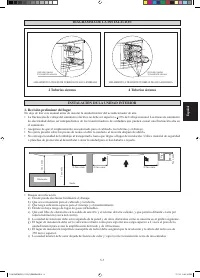
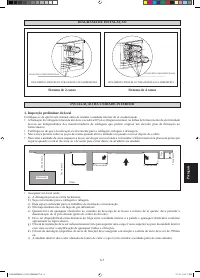
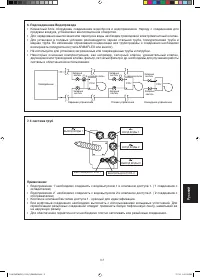
- 133 РИСУНОК УСТАНОВКИ; Убедитесь, что место установки отвечает следующим требованиям:; Предварительный осмотр места установки; Трубы системы
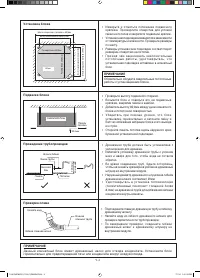
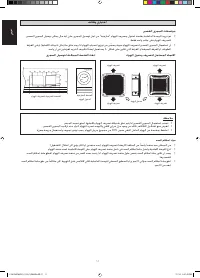
- 134 Обязательно обсудите сверлильные потолочные
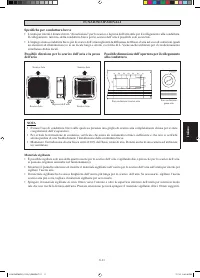
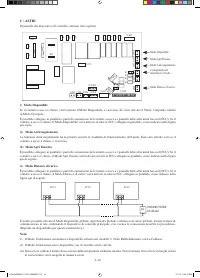
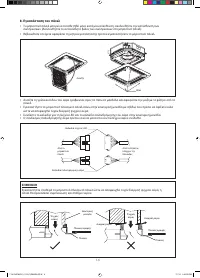
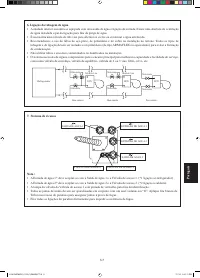
- 135 Подсоединение Водопровода; Водоприемник 1
- 136 ПРИМЕЧАНИЕ
- 139 должны быть не менее 3мм.
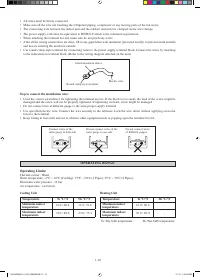
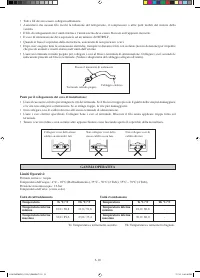
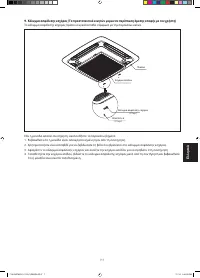
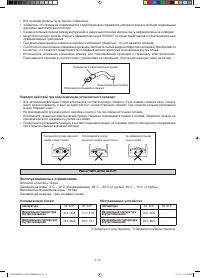
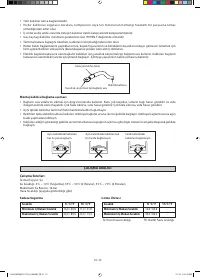
- 140 Эксплуатационные ограничения:
- 141 Характеристика короткой вентиляционной трубы
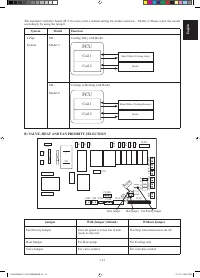
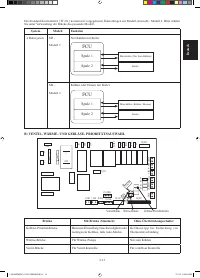
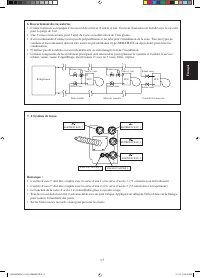
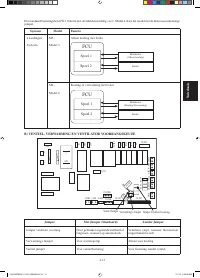
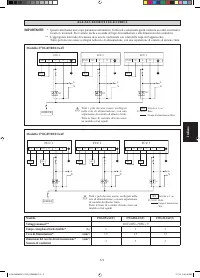
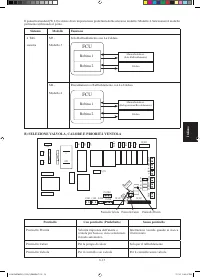
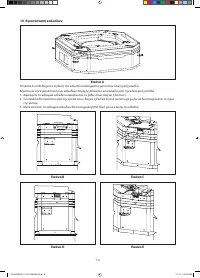
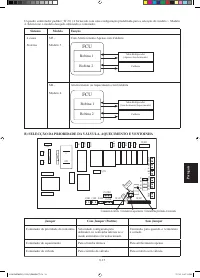
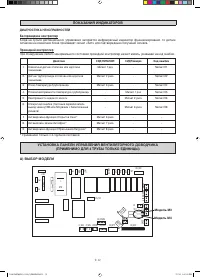
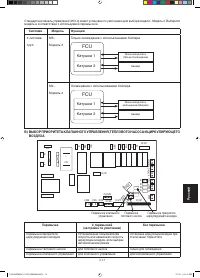
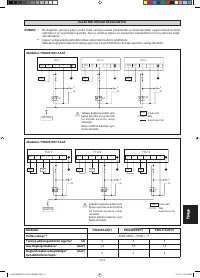
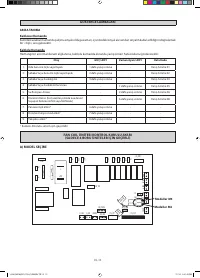
- 142 ПОКАЗАНИЯ ИНДИКАТОРОВ; Действие; УСТАНОВКА ПАНЕЛИ УПРАВЛЕНИЯ ВЕНТИЛЯТОРНОГО ДОВОДЧИКА; Модель M3
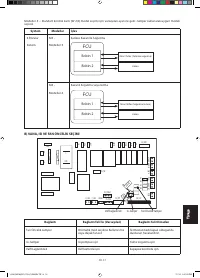
- 143 ВОЗДУХА; Катушка 1; Катушка 2
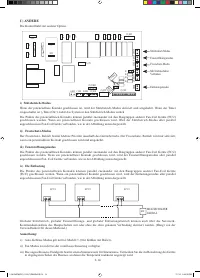
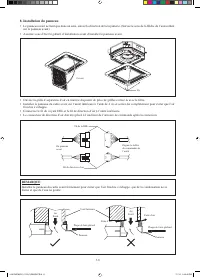
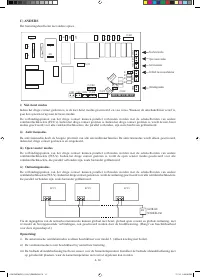
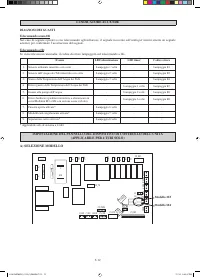
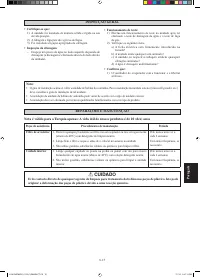
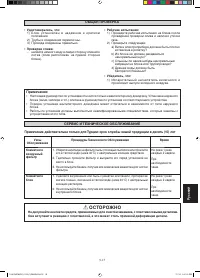
- 145 ОCTOPOЖHO; Узлы
- 146 МЕРЫ ПО УСТРАНЕНИЮ; Неисправность


