Усилители Yamaha RX-E810 - инструкция пользователя по применению, эксплуатации и установке на русском языке. Мы надеемся, она поможет вам решить возникшие у вас вопросы при эксплуатации техники.
Если остались вопросы, задайте их в комментариях после инструкции.
"Загружаем инструкцию", означает, что нужно подождать пока файл загрузится и можно будет его читать онлайн. Некоторые инструкции очень большие и время их появления зависит от вашей скорости интернета.


iii
1
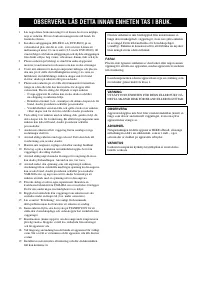
To assure the finest performance, please read this manual
carefully. Keep it in a safe place for future reference.
2
Install this unit (RX-E810 and DVD-E810) in a well ventilated,
cool, dry, clean place with at least 10 cm on the top (2.5 cm for
DVD-E810), 10 cm on the left and right, and 10 cm at the back of
this unit — away from direct sunlight, heat sources, vibration,
dust, moisture, and/or cold.
3
Locate this unit away from other electrical appliances, motors, or
transformers to avoid humming sounds.
4
Do not expose this unit to sudden temperature changes from cold
to hot, and do not locate this unit in an environment with high
humidity (i.e. a room with a humidifier) to prevent condensation
inside this unit, which may cause an electrical shock, fire,
damage to this unit, and/or personal injury.
5
Avoid installing this unit where foreign object may fall onto this
unit and/or this unit may be exposed to liquid dripping or
splashing. On the top of this unit, do not place:
– Other components, as they may cause damage and/or
discoloration on the surface of this unit.
– Burning objects (i.e. candles), as they may cause fire, damage
to this unit, and/or personal injury.
– Containers with liquid in them, as they may fall and liquid
may cause electrical shock to the user and/or damage to this
unit.
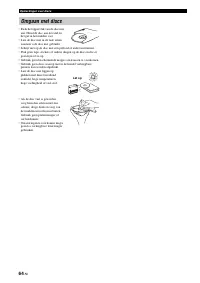
6
Do not cover this unit with a newspaper, tablecloth, curtain, etc.
in order not to obstruct heat radiation. If the temperature inside
this unit rises, it may cause fire, damage to this unit, and/or
personal injury.
7
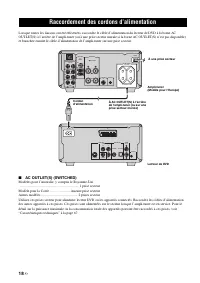
Do not plug in this unit to a wall outlet until all connections are
complete.
8
Do not operate this unit upside-down. It may overheat, possibly
causing damage.
9
Do not use force on switches, knobs and/or cords.
10 When disconnecting the power cable from the wall outlet, grasp
the plug; do not pull the cable.
11 Do not clean this unit with chemical solvents; this might damage
the finish. Use a clean, dry cloth.
12 Only voltage specified on this unit must be used. Using this unit
with a higher voltage than specified is dangerous and may cause
fire, damage to this unit, and/or personal injury. YAMAHA will
not be held responsible for any damage resulting from use of this
unit with a voltage other than specified.
13 Do not attempt to modify or fix this unit. Contact qualified
YAMAHA service personnel when any service is needed.
The cabinet should never be opened for any reasons.
14 When not planning to use this unit for long periods of time (i.e.
vacation), disconnect the AC power plug from the wall outlet.
15 Be sure to read the “Troubleshooting” section on common
operating errors before concluding that this unit is faulty.
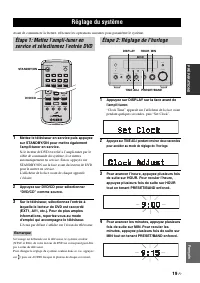
16 Before moving this unit, press STANDBY/ON to set this unit in
standby mode, and disconnect the AC power plug from the wall
outlet.
17 Condensation will form when the surrounding temperature
changes suddenly. Disconnect the power cable from the outlet,
then leave the unit alone.
18 When using the unit for a long time, the unit may become warm.
Turn the power off, then leave the unit alone for cooling.
19 Install this unit near the wall outlet and where the AC power plug
can be reached easily.
DANGER
When this unit is plugged to the wall outlet, do not place your
eyes close to the opening of the disc tray and other openings to
look into inside.
■
For U.K. customers
If the socket outlets in the home are not suitable for the plug
supplied with this appliance, it should be cut off and an
appropriate 3 pin plug fitted. For details, refer to the instructions
described below.
The plug severed from the mains lead must be destroyed, as a
plug with bared flexible cord is hazardous if engaged in a live
socket outlet.
■
Special Instructions for U.K. Model
CAUTION: READ THIS BEFORE OPERATING YOUR UNIT.
This unit is not disconnected from the AC power source as
long as it is connected to the wall outlet, even if this unit itself
is turned off. This state is called the standby mode. In this
state, this unit is designed to consume a very small quantity of
power.
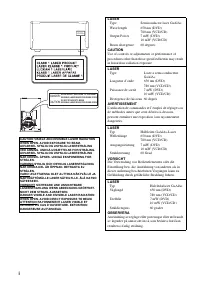
The laser component in this product is capable of emitting
radiation exceeding the limit for Class 1.
WARNING
TO REDUCE THE RISK OF FIRE OR ELECTRIC SHOCK,
DO NOT EXPOSE THIS APPLIANCE TO RAIN OR
MOISTURE.
Note
IMPORTANT
THE WIRES IN MAINS LEAD ARE COLOURED IN
ACCORDANCE WITH THE FOLLOWING CODE:
Blue: NEUTRAL
Brown: LIVE
As the colours of the wires in the mains lead of this appa-
ratus may not correspond with the coloured markings
identifying the terminals in your plug, proceed as follows:
The wire which is coloured BLUE must be connected to
the terminal which is marked with the letter N or coloured
BLACK. The wire which is coloured BROWN must be
connected to the terminal which is marked with the letter L
or coloured RED.
Making sure that neither core is connected to the earth
terminal of the three pin plug.
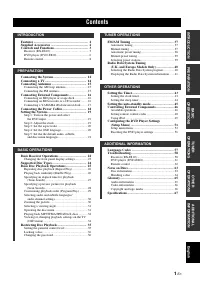
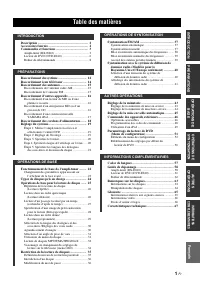
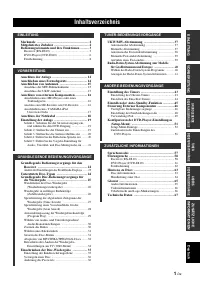
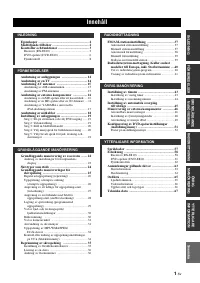
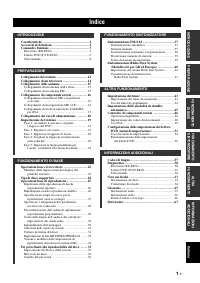
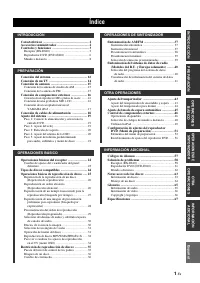
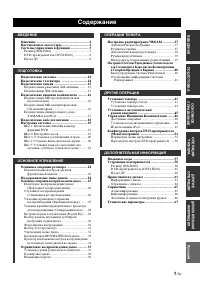
Содержание
- 481 ТЕЛЬНА; Содержание
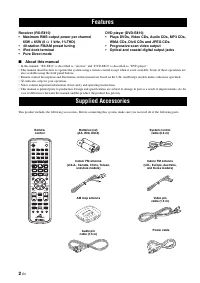
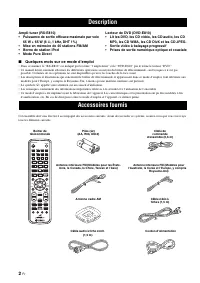
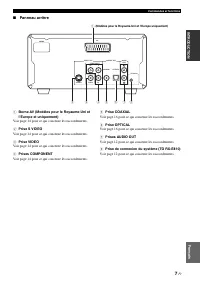
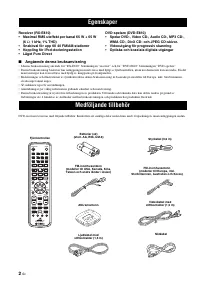
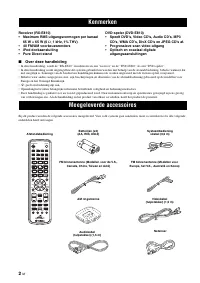
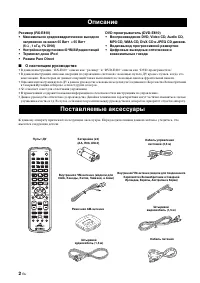
- 482 коаксиальные гнезда; О настоящем руководстве; Описание
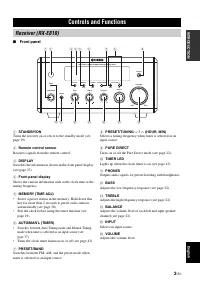
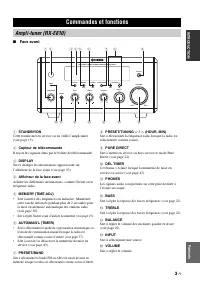
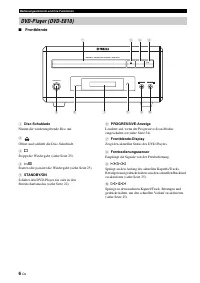
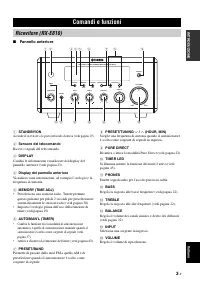
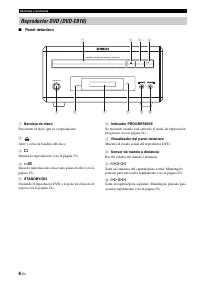
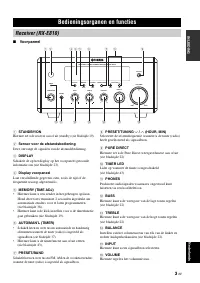
- 483 кий; Фронтальная панель; Системы управления и функции
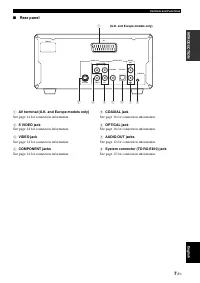
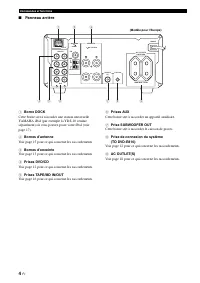
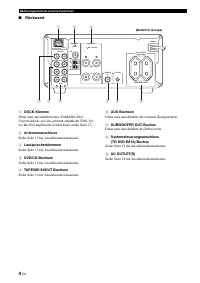
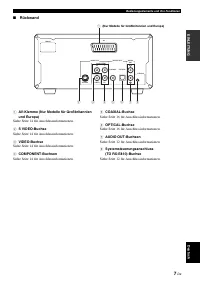
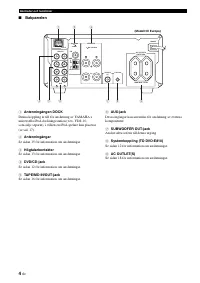
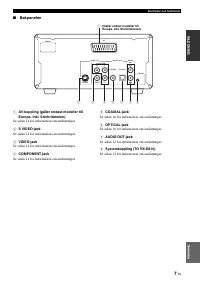
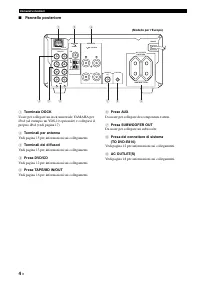
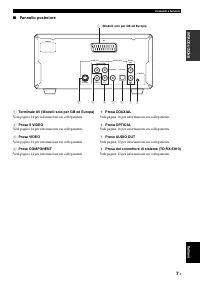
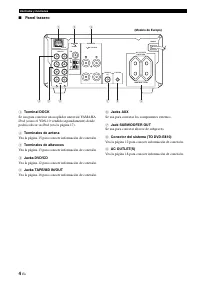
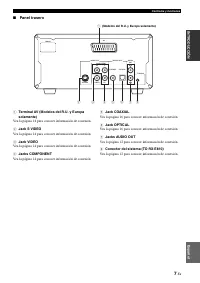
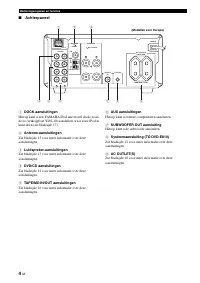
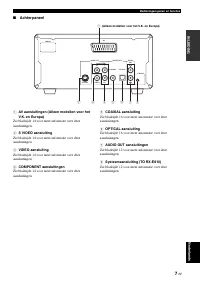
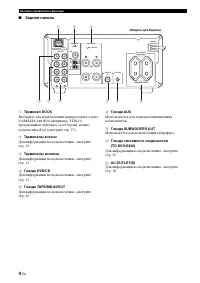
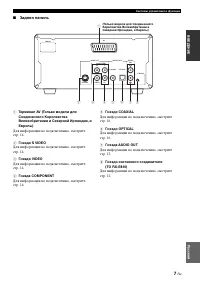
- 484 Задняя панель; Терминал DOCK; Используется для подключения сабвуфера.
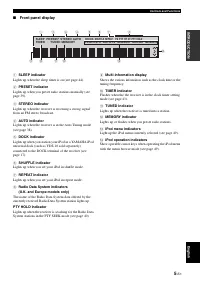
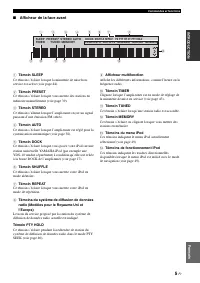
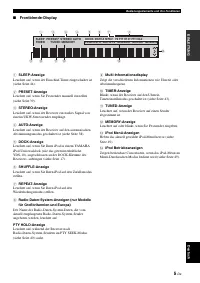
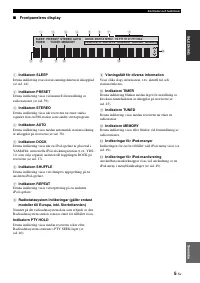
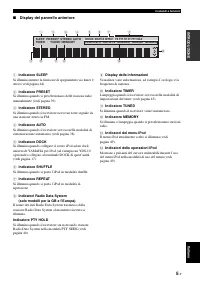
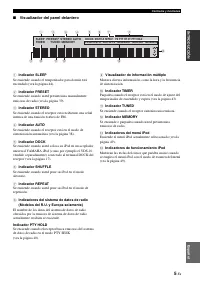
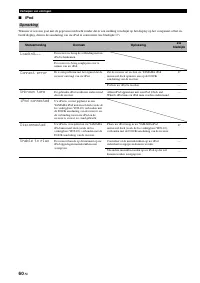
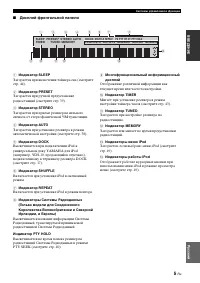
- 485 Дисплей фронтальной панели; Включается при установке iPod в режим повтора.
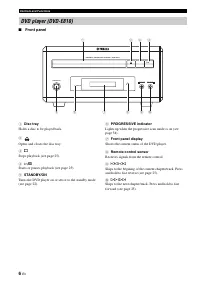
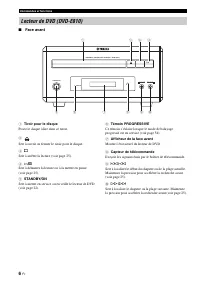
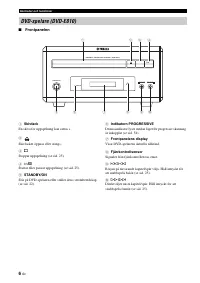
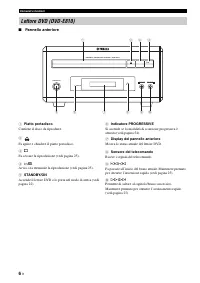
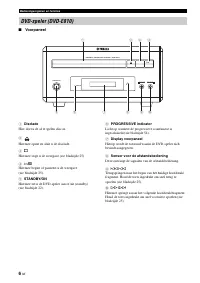
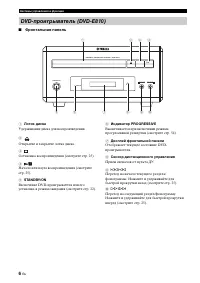
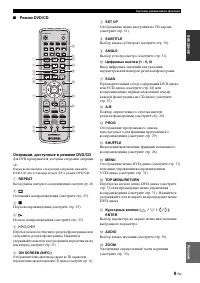
- 486 Лоток диска; Удерживание диска для воспроизведения.; Индикатор PROGRESSIVE; Прием сигналов от пульта ДУ.
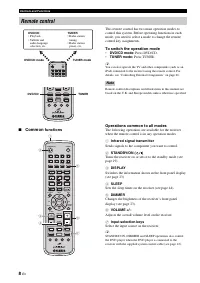
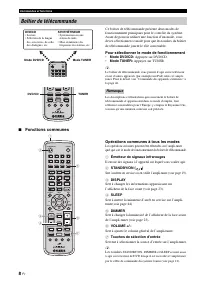
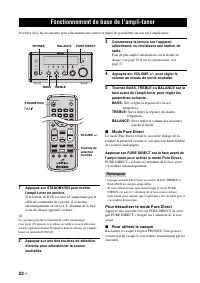
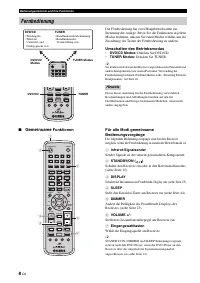
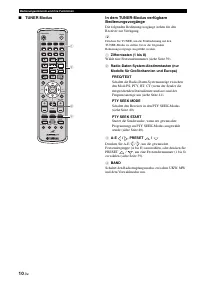
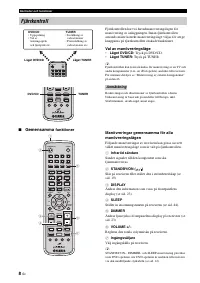
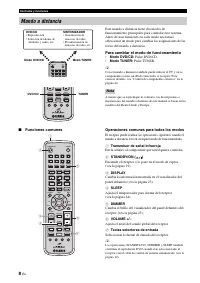
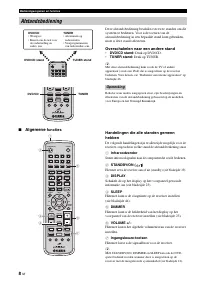
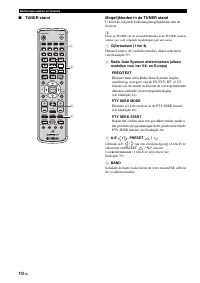
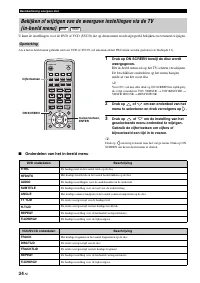
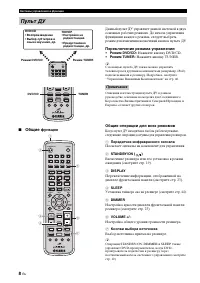
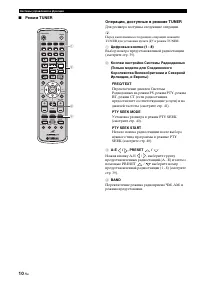
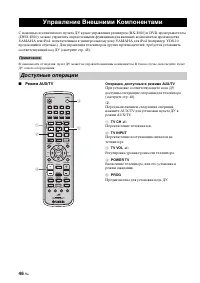
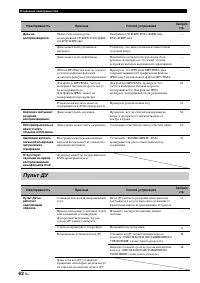
- 488 Общие; функции; Нажмите кнопку TUNER.; Общие операции для всех режимов; Посылает сигналы на компонент для управления.; Пульт ДУ; Примечание
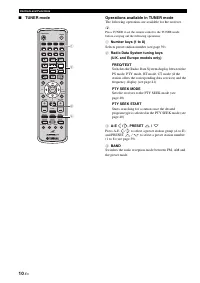
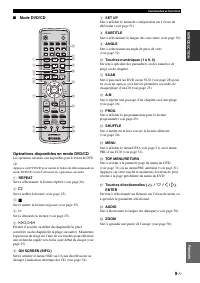
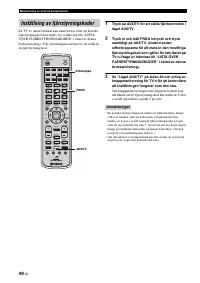
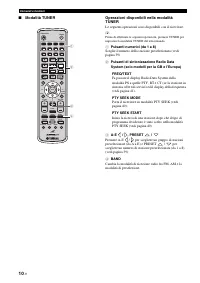
- 490 Режим TUNER; Для ресивера доступны следующие операции.
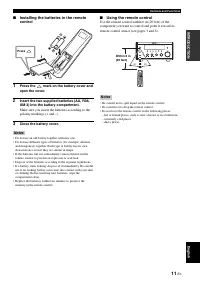
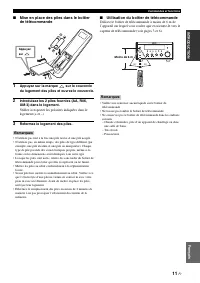
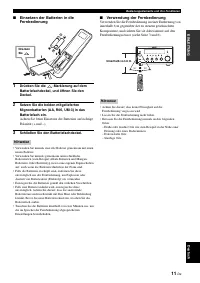
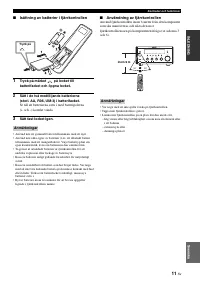
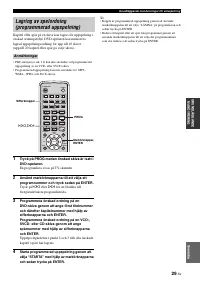
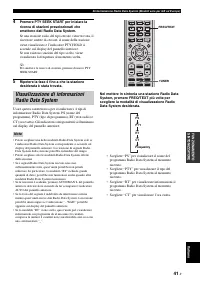
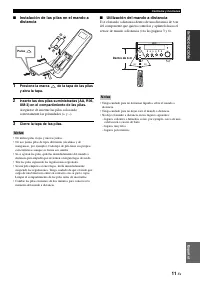
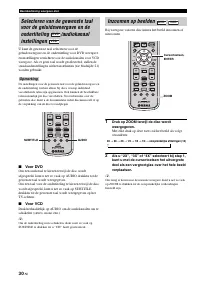
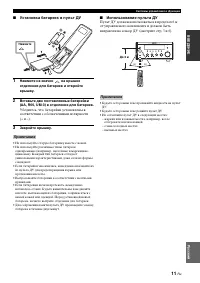
- 491 Установка батареек в пульт ДУ; Нажмите на значок; Использование пульта ДУ; Примечания
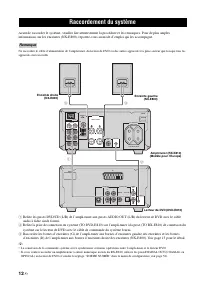
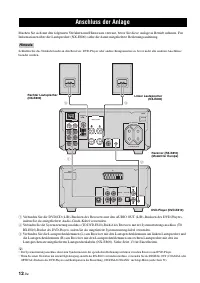
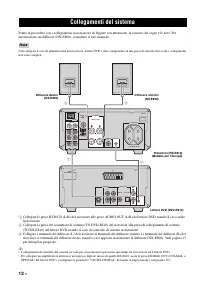
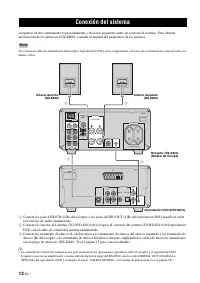
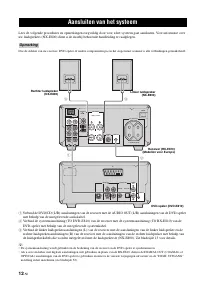
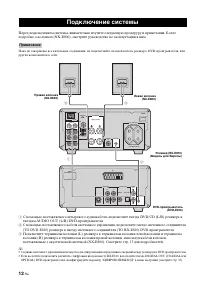
- 492 Подключение системы
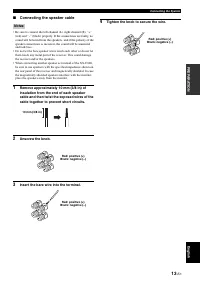
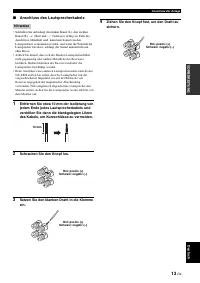
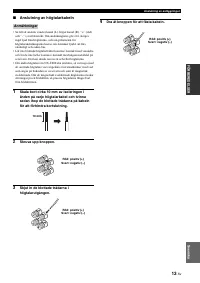
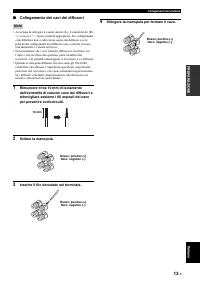
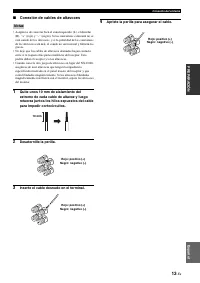
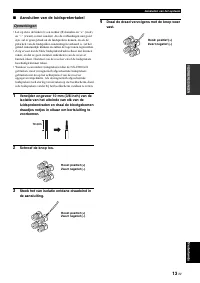
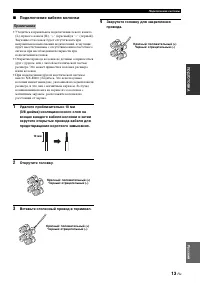
- 493 Подключение кабеля колонки; Вставьте оголенный провод в терминал.
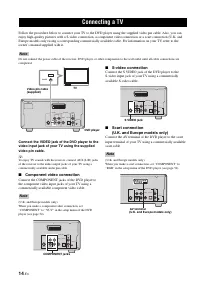
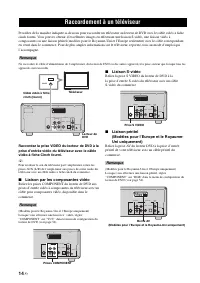
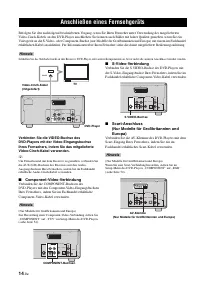
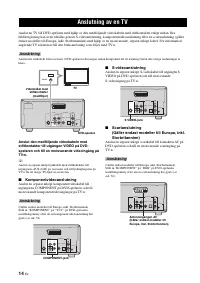
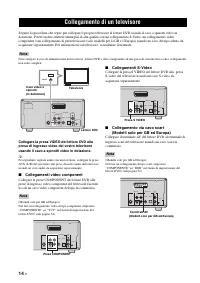
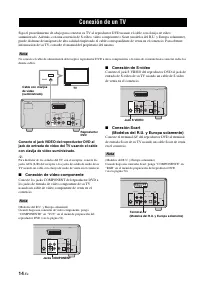
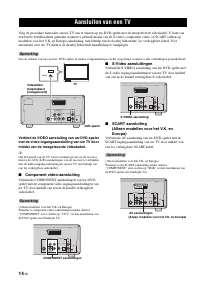
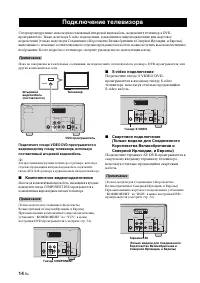
- 494 Компонентное видеоподключение; Подключение телевизора
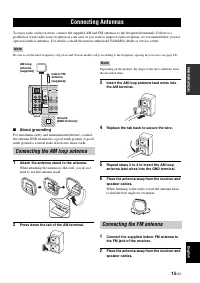
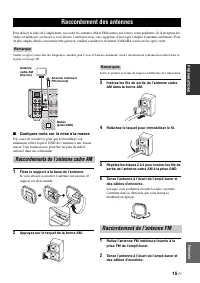
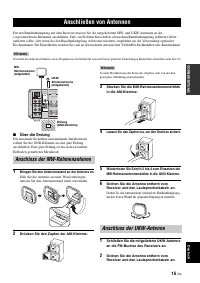
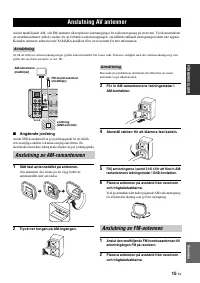
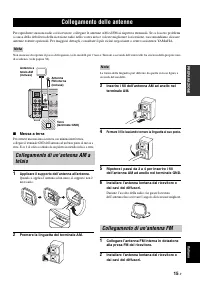
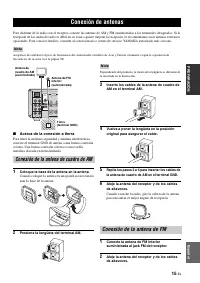
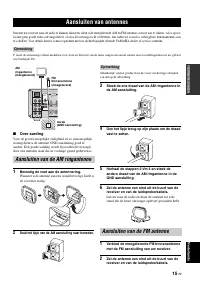
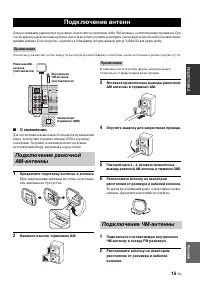
- 495 О заземлении; Прикрепите подставку антенны к антенне.; Подключение антенн; Подключение ЧМ-антенны
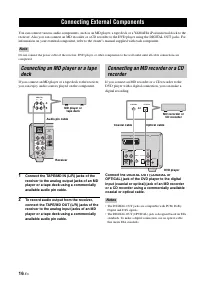
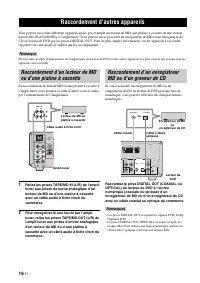
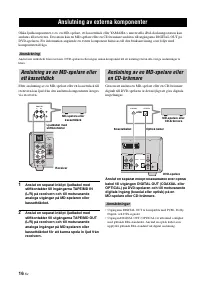
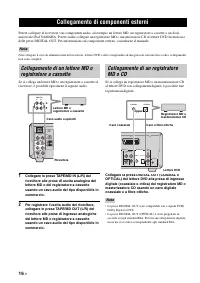
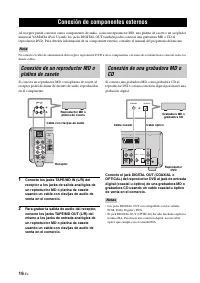
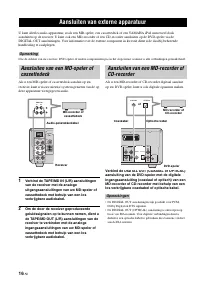
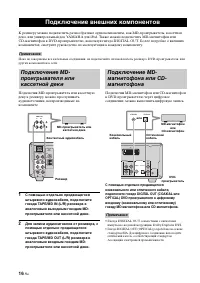
- 496 Подключение внешних компонентов
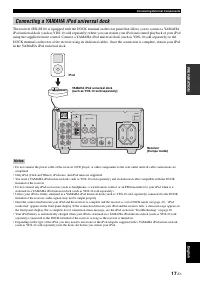
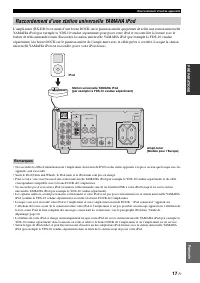
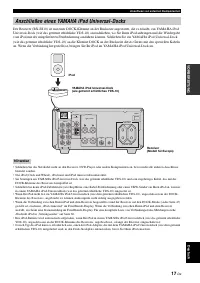
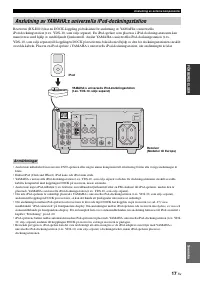
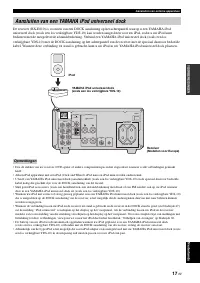
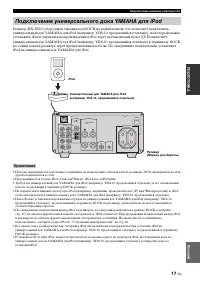
- 497 Подключение универсального дока YAMAHA для iPod
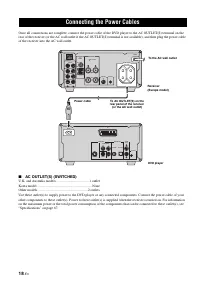
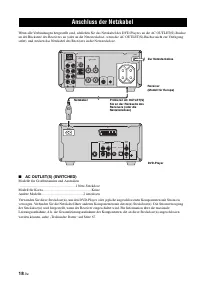
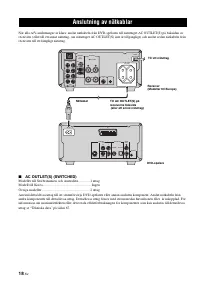
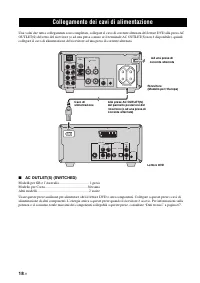
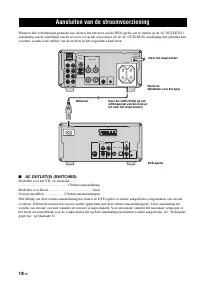
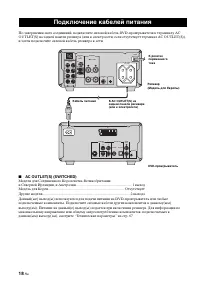
- 498 Подключение кабелей питания
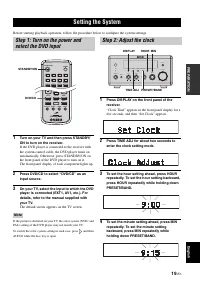
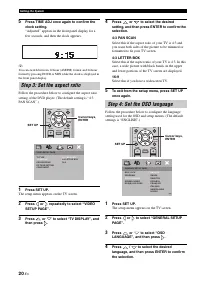
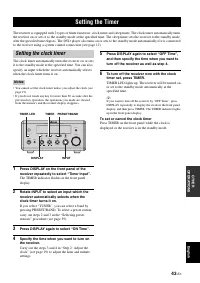
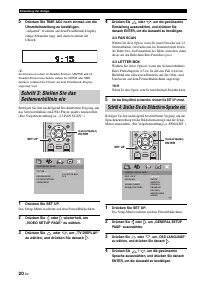
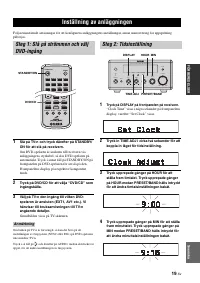
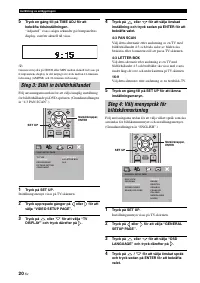
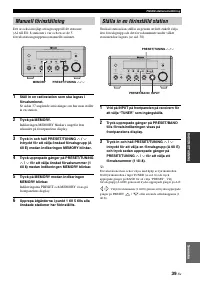
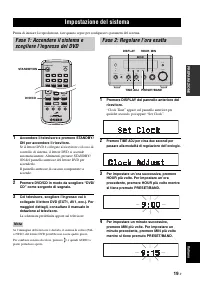
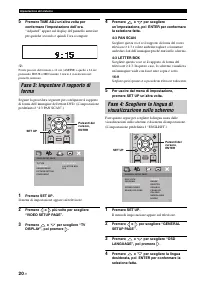
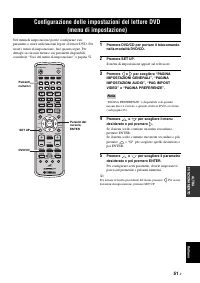
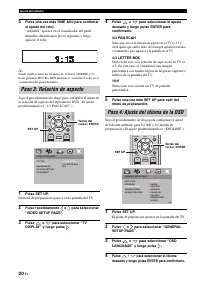
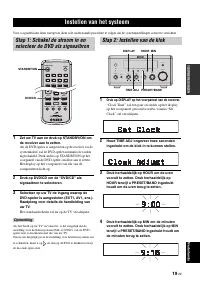
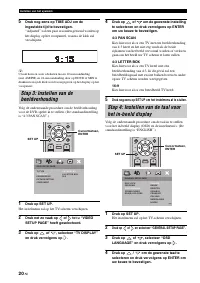
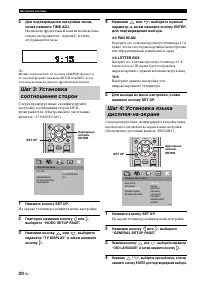
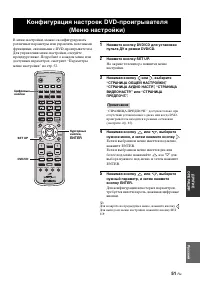
- 499 Настройка системы; Шаг 2: Настройка часов
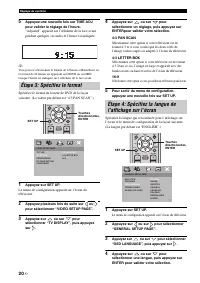
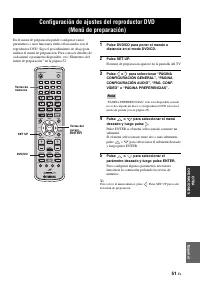
- 500 На экране телевизора появится меню настройки.
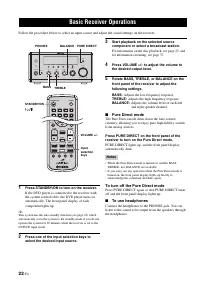
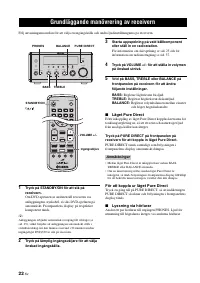
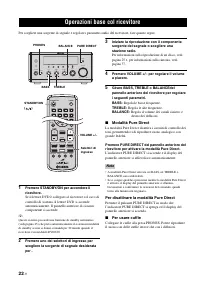
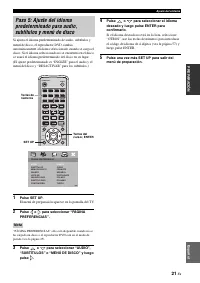
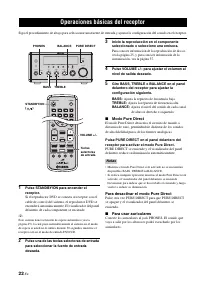
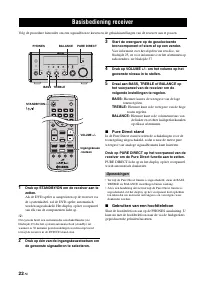
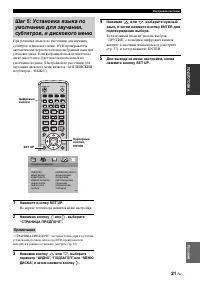
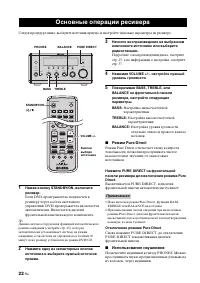
- 502 Настройка низкочастотной; Режим Pure Direct; Отключение режима Pure Direct; Использование наушников; Основные операции ресивера; Примечаниея
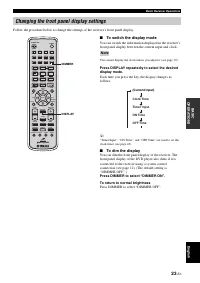
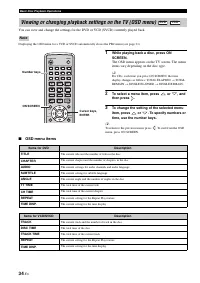
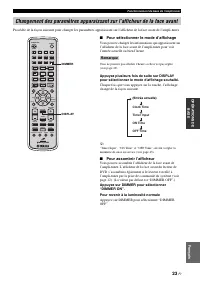
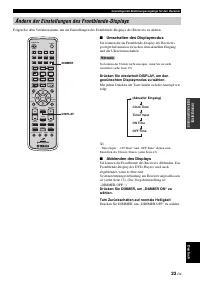
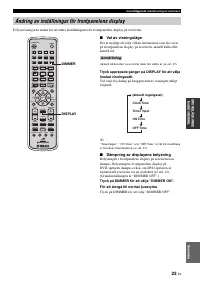
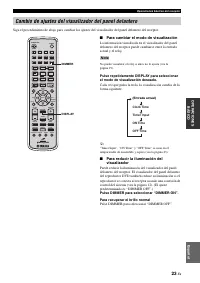
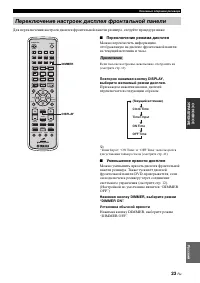
- 503 Переключение режима дисплея; Установка обычной яркости; Переключение настроек дисплея фронтальной панели
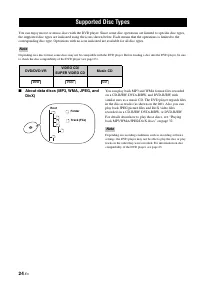
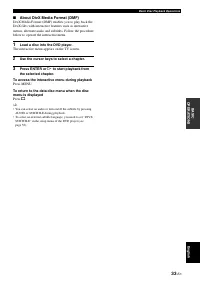
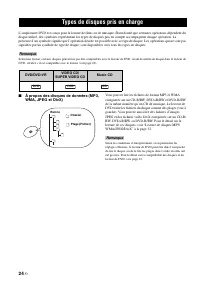
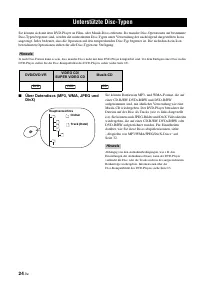
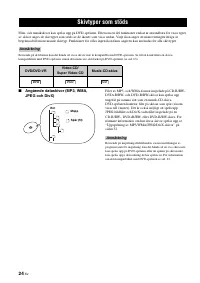
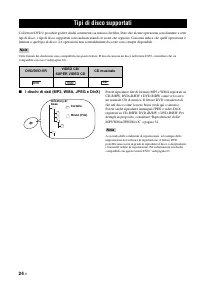
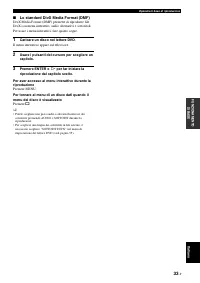
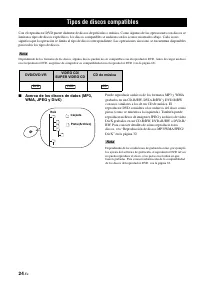
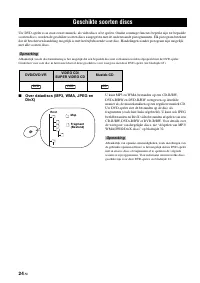
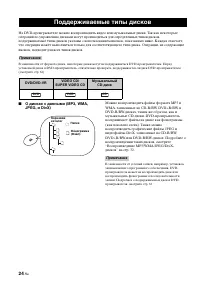
- 504 Поддерживаемые типы дисков
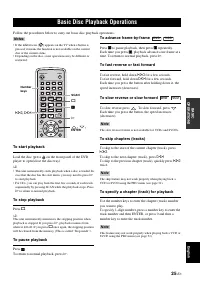
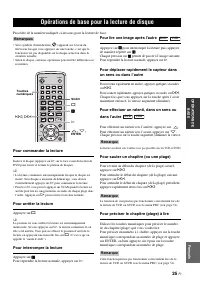
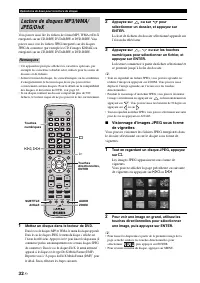
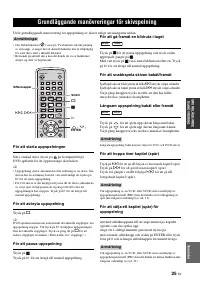
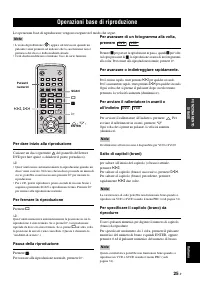
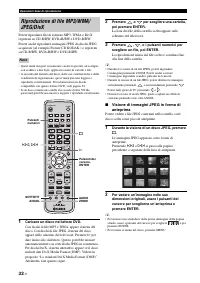
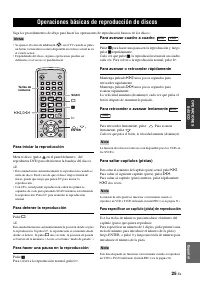
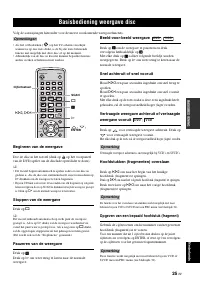
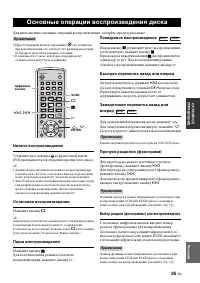
- 505 Основные операции воспроизведения диска
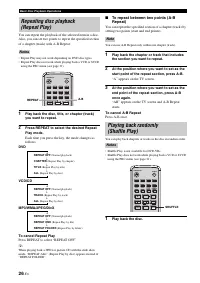
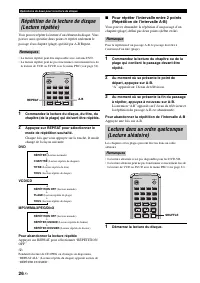
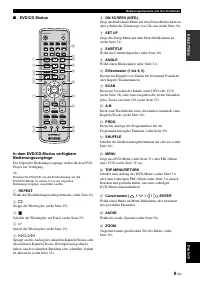
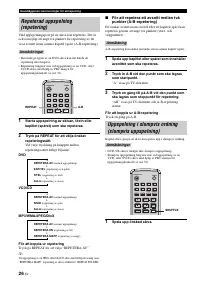
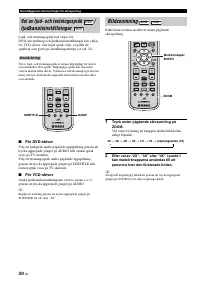
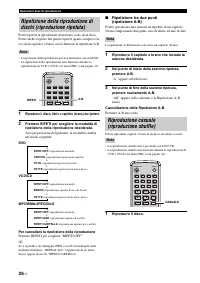
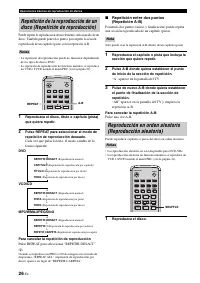
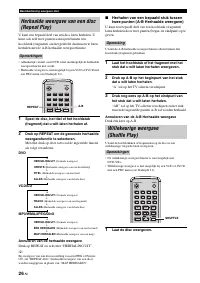
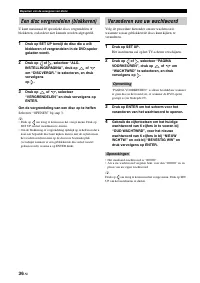
- 506 Отмена функции Repeat Play; Нажимая кнопку REPEAT, выберите режим “ПОВТОР ВЫКЛЮЧЕН”.; Отмена функции A-B Repeat
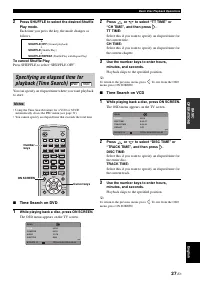
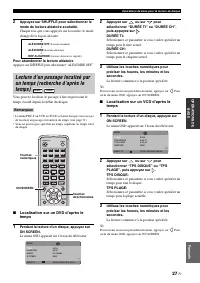
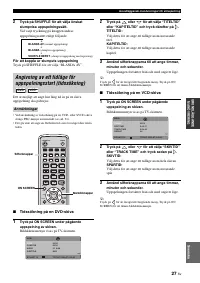
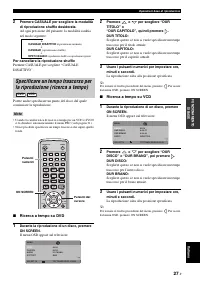
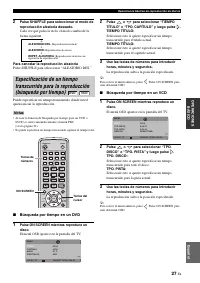
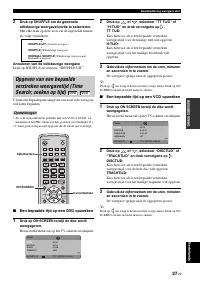
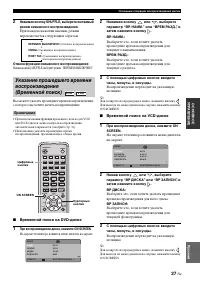
- 507 Нажимая кнопку SHUFFLE, выберите режим “ПЕРЕМЕН ВЫКЛЮЧЕНО”.; Временной поиск на DVD-диске
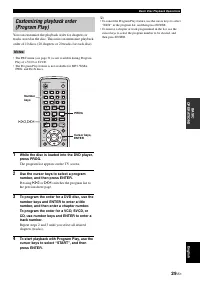
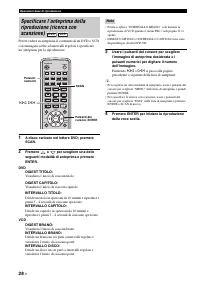
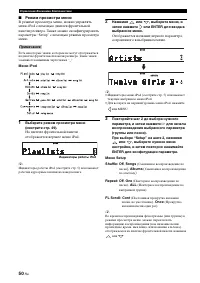
- 508 Нажимая; Отображает начало каждого наименования.; Отображает начало каждой фонограммы.; При нажатии
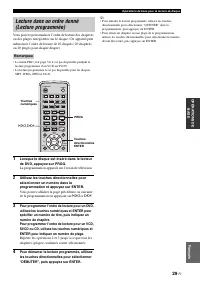
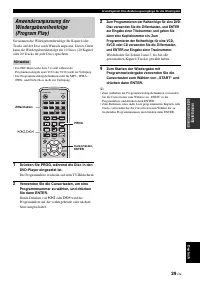
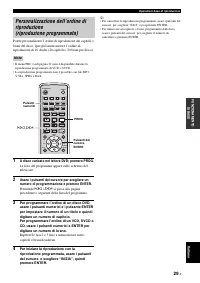
- 509 выберите “СТАРТ”, и затем
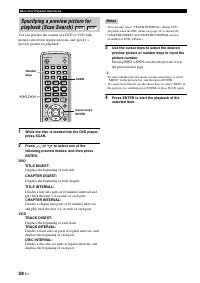
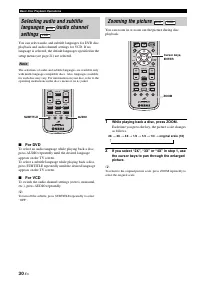
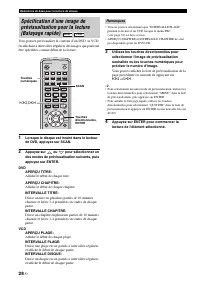
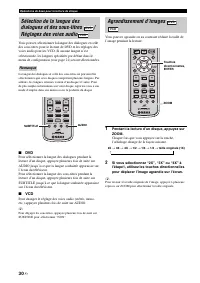
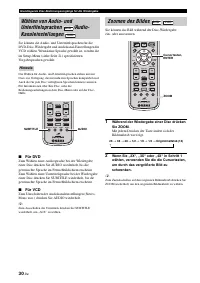
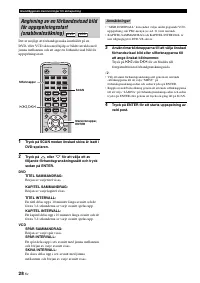
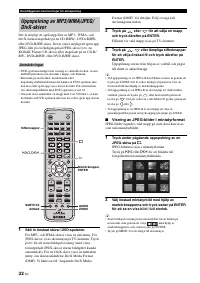
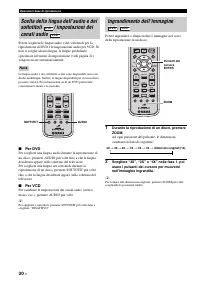
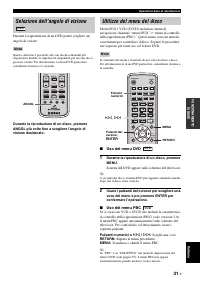
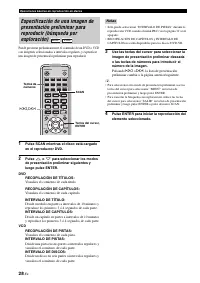
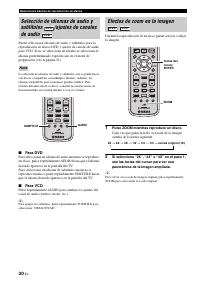
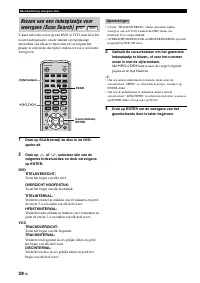
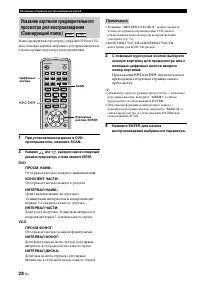
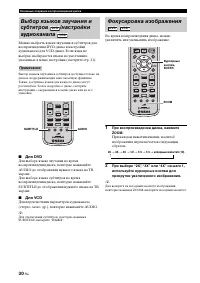
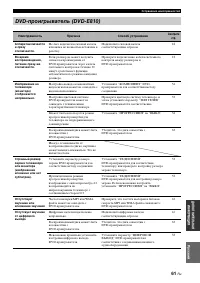
- 510 Для DVD; Фокусировка изображения
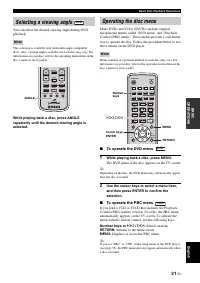
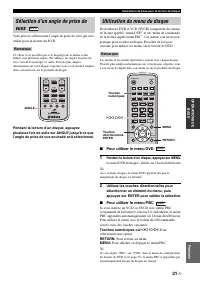
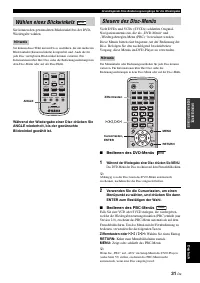
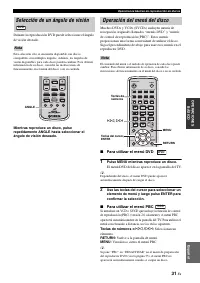
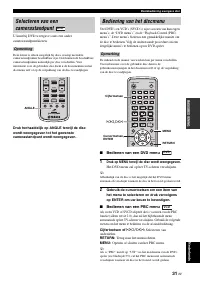
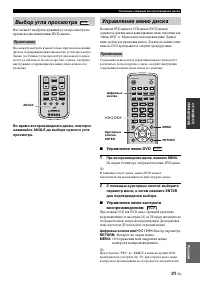
- 511 Управление меню DVD; На экране телевизора отображается меню DVD-диска.; Цифровые кнопки или; Возврат на экран меню.; Выбор угла просмотра; Управление меню диска
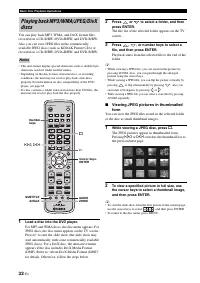
- 512 для начала показа; Нажимая кнопку; или
- 513 Нажмите кнопку
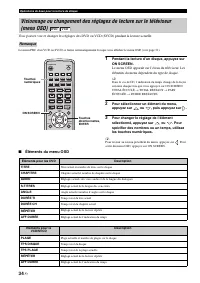
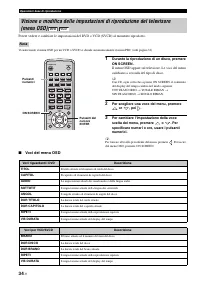
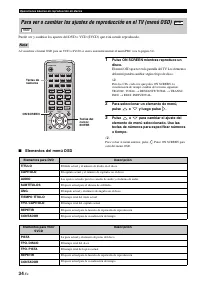
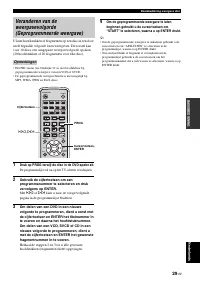
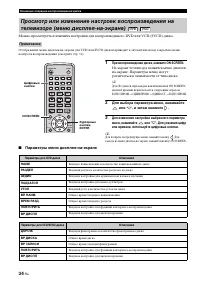
- 514 При воспроизведении диска, нажмите ON SCREEN.
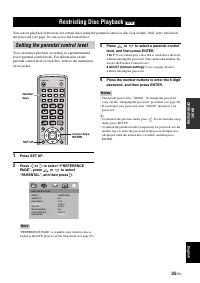
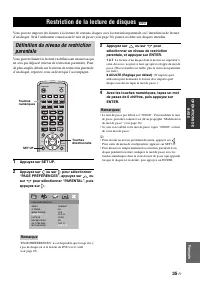
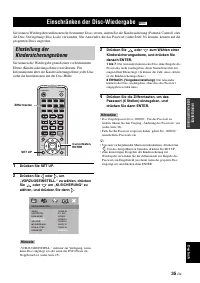
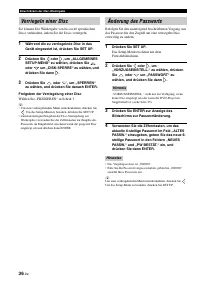
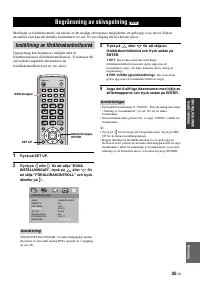
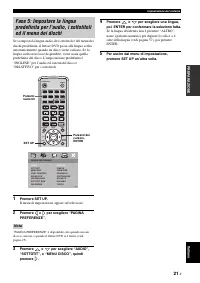
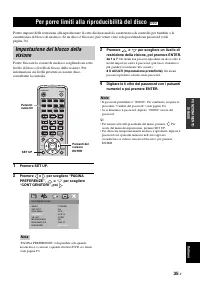
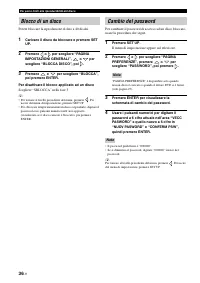
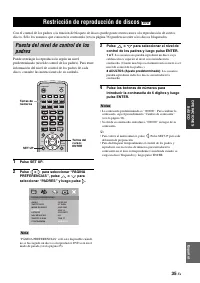
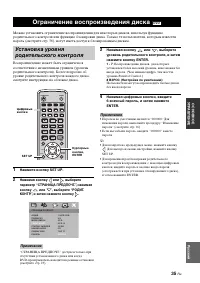
- 515 Ограничение воспроизведения диска
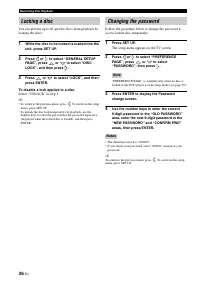
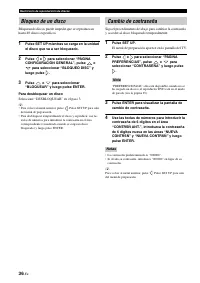
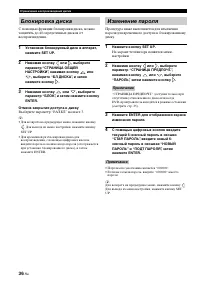
- 516 Выберите параметр “РАЗБЛ” на шаге 3.; Блокировка диска
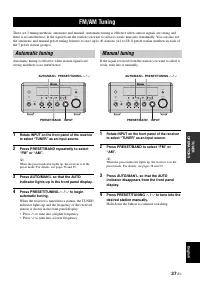
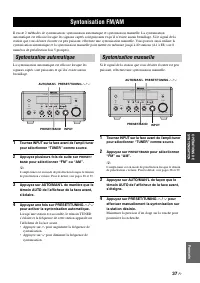
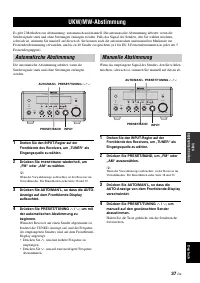
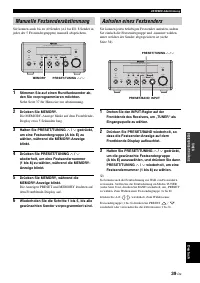
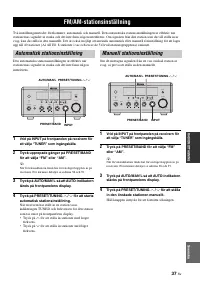
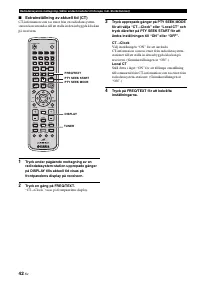
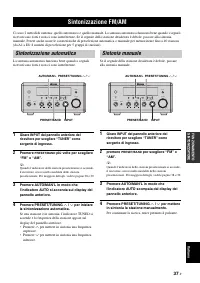
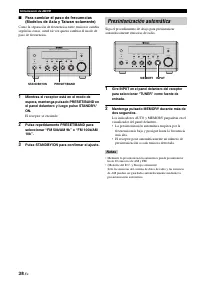
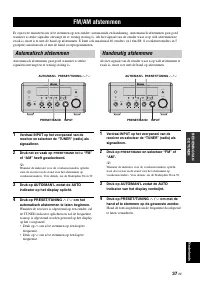
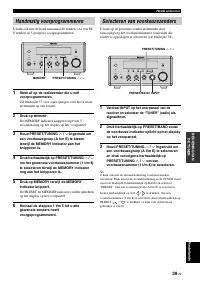
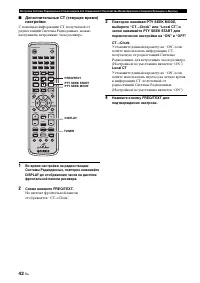
- 517 для настройки на; Нажмите кнопку PRESET/TUNING; Настройка радиопрограмм ЧМ/AM; Автоматическая настройка
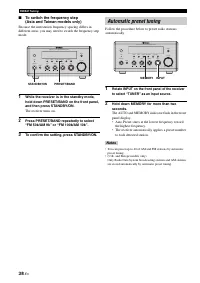
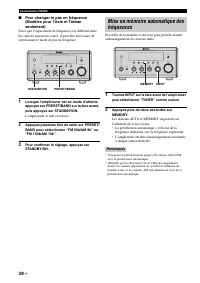
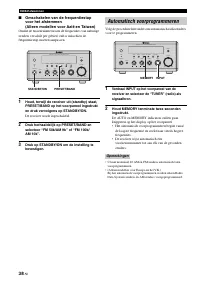
- 518 • Ресивер автоматически присваивает номер
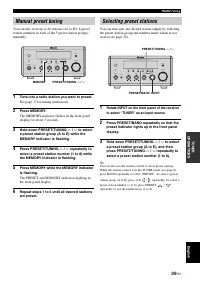
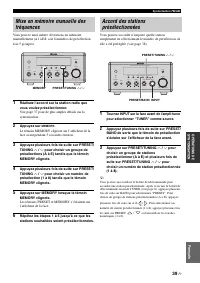
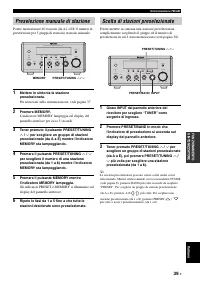
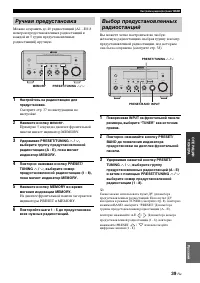
- 519 Удерживая PRESET/TUNING; Ручная предустановка
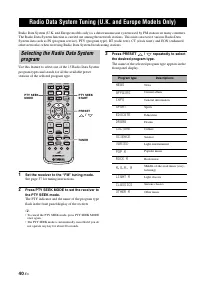
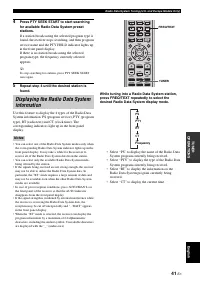
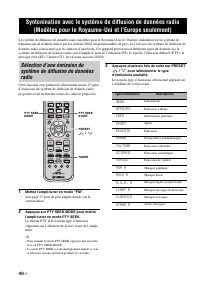
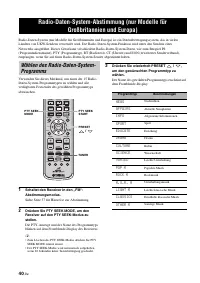
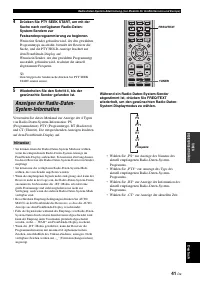
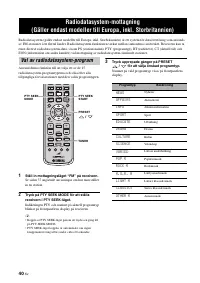
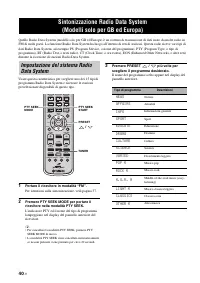
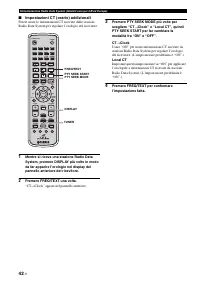
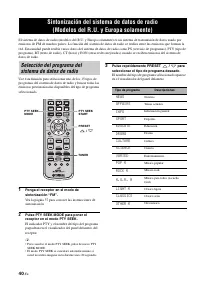
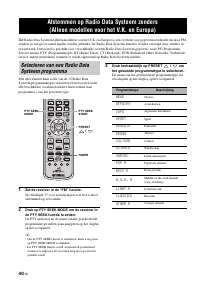
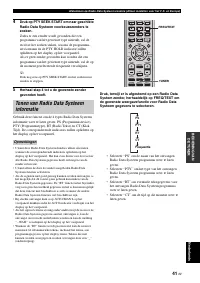
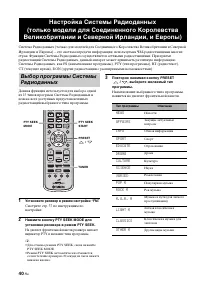
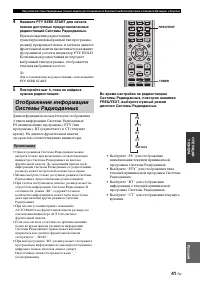
- 520 Установите ресивер в режим настройки “FM”.; Настройка Системы Радиоданных
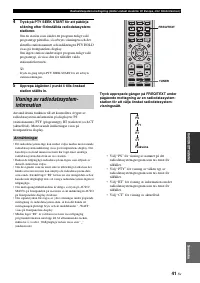
- 521 • Выберите “PS” для отображения
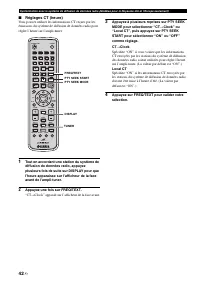
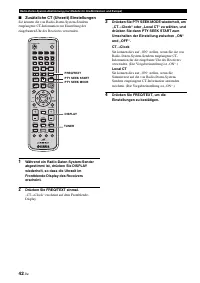
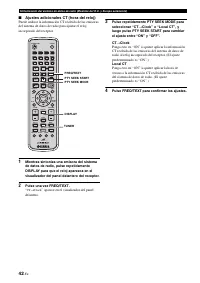
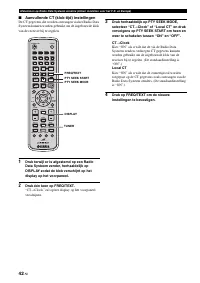
- 522 Clock” или “Local CT”, и
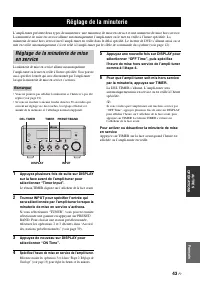
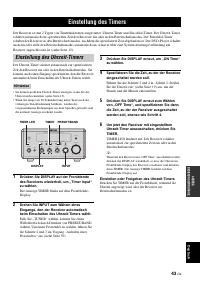
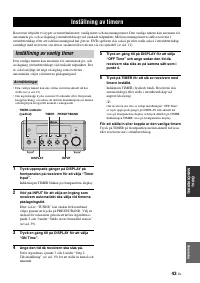
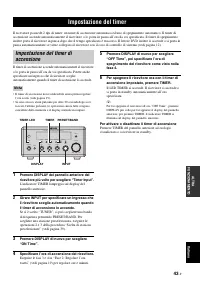
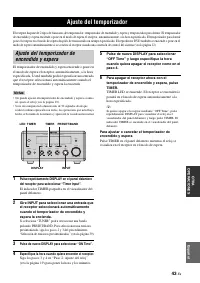
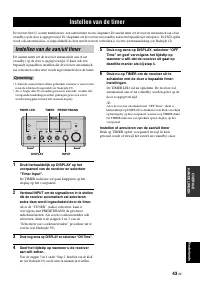
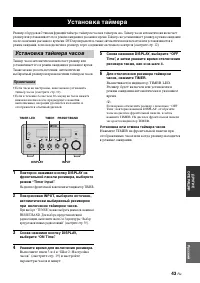
- 523 На дисплее фронтальной панели мигает индикатор TIMER.; Укажите время для включения ресивера.; Установка таймера; Установка таймера часов
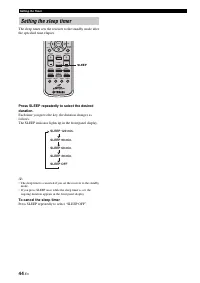
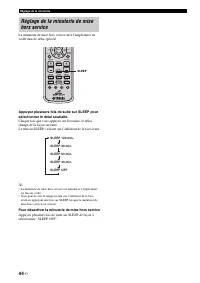
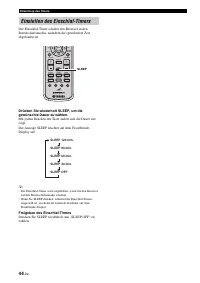
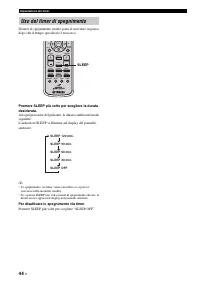
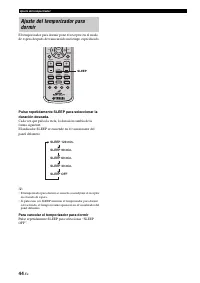
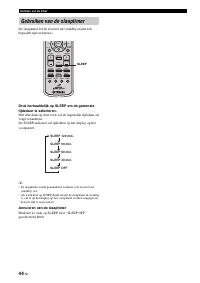
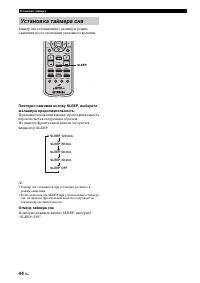
- 524 Отмена таймера сна; Установка таймера сна
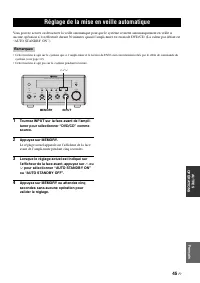
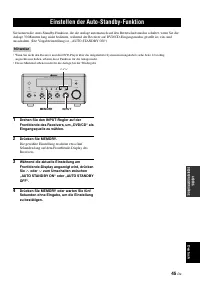
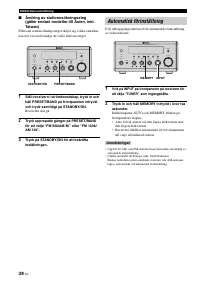
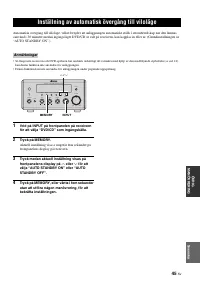
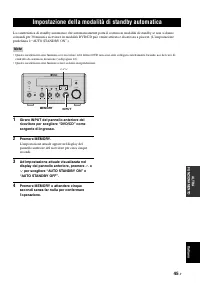
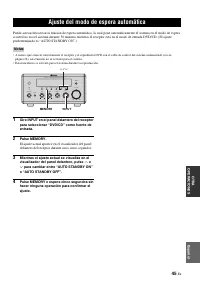
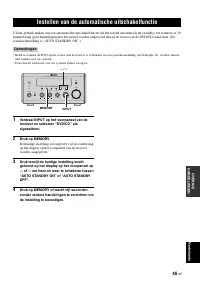
- 525 Установка в автоматический режим ожидания
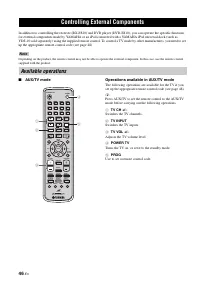
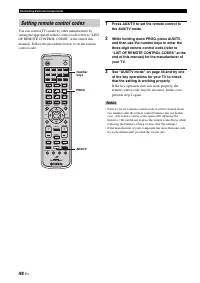
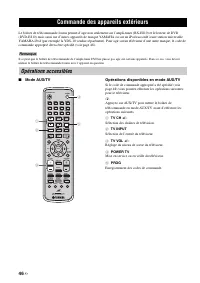
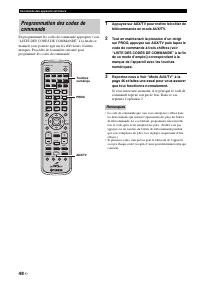
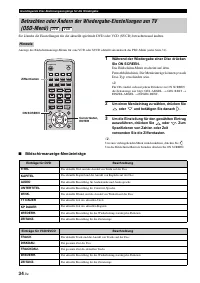
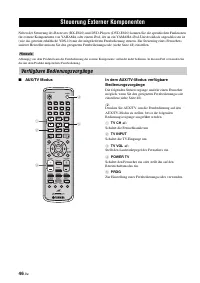
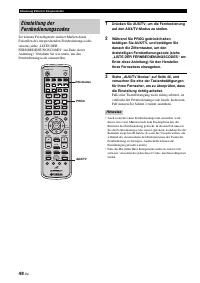
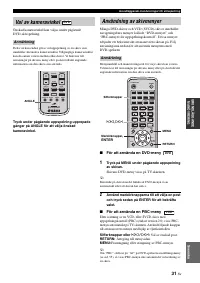
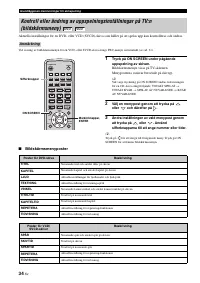
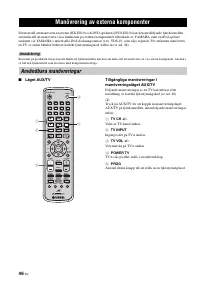
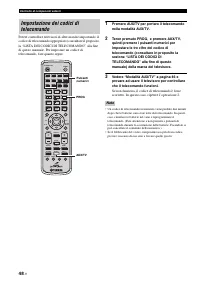
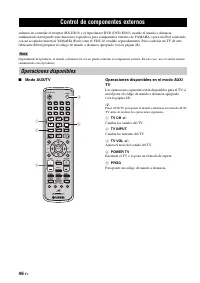
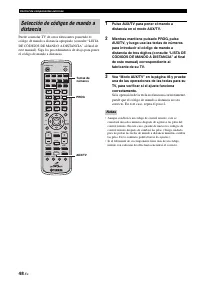
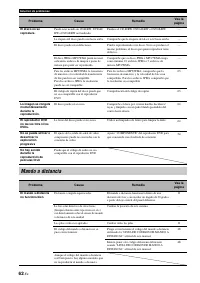
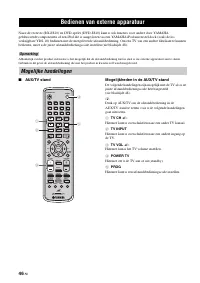
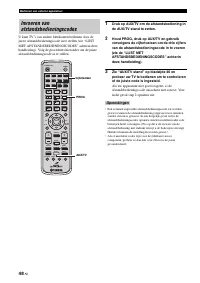
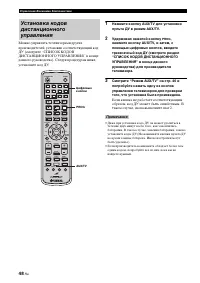
- 526 Переключение телеканалов.; Регулировка уровня громкости телевизора.; Предназначена для установки кода ДУ.; Управление Внешними Компонентами; Доступные операции
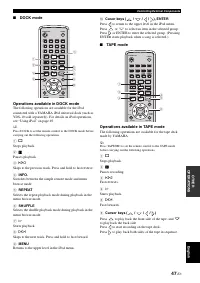
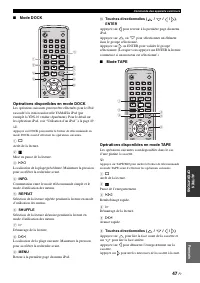
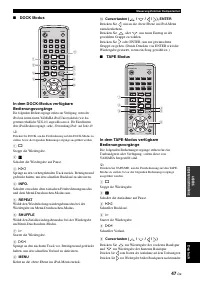
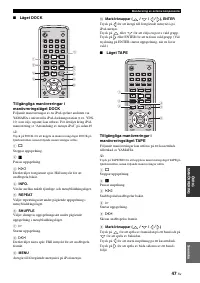
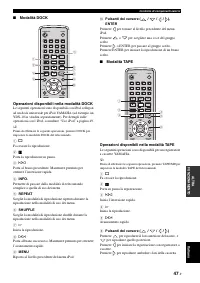
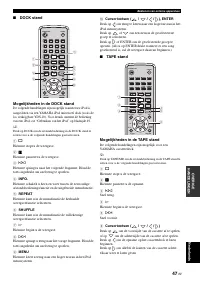
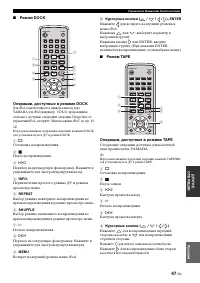
- 527 Режим DOCK; Режим TAPE
- 528 Удерживая нажатой кнопку
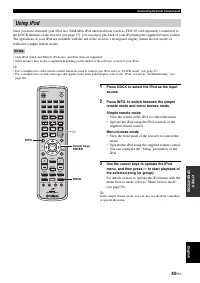
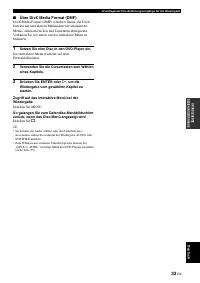
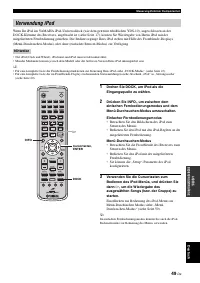
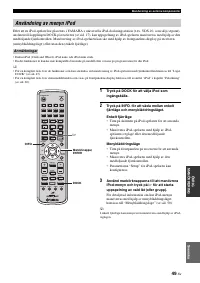
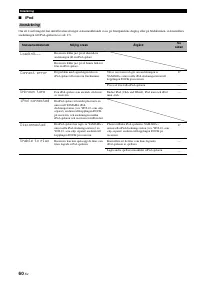
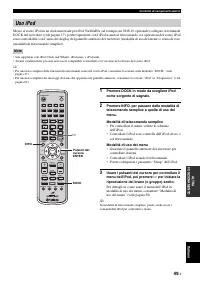
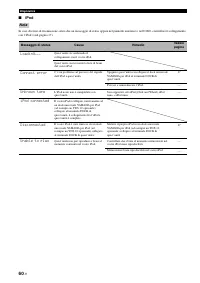
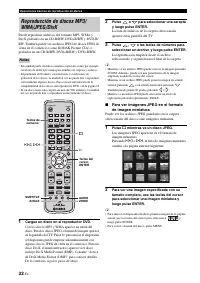
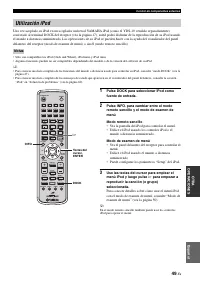
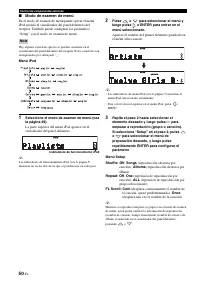
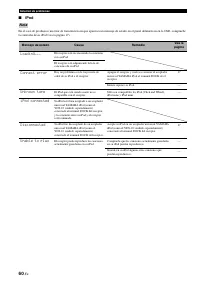
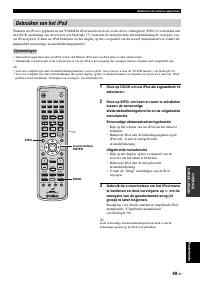
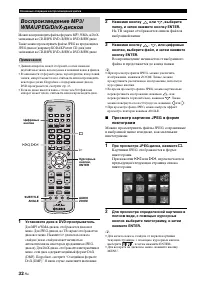
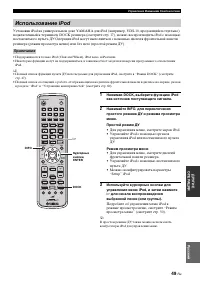
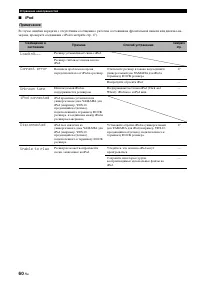
- 529 • Для управления меню, смотрите дисплей; для начала воспроизведения; Использование iPod
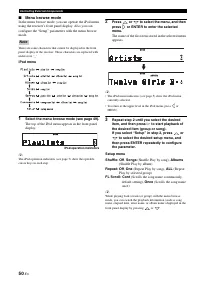
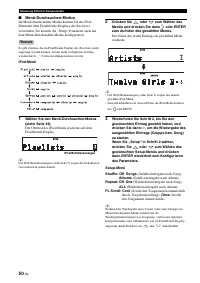
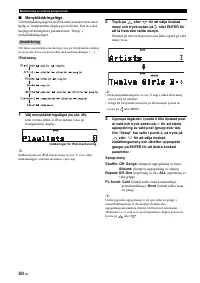
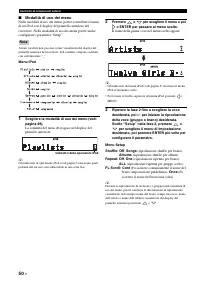
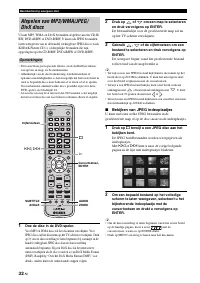
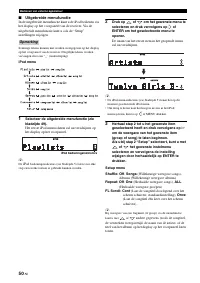
- 530 Режим просмотра меню
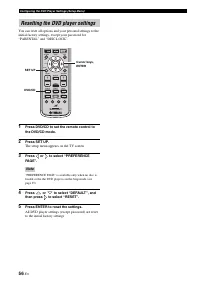
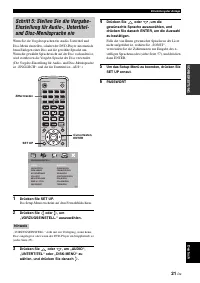
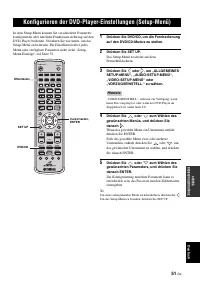
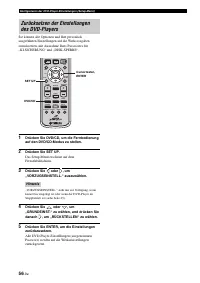
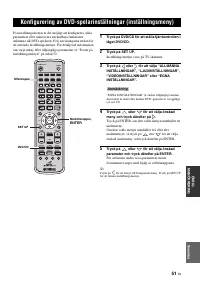
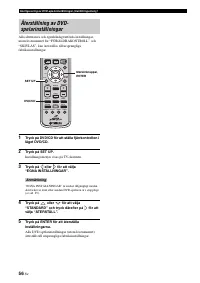
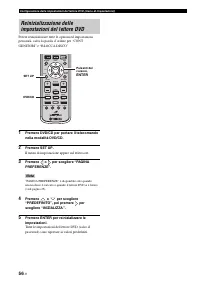
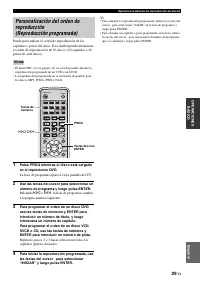
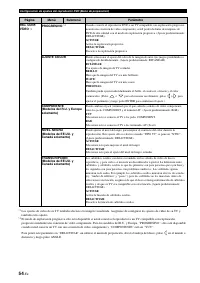
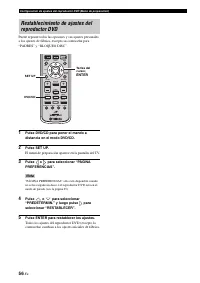
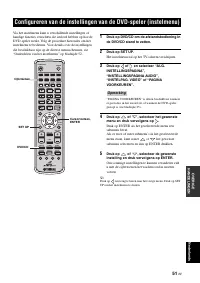
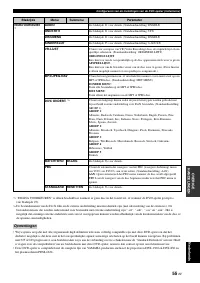
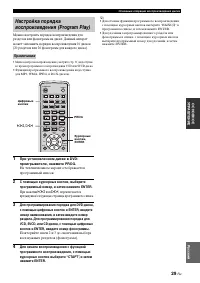
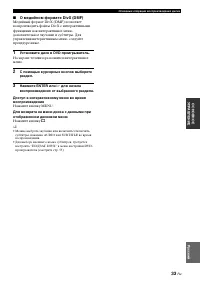
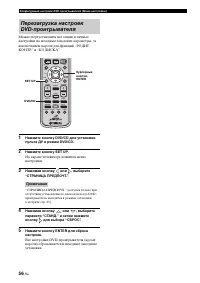
- 531 для; Конфигурация настроек DVD-проигрывателя
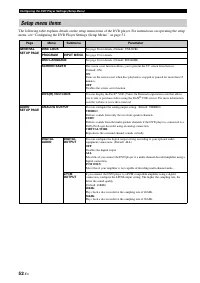
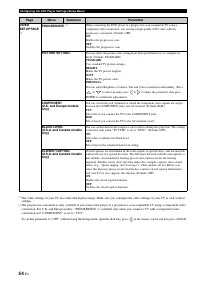
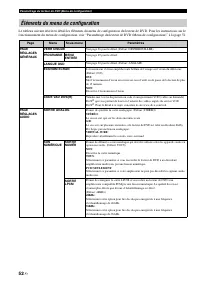
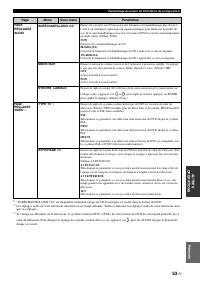
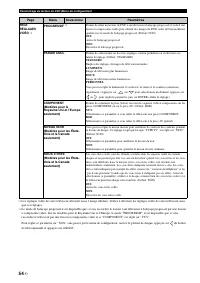
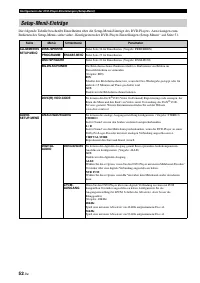
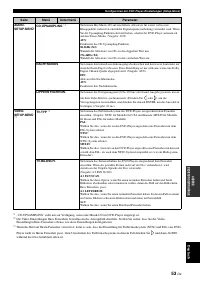
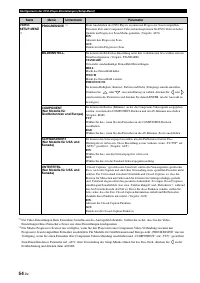
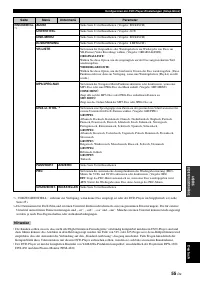
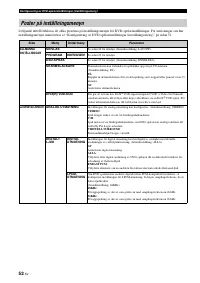
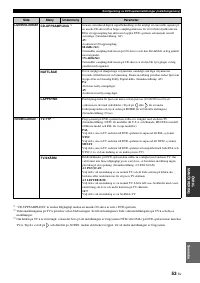
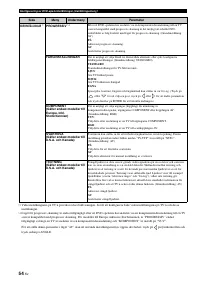
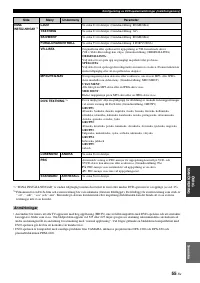
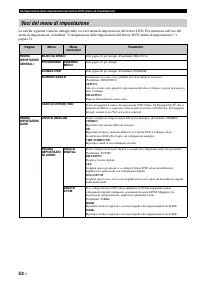
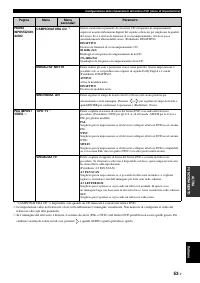
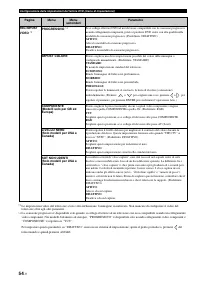
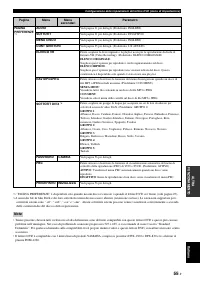
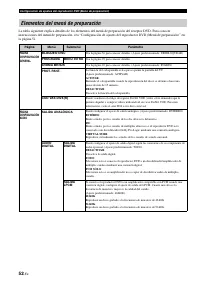
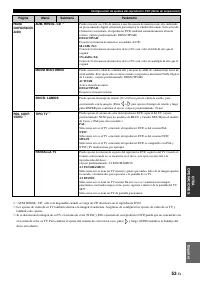
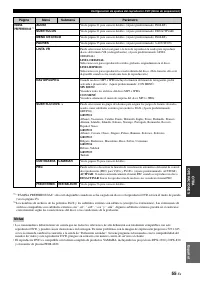
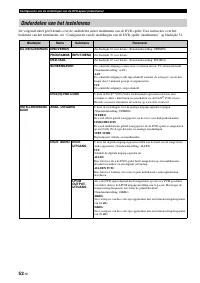
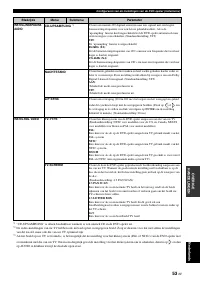
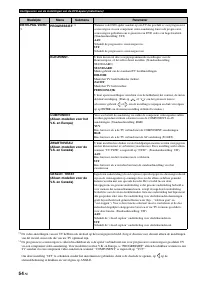
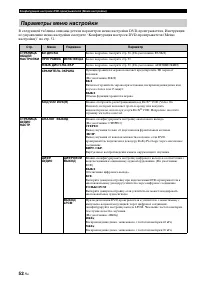
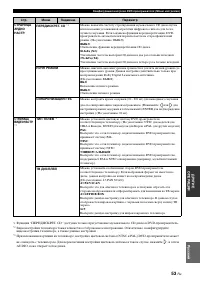
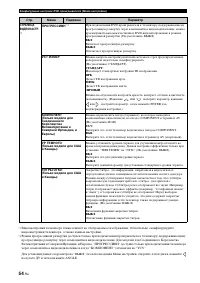
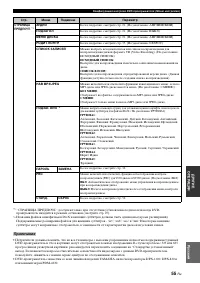
- 532 Параметры меню настройки
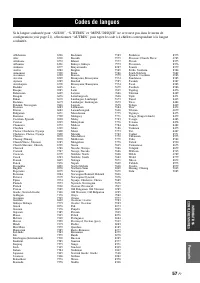
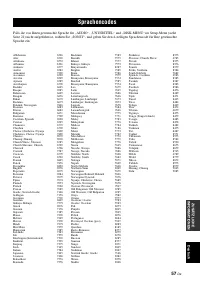
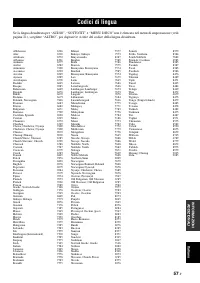
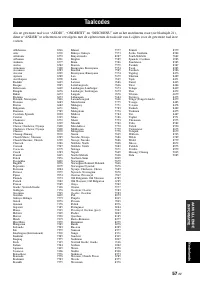
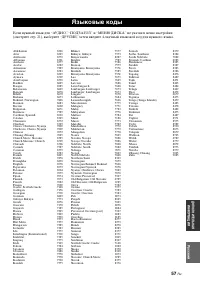
- 537 Языковые коды
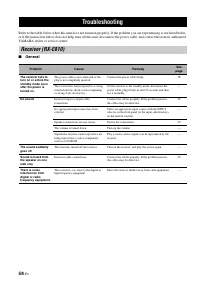
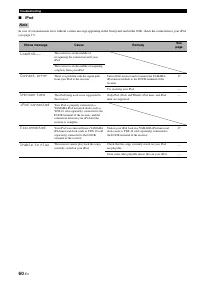
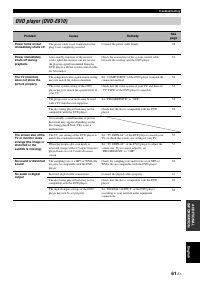
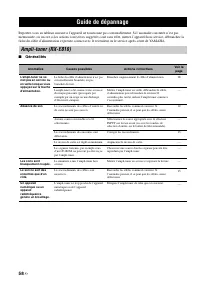
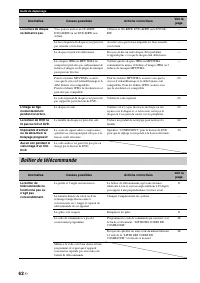
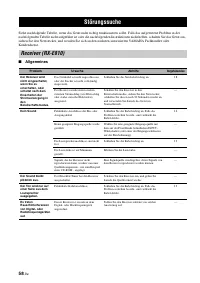
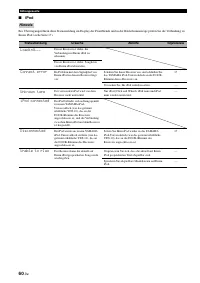
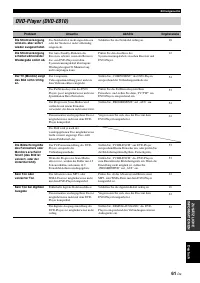
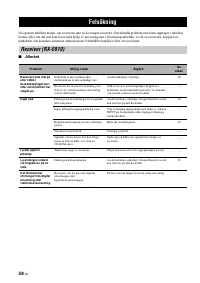
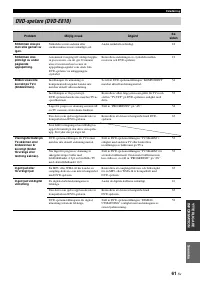
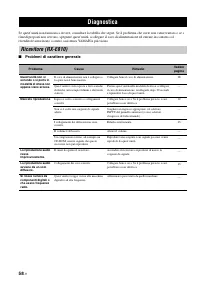
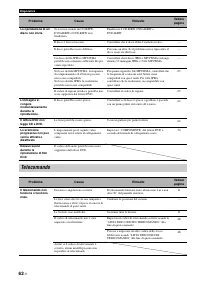
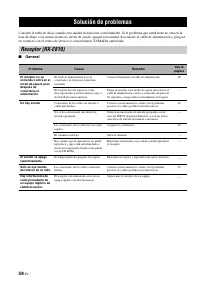
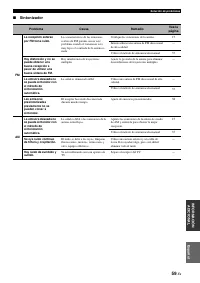
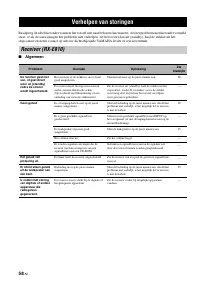
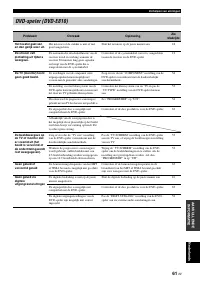
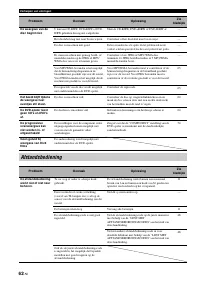
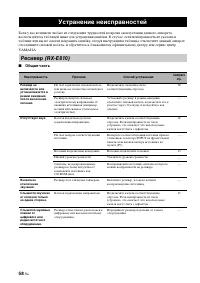
- 538 Общая часть; Устранение неисправностей
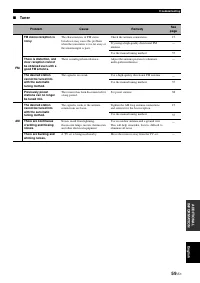
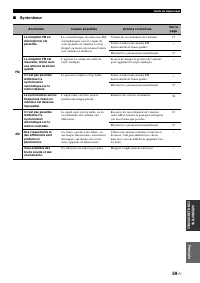
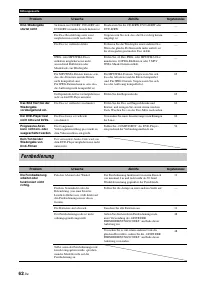
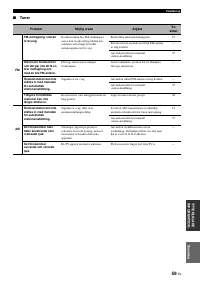
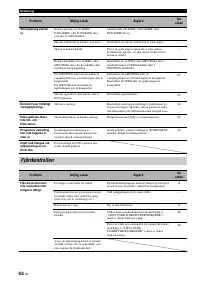
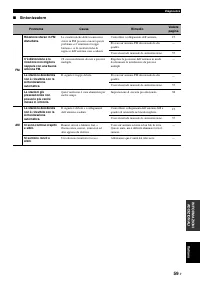
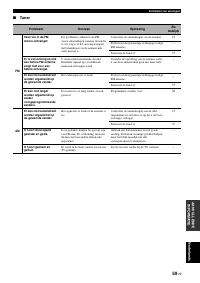
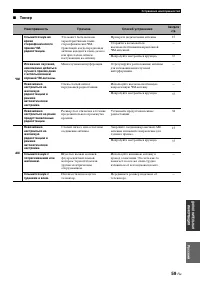
- 539 Тюнер
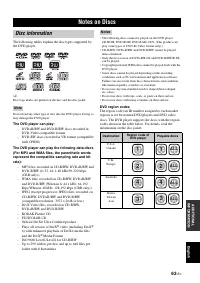
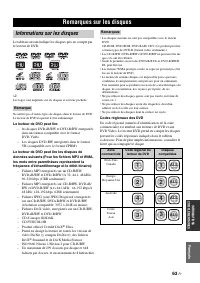
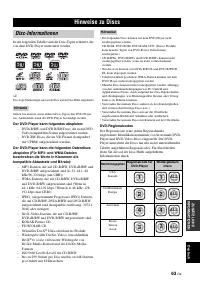
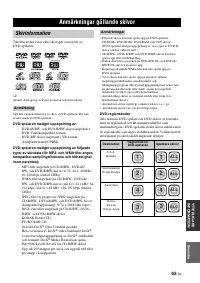
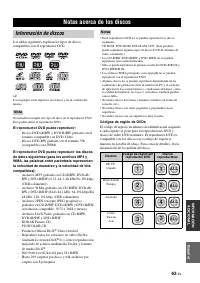
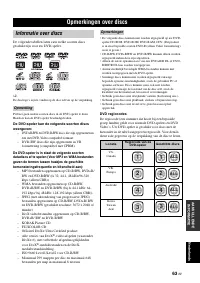
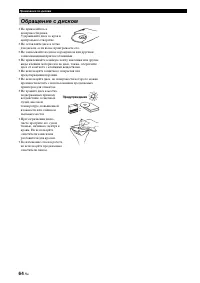
- 543 Примечания по дискам; Информация о диске
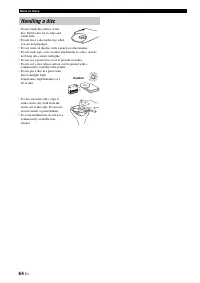
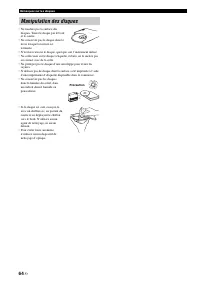
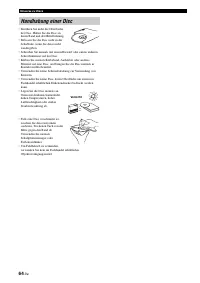
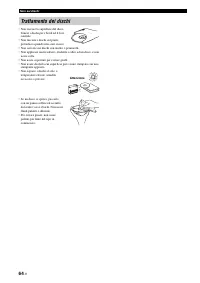
- 544 Обращение с диском
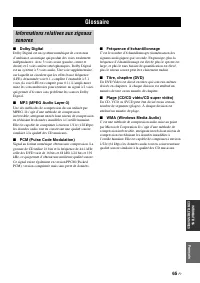
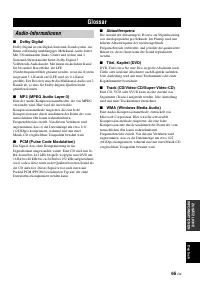
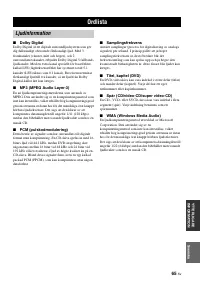
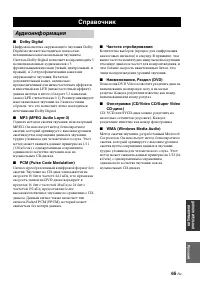
- 545 Справочник; Аудиоинформация
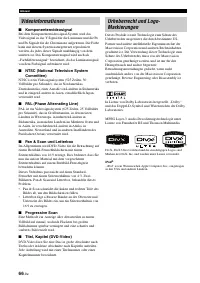
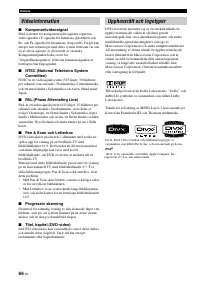
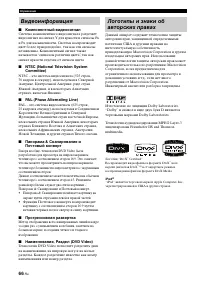
- 546 Компонентный видеосигнал; и P; Прогрессивная развертка; Видеоинформация
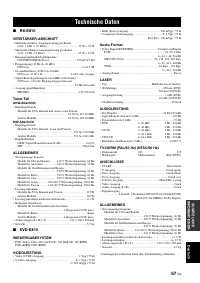
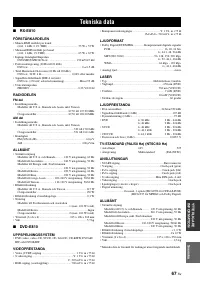
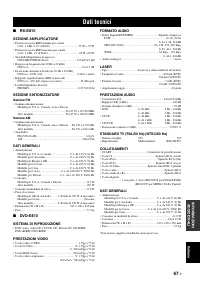
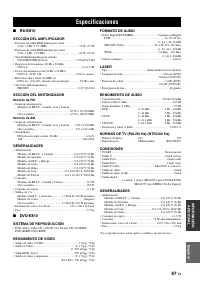
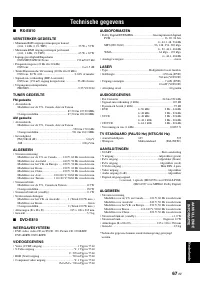
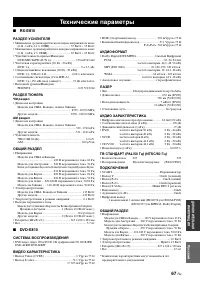
- 547 Технические параметры


