Кондиционеры Daikin FWP-AT - инструкция пользователя по применению, эксплуатации и установке на русском языке. Мы надеемся, она поможет вам решить возникшие у вас вопросы при эксплуатации техники.
Если остались вопросы, задайте их в комментариях после инструкции.
"Загружаем инструкцию", означает, что нужно подождать пока файл загрузится и можно будет его читать онлайн. Некоторые инструкции очень большие и время их появления зависит от вашей скорости интернета.


FC66003946
Rev 00
USER MANUAL
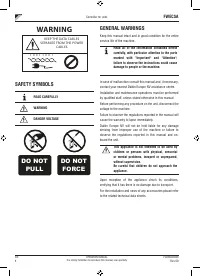
It is strictly forbidden to reproduce this manual, even par tially
EN
6
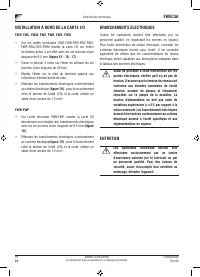
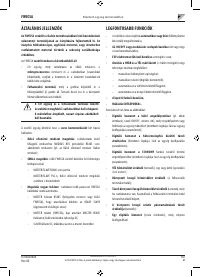
FWECSA
Controller for units
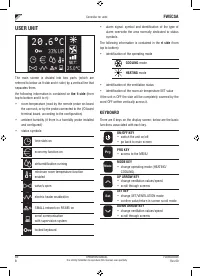
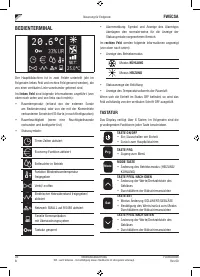
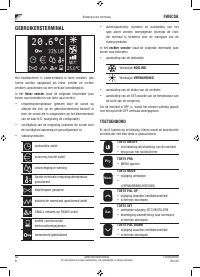
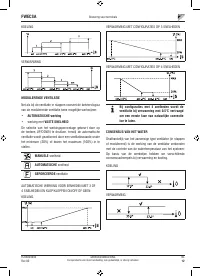
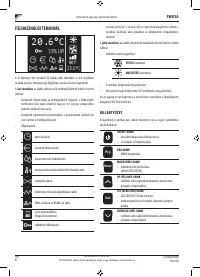
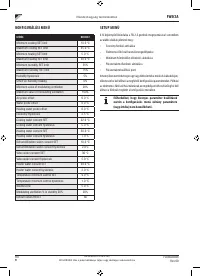
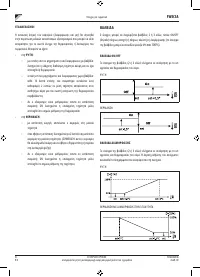
VIEWING WATER TEMPERATURE
To view the water temperature value you must have previously
configured the presence of the probe in the CONFIGURATION
MENU. To view the temperature value read by the probe you
must go to the main screen and press the
UP ARROW
and
DOWN ARROW
keys at the same time. With a 4-pipe unit
with 2 temperature probes, it is possible to scroll through the
two screens that display the two temperature values using
the UP/DOWN ARROW keys (cold water temperature and hot
water temperature).
LOCKING/UNLOCKING THE KEYBOARD
To lock/unlock normal operation of the keys on the user unit,
press the
UP + SET + DOWN
keys at the same time. The
key symbol will appear on the display when the keyboard is
locked. When stand-by mode star ts up it is possible to view
the main screen by pressing the ON/OFF key.
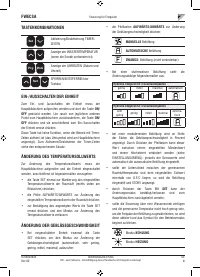
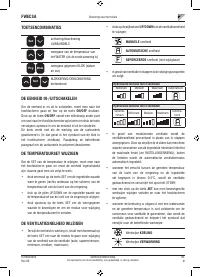
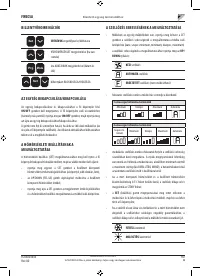
VIEWING DATE AND TIME (INTERNAL CLOCK)
To view clock data you must view the main screen, with the
unit on. Press
PRG
and
MODE
at the same time: time and
date will be displayed for 5 seconds, and then the screen will
automatically go back to the main page.
The above procedure will not have any effect if “Clock” has
been set as well as
Stand-by mode
(inside the CONFIGURATION
MENU); in this case, in fact, time and date will constantly be
displayed on the screen after the stand-by time has lapsed, i.e. 30
seconds since the last operation has been carried on the display.
CHANGING DATE AND TIME
From the main screen press PRG to enter the
MENU
and from
here scroll through the screens until you get to
Clock Setup
and press SET to enter. Change the data as required and press
SET every time to confirm and move on to the next piece of
data. Lastly, press ON/OFF to go back to the main screen.
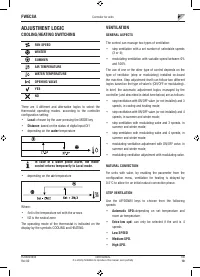
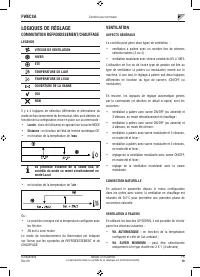
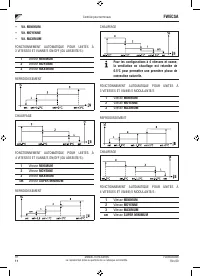
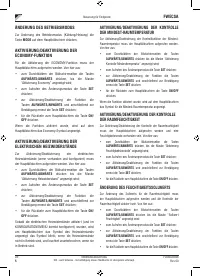
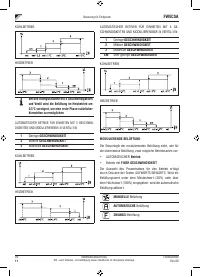
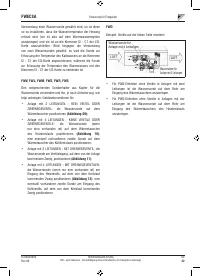
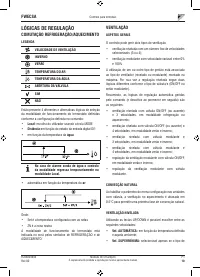
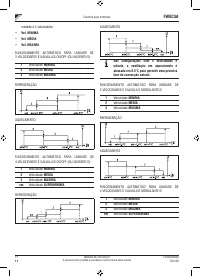
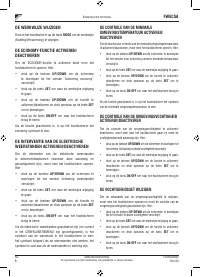
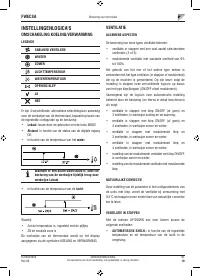
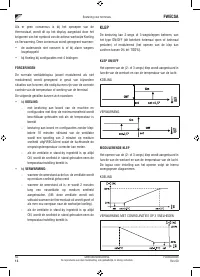
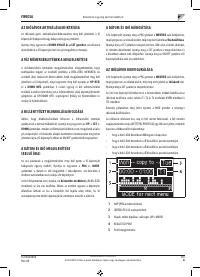
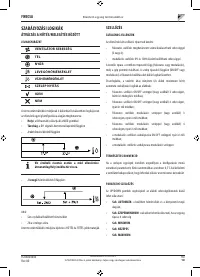
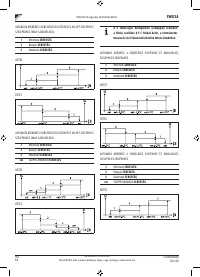
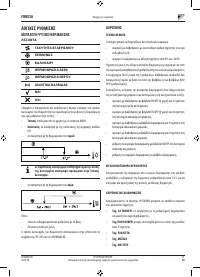
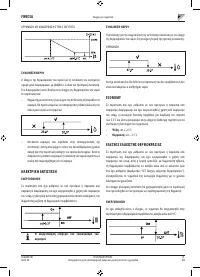
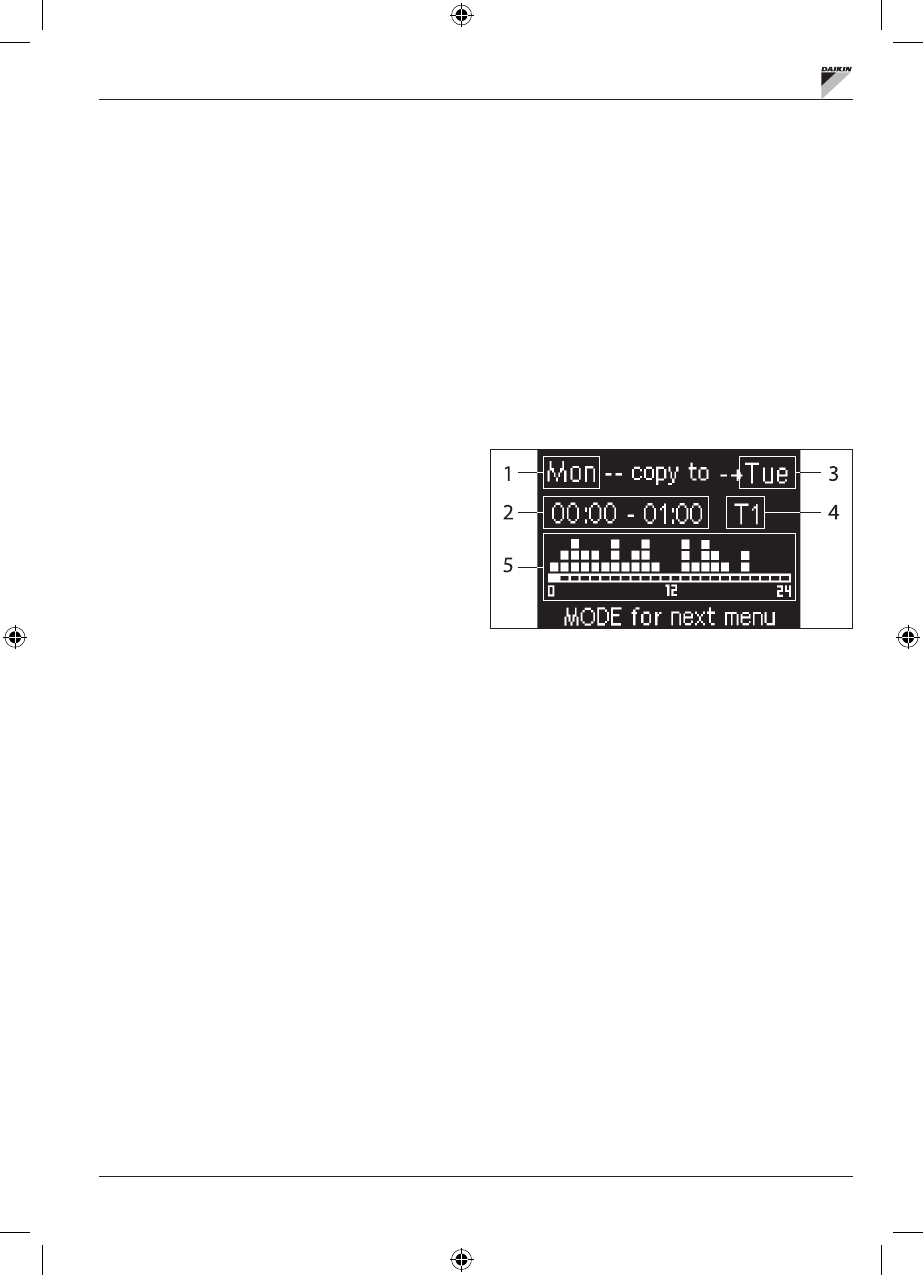
CONFIGURING TIME SLOTS
From the main screen, press PRG to enter the
MENU
and
from here scroll through the screens until you get to
Time
Slots
and press SET to enter.
The first six screens are used to set the values for
the temperature SETS that can be used in time slot
configurations, i.e. T1, T2 and T3 values in SUMMER and
WINTER mode.
At any time it is possible to press the MODE key to access
the actual time slot settings.
The time slot system is hourly, daily and weekly: every hour
of every day of the week (from MONDAY to SUNDAY) is a
slot that the user can decide whether:
•
the fan coil is
OFF
•
the fan coil operates with setpoint
T1
•
the fan coil operates with setpoint
T2
•
the fan coil operates with setpoint
T3
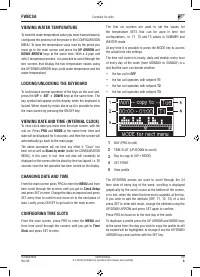
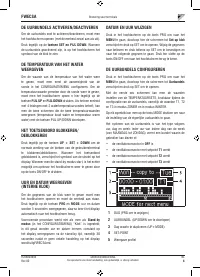
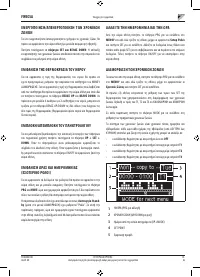
1
DAY (PRG to edit)
2
TIME SLOT (UP/DOWN to scroll)
3
Day to copy to (UP+MODE)
4
SET POINT
5
View profile
The UP/DOWN arrows are used to scroll through the 24
time slots of every day of the week; scrolling is displayed
graphically by the scroll cursor at the bottom of the screen,
or in text, when the when the time slot is updated, at the top.
If you wish to edit the attribute (OFF, T1, T2, T3) of a slot
press SET to enter edit mode, change the attribute using the
UP/DOWN ARROW and press SET again to confirm.
Press PRG to move on to the next day of the week.
To duplicate a profile press the UP ARROW and MODE keys
at the same time; the day you wish to copy the profile to will
be copied will be highlighted: to change it use the UP/DOWN
ARROW keys and confirm with the SET key.
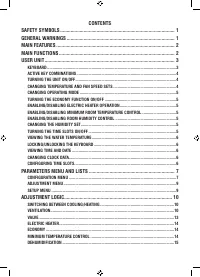
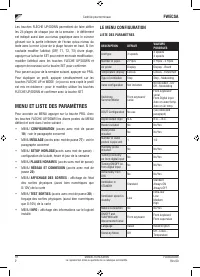
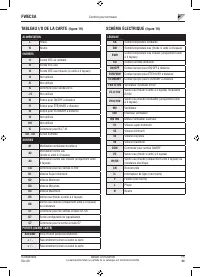
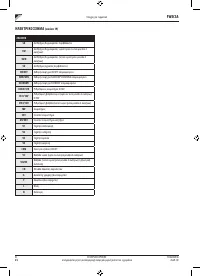
Содержание
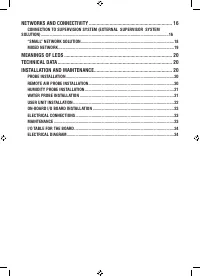
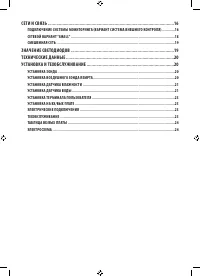
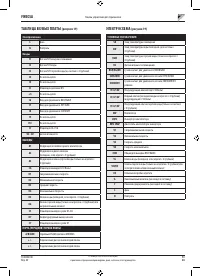
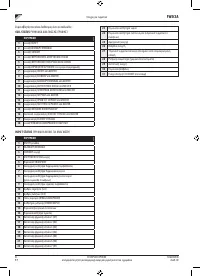
- 218 СЕТИ И СВЯЗЬ ��������������������������������������������������������������������������������������������������������16
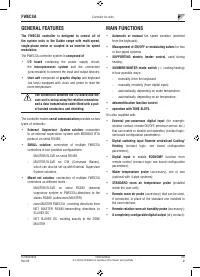
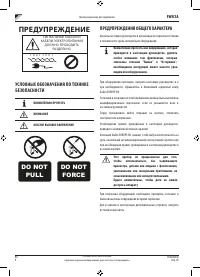
- 219 ПРЕДУПРЕЖДЕНИЕ; УСЛОВНЫЕ ОБОЗНАЧЕНИЯ ПО ТЕХНИКЕ; ВНИМАТЕЛЬНО ПРОЧЕСТЬ; ПРЕДУПРЕЖДЕНИЯ ОБЩЕГО ХАРАКТЕРА
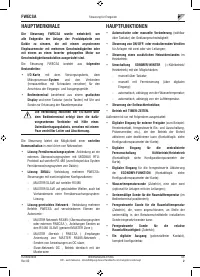
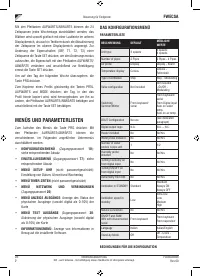
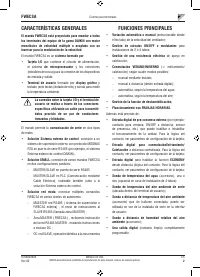
- 220 Основные характеристики
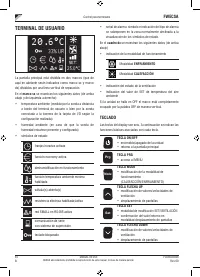
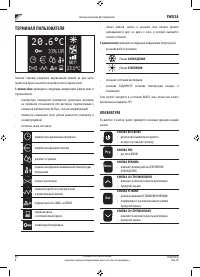
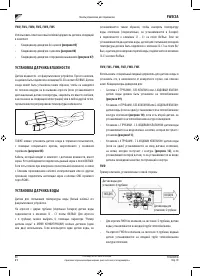
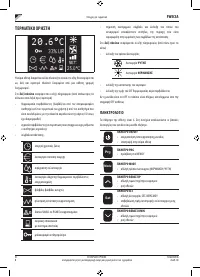
- 221 ТЕРМИНАЛ ПОЛЬЗОВАТЕЛЯ; КЛАВИАТУРА
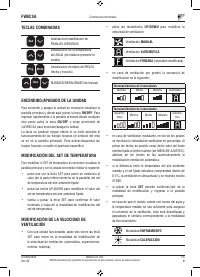
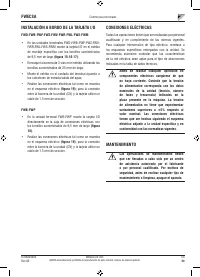
- 222 ВКЛЮЧИТЬ ВЫКЛЮЧИТЬ АГРЕГАТ
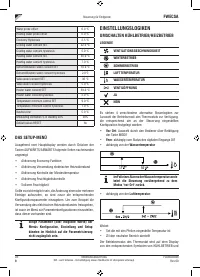
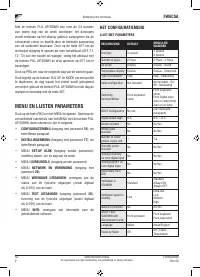
- 225 МЕНЮ И СПИСКИ ПАРАМЕТРОВ; МЕНЮ КОНФИГУРАЦИИ
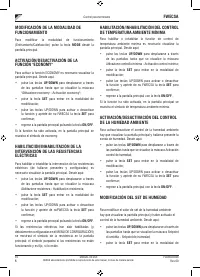
- 226 ЦИФРОВОЙ КОНФИГУРИРУЕМЫЙ ВЫХОД; НР
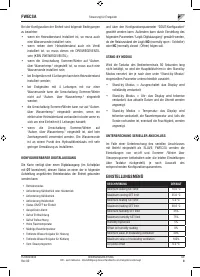
- 227 МЕНЮ ЗАДАННЫХ ПАРАМЕТРОВ
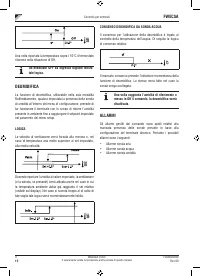
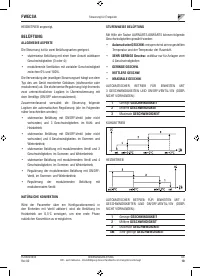
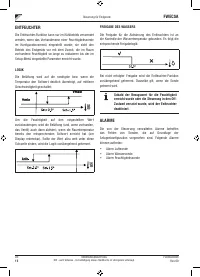
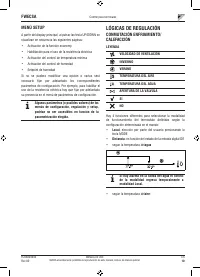
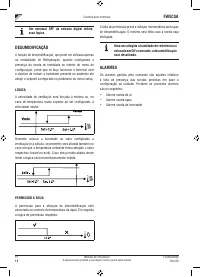
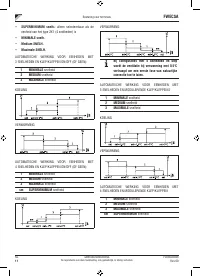
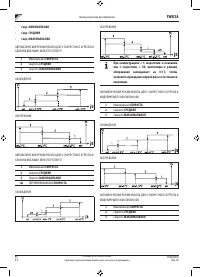
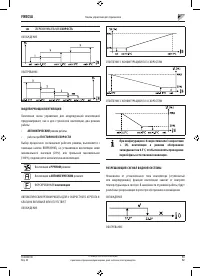
- 228 ЛОГИЧЕСКИЕ СХЕМЫ НАСТРОЕК; ПЕРЕКЛЮЧЕНИЕ ОХЛАЖДЕНИЯ/ОТОПЛЕНИЯ
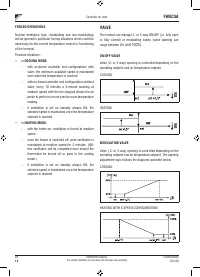
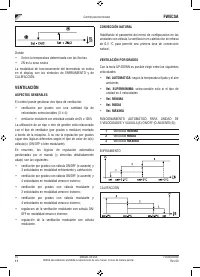
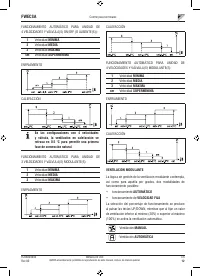
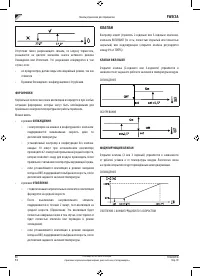
- 231 ФОРСИРОВКИ; КЛАПАН; МОДУЛИРУЮЩИЙ КЛАПАН
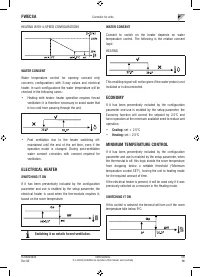
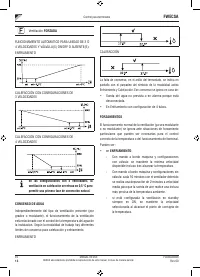
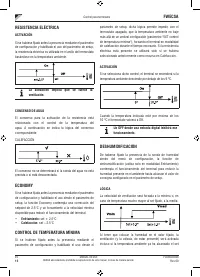
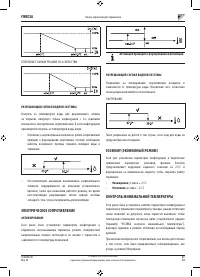
- 232 РАЗРЕШАЮЩИЙ СИГНАЛ ВОДНОЙ СИСТЕМЫ; ЭЛЕКТРИЧЕСКОЕ СОПРОТИВЛЕНИЕ; АКТИВИРОВАНИЕ; КОНТРОЛЬ МИНИМАЛЬНОЙ ТЕМПЕРАТУРЫ
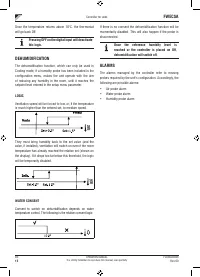
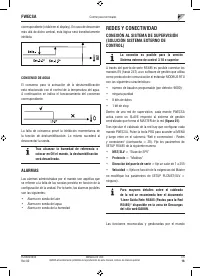
- 233 ОС УШЕНИЕ; ЛОГИЧЕСКАЯ СХЕМА; СИГНАЛЫ ТРЕВОГИ
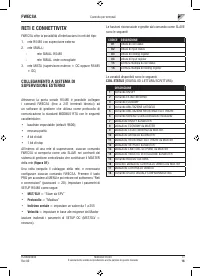
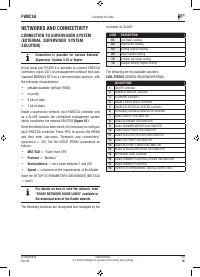
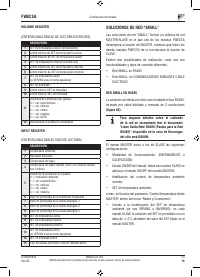
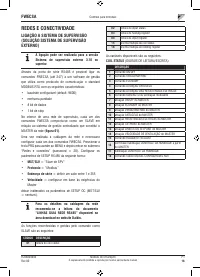
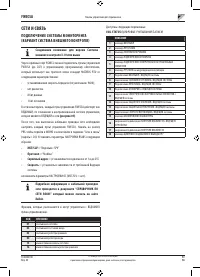
- 234 СЕТИ И СВЯЗЬ; ПОДКЛЮЧЕНИЕ СИСТЕМЫ МОНИТОРИНГА; Протокол
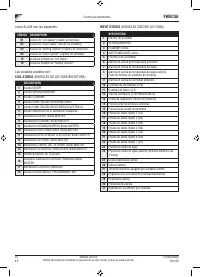
- 235 СТАТУС ВХОДА; РЕГИСТР ХРАНЕНИЯ; ВХОД РЕГИСТРА
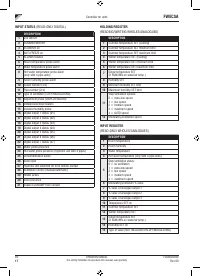
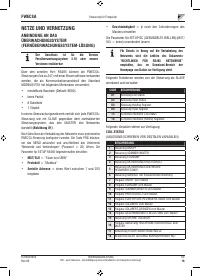
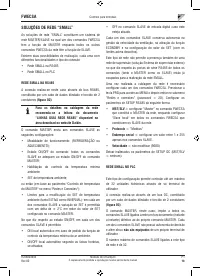
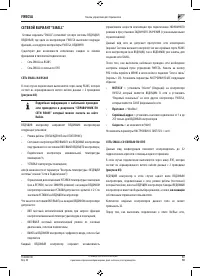
- 236 СЕТЕВОЙ ВАРИАНТ “SMALL”
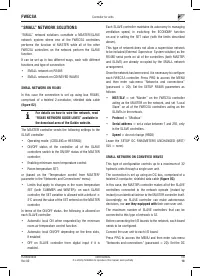
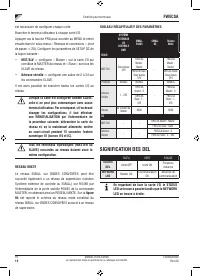
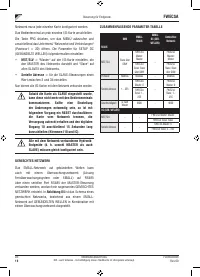
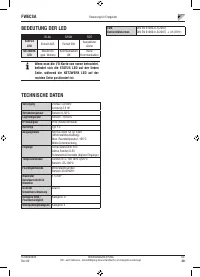
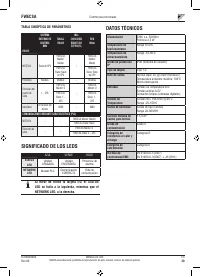
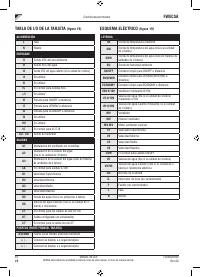
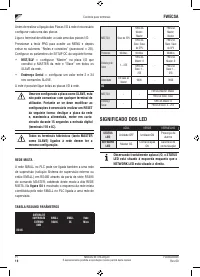
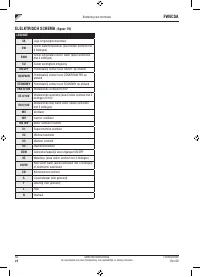
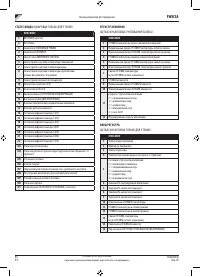
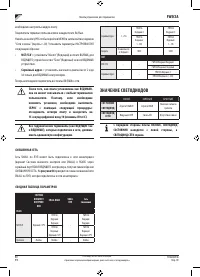
- 237 Серийный адрес; СМЕШЕННАЯ СЕТЬ; СВОДНАЯ ТАБЛИЦА ПАРАМЕТРОВ; ЗНАЧЕНИЕ СВЕТОДИОДОВ
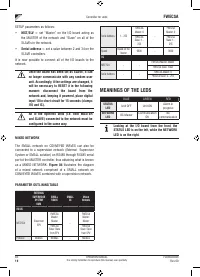
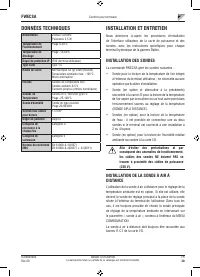
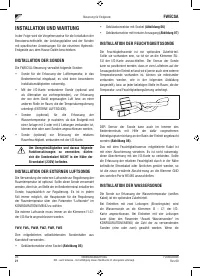
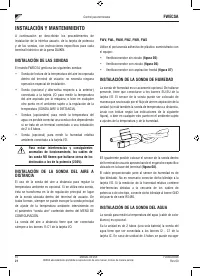
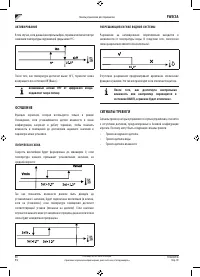
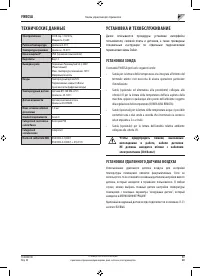
- 238 ТЕХНИЧЕСКИЕ ДАННЫЕ; УСТАНОВКА И ТЕХОБСЛУЖИВАНИЕ; УСТАНОВКА ЗОНДА; УСТАНОВКА УДАЛЕННОГО ДАТЧИКА ВОЗДУХА
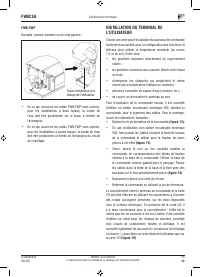
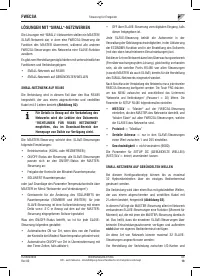
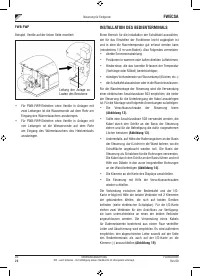
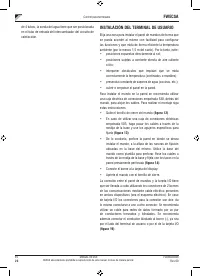
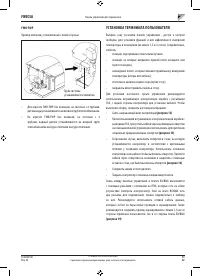
- 240 УСТАНОВКА ТЕРМИНАЛА ПОЛЬЗОВАТЕЛЯ
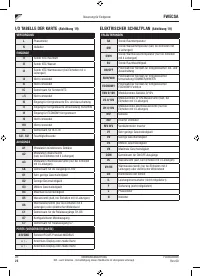
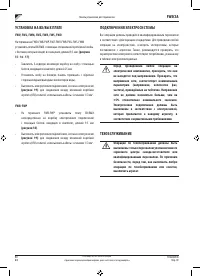
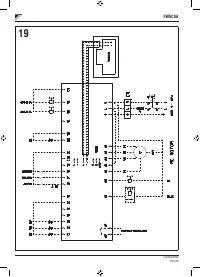
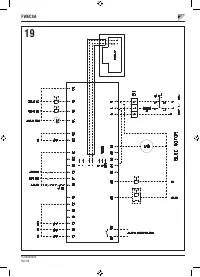
- 241 ПОДКЛЮЧЕНИЯ ЭЛЕКТРОСИСТЕМЫ
- 242 ЭЛЕКТРОСХЕМА


