
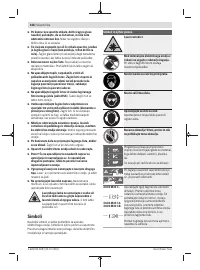
Пилы торцовочные Bosch 0.601.B23.100 - инструкция пользователя по применению, эксплуатации и установке на русском языке. Мы надеемся, она поможет вам решить возникшие у вас вопросы при эксплуатации техники.
Если остались вопросы, задайте их в комментариях после инструкции.
"Загружаем инструкцию", означает, что нужно подождать пока файл загрузится и можно будет его читать онлайн. Некоторые инструкции очень большие и время их появления зависит от вашей скорости интернета.


English |
35
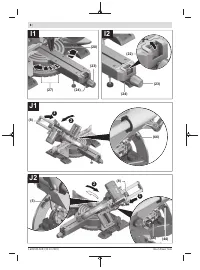
– Rotate the tilt protector
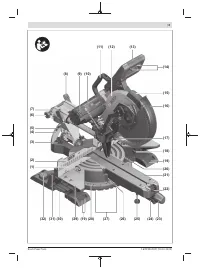
(25)
inwards or outwards until
the power tool is positioned straight on the work surface.
Dust/Chip Extraction
The dust from materials such as lead paint, some types of
wood, minerals and metal can be harmful to human health.
Touching or breathing in this dust can trigger allergic reac-
tions and/or cause respiratory illnesses in the user or in
people in the near vicinity.
Certain dusts, such as oak or beech dust, are classified as
carcinogenic, especially in conjunction with wood treatment
additives (chromate, wood preservative). Materials contain-
ing asbestos may only be machined by specialists.
– Use a dust extraction system that is suitable for the ma-
terial wherever possible.
– Provide good ventilation at the workplace.
– It is advisable to wear a P2 filter class breathing mask.
The regulations on the material being machined that apply in
the country of use must be observed.
u
Avoid dust accumulation at the workplace.
Dust can
easily ignite.
The dust/chip extraction system can be blocked by dust,
chips or fragments of the workpiece.
– Switch the power tool off and pull the mains plug out of
the socket.
– Wait until the saw blade has come to a complete stop.
– Determine the cause of the blockage and eliminate it.
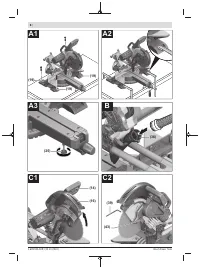
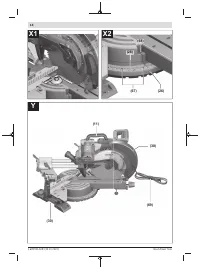
External dust extraction (see figure B)
You can also attach a dust extraction hose (
35
mm dia-
meter) to the chip ejector
(36)
for extraction.
– Connect the dust extraction hose to the chip ejector
(36)
.
The dust extractor must be suitable for the material being
worked.
When extracting dry dust that is especially detrimental to
health or carcinogenic, use a special dust extractor.
Changing the Saw Blade
u
Pull the plug out of the socket before carrying out any
work on the power tool.
u
Wear protective gloves when fitting the saw blade.
There is a risk of injury when touching the saw blade.
Only use saw blades that have a maximum permitted speed
higher than the no-load speed of the power tool.
Only use saw blades that match the specifications given in
this operating manual and that have been tested and marked
in accordance with EN 847-1.
Only use saw blades that are recommended by the power
tool manufacturer and are suitable for use on the material
you want to saw. This will prevent the saw teeth overheating
when sawing.
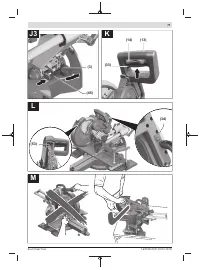
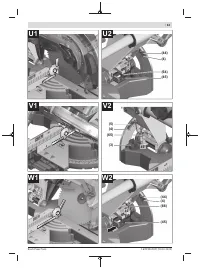
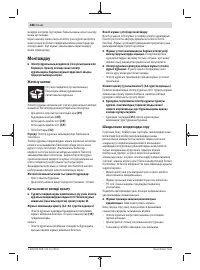
Assembly with hex socket screw (see figures C1−C3)
Removing the Saw Blade
– Bring the power tool into the work position.
– Swivel the retracting blade guard
(16)
to the back and
hold it in this position.
– Turn the hex socket screw
(47)
with the hex key
(
6
mm)
(39)
and at the same time push the spindle
lock
(43)
until it engages.
– Keep holding the spindle lock
(43)
and loosen the hex
socket screw
(47)
by turning it clockwise (left-hand
thread).
– Remove the clamping flange
(48)
.
– Remove the saw blade
(49)
.
– Slowly push the retracting blade guard back down.
Fitting the saw blade
u
When fitting the saw blade, make sure that the cutting
direction of the teeth (arrow direction on the saw
blade) matches the direction of the arrow on the pro-
tective guard.
If required, clean all the parts you want to fit before installing
them.
– Swivel the retracting blade guard
(16)
to the back and
hold it in this position.
– Place the new saw blade on the inner clamping
flange
(50)
.
– Fit the clamping flange
(48)
and the hex socket
screw
(47)
. Press the spindle lock
(43)
until it engages
and tighten the hex socket screw by turning it anticlock-
wise.
– Slowly push the retracting blade guard back down.
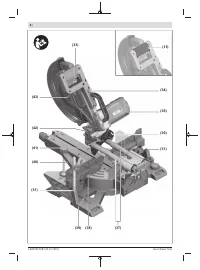
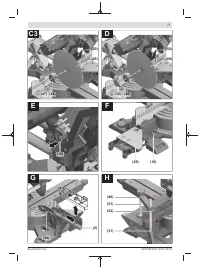
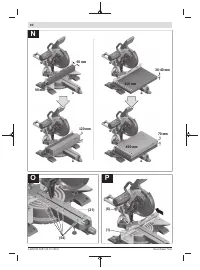
Assembly with SDS bolt (see figure D)
u
For bevel cuts when using the SDS bolt
(32), before
sawing, first make sure that the SDS bolt cannot come
into contact with the surface of the workpiece at any
time by making a suitable adjustment to the depth
stop
(42).
This prevents damage to the SDS bolt and/or
the workpiece.
Removing the saw blade
– Bring the power tool into the work position.
– Swivel the retracting blade guard
(16)
to the back and
hold it in this position.
– Turn the SDS bolt
(32)
while pressing the spindle
lock
(43)
until it engages.
– Press and hold the spindle lock
(43)
and unscrew the
SDS bolt
(32)
by turning it clockwise (left-hand thread).
– Remove the clamping flange
(48)
.
– Remove the saw blade
(49)
.
– Slowly push the retracting blade guard back down.
Fitting the saw blade
u
When fitting the saw blade, make sure that the cutting
direction of the teeth (arrow direction on the saw
blade) matches the direction of the arrow on the pro-
tective guard.
If required, clean all the parts you want to fit before installing
them.
– Swivel the retracting blade guard
(16)
to the back and
hold it in this position.
– Place the new saw blade on the inner clamping
flange
(50)
.
Bosch Power Tools
1 609 92A 5U9 | (20.10.2020)
Содержание
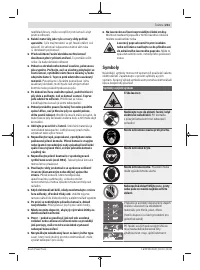
- 253 Содержите рабочее место в чистоте.
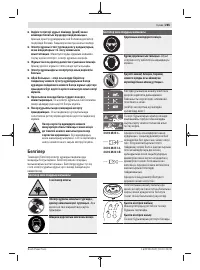
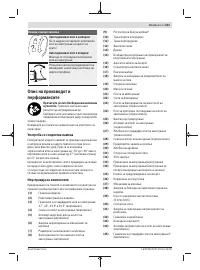
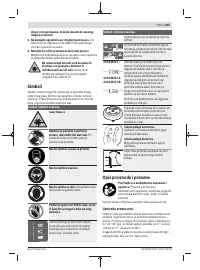
- 254 Не меняйте ничего в лазерном устройстве.; Символы; Символы и их значение; Описание продукта и услуг
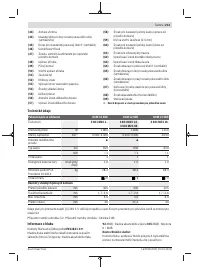
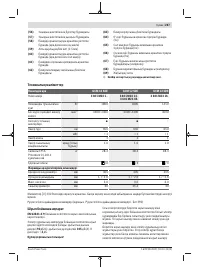
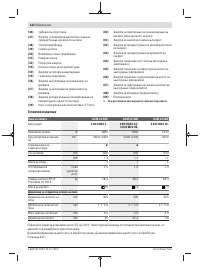
- 256 Технические данные; Панельная пила; Данные о шуме; Используйте средства защиты органов слуха!
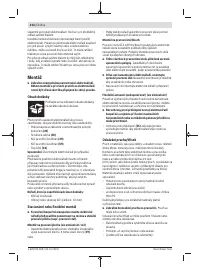
- 257 Сборка; Комплект поставки; Монтаж на верстаке производства Bosch; Удаление пыли и стружки; Избегайте скопления пыли на рабочем месте.
- 258 Замена пильного диска; Монтаж пильного диска; Работа с инструментом
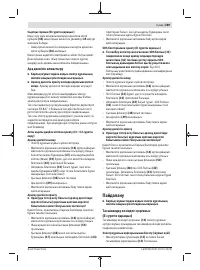
- 259 Подготовка эксплуатации; Вертикальный диапазон угла распила; Настройка горизонтального угла распила; слева
- 260 Настройка вертикального угла распила; Включение электроинструмента
- 261 Указания по применению; Общие указания для пиления; Пиление
- 262 Юстирование лазера
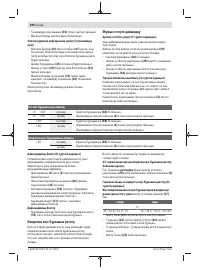
- 263 Основные настройки – контроль и коррекция
- 265 Техобслуживание и сервис; Техобслуживание и очистка; Принадлежности; Товарный номер
- 266 Россия; Утилизация; Українська; Вказівки з техніки безпеки; Загальні застереження для електроприладів; ДЖЕННЯ; електроінструментом.
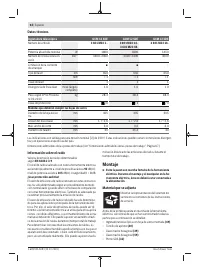
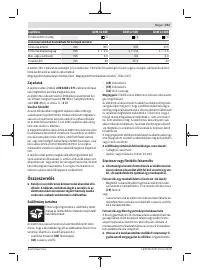
Характеристики

Остались вопросы?Не нашли свой ответ в руководстве или возникли другие проблемы? Задайте свой вопрос в форме ниже с подробным описанием вашей ситуации, чтобы другие люди и специалисты смогли дать на него ответ. Если вы знаете как решить проблему другого человека, пожалуйста, подскажите ему :)


