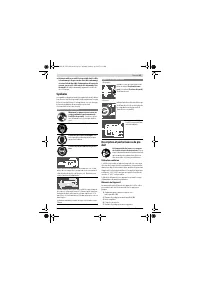
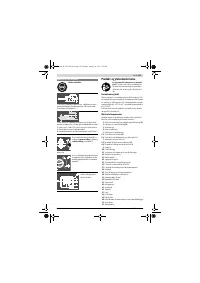
Пилы дисковые Bosch GTS 10 J - инструкция пользователя по применению, эксплуатации и установке на русском языке. Мы надеемся, она поможет вам решить возникшие у вас вопросы при эксплуатации техники.
Если остались вопросы, задайте их в комментариях после инструкции.
"Загружаем инструкцию", означает, что нужно подождать пока файл загрузится и можно будет его читать онлайн. Некоторые инструкции очень большие и время их появления зависит от вашей скорости интернета.


34
| English
1 609 92A 15R | (26.1.15)
Bosch Power Tools
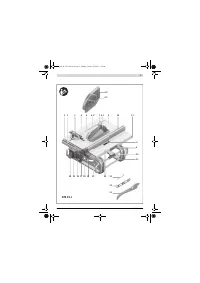
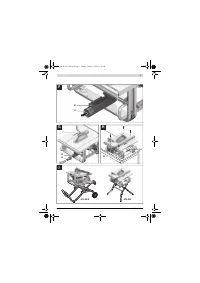
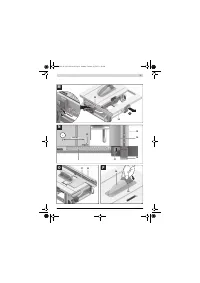
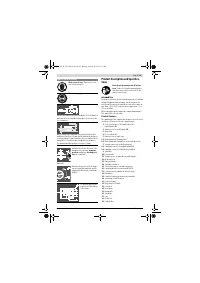
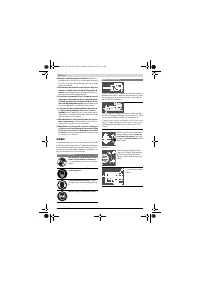
Adjusting the Auxiliary Parallel Guide
(see figure O)
When sawing narrow workpieces and bevel angles,
the auxil-
iary parallel guide
37
must be mounted to parallel guide
10
.
The auxiliary parallel guide can be mounted left or right to par-
allel guide
10
as required.
When sawing workpieces, these can become jammed be-
tween the parallel guide and the saw blade, be caught by the
rotating saw blade, and be thrown from the machine.
Therefore, adjust the auxiliary parallel guide in such a manner
that its guiding end is located between the front saw blade
tooth and the front edge of the riving knife.
– For this, loosen all wing nuts and move the auxiliary paral-
lel guide until only the two front screws can be used for fas-
tening.
– Tighten the wing nuts again.
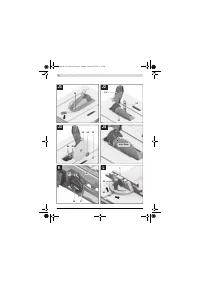
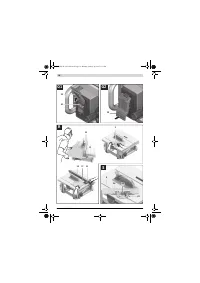
Adjusting the Riving Knife
The riving knife
25
prevents the saw blade
26
from becoming
jammed in the saw cut. Otherwise, there is danger of kickback
when the saw blade becomes wedged in the workpiece.
Always pay attention that the riving knife is properly adjusted:
– The radial clearance between saw blade and riving knife
may not exceed 5 mm (max.).
– The thickness of the riving knife must be smaller than the
cutting width and greater than the blade thickness.
– The riving knife must always be in a line to the saw blade.
– For normal separating cuts, the riving knife must always be
in the highest possible position.
The machine is supplied with the riving knife correctly adjusted.
Adjusting the height of the riving knife (see figure P)
For sawing grooves, the height of the riving knife must be ad-
justed.
Use the machine for grooving or rebating only with an
appropriately suitable protective device (e. g. a tunnel
blade guard).
– Loosen clamping lever
8.1
or clamping screw
8.2
until
blade guard
6.x
can easily be pulled from the recess in riv-
ing knife
25
.
To protect the blade guard against damage, deposit it in
the provided holding fixture
33
on the housing (also see
figure Y1).
– Turn crank
19
clockwise to the stop, so that the saw blade
26
is in the highest possible position above the saw table.
– Push the riving knife
25
down to the stop.
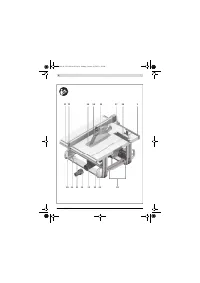
Starting Operation
Observe the mains voltage!
The voltage of the power
source must correspond with the data on the type plate of
the machine.
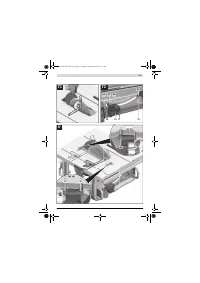
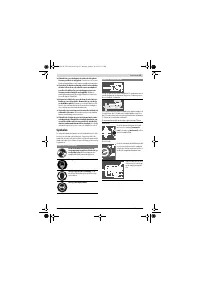
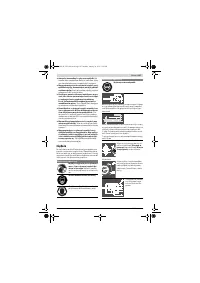
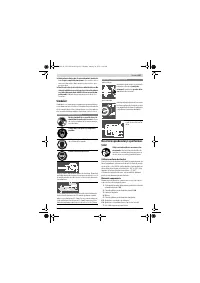
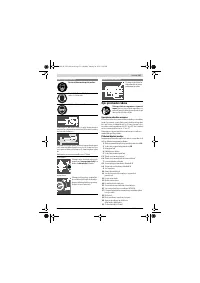
Switching On (see figure Q1)
To save energy, only switch the power tool on when using it.
– Tilt safety flap
20
upward.
– To start the operation, press the green ON button
52
.
– Tilt safety flap
20
down again.
Switching Off (see figure Q2)
– Press on the safety flap
20
.
Power Failure
The ON/OFF switch is a so-called non-voltage switch, which
prevents the power tool from restarting after a power failure
(e. g., when the mains plug is pulled during operation).
To restart the operation of the machine afterwards, the green
ON button
52
must be pressed again.
Working Advice
General Sawing Instructions
For all cuts, it must first be ensured that the saw blade
at no time can come in contact with the stops or other
machine parts.
Use the machine for grooving or rebating only with an
appropriately suitable protective device (e. g. a tunnel
blade guard).
Do not use the machine for cutting slots (stopped
grooves).
Protect the saw blade against impact and shock. Do not sub-
ject the saw blade to lateral pressure.
The riving knife must be in alignment with the saw blade to
avoid jamming of the workpiece.
Do not saw warped/bent workpieces. The workpiece must al-
ways have a straight edge to face against the parallel guide.
Always keep/store the push stick with the power tool.
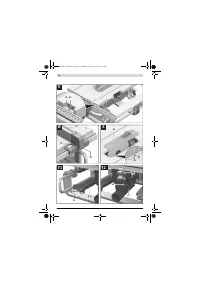
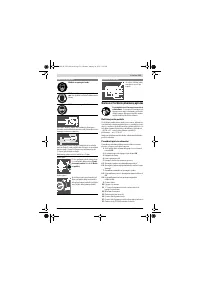
Position of the Operator (see figure R)
Do not stand in a line with the saw blade in front of the
machine. Always stand aside of the saw blade.
This pro-
tects your body against possible kickback.
– Keep hands, fingers and arms away from the rotating saw
blade.
Observe the following instructions:
– Hold the workpiece securely with both hands and press it
firmly against the saw table.
– When sawing narrow workpieces and bevel angles, always
use the supplied hold-down stick
23
and the auxiliary par-
allel guide
37
.
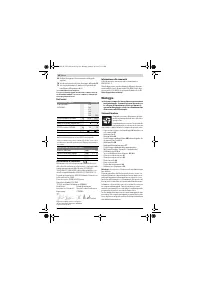
Maximum Workpiece Dimensions
Sawing
Sawing Straight Cuts
– Adjust the parallel guide
10
to the requested cutting width.
(see “Adjusting the Parallel Guide”, page 33)
– Position the workpiece on the saw table in front of the
blade guard
6.x
.
– Raise or lower the saw blade with the crank
19
so that the
upper saw teeth project approx. 5 mm above the work-
piece surface.
Bevel angle
Max. workpiece height [mm]
0 °
79
45 °
56
OBJ_BUCH-1325-003.book Page 34 Monday, January 26, 2015 1:18 PM
Содержание
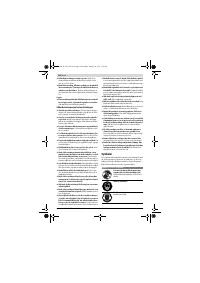
- 218 или подвижных частей электроинструмента.
- 219 Всегда распиливайте только одну деталь.; Символы; Символы и их значение
- 220 Описание продукта и услуг; Применение по назначению; Используйте защитные очки.
- 221 Технические данные; Настольная дисковая пила; Размеры пильных дисков
- 222 Данные о шуме; Применяйте средства защиты органов слуха!; Сборка; Комплект поставки
- 223 Отсос пыли и стружки; Избегайте скопления пыли на рабочем месте.; Стационарный или временный монтаж
- 224 Демонтаж пильного диска; Работа с инструментом; Транспортное положение; Настройка угла распила
- 225 Установка параллельного упора; при не вытянутом столе; Регулировка распорного клина; Примите во внимание напряжение в сети!
- 226 Отказ электропитания; Указания по применению; Общие указания для пиления; Пиление; Выполнение прямых пропилов; Основные настройки – контроль и коррекция; Вертикальный угол
- 227 Настройка усилия зажатия параллельного упора
- 228 Хранение и транспортировка; Перенос электроинструмента; Техобслуживание и сервис; Техобслуживание и очистка; Очистка
- 229 Меры по уменьшению уровня шума; Принадлежности; Россия; Утилизация; Товарный No
Характеристики

Остались вопросы?Не нашли свой ответ в руководстве или возникли другие проблемы? Задайте свой вопрос в форме ниже с подробным описанием вашей ситуации, чтобы другие люди и специалисты смогли дать на него ответ. Если вы знаете как решить проблему другого человека, пожалуйста, подскажите ему :)


