Измерительные приборы Bosch GLL 3 - инструкция пользователя по применению, эксплуатации и установке на русском языке. Мы надеемся, она поможет вам решить возникшие у вас вопросы при эксплуатации техники.
Если остались вопросы, задайте их в комментариях после инструкции.
"Загружаем инструкцию", означает, что нужно подождать пока файл загрузится и можно будет его читать онлайн. Некоторые инструкции очень большие и время их появления зависит от вашей скорости интернета.


English |
13
Bosch Power Tools
1 609 92A 0KL | (12.5.14)
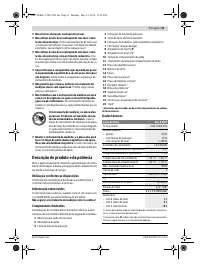
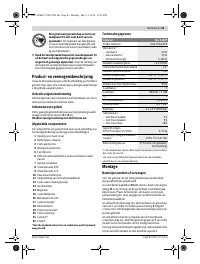
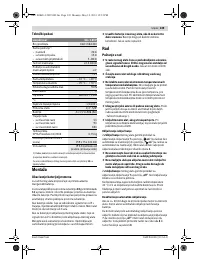
Technical Data
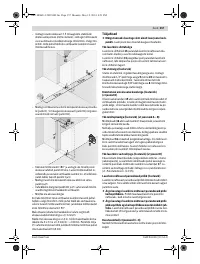
Assembly
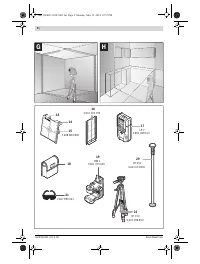
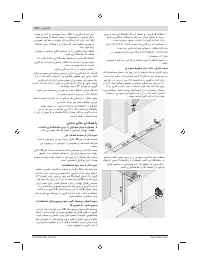
Inserting/Replacing the Batteries
Alkali-manganese batteries are recommended for the meas-
uring tool.
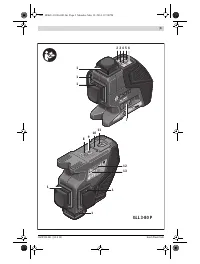
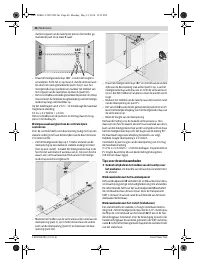
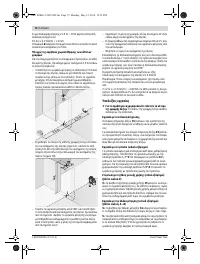
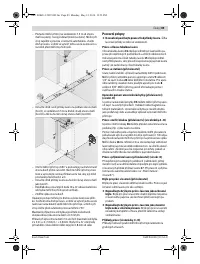
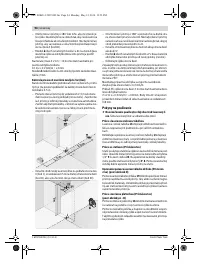
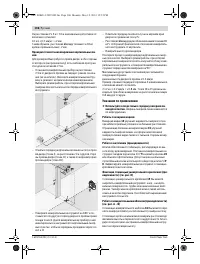
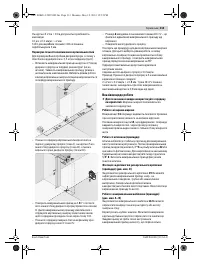
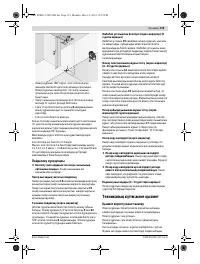
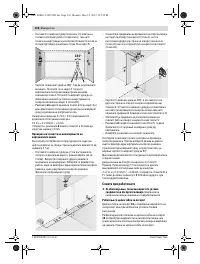
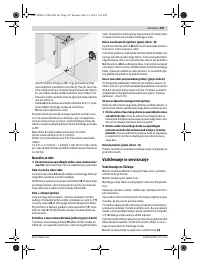
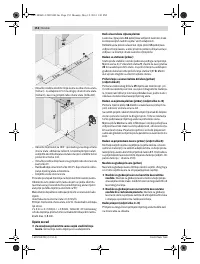
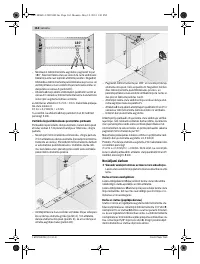
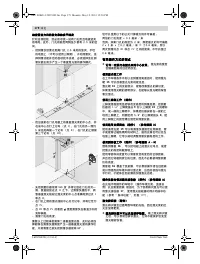
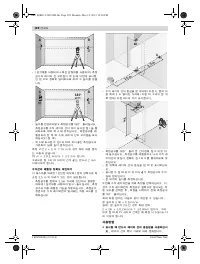
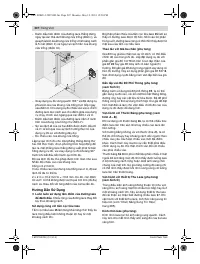
To open the battery lid
10
, slide the latch
11
in the direction
of the arrow and fold the battery lid up. Insert the batteries.
When inserting, pay attention to the correct polarity accord-
ing to the representation on the inside of the battery lid.
When the batteries become weak, a single 5 s audio signal will
sound. The battery low indicator
2
continuously flashes red.
The measuring tool can be operated for less then 2 h.
If the batteries are weak when switching on the measuring
tool, the 5 s audio signal will sound directly after switching on
the measuring tool.
Always replace all batteries at the same time. Only use batter-
ies from one brand and with the identical capacity.
Remove the batteries from the measuring tool when
not using it for extended periods.
When storing for
extended periods, the batteries can corrode and self-
discharge.
Operation
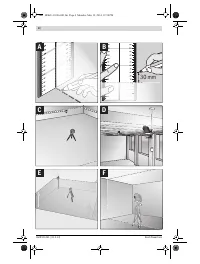
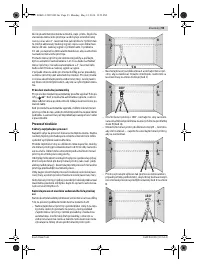
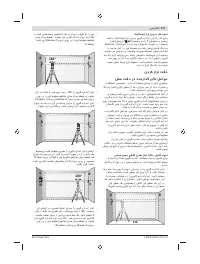
Initial Operation
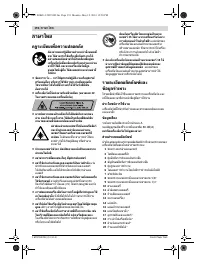
Loud audio signals will sound under certain conditions
while operating the measuring tool. Therefore, keep
the measuring tool away from your ear or other per-
sons.
The loud audio signal can cause hearing damage.
Protect the measuring tool against moisture and direct
sun light.
Do not subject the measuring tool to extreme tempera-
tures or variations in temperature.
As an example, do
not leave it in vehicles for a long time. In case of large vari-
ations in temperature, allow the measuring tool to adjust to
the ambient temperature before putting it into operation.
In case of extreme temperatures or variations in tempera-
ture, the accuracy of the measuring tool can be impaired.
Avoid heavy impact or falling of the measuring tool.
Af-
ter heavy exterior impact on the measuring tool, an accura-
cy check should always be carried out before continuing to
work (see “Levelling Accuracy”).
Switch the measuring tool off during transport.
When
switching off, the levelling unit, which can be damaged in
case of intense movement, is locked.
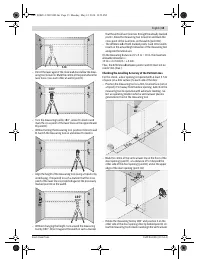
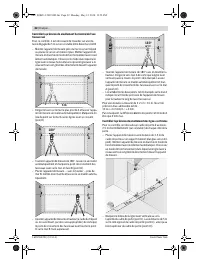
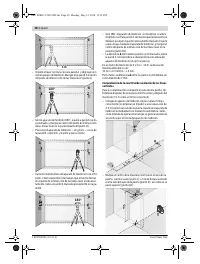
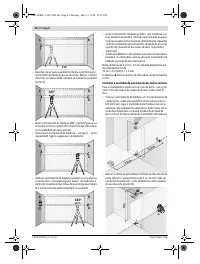
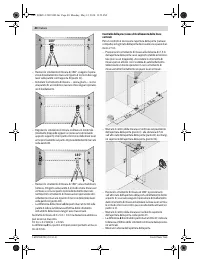
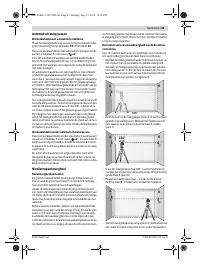
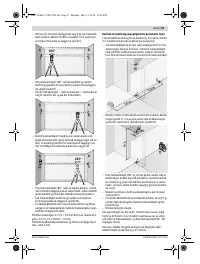
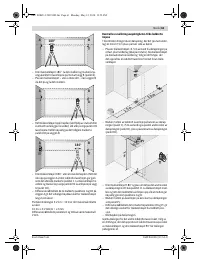
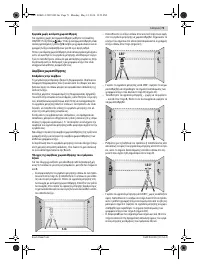
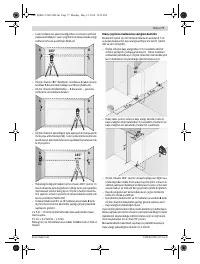
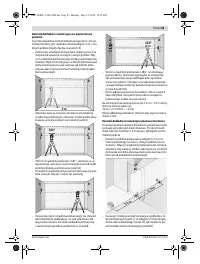
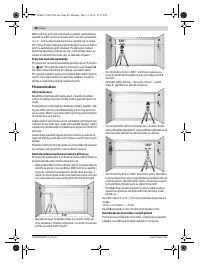
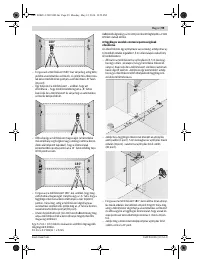
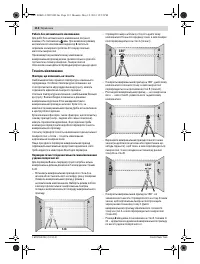
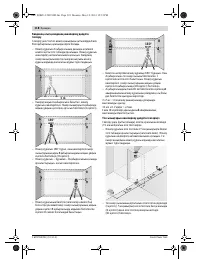
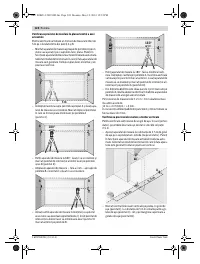
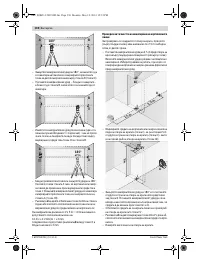
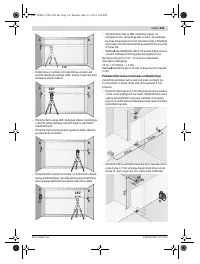
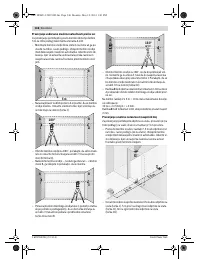
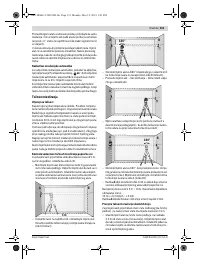
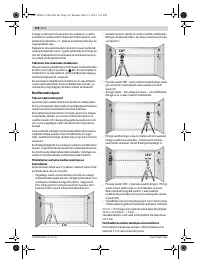
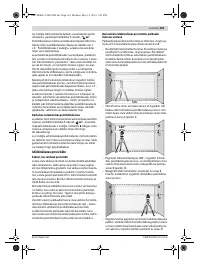
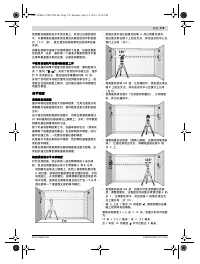
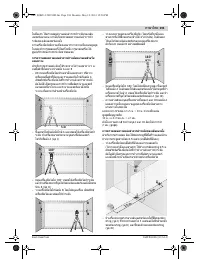
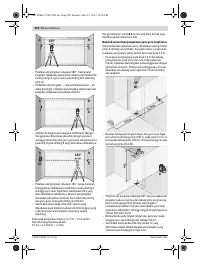
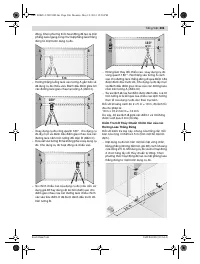
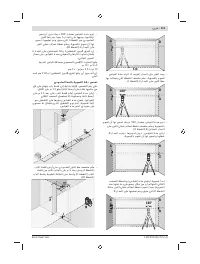
Switching On and Off
To
switch on
the measuring tool, slide the On/Off switch
7
to
the
“
on”
position (when working without automatic level-
ling) or to the
“
on”
position (when working with automat-
ic levelling). Immediately after switching on, the measuring
tool sends laser beams out of the exit openings
1
.
Do not point the laser beam at persons or animals and
do not look into the laser beam yourself, not even from
a large distance.
Do not leave the switched-on measuring tool unattend-
ed and switch the measuring tool off after use. Other
persons could be blinded by the laser beam.
To
switch off
the measuring tool, slide the On/Off switch
7
to
the
“off”
position. When switching off, the levelling unit is
locked.
When exceeding the maximum permitted operating tempera-
ture of 40 ° C, the measuring tool switches off to protect the
laser diode. After cooling down, the measuring tool is ready
for operation and can be switched on again.
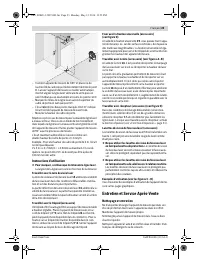
Deactivating the Automatic Shut-off
When no button on the measuring tool is pressed for approx.
30 minutes, the measuring tool automatically switches off to
save the batteries.
To switch on the measuring tool after automatic shut-off,
either slide the On/Off switch
7
to the
“off”
position and then
switch the measuring tool on again or press the operating
mode button
5
once or press the pulse-function button
3
once.
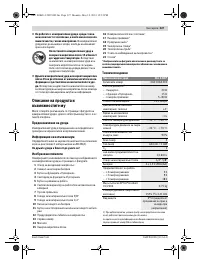
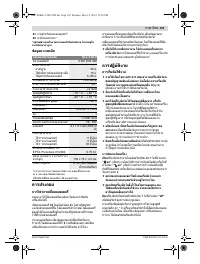
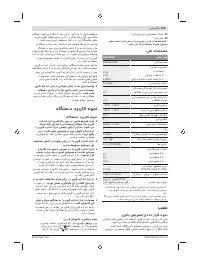
Line laser
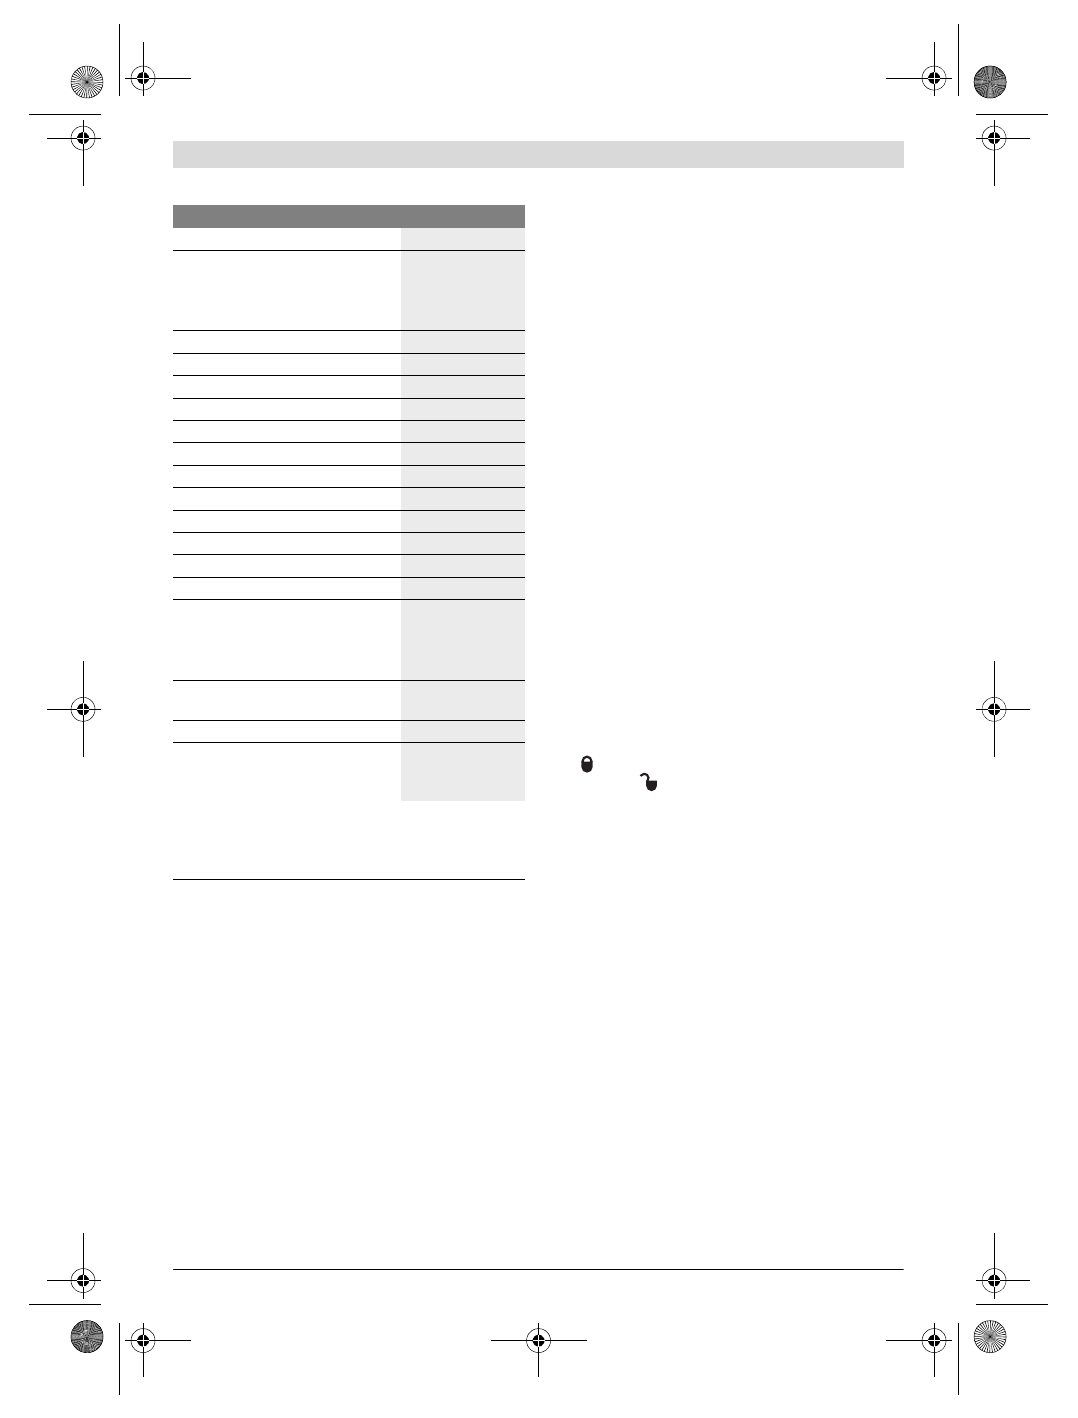
GLL 3-80 P
Article number
3 601 K63 300
Working range
1)
– Standard
– With pulse function
– With laser receiver
20 m
15 m
5 – 80 m
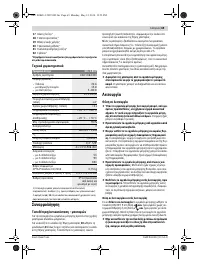
Levelling Accuracy
± 0.2 mm/m
Self-levelling range, typically
± 4 °
Levelling duration, typically
< 4 s
Operating temperature
– 10 ° C ... + 40 ° C
Storage temperature
– 20 ° C ... + 70 ° C
Relative air humidity, max.
90 %
Laser class
2
Laser type
640 nm, < 1 mW
C
6
1
Shortest pulse duration
1/1 600 s
Tripod mount
1/4", 5/8"
Batteries
4 x 1.5 V LR06 (AA)
Operating duration
– With 3 laser planes
– With 2 laser planes
– With 1 laser plane
5 h
9 h
18 h
Weight according to EPTA-Procedure
01/2003
0.75 kg
Dimensions (length x width x height)
159 x 75 x 141 mm
Degree of protection
IP 54 (dust and
splash water
protected)
1) The working range can be decreased by unfavourable environmental
conditions (e. g. direct sun irradiation).
The measuring tool can be clearly identified with the serial number
13
on the type plate.
OBJ_DOKU-32907-002.fm Page 13 Monday, May 12, 2014 12:52 PM
Характеристики

Остались вопросы?Не нашли свой ответ в руководстве или возникли другие проблемы? Задайте свой вопрос в форме ниже с подробным описанием вашей ситуации, чтобы другие люди и специалисты смогли дать на него ответ. Если вы знаете как решить проблему другого человека, пожалуйста, подскажите ему :)


