Коммутаторы NETGEAR S3300-28X (GS728TX) 24x1GE - инструкция пользователя по применению, эксплуатации и установке на русском языке. Мы надеемся, она поможет вам решить возникшие у вас вопросы при эксплуатации техники.
Если остались вопросы, задайте их в комментариях после инструкции.
"Загружаем инструкцию", означает, что нужно подождать пока файл загрузится и можно будет его читать онлайн. Некоторые инструкции очень большие и время их появления зависит от вашей скорости интернета.


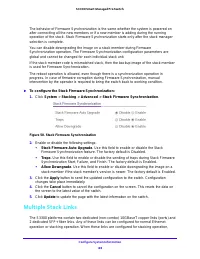

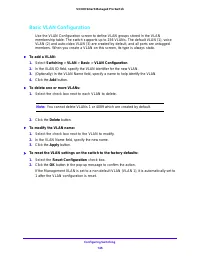
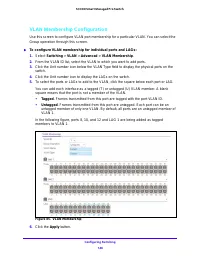


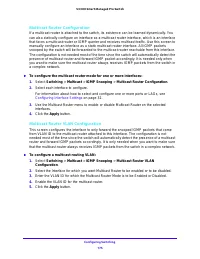

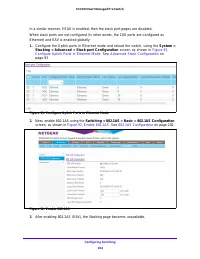

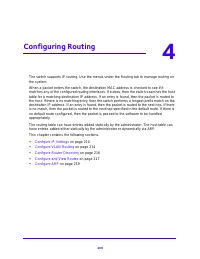

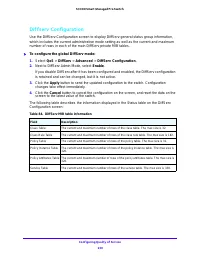


Maintenance
314
S3300 Smart Managed Pro Switch
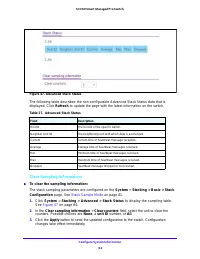
3.
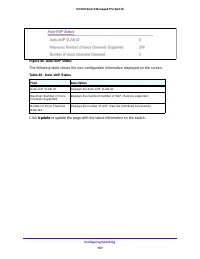
Click the
Apply
button.
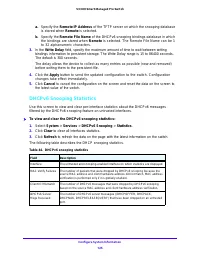
The updated configuration is sent to the switch. Configuration changes take effect
immediately.
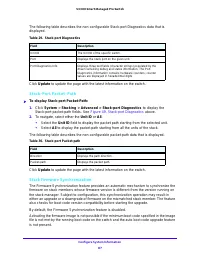
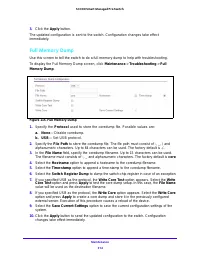
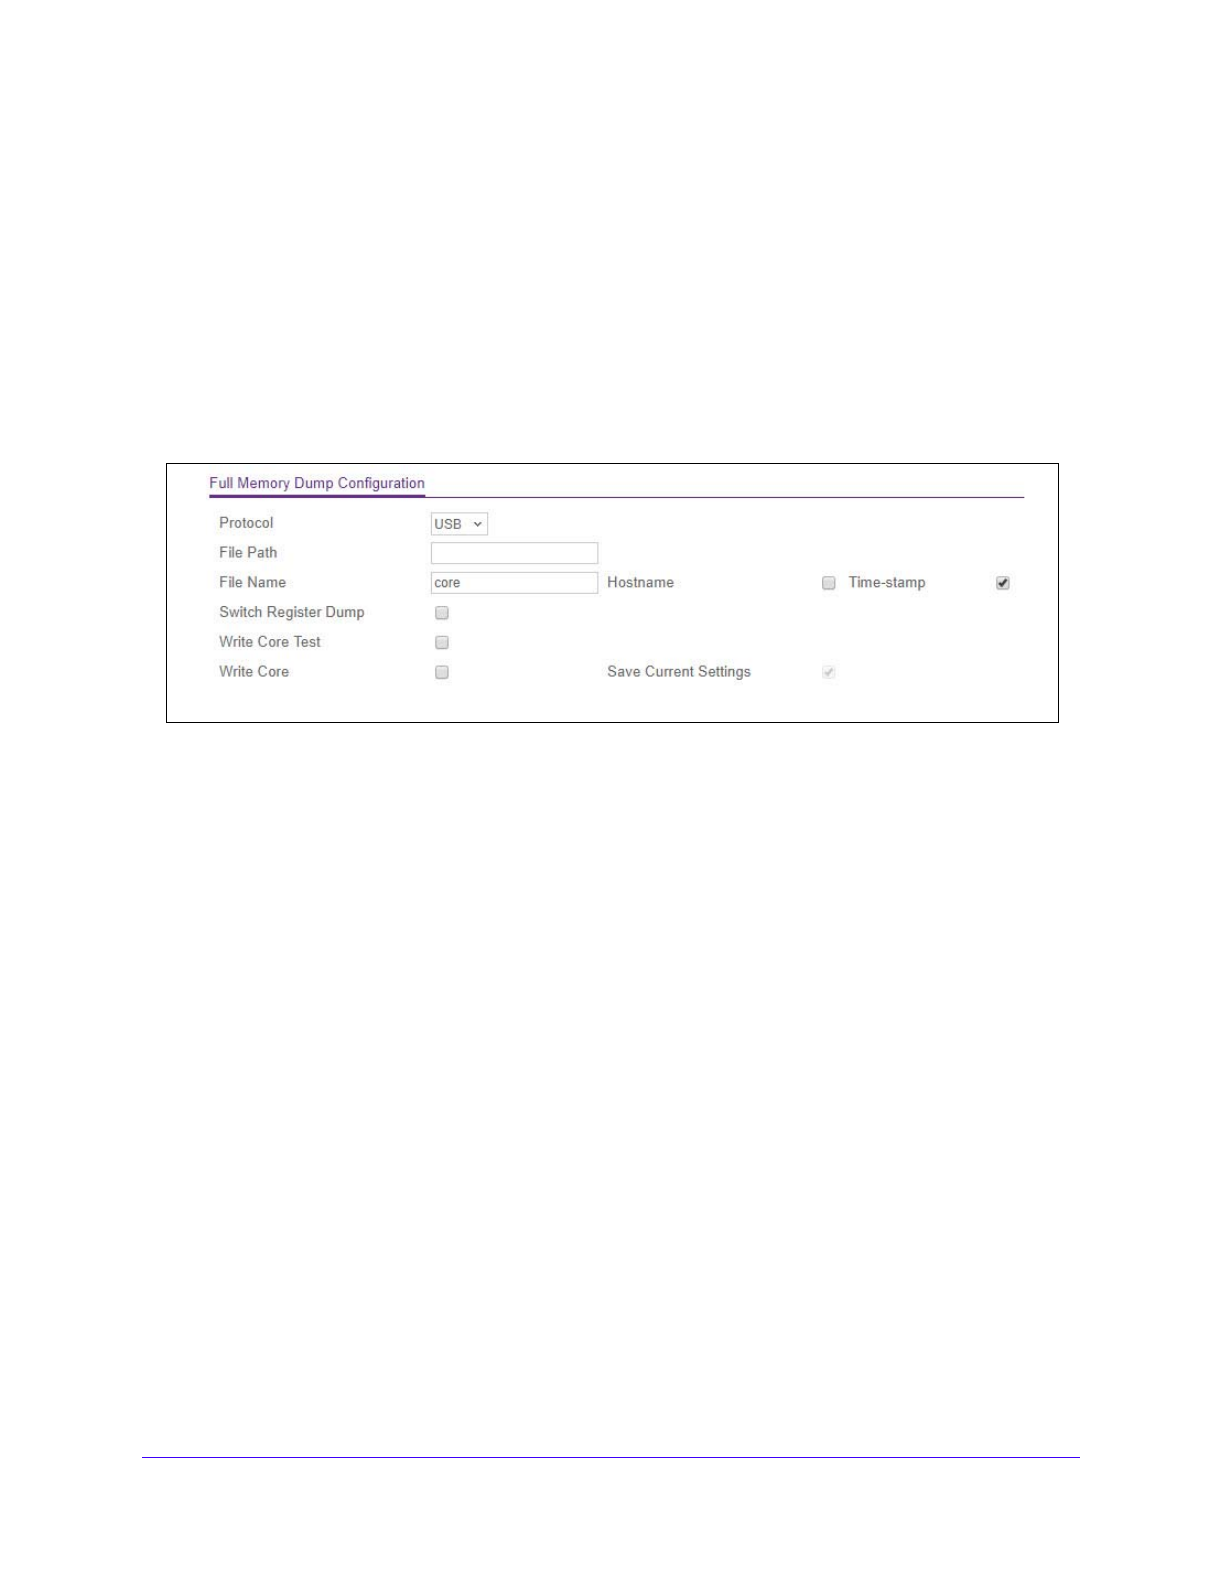
Full Memory Dump
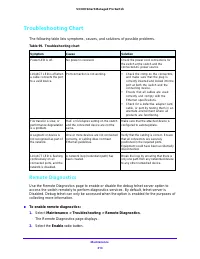
Use this screen to tell the switch to do a full memory dump to help with troubleshooting.
To display the Full Memory Dump screen, click
Maintenance
>
Troubleshooting
>
Full
Memory Dump
.
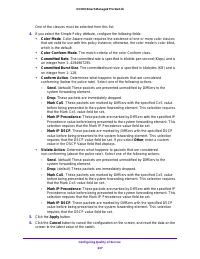
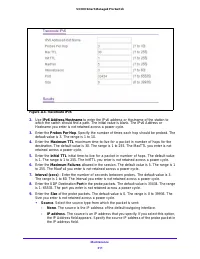
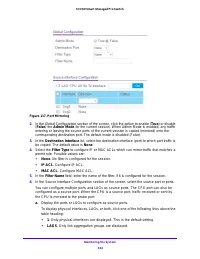
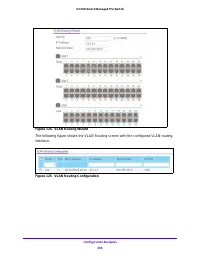
Figure 115. Full Memory Dump
1.
Specify the
Protocol
used to store the coredump file. Possible values are:
a. None
— Disable coredump.
b. USB
— Set USB protocol.
2.
Specify the
File Path
to store the coredump file. The file path must consist of -, _, / and
alphanumeric characters. Up to 64 characters can be used. The factory default is ./..
3.
In the
File Name
field, specify the coredump filename. Up to 15 characters can be used.
The filename must consists of -, _ and alphanumeric characters. The factory default is
core
.
4.
Select the
Hostname
option to append a hostname to the coredump filename.
5.
Select the
Time-stamp
option to append a time-stamp to the coredump filename.
6.
Select the
Switch Register Dump
to dump the switch-chip-register in case of an exception.
7.
If you specified USB as the protocol, the
Write Core Test
option appears. Select the
Write
Core Test
option and press
Apply
to test the core dump setup. In this case, the
File Name
value will be used as the destination filename.
8.
If you specified USB as the protocol, the
Write Core
option appears. Select the
Write Core
option and press
Apply
to create a core dump and store it in the previously configured
external server. Execution of this procedure causes a reload of the device.
9.
Select the
Save Current Settings
option to save the current configuration settings of the
system.
10.
Click the
Apply
button to send the updated configuration to the switch. Configuration
changes take effect immediately.
Характеристики

Остались вопросы?Не нашли свой ответ в руководстве или возникли другие проблемы? Задайте свой вопрос в форме ниже с подробным описанием вашей ситуации, чтобы другие люди и специалисты смогли дать на него ответ. Если вы знаете как решить проблему другого человека, пожалуйста, подскажите ему :)
