Мойки высокого давления Karcher CB 2 23 - инструкция пользователя по применению, эксплуатации и установке на русском языке. Мы надеемся, она поможет вам решить возникшие у вас вопросы при эксплуатации техники.
Если остались вопросы, задайте их в комментариях после инструкции.
"Загружаем инструкцию", означает, что нужно подождать пока файл загрузится и можно будет его читать онлайн. Некоторые инструкции очень большие и время их появления зависит от вашей скорости интернета.


-
11
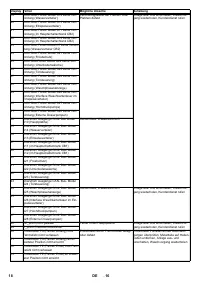
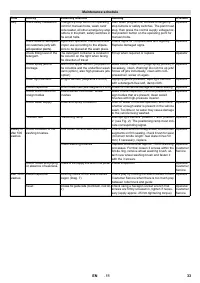
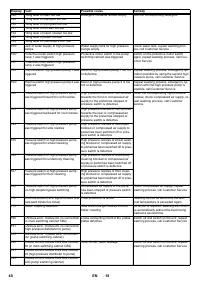
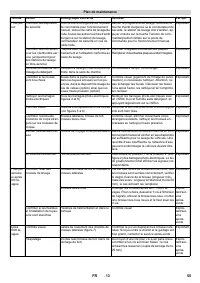
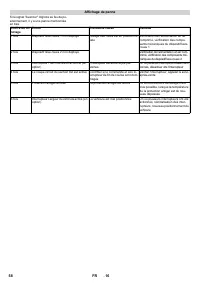
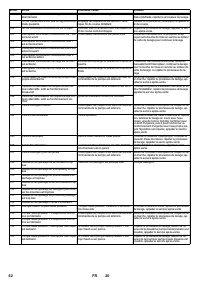
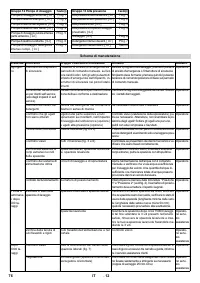
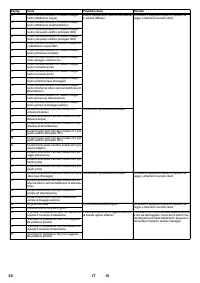
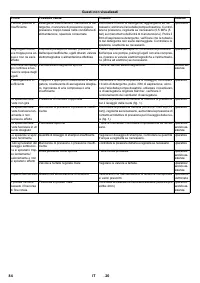
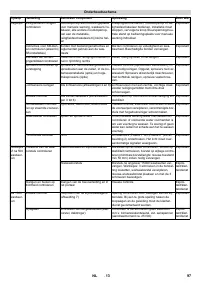
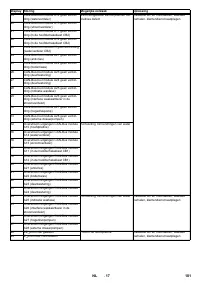
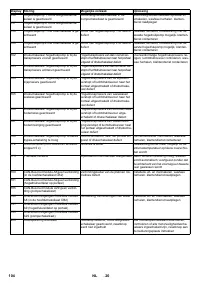
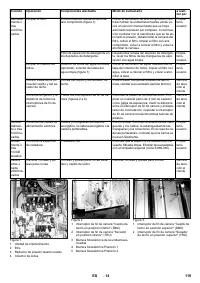
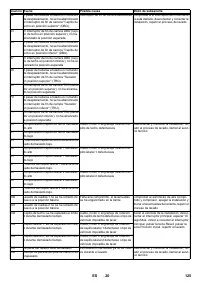
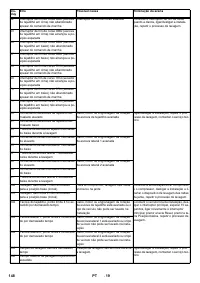
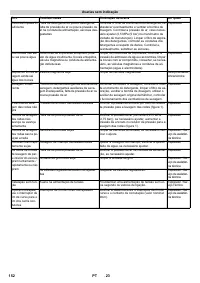
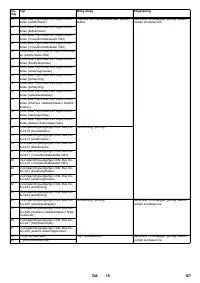
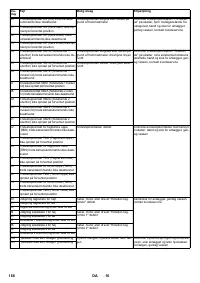
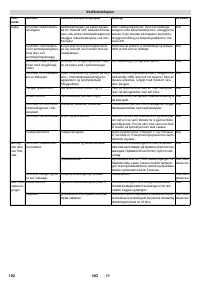
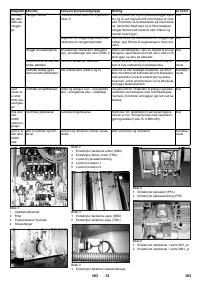
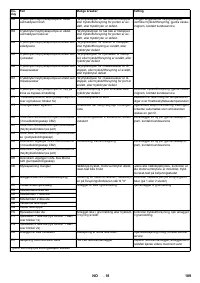
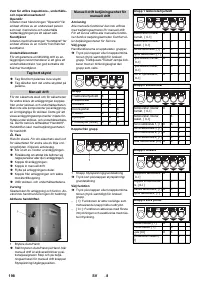
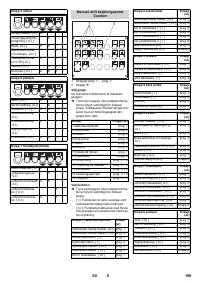
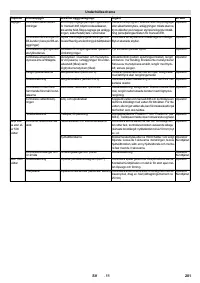
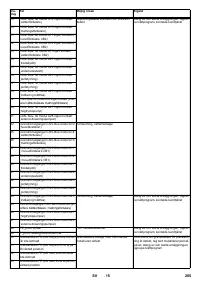
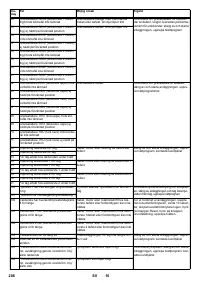
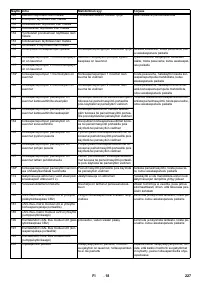
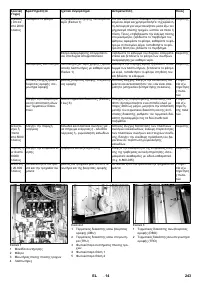
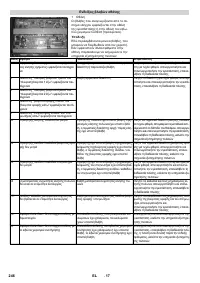
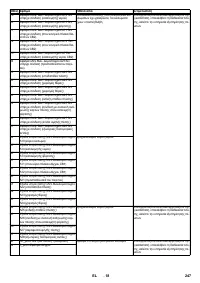
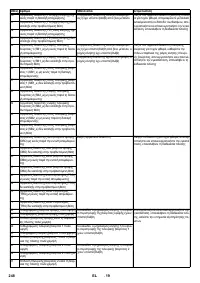
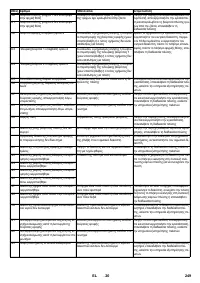
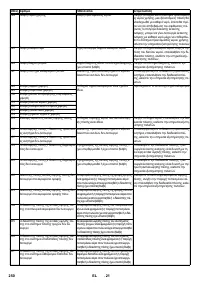
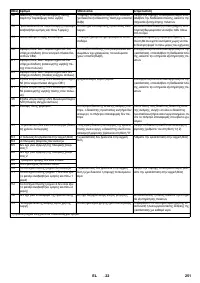
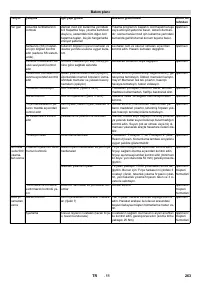
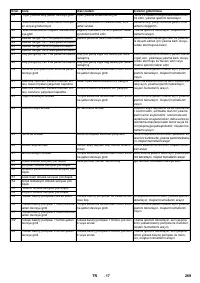
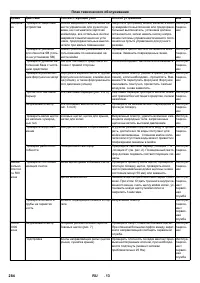
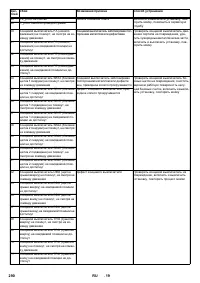
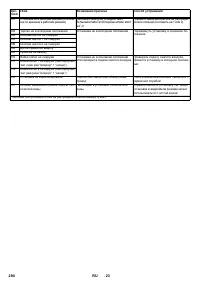
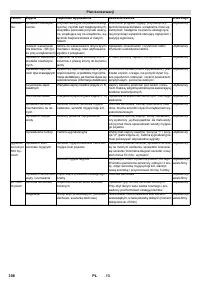
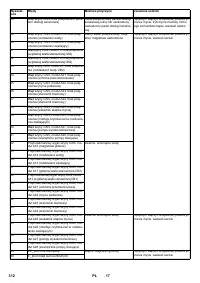
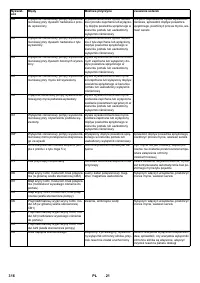
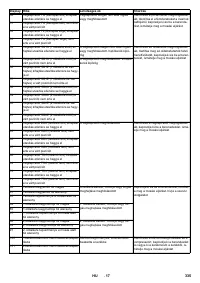
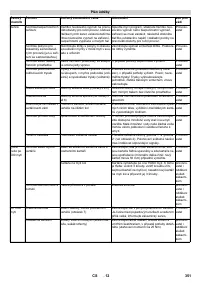
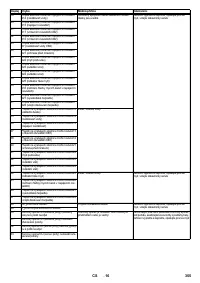
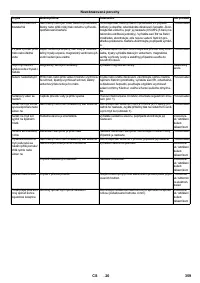
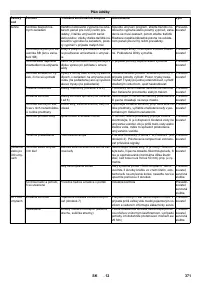
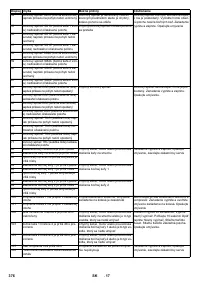
Maintenance schedule
Time
Activity
Assembly affected
Remedy
of whom
daily
Check safety installations
Emergency-stop button on operating
point for manual mode, wash card/
code reader, all other emergency-stop
buttons in the plant, safety switches in
the small halls.
Start wash programme, activate emergency-
stop buttons or safety switches. The plant must
stop, then press the control supply voltage/nor-
mal position button on the operating point for
manual mode.
Operator
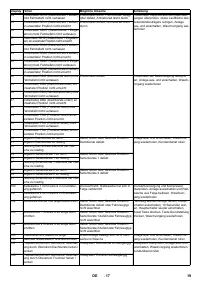
Check notes for self-opera-
tion customers (only with
self-operation plants).
Signs with operation instructions and
proper use according to the stipula-
tions to be placed at the wash place.
Check signs for completeness and legibility.
Replace damaged signs.
Operator
Check filling level of the
detergent.
The detergent container is located in
the column on the right when facing
the direction of travel
Fill up when required or replace
Operator
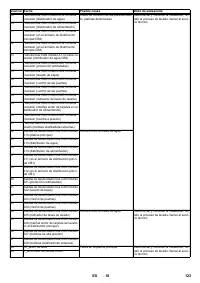
Check spray jets for
blockage
Jets in the upper section, jet pipes on
the columns and the underfloor wash
plant (option), also high-pressure jets
(option)
Make visible inspection (judge spray picture), if
necessary, clean. Warning! Do not mix up jets!
Screw off jets individually, clean with com-
pressed air, screw on again.
Operator
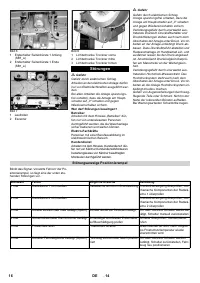
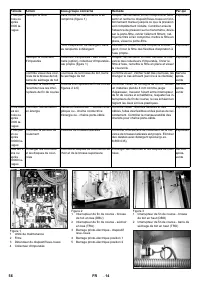
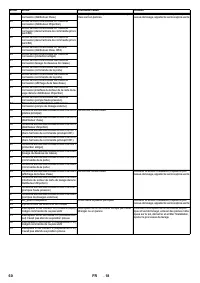
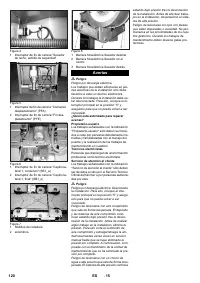
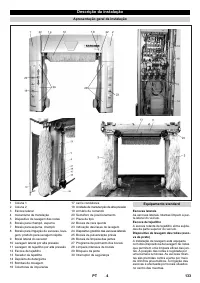
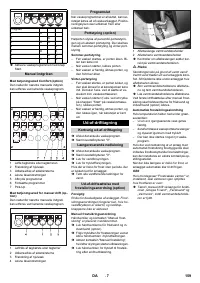
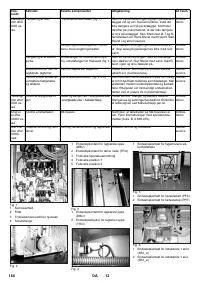
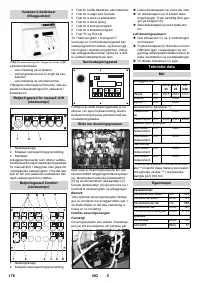
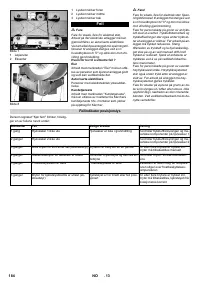
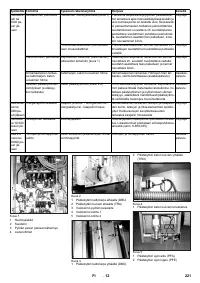
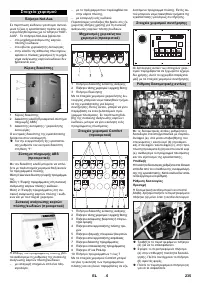
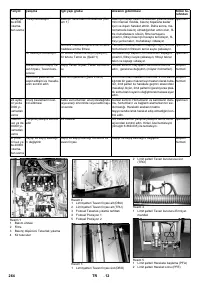
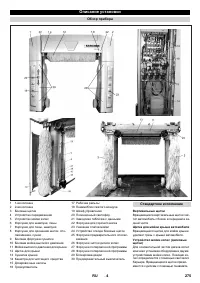
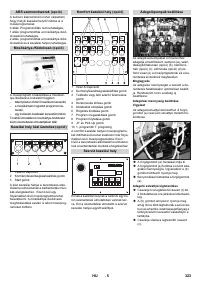
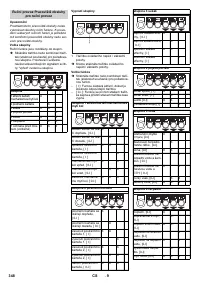
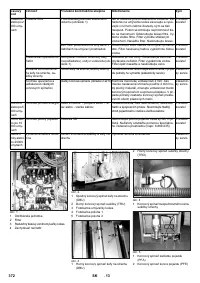
Clean light barriers.
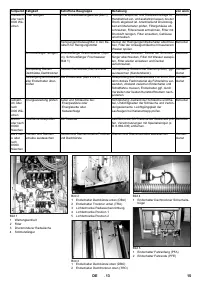
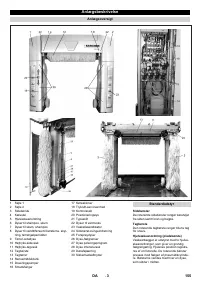
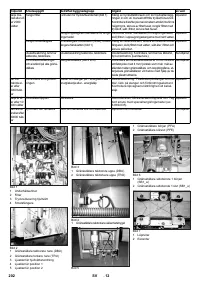
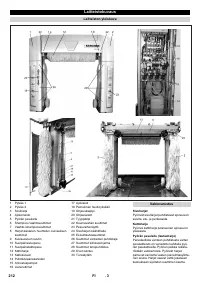
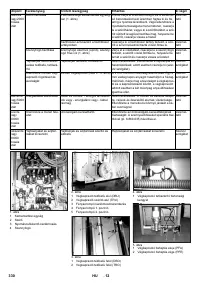
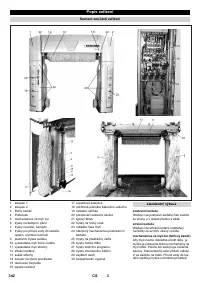
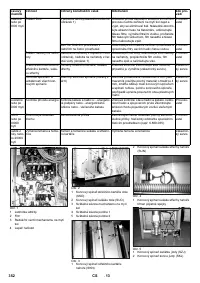
All light barriers (diagrams 2 und 8)
Applying gentle pressure, wipe light barriers
with a detergent-free soft, damp cloth.
Operator
Visual inspection
All limit switches (see diagrams 3 to 6) Check for mechanical damage and stable seating. Operator
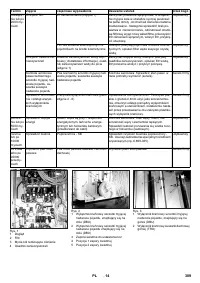
Check brush rollers for
foreign bodies
Side-brushes, roof brush, wheel
brushes
Make visible inspection, remove possible for-
eign bodies that are present, clean soiled
brushes with high-pressure cleaner.
Operator
Check water supply
Rinse and spray circulation
Shut off water in manual operation and check
whether enough water is present in the vehicle
wash. Too little or no water may cause damage
to the vehicle being washed.
Operator
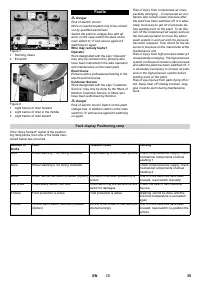
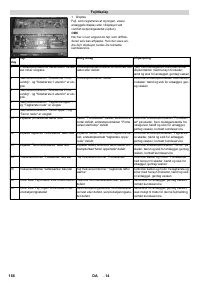
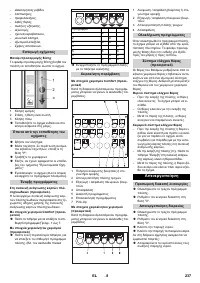
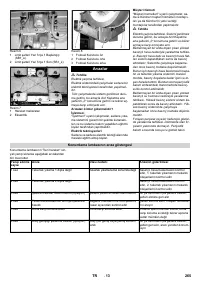
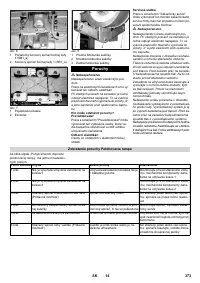
Function test
Positioning ramp
Interrupt light barriers "position 1“ and "position
2“ (see Fig. 2). The positioning ramp must indi-
cate corresponding signal.
Operator
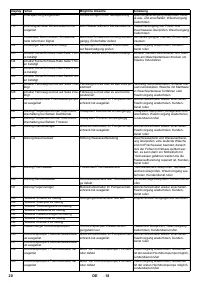
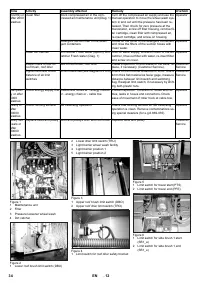
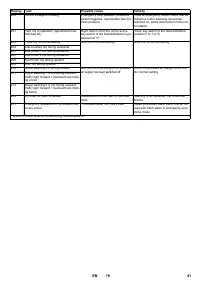
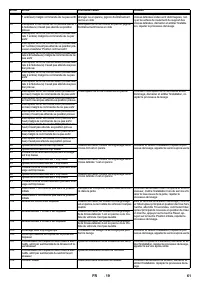
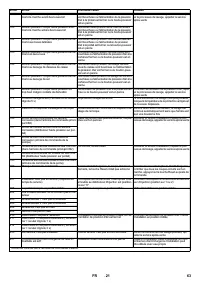
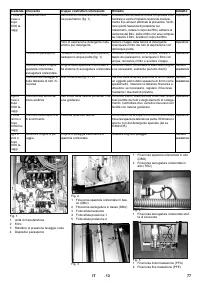
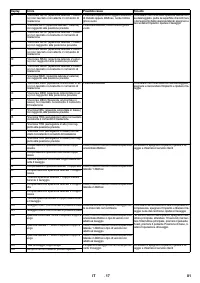
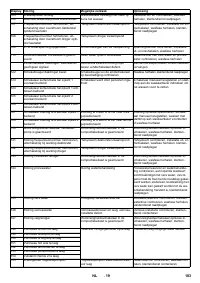
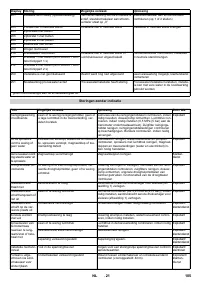
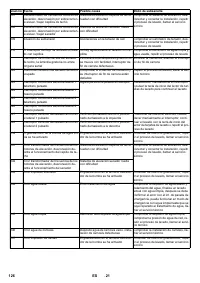
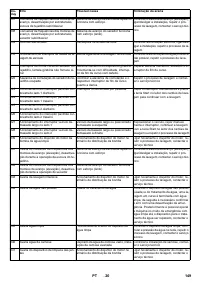
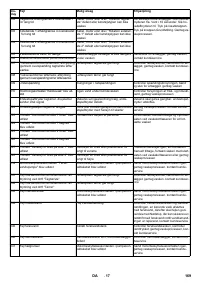
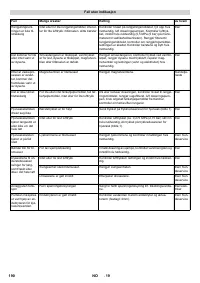
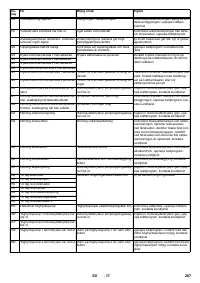
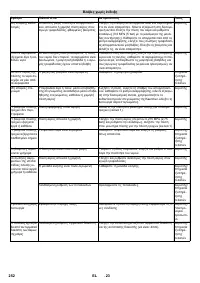
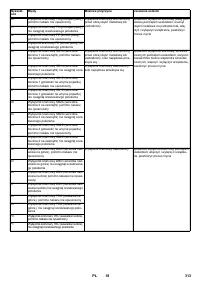
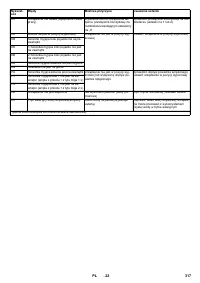
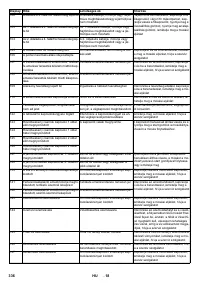
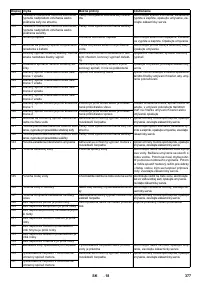
weekly or
after 500
washes
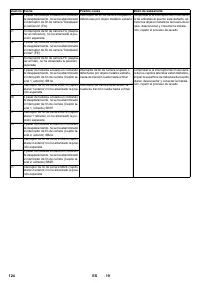
Check condition of the
washing brushes.
Roof brush roll and side brush rolls
Check brush shaft for straightness, check brush
segments on firm seating, check brush for wear
(minimum bristle length: new state minus 50
mm) if necessary, replace.
Operator
Wheel washing brushes
Replace brushes after approx. 15000 washing
processes. For this: loosen 3 screws within the
bristle ring, remove wheel washing brush, at-
tach new wheel washing brush and fasten it
with the 3 screws.
Operator/
Customer
Service
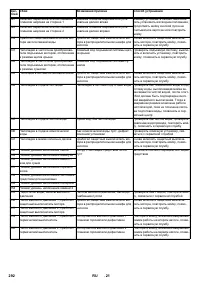
Check hoses and piping
for absence of leakness.
Hoses of the supply line and in the portal Visual inspection
Operator/
Customer
Service
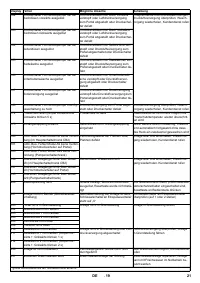
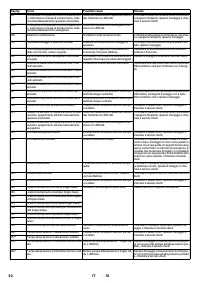
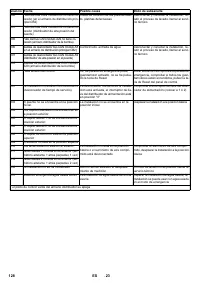
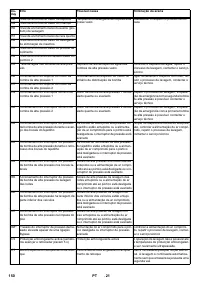
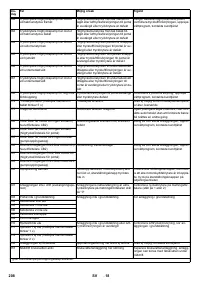
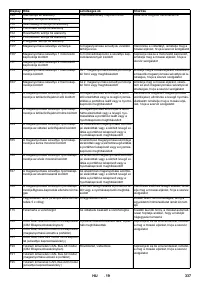
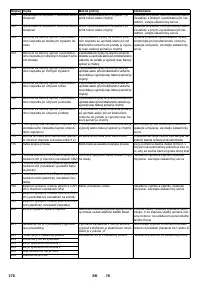
after 1000
washes
Visual inspection
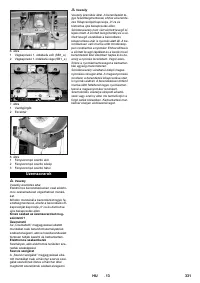
Running rollers of the side-brushes’
wagon (Diag. 7)
Check play by moving the side-brushes. Inform
Customer Service when there is too much play
between roller truck and guide:
Operator
Reset
Screws for guide rails (roof brush, roof dri-
er)
Check using a hexagon socket wrench that
screws are firmly screwed in, tighten if neces-
sary (apply approx. 25 Nm tightening torque)
Operator/
Customer
Service
33
EN


