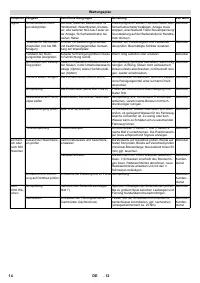
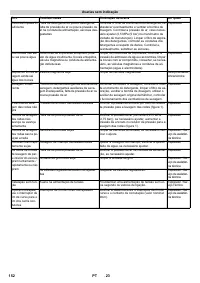
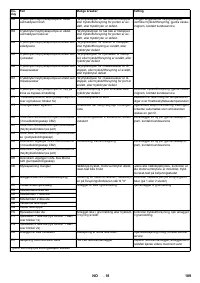
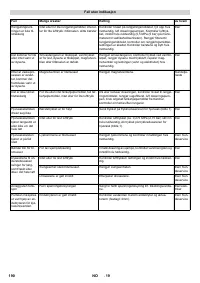
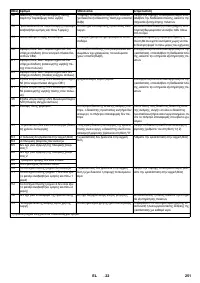
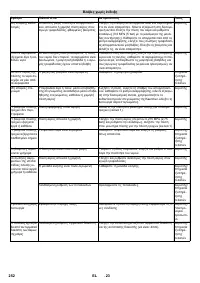
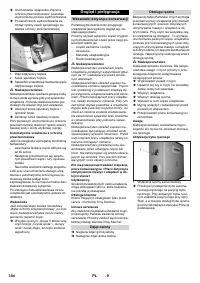
Мойки высокого давления Karcher CB 2 23 - инструкция пользователя по применению, эксплуатации и установке на русском языке. Мы надеемся, она поможет вам решить возникшие у вас вопросы при эксплуатации техники.
Если остались вопросы, задайте их в комментариях после инструкции.
"Загружаем инструкцию", означает, что нужно подождать пока файл загрузится и можно будет его читать онлайн. Некоторые инструкции очень большие и время их появления зависит от вашей скорости интернета.


-
9
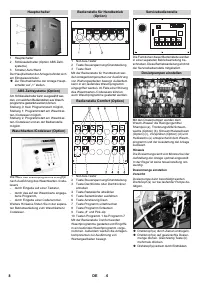
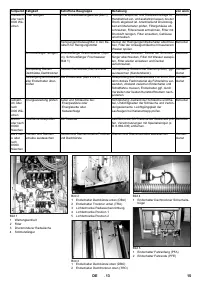
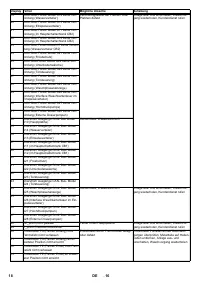
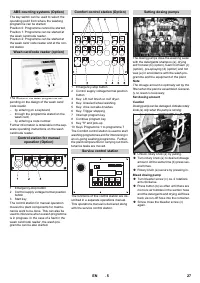
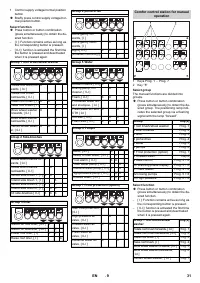
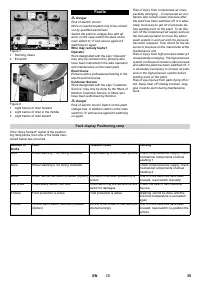
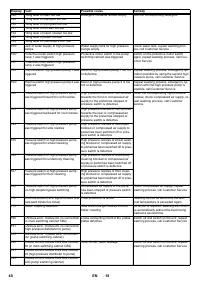
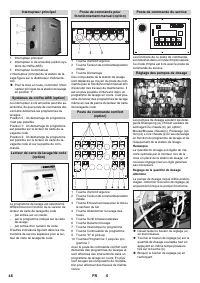
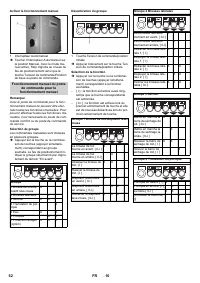
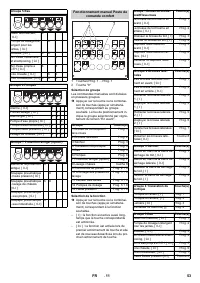
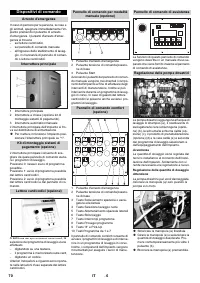
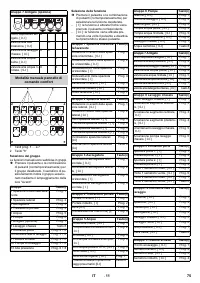
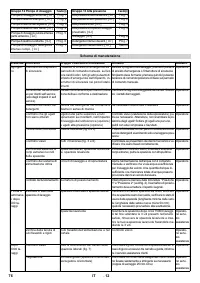
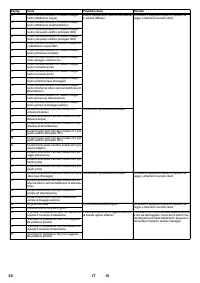
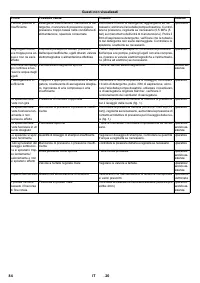
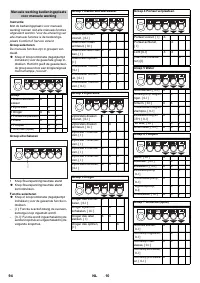
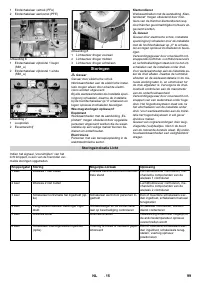
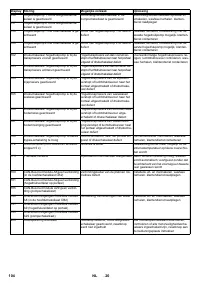
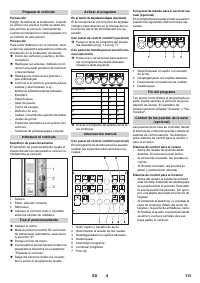
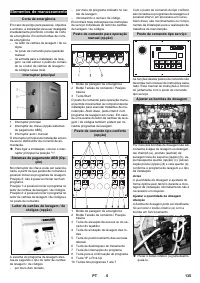
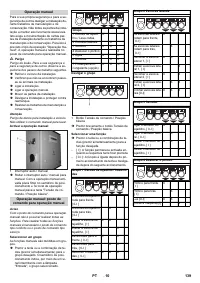
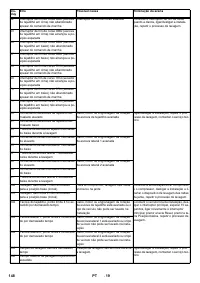
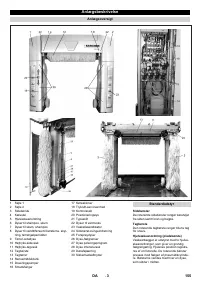
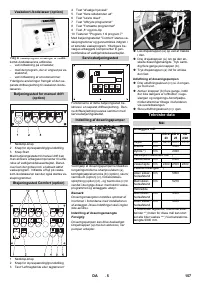
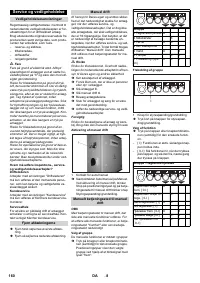
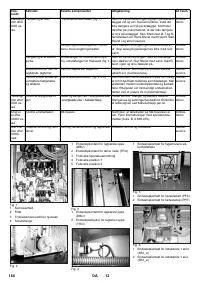
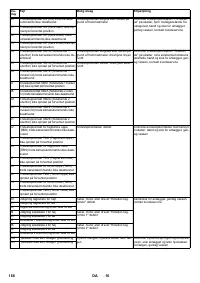
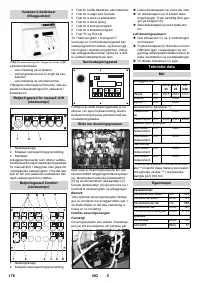
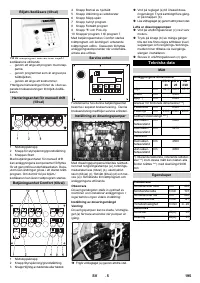
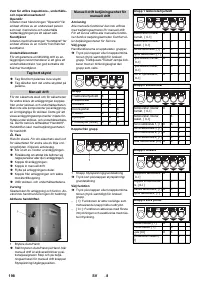
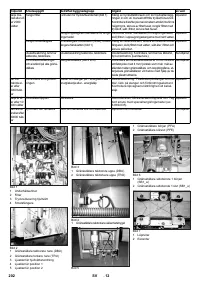
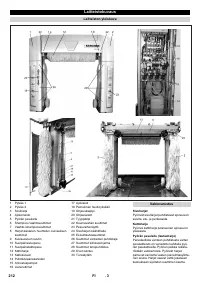
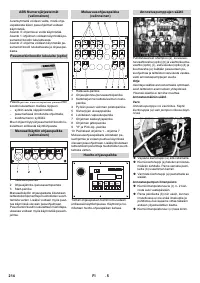
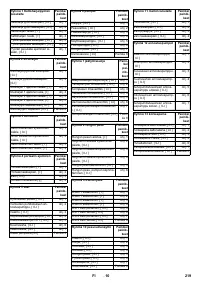
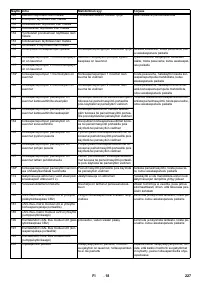
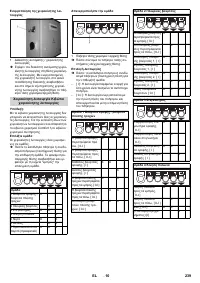
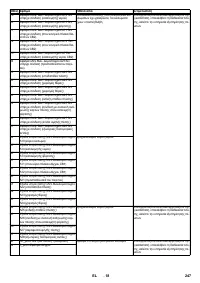
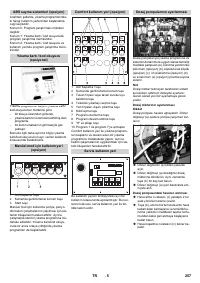
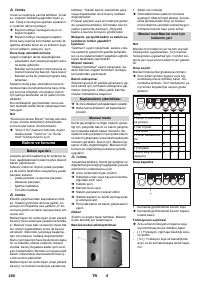
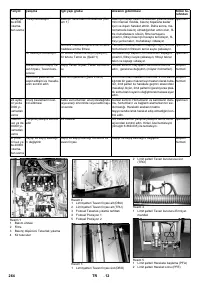
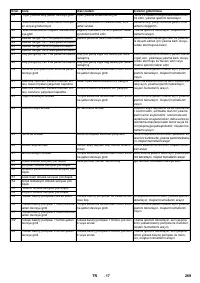
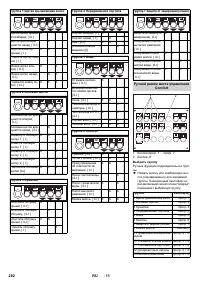
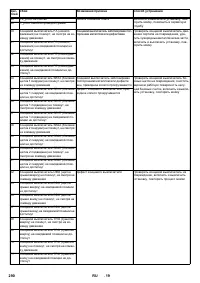
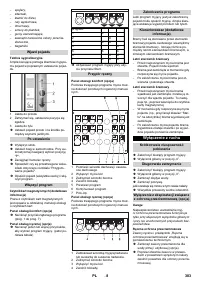
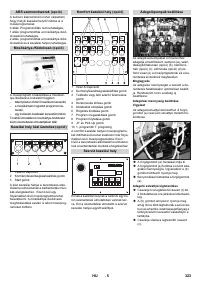
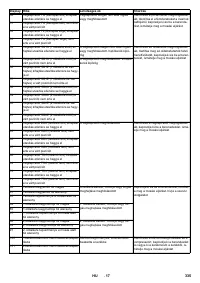
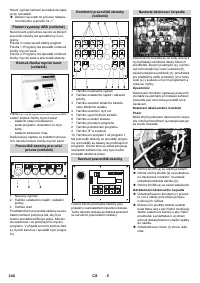
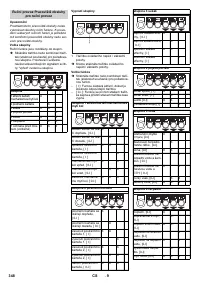
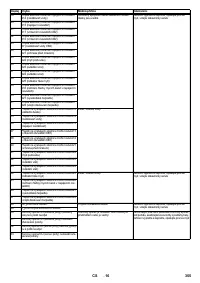
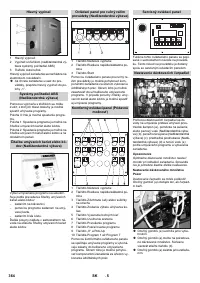
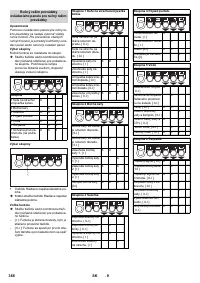
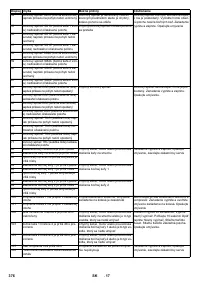
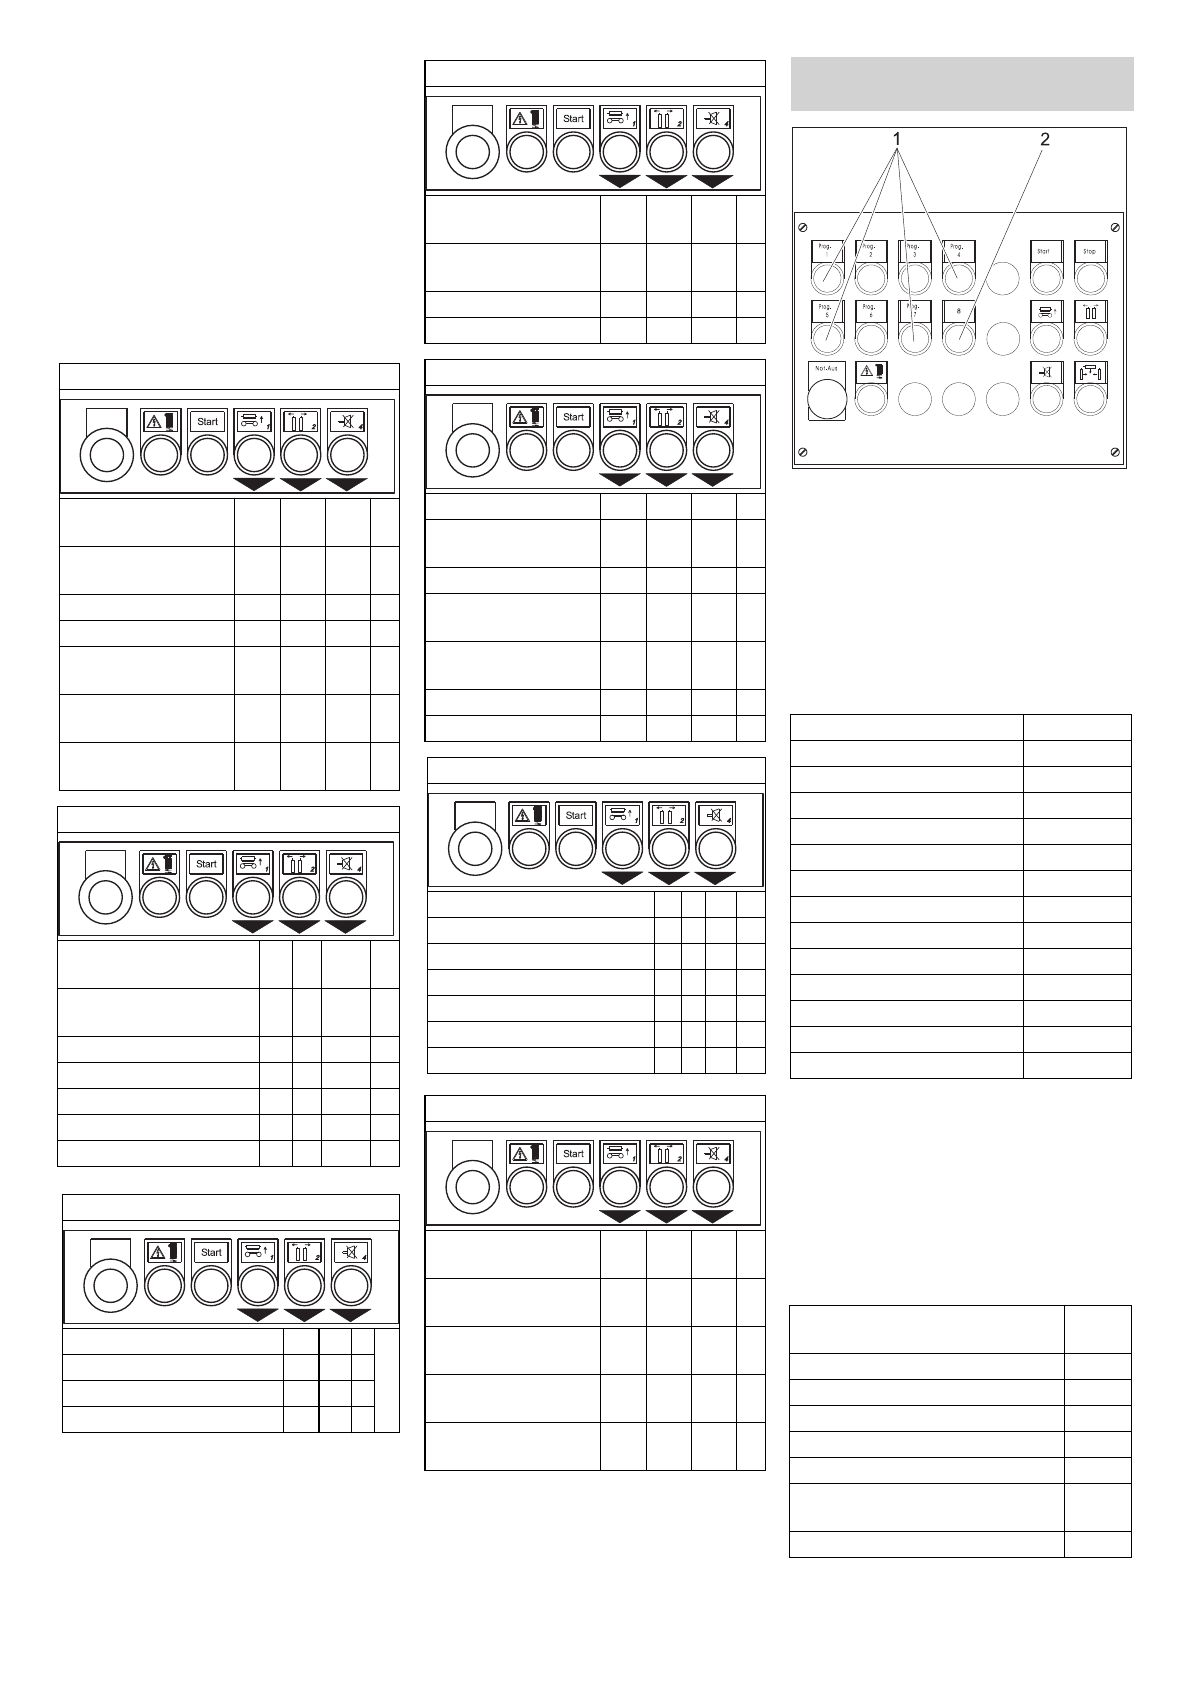
1 Control supply voltage/normal position
button
Briefly press control supply voltage/nor-
mal position button.
Press button or button combination
(press simultaneously) to obtain the de-
sired function.
–
[ I ]: Function remains active as long as
the corresponding button is pressed.
–
[ 0-I ]: function is activated the first time
the button is pressed and deactivated
when it is pressed again.
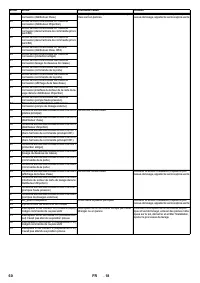
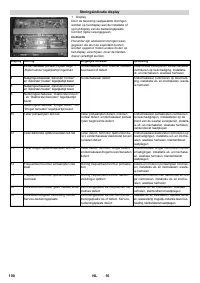
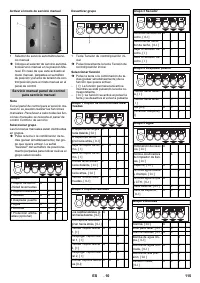
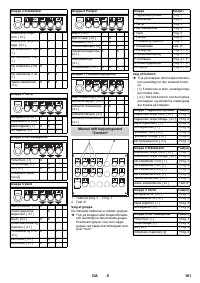
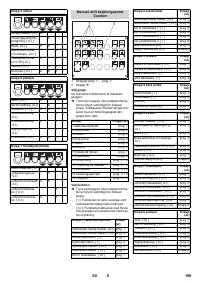
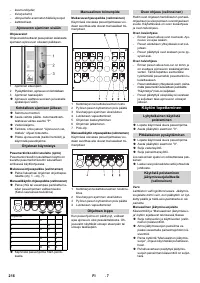
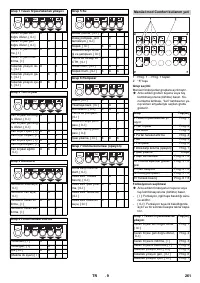
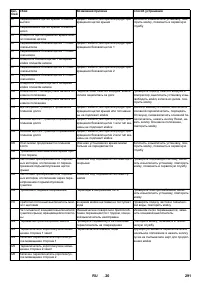
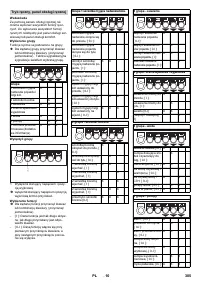
1 Keys Prog. 1 ... Prog. 7
2 Key "8"
The manual functions are divided into
groups.
Press button or button combination
(press simultaneously) to obtain the de-
sired group. The positioning ramp indi-
cates the selected group via a flashing
signal with the lamp “forward”.
Press button or button combination
(press simultaneously) to obtain the de-
sired function.
–
[ I ]: Function remains active as long as
the corresponding button is pressed.
–
[ 0-I ]: function is activated the first time
the button is pressed and deactivated
when it is pressed again.
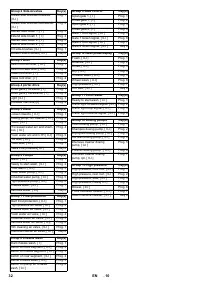
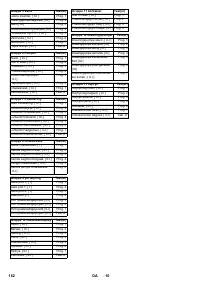
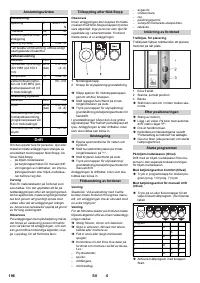
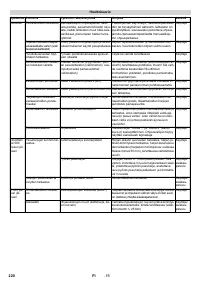
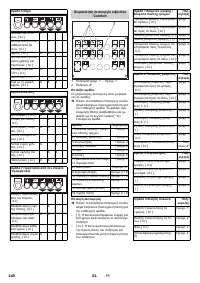
Select function
Group 1 roof brush/wheel washer
Rotate roof brush for-
wards, [ 0-I ]
X
Rotate roof brush
backwards, [ 0-I ]
X
Lower roof brush, [ I ] X
X
Raise roof brush, [ I ]
X
Move wheel washer
forwards, [ 0-I ]
X
X
Move wheel washer
backwards, [ 0-I ]
X
X
Retract wheel wash-
er, [ 0-I ]
X
X
X
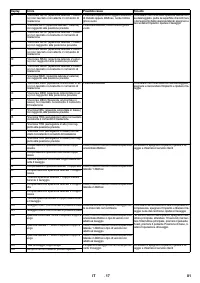
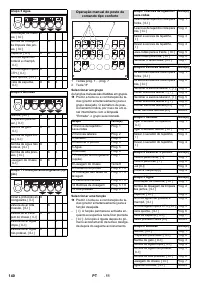
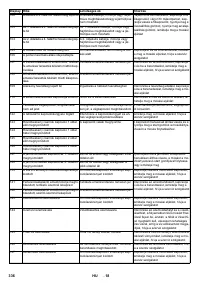
Group 2 Side-brushes
Rotate side brushes for-
wards, [ 0-I ]
X
Rotate side brushes
backwards, [ 0-I ]
X
Retract side brush 1, [ I ] X
X
Extend side brush 1, [ I ]
X
Retract side brush 2, [ I ] X
X
Extend side brush 2, [ I ]
X X
Tilt side-brushes [ 0-I ]
X
X X
Group 3 Drier
Switch on roof drier, [ 0-I ] X
Switch on side drier, [ 0-I ]
X
Lower roof drier, [ I ]
X
X
Raise roof drier, [ I ]
X
Group 4 portal drive
Move gantry for-
wards, [ I ]
X
Move gantry back-
wards, [ I ]
X
Light [ 0-I ]
X
X
(initialise machine) [I]
X
Group 5 Water
Loosen insects, [ 0-I ] X
Dosing pump, rim
cleaner, [ 0-I ]
X
Foam, [ 0-I ]
X
X
Processed water arc
and shampoo, [ 0-I ]
X
Fresh water arc and
CTH [ 0-I ]
X
X
Hot wax, [ 0-I ]
X
X
Foam wax, [ 0-I ]
X
X
X
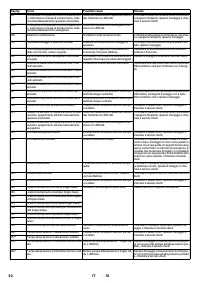
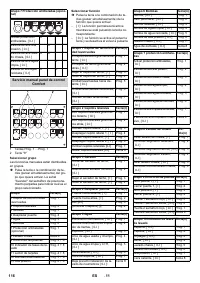
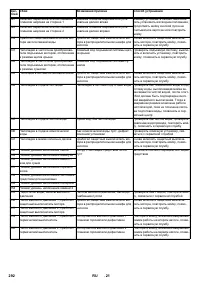
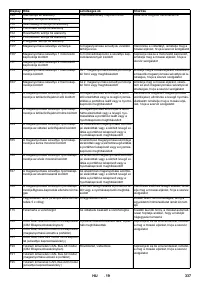
Group 6 Pumps
Alarm, [ 0-I ]
X
Ready to start wash, [ 0-I ]
X
Frost alarm, [ 0-I ]
X X
Fresh water pump, [ 0-I ]
X
Industrial water pump, [ 0-I ] X
X
High-pressure pump, [ 0-I ]
X X
Chassis wash, [ 0-I ]
X X X
Group 7 Frost protection (option)
Start frost protection,
[ 0-I ]
X
High-pressure air
valve, [ 0-I ]
X
Chassis wash air
valve, [ 0-I ]
X
X
Fresh water air
valve, [ 0-I ]
X
Industrial water air
valve, [ 0-I ]
X
X
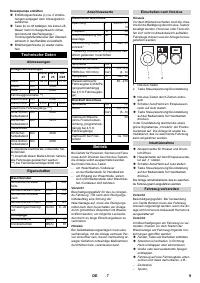
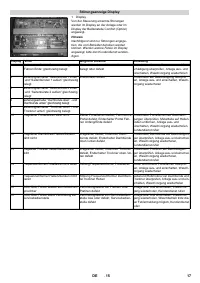
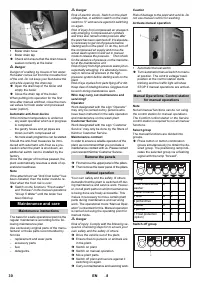
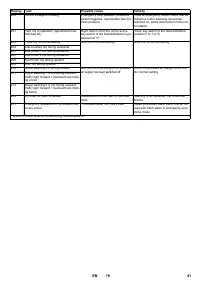
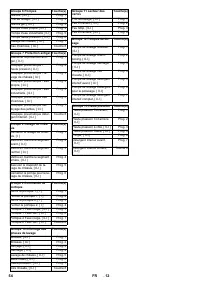
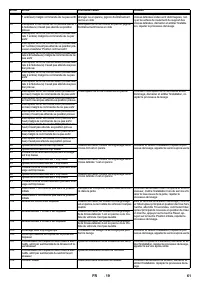
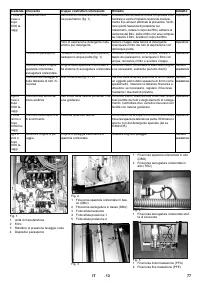
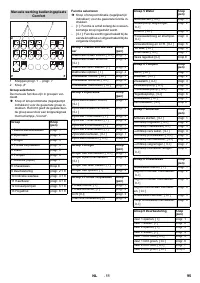
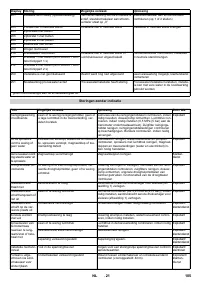
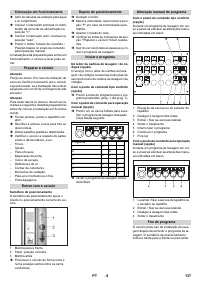
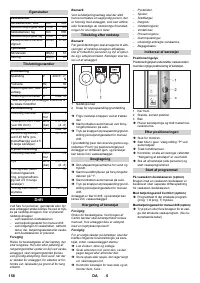
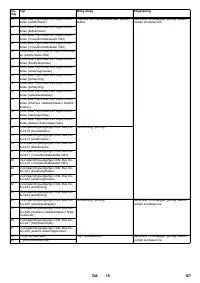
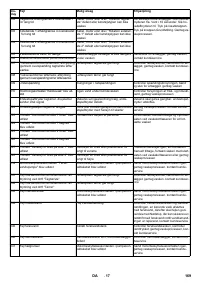
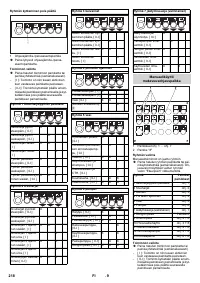
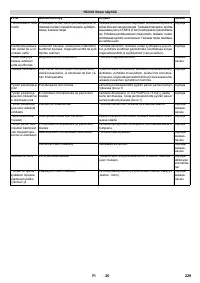
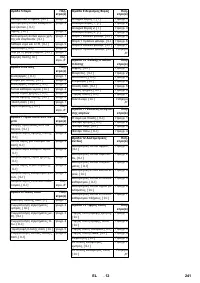
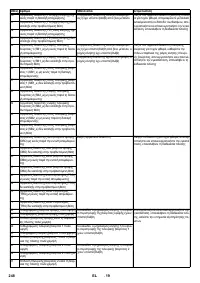
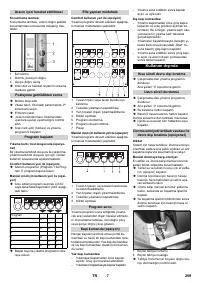
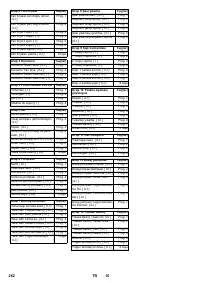
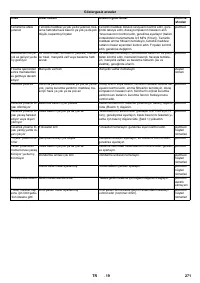
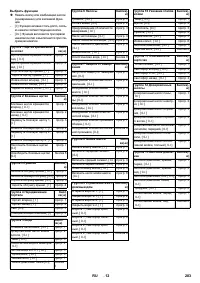
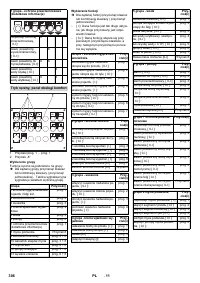
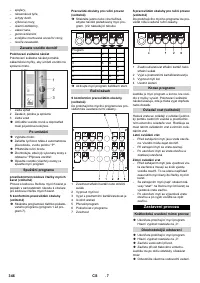
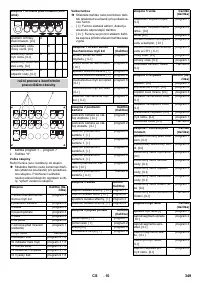
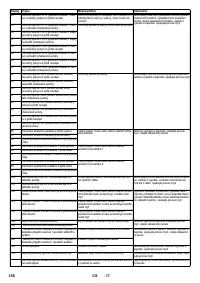
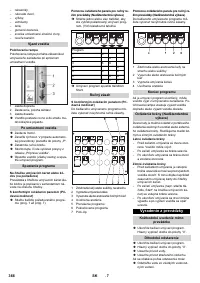
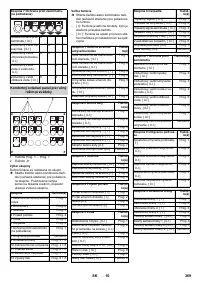
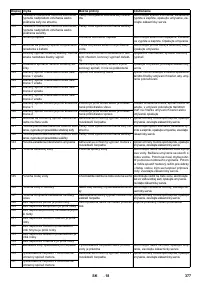
Comfor control station for manual
operation
Select group
Group
Key(s)
1 roof brush/wheel washer
Prog. 1
2 side- brushes
Prog. 2
3 drier
Prog. 3
4 portal drive
Prog. 4
5 water
Prog. 5
6 pumps
Prog. 6
7 Frost protection (option)
Prog. 7
8 Chassis wash
Key 8
9 Gate control
Prog. 2 + 8
10 Washing phase display
Prog. 3 + 8
11 Card reader
Prog. 4 + 8
12 Dosing pumps
Prog. 5 + 8
13 High pressure
Prog. 6 + 8
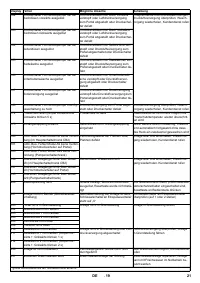
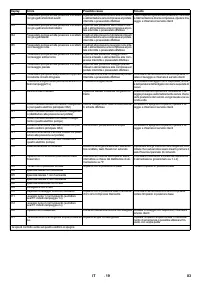
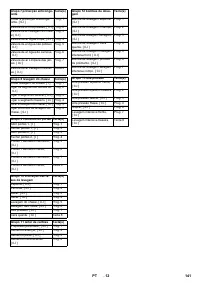
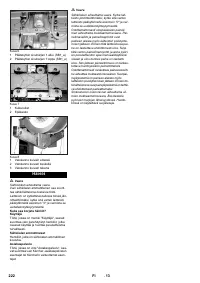
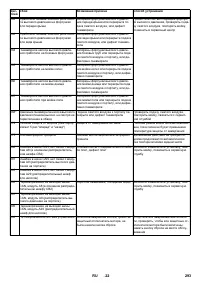
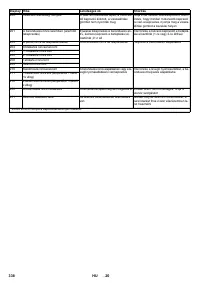
Select function
Group 1 roof brush/wheel
washer
Key(s)
Rotate roof brush forwards, [ 0-I ]
Prog. 1
Rotate roof brush backwards, [ 0-I ] Prog. 2
Lower roof brush, [ I ]
Prog. 3
Raise roof brush, [ I ]
Prog. 4
Move wheel washer forwards, [ 0-I ] Prog. 5
Move wheel washer backwards,
[ 0-I ]
Prog. 6
Retract wheel washer, [ 0-I ]
Prog. 7
31
EN


