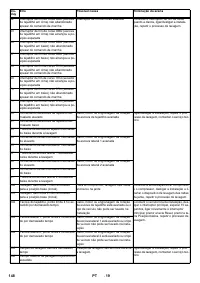
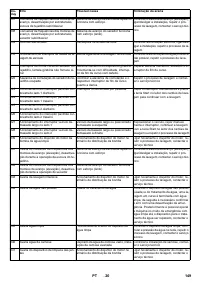
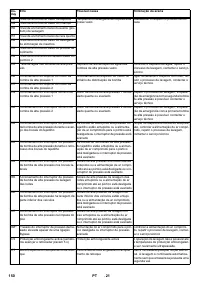
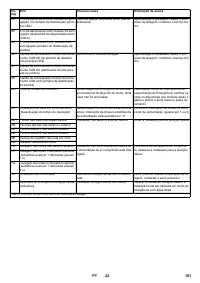
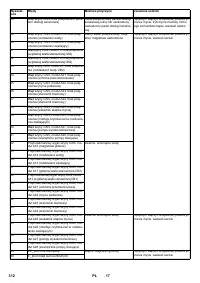
Мойки высокого давления Karcher CB 2 23 - инструкция пользователя по применению, эксплуатации и установке на русском языке. Мы надеемся, она поможет вам решить возникшие у вас вопросы при эксплуатации техники.
Если остались вопросы, задайте их в комментариях после инструкции.
"Загружаем инструкцию", означает, что нужно подождать пока файл загрузится и можно будет его читать онлайн. Некоторые инструкции очень большие и время их появления зависит от вашей скорости интернета.


-
7
–
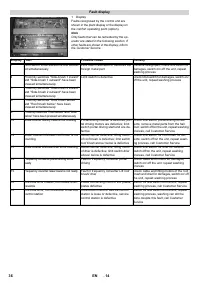
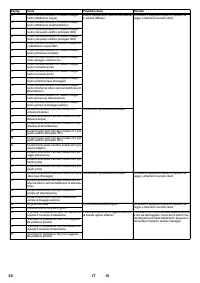
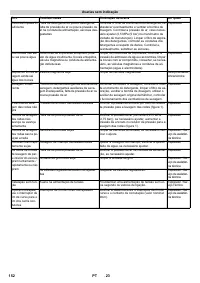
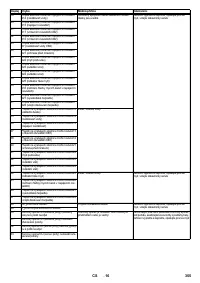
exhaust pipes,
–
wind-breakers,
–
tilt ropes,
–
rubber gaskets,
–
sunshades attached to the outside of
the vehicle,
–
Luggage rack
.
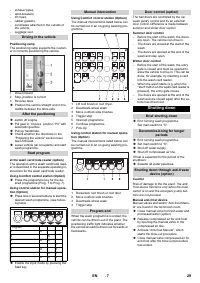
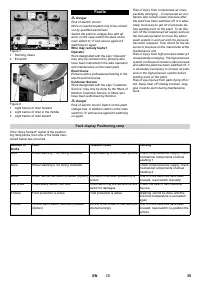
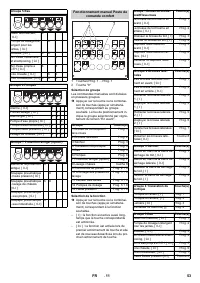
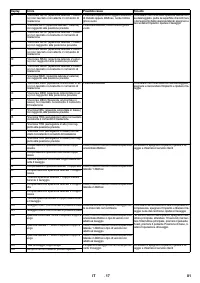
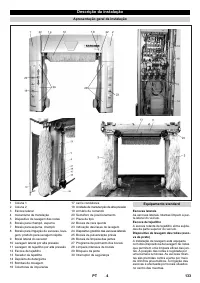
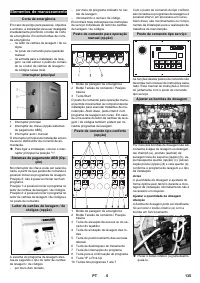
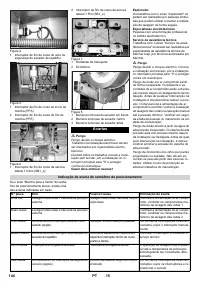
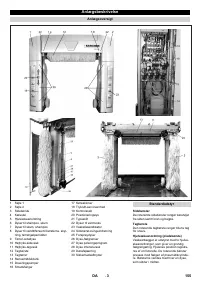
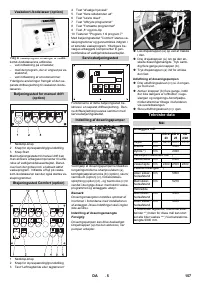
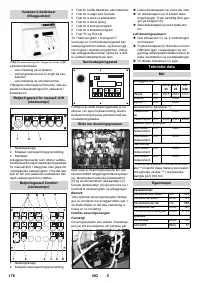
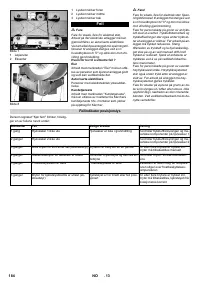
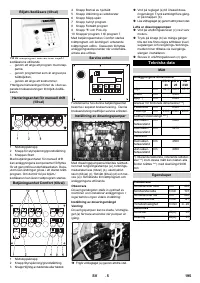
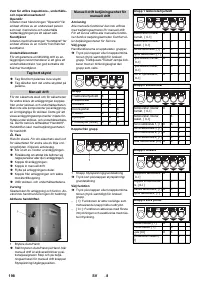
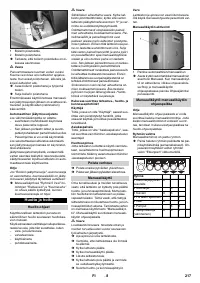
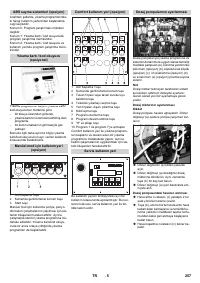
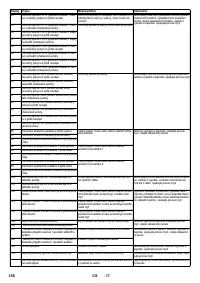
The positioning ramp supports the custom-
er in correctly positioning the vehicle.
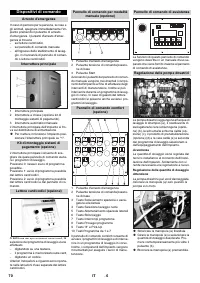
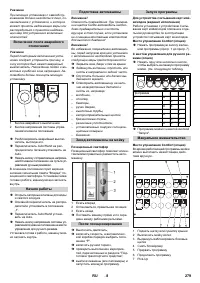
1 Drive forward
2 Stop, position is correct
3 Reverse drive
Position the vehicle straight and in the
middle between the drive-rails.
switch off engine.
Put gear in. Choose position “P2” with
automatic gearbox.
Pull up handbrake.
Check whether the directions in the
"Preparing the vehicle" section have
been followed.
Leave vehicle (all occupants) and start
wash programme.
The operation with a wash card/code read-
er is described in the separate operating in-
structions for the wash card/code reader.
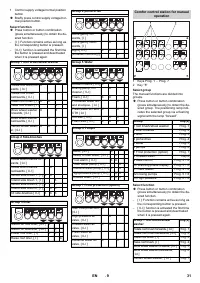
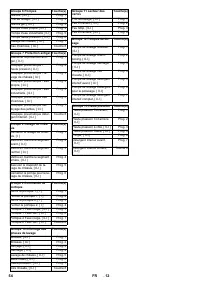
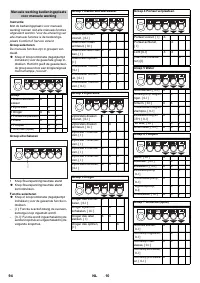
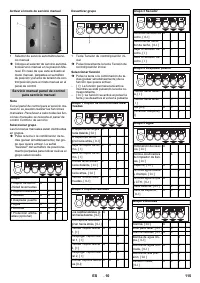
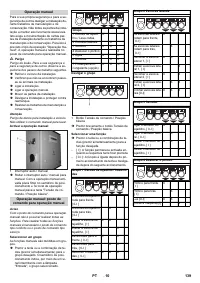
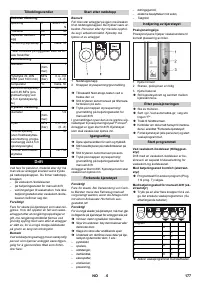
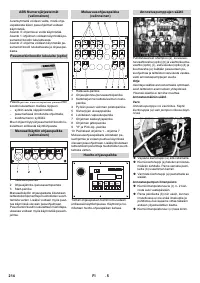
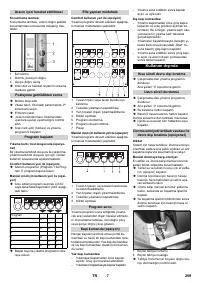
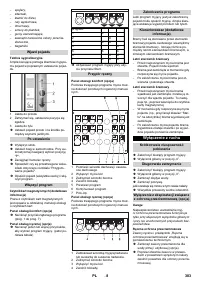
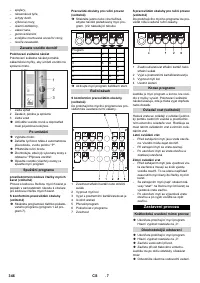
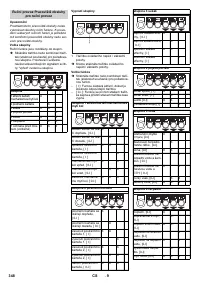
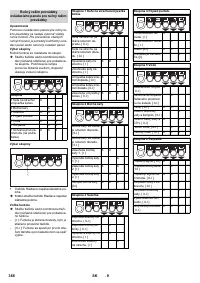
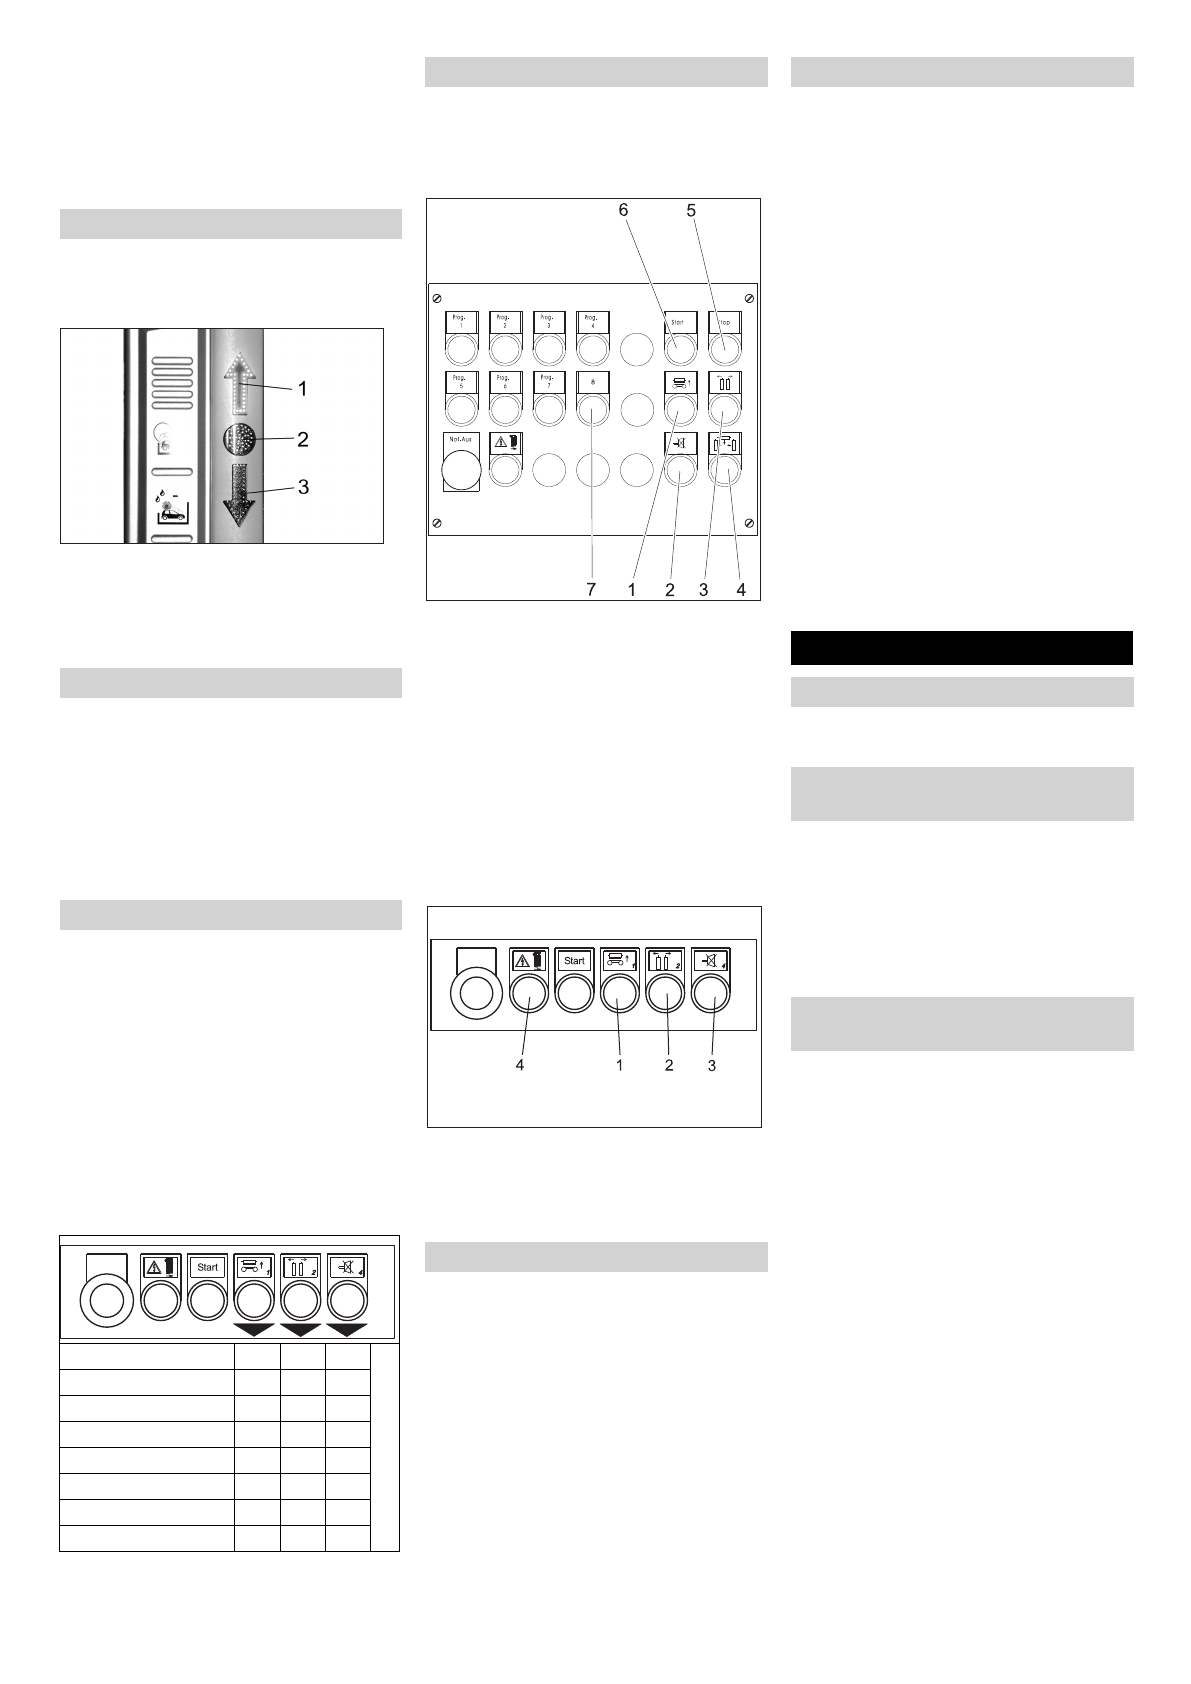
Press the programme key for the de-
sired programme (Prog. 1 to Prog. 7).
Press one or several buttons to start the
desired wash programme. (see follow-
ing table
Enable the input mode by pressing the
Start key.
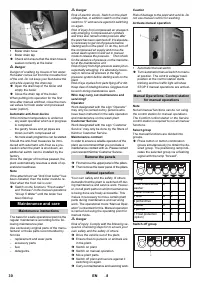
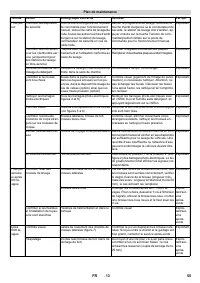
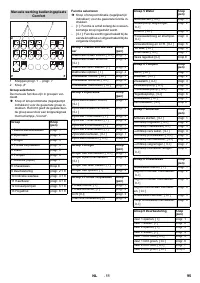
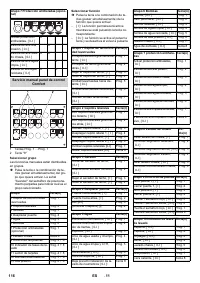
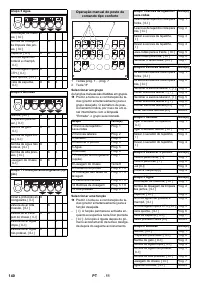
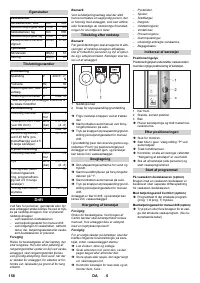
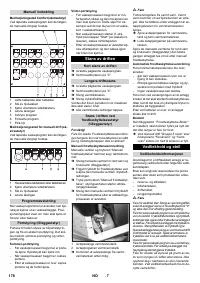
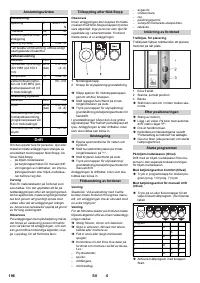
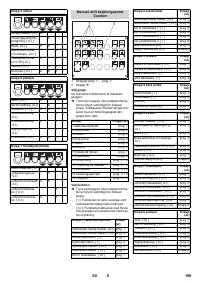
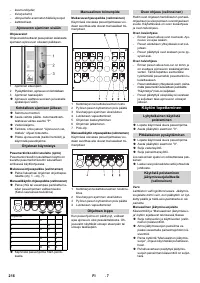
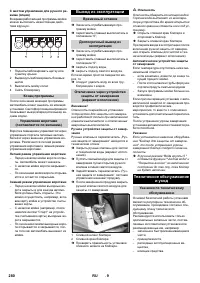
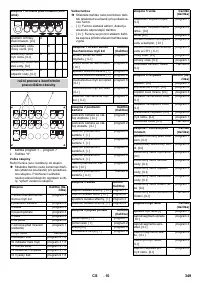
The manual interventions listed below can
be carried out in an on-going washing pro-
gramme.
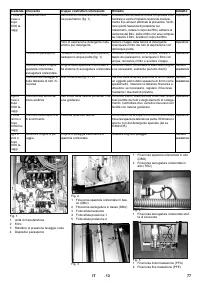
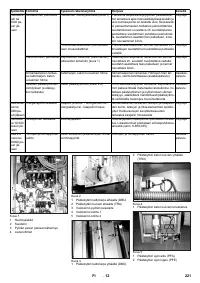
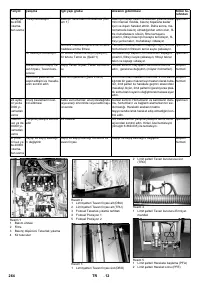
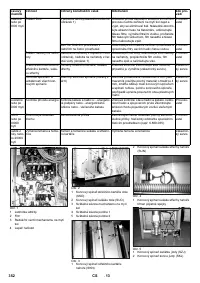
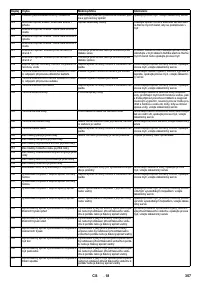
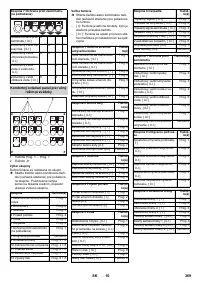
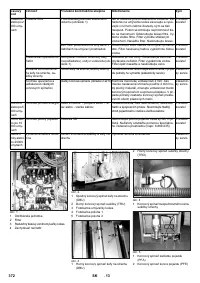
1 Lift roof brush or roof dryer.
2 Deactivate wheel wash
3 Move out/lock side brushes
4 Trigger stop
5 Interrupt programme
6 Continue programme
7 Pick-Up
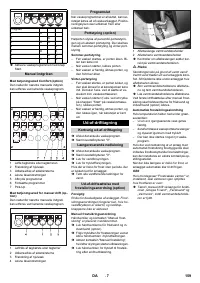
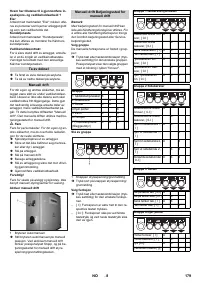
The manual interventions listed below can
be carried out in an on-going washing pro-
gramme.
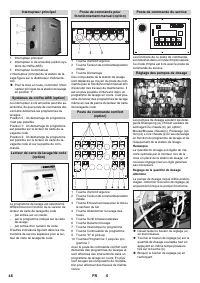
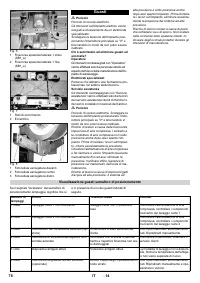
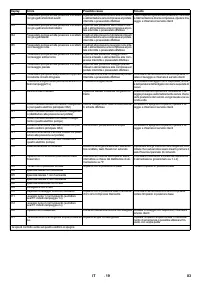
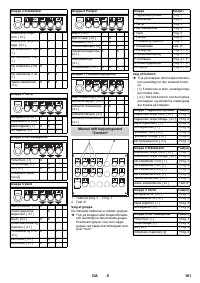
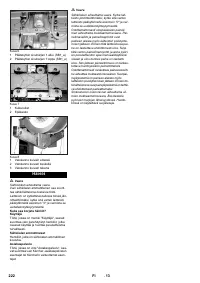
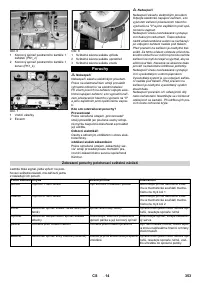
1 Raise/lock roof brush or roof drier
2 Move out/lock side brushes
3 Deactivate wheel wash
4 Trigger stop
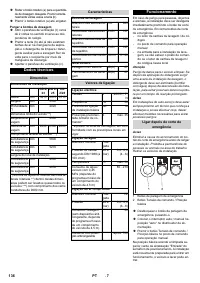
When the wash programme is ended, the
vehicle can be driven out of the plant. The
positioning traffic light indicates whether
the vehicle should be driven out forwards or
backwards.
The hall doors are controlled by the car
wash gantry control and by an external
door control. Difference is made between
summer and winter door control.
–
Before the start of the wash, the doors
are open. The vehicle can drive in.
–
The doors are closed at the start of the
wash.
–
The doors are opened at the end of the
wash and stay open.
–
Before the start of the wash, the entry
gate is closed and must be opened to
allow the vehicle to drive in. This can be
done, for example, by inserting a card
into the wash card reader.
–
When the wash starts (e.g. when the
"start" button on the wash card reader is
pressed), the entry gate closes.
–
The doors are opened at the end of the
wash and are closed again after the ve-
hicle has driven out.
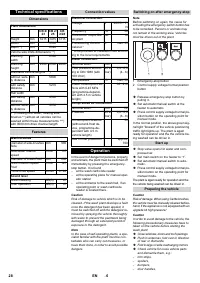
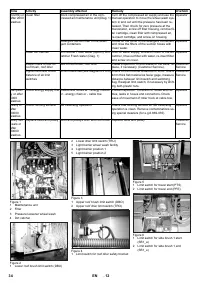
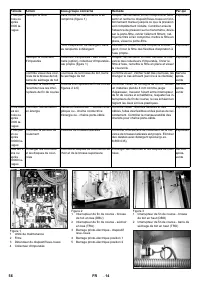
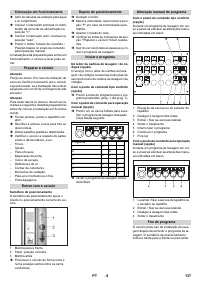
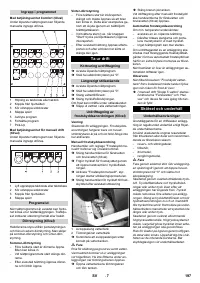
End running wash programme.
Set main switch to “O”.
End running wash programme.
Set main switch to “O”.
Shut off water supply.
Shut off compressed air line.
If frost is expected for the period of the
shutdown:
dewater all water pipelines.
Caution
Risk of damage to the the plant. The anti-
frost device functions only when the main
switch is on and the emergency-stop but-
tons are not pressed.
Manual valves and switch “Anti-frost Manu-
al“ are found in the technician room.
Close manual valve for fresh water and
processed water (option).
Release compressed air for anti-frost
by opening the manual valve in the
compressed air line.
Activate “Anti-frost Manual”, which
starts the blow-out procedure.
Close manual valve compressed air for
anti-frost after the blow-out procedure
has ended.
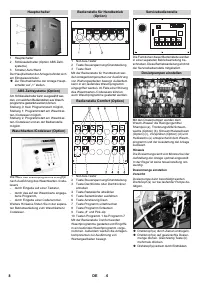
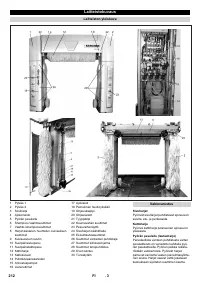
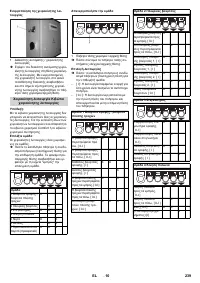
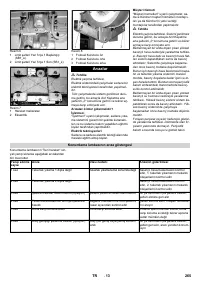
Driving in the vehicle
Positioning ramp
After the positioning
Start program
at the wash card/code reader (option)
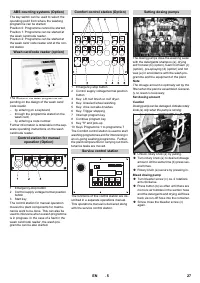
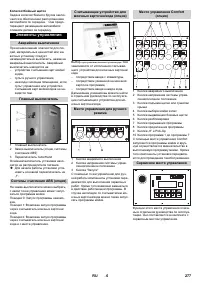
Using Comfort control station (Option)
Using control station for manual opera-
tion (Option)
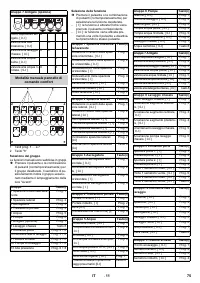
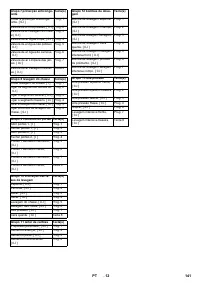
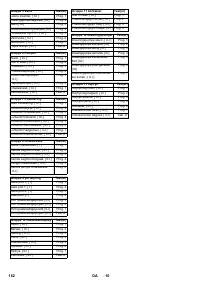
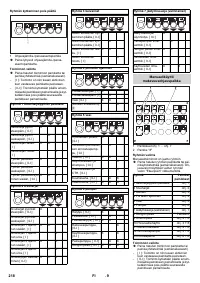
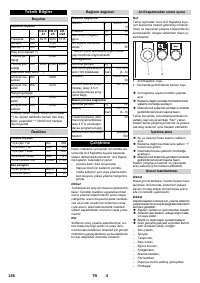
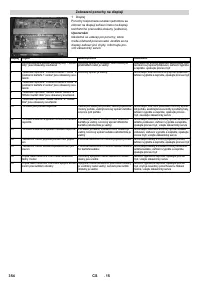
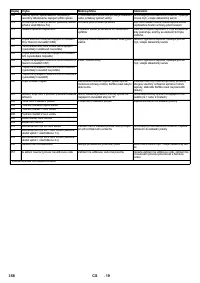
Program
1
X
2
X
3
X
X
4
X
5
X
X
6
X
X
7
X
X
X
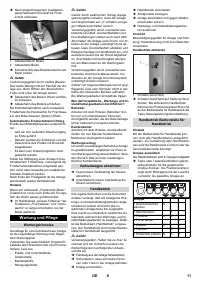
Manual intervention
Using Comfort control station (Option)
Using control station for manual opera-
tion (Option)
Program end
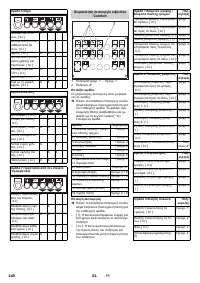
Door control (option)
Summer door control
Winter door control
Shutting down
Brief shutting down
Decommissioning for longer
periods
Shutting down through anti-freeze
device (option)
Manual anti-frost device
29
EN


