Пилы торцовочные Bosch GTM 12 JL - инструкция пользователя по применению, эксплуатации и установке на русском языке. Мы надеемся, она поможет вам решить возникшие у вас вопросы при эксплуатации техники.
Если остались вопросы, задайте их в комментариях после инструкции.
"Загружаем инструкцию", означает, что нужно подождать пока файл загрузится и можно будет его читать онлайн. Некоторые инструкции очень большие и время их появления зависит от вашей скорости интернета.


English |
47
Bosch Power Tools
1 609 92A 1T0 | (28.10.15)
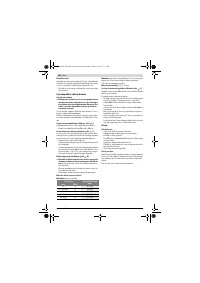
Operation as Table Saw
Before any work on the machine itself, pull the mains
plug.
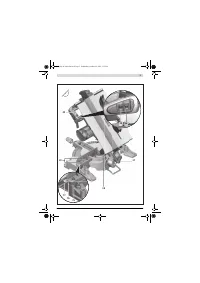
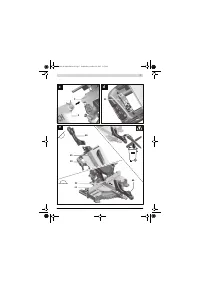
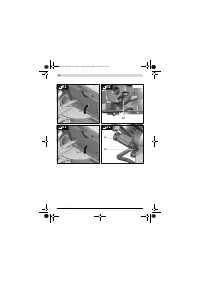
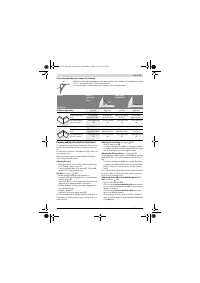
Working Position (see figure
A)
If the power tool was used as a chop and mitre saw, then the fol-
lowing steps must be carried out before using as a table saw:
– Bring the power tool into the chop and mitre saw working
position. (see “Working Position”, page 42)
–
Loosen
locking screw
44
.
– Pull the adjustable fence
31
completely outward.
– Retighten the locking screw
44
.
– Pull the lower saw blade cover
66
out of the groove of the
parallel guide
61
.
– Insert the lower saw blade cover
66
into the saw table
22
.
During operation as a table saw, the lower saw blade cover
66
must cover the bottom part of the saw blade.
– Set the vertical bevel angle to 0 ° and tighten the lock lever
37
.
– Press release button
17
and slowly guide the tool arm by
handle
18
downward until the transport safety-lock
38
can
be pushed completely inward.
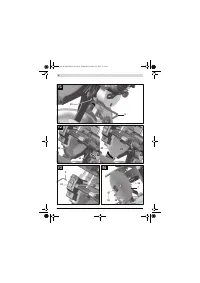
Preparing for Operation
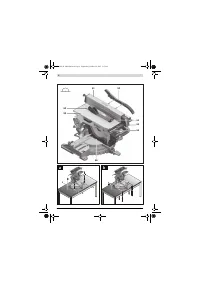
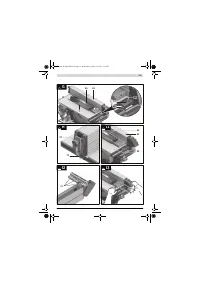
Adjusting the Saw Blade Height (see figure
B)
For safe operation, the correct working position of the saw
blade
7
to the workpiece must be adjusted. The
maximum
workpiece height
is 51 mm.
– Loosen both clamping levers
68
below the saw table
59
.
– Tilt the protection guard
63
toward the rear to the stop and
position your workpiece next to the saw blade.
– Push the saw table down or pull it upward until the upper
saw teeth of the saw blade project approx. 1 mm above the
workpiece surface.
– Hold the saw table in this position and retighten the clamp-
ing levers again.
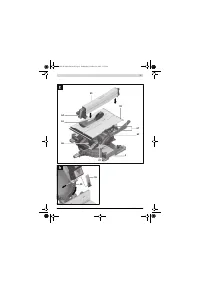
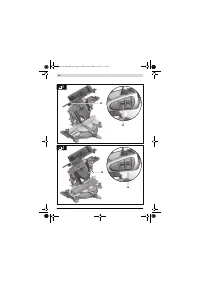
Adjusting the Parallel Guide (see figure
C)
The parallel guide
61
can be positioned to the right of the saw
blade. The clearance indicator
69
indicates the clearance of
the parallel guide to the saw blade on the scale
65
.
– Loosen the clamping knob
64
.
This relieves the guide
71
at the rear of the parallel guide.
– Firstly, insert the parallel guide into the rear guide groove
of the saw table.
– Then position the parallel guide into the front guide groove
of the saw table.
The parallel guide can be moved variably now.
– Move the parallel guide until the clearance indicator
69
in-
dicates the requested clearance to the saw blade.
– To lock the parallel guide, push the clamping knob
64
downward again.
Make sure that the parallel guide is always parallel to
the saw blade or that the sawblade/parallel guide clear-
ance increases toward the rear.
Otherwise, danger is giv-
en that the workpiece is jammed between the saw blade
and the parallel guide.
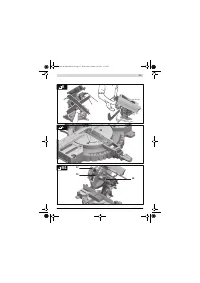
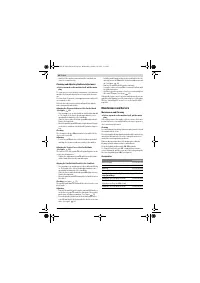
Starting Operation
Switching On (see figure
D)
– For
starting operation
, press the green ON pushbutton
2
(
I
).
Switching Off
– Press the red OFF pushbutton
1
(
O
).
To save energy, only switch the power tool on when using it.
Power Failure
The ON/OFF switch is a so-called non-voltage switch, which
prevents the power tool from restarting after a power failure
(e. g., when the mains plug is pulled during operation).
– To restart the power tool, press the green ON pushbutton
2
again.
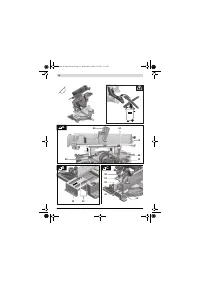
Working Advice
General Sawing Instructions
For all cuts, it must first be ensured that the saw blade
at no time can come in contact with the stops or other
machine parts.
Protect the saw blade against impact and shock. Do not sub-
ject the saw blade to lateral pressure.
Pay attention that the riving knife is in line with the saw blade.
Do not saw warped/bent workpieces. The workpiece must al-
ways have a straight edge to face against the parallel guide.
Always keep/store the push stick with the power tool.
Do not use the power tool for joining, grooving or cutting slots.
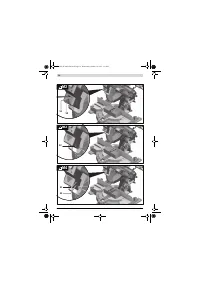
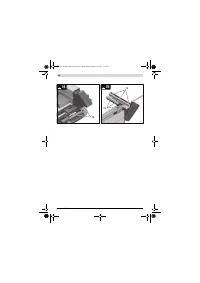
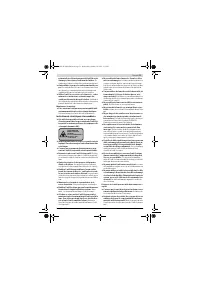
Long workpieces must be underlaid or supported at their free
end. (see figure
E)
Position of the Operator (see figure
F)
Do not stand in a line with the saw blade in front of the
machine. Always stand aside of the saw blade.
This pro-
tects your body against possible kickback.
– Keep hands, fingers and arms away from the rotating saw
blade.
Observe the following instructions:
– Hold the workpiece securely with both hands and press it
firmly against the saw table, expecially when working with-
out the guide.
– When sawing small workpieces, use the hold-down stick
provided.
Sawing
Sawing Straight Cuts
– Adjust the parallel guide
61
to the requested cutting width.
(see “Adjusting the Parallel Guide”, page 47)
– Position the workpiece on the saw table in front of the
blade guard
63
.
– Adjust the correct saw blade height (see “Adjusting the
Saw Blade Height”, page 47)
–
Make sure that the blade guard is positioned properly.
It must always face against the workpiece while sawing.
– Switch on the machine.
– Saw through the workpiece applying uniform feed.
OBJ_BUCH-1688-006.book Page 47 Wednesday, October 28, 2015 3:13 PM
Содержание
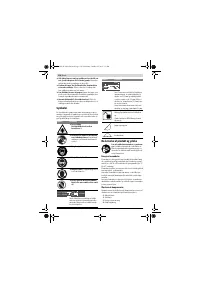
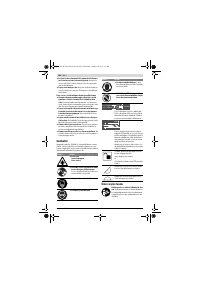
- 275 Безопасность людей
- 276 Не становитесь на электроинструмент.
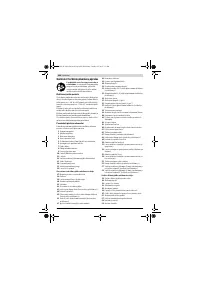
- 277 Всегда распиливайте только одну деталь.; Символы; Применение по назначению; Символ
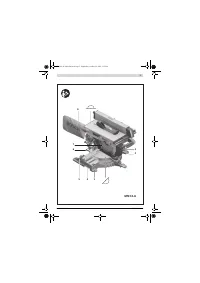
- 278 Изображенные составные части; Части торцовочно-усовочной пилы
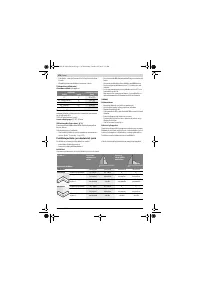
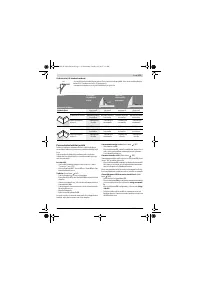
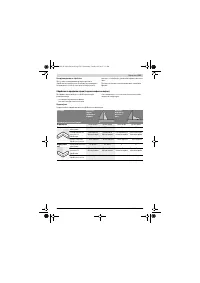
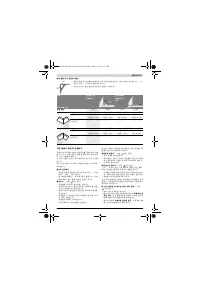
- 279 Продольный упор; Технические данные; Применяйте средства защиты органов слуха!; Монтаж и транспорт; Комплект поставки; Комбинированная пила; Размеры пильных дисков
- 280 Монтаж на верстаке производства Bosch; Отсос пыли и стружки; Избегайте скопления пыли на рабочем месте.; Монтаж отдельных частей
- 281 Демонтаж пильного диска
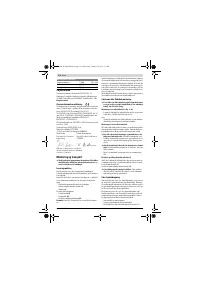
- 282 Подготовка к эксплуатации; Отпустите; Настройка угла распила; Регулировка с помощью шкалы точной настройки
- 283 Включение электроинструмента; Угол распила
- 284 Пиление; Торцование
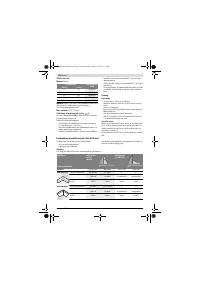
- 285 Основные настройки – контроль и коррекция; Настройки
- 286 Настройка упорной планки
- 287 симальная высота детали; Включения
- 288 Указания по применению; Общие указания для пиления; Выполнение прямых пропилов
- 289 Техобслуживание и сервис; Техобслуживание и очистка; Очистка; Принадлежности; Россия
- 290 Беларусь; Утилизация
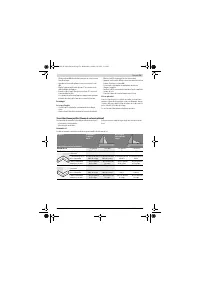
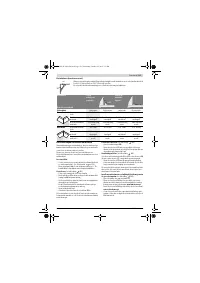
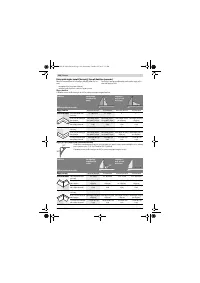
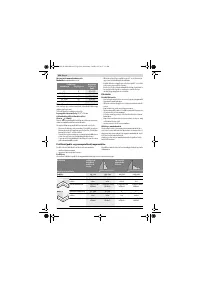
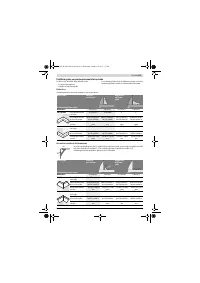
Характеристики

Остались вопросы?Не нашли свой ответ в руководстве или возникли другие проблемы? Задайте свой вопрос в форме ниже с подробным описанием вашей ситуации, чтобы другие люди и специалисты смогли дать на него ответ. Если вы знаете как решить проблему другого человека, пожалуйста, подскажите ему :)


