Пилы торцовочные Bosch GTM 12 JL - инструкция пользователя по применению, эксплуатации и установке на русском языке. Мы надеемся, она поможет вам решить возникшие у вас вопросы при эксплуатации техники.
Если остались вопросы, задайте их в комментариях после инструкции.
"Загружаем инструкцию", означает, что нужно подождать пока файл загрузится и можно будет его читать онлайн. Некоторые инструкции очень большие и время их появления зависит от вашей скорости интернета.


46
| English
1 609 92A 1T0 | (28.10.15)
Bosch Power Tools
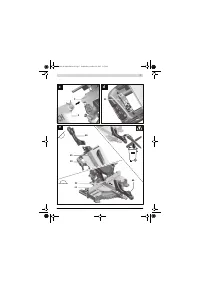
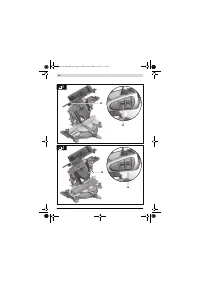
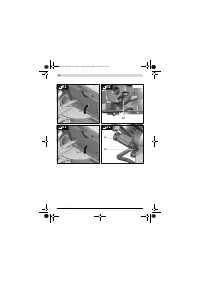
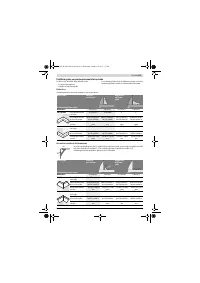
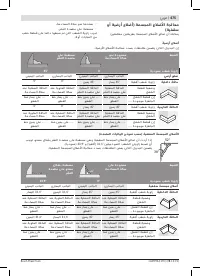
Aligning the Fine Scale (see figure
N)
– Bring the power tool into the chop and mitre saw working
position. (see “Working Position”, page 42)
– Turn the saw table
22
to the 0 ° detent
27
. The lever
26
must be felt to engage in the detent.
Checking:
The 0 ° mark of the fine scale
46
must be in alignment with the
0 ° mark of the scale
23
.
Adjusting:
– Remove the insert plate
24
.
– Loosen the screw
55
with the slotted screwdriver provid-
ed and align the fine scale alongside the 0 ° marks.
– Retighten the screw again.
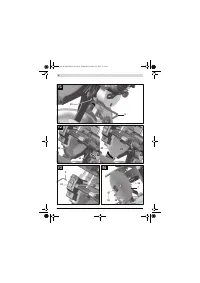
Aligning the Angle Indicator (Vertically)
(see figure
O)
– Bring the power tool into the chop and mitre saw working
position. (see “Working Position”, page 42)
– Turn the saw table
22
to the 0 ° detent
27
. The lever
26
must be felt to engage in the detent.
Checking:
The angle indicator
47
must be in alignment with the 0 ° mark
of the scale
48
.
Adjusting:
– Loosen the screw
56
with the slotted screwdriver provid-
ed and align the angle indicator alongside the 0 ° mark.
– Afterwards, check to ensure that the adjustment made is
correct for the 45 ° mark.
– Retighten the screw again.
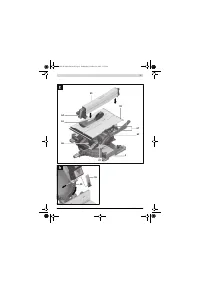
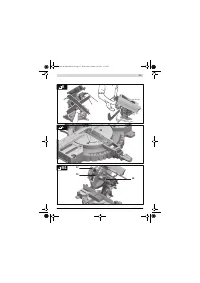
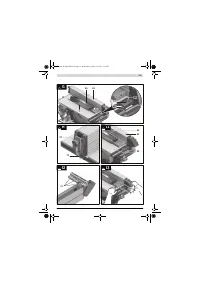
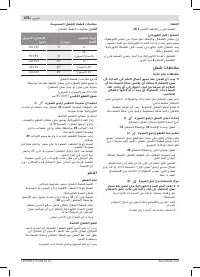
Aligning the Fence
– Bring the power tool into the table saw working position.
(see “Working Position”, page 47)
– Turn the saw table
22
to the 0 ° detent
27
. The lever
26
must be felt to engage in the detent.
Checking:
(see figure
P1)
– Adjust an angle gauge to 90 ° and position it between the
fence
30
and the saw blade
7
on the saw table
22
.
The leg of the angle gauge must be flush with the fence over
the complete length.
Adjusting:
(see figure
P2)
– Loosen all hex socket screws
39
with the hex key
5
provid-
ed.
– Turn the fence
30
until the angle gauge is flush over the
complete length.
– Retighten the screws again.
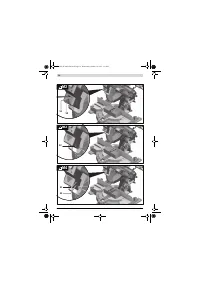
Setting the Standard Bevel Angle 0 ° (Vertical)
– Bring the power tool into the table saw working position.
(see “Working Position”, page 47)
– Turn the saw table
22
to the 0 ° detent
27
. The lever
26
must be felt to engage in the detent.
Checking:
(see figure
Q1)
– Adjust an angle gauge to 90 ° and position it on the saw ta-
ble
22
.
The leg of the angle gauge must be flush with the saw blade
7
over the complete length.
Adjusting:
(see figure
Q2)
– Loosen the nut (size 10 mm) of the Allen screw
57
.
– Screw the Allen screw
57
with a suitable Allen wrench (size
3 mm) in or out until the leg of the angle gauge is flush with
the saw blade over the complete length.
– Retighten the nut again.
In case the angle indicator
47
is not in a line with the 0 ° mark
of the scale
48
after the adjustment, the angle indicator must
be aligned accordingly (see “Aligning the Angle Indicator (Ver-
tically)”, page 46).
Setting the Standard Bevel Angle 45 ° (Vertical)
– Bring the power tool into the table saw working position.
(see “Working Position”, page 47)
– Turn the saw table
22
to the 0 ° detent
27
. The lever
26
must be felt to engage in the detent.
– Loosen the lock lever
37
and tilt the tool arm leftward to
the stop (45 °) by the handle
18
.
Checking:
(see figure
R1)
– Adjust an angle gauge to 45 ° and position it on the saw ta-
ble
22
.
The leg of the angle gauge must be flush with the saw blade
7
over the complete length.
Adjusting:
(see figure
R2)
– Loosen the nut (size 10 mm) of the Allen screw
58
.
– Screw the Allen screw
58
with a suitable Allen wrench (size
3 mm) in or out until the leg of the angle gauge is flush with
the saw blade over the complete length.
– Retighten the nut again.
In case the angle indicator
47
is not in a line with the 45 ° mark
of the scale
48
, firstly check the 0 ° setting for the bevel angle
and the angle indicator again. Then repeat the adjustment of
the 45 ° bevel angle.
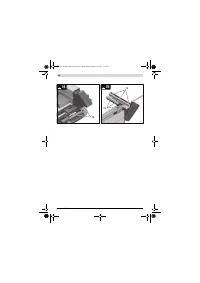
Setting the Standard Bevel Angle 33.9 ° (Vertical)
– Bring the power tool into the table saw working position.
(see “Working Position”, page 47)
– Turn the saw table
22
to the 0 ° detent
27
. The lever
26
must be felt to engage in the detent.
– Loosen the lock lever
37
.
– Push the stop bolt
33
completely inside and swivel the tool
arm until the bolt faces against the stop screw
32
.
Checking:
(see figure
S1)
– Adjust an angle gauge to 33.9 ° and position it on the saw
table
22
.
The leg of the angle gauge must be flush with the saw blade
7
over the complete length.
Adjusting:
(see figure
S2)
– Loosen the nut (size 10 mm) of the stop screw
32
.
– Screw the stop screw with a suitable spanner (size 10 mm)
in or out until the leg of the angle gauge is flush with the saw
blade over the complete length.
– Retighten the nut again.
OBJ_BUCH-1688-006.book Page 46 Wednesday, October 28, 2015 3:13 PM
Содержание
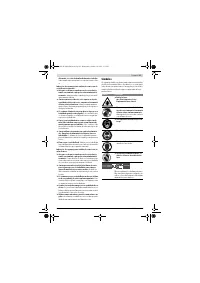
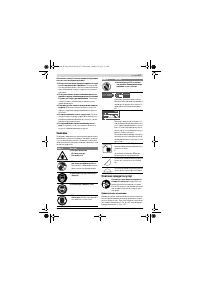
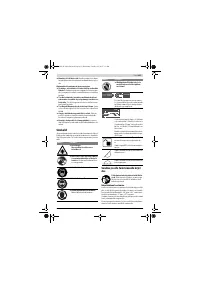
- 275 Безопасность людей
- 276 Не становитесь на электроинструмент.
- 277 Всегда распиливайте только одну деталь.; Символы; Применение по назначению; Символ
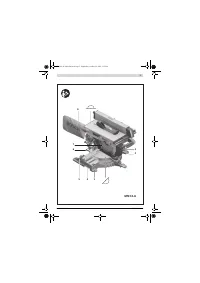
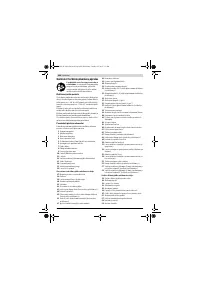
- 278 Изображенные составные части; Части торцовочно-усовочной пилы
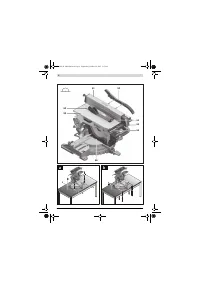
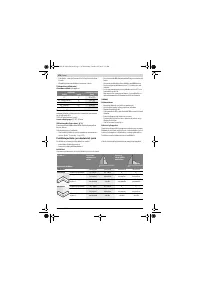
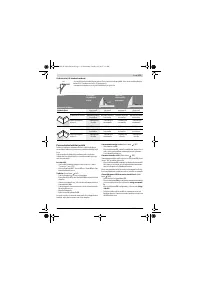
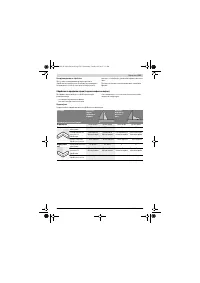
- 279 Продольный упор; Технические данные; Применяйте средства защиты органов слуха!; Монтаж и транспорт; Комплект поставки; Комбинированная пила; Размеры пильных дисков
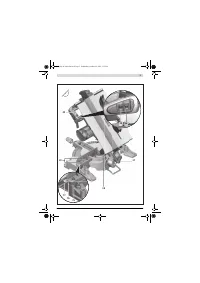
- 280 Монтаж на верстаке производства Bosch; Отсос пыли и стружки; Избегайте скопления пыли на рабочем месте.; Монтаж отдельных частей
- 281 Демонтаж пильного диска
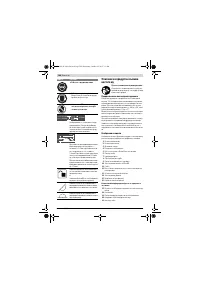
- 282 Подготовка к эксплуатации; Отпустите; Настройка угла распила; Регулировка с помощью шкалы точной настройки
- 283 Включение электроинструмента; Угол распила
- 284 Пиление; Торцование
- 285 Основные настройки – контроль и коррекция; Настройки
- 286 Настройка упорной планки
- 287 симальная высота детали; Включения
- 288 Указания по применению; Общие указания для пиления; Выполнение прямых пропилов
- 289 Техобслуживание и сервис; Техобслуживание и очистка; Очистка; Принадлежности; Россия
- 290 Беларусь; Утилизация
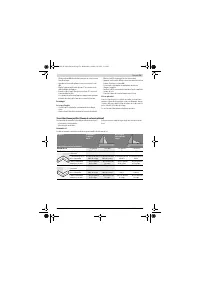
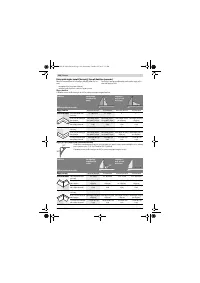
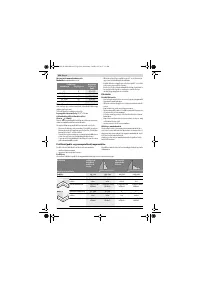
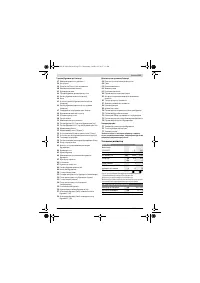
Характеристики

Остались вопросы?Не нашли свой ответ в руководстве или возникли другие проблемы? Задайте свой вопрос в форме ниже с подробным описанием вашей ситуации, чтобы другие люди и специалисты смогли дать на него ответ. Если вы знаете как решить проблему другого человека, пожалуйста, подскажите ему :)


