Электропилы Bosch PTS 10 - инструкция пользователя по применению, эксплуатации и установке на русском языке. Мы надеемся, она поможет вам решить возникшие у вас вопросы при эксплуатации техники.
Если остались вопросы, задайте их в комментариях после инструкции.
"Загружаем инструкцию", означает, что нужно подождать пока файл загрузится и можно будет его читать онлайн. Некоторые инструкции очень большие и время их появления зависит от вашей скорости интернета.


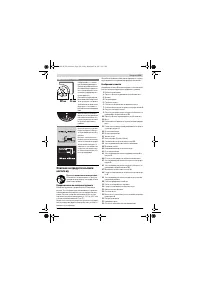


32
| English
1 609 92A 039 | (28.9.12)
Bosch Power Tools
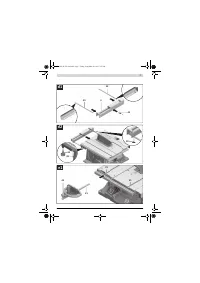
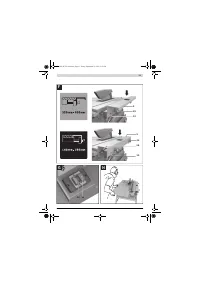
– Insert both guide rods (rod end with threaded hole ahead)
to the stop into the appropriate holes on the table exten-
sion
2
.
– Screw the rubber buffer
40
onto the table extension.
– Fasten the guide rods to the extension bar by inserting the
clips into the threaded holes.
– Afterwards, insert the table extension via both guide rods
into the intended fixtures under the saw table.
– Screw the securing screws against pulling out, into the
threads intended for this purpose.
– Screw the fastening knobs
23
into the threads intended for
this purpose under the saw table.
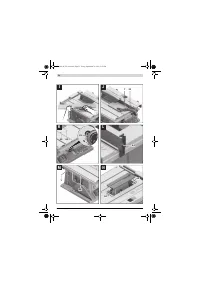
Mounting the Angle Stop (see figures e1
–
e2)
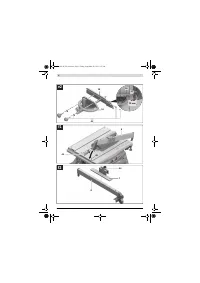
– Insert the guide rail
41
of the angle stop
16
into one of the
guide grooves
21
of the saw table intended for this pur-
pose.
Note:
In the lefthand guide groove, the position of the angle
stop can be affixed on the sliding table by screwing in the lock-
ing knob
42
.
– Mount the auxiliary stop
18
to the angle stop with the sup-
plied fastening kit
43
.
Note:
Take care that the auxiliary stop rests completely on the
saw table.
The clearance between saw blade and auxiliary stop
18
must
not exceed 15 mm (max.).
Mounting the Parallel Guide (see figures f1
–
f2)
The parallel guide
8
can be positioned either left or right from
the saw blade.
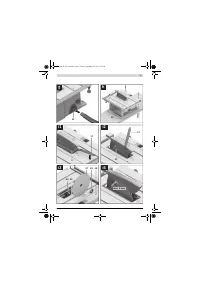
– Screw the clamping knob
44
into the thread intended for
this purpose at the front of the parallel fence.
– Firstly, place the parallel fence onto the rear of the saw ta-
ble. Now, position the parallel fence in guide groove
45
.
The parallel fence can now be moved to any position.
– To lock the parallel guide, press the clamping handle
44
down.
When sawing narrow workpieces and bevel angles
, the
auxiliary stop
7
must be mounted to the parallel guide
8
.
– Open clamping lever
46
.
– Insert auxiliary stop
7
onto parallel guide
8
.
– To lock the position, press clamping lever
46
downward.
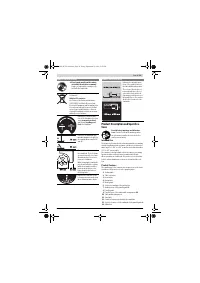
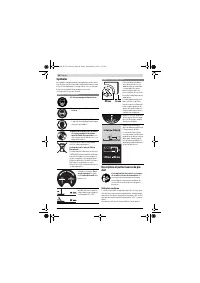
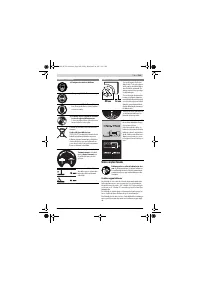
Dust/Chip Extraction
Dusts from materials such as lead-containing coatings, some
wood types, minerals and metal can be harmful to one’s
health. Touching or breathing-in the dusts can cause allergic
reactions and/or lead to respiratory infections of the user or
bystanders.
Certain dusts, such as oak or beech dust, are considered as
carcinogenic, especially in connection with wood-treatment
additives (chromate, wood preservative). Materials contain-
ing asbestos may only be worked by specialists.
– Always use dust extraction.
– Provide for good ventilation of the working place.
– It is recommended to wear a P2 filter-class respirator.
Observe the relevant regulations in your country for the mate-
rials to be worked.
Prevent dust accumulation at the workplace.
Dusts can
easily ignite.
The dust/chip extraction can be blocked by dust, chips or
workpiece fragments.
– Switch the machine off and pull the mains plug from the
socket outlet.
– Wait until the saw blade has come to a complete stop.
– Determine the cause of the blockage and correct it.
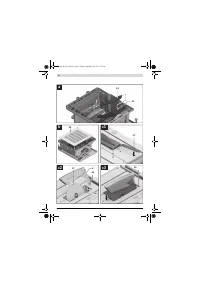
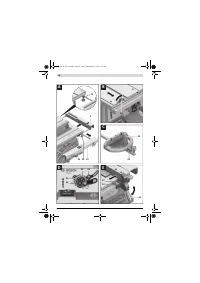
Cleaning the Lower Saw Blade Cover
For removal of workpiece fragments and large chips, the low-
er saw blade cover must be vacuum cleaned regularly.
– Using the ring spanner
17
, lift up the insert plate
3
at the
front and remove it from the notches
36
.
– Turn crank
12
in anticlockwise direction until the teeth of
the saw blade
37
are positioned below the saw table
11
.
– Vacuum clean the lower saw blade cover with a suitable
vacuum cleaner.
– Finally, reassemble the insert plate
3
.
For this, hook the insert plate into the notches
36
and then
press the insert plate downward until it engages in the saw
table.
External Dust Extraction (see figure g)
– Connect a vacuum hose to the sawdust ejector
31
.
The vacuum cleaner must be suitable for the material being
worked.
When vacuuming dry dust that is especially detrimental to
health or carcinogenic, use a special vacuum cleaner.
Stationary or Flexible Mounting
To ensure safe handling, the machine must be mounted
on a level and stable surface (e. g., workbench) prior to
using.
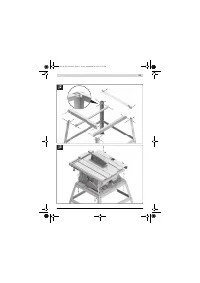
Mounting without Base Unit (see figure h)
– Fasten the power tool with suitable screw fasteners to the
working surface. The mounting holes 20 serve for this pur-
pose.
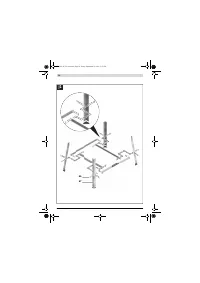
Mounting with Base Unit
(see figures j1
–
j3 from page 14 on)
For mounting, use the base-unit fastening kit 66. (24 screws
with nuts for assembly, 4 screws with nuts for fastening of the
machine, 4 washers)
– Screw the base unit
67
together. Tighten the screws firm-
ly.
– Fasten the power tool to the supporting surface of the base
unit. For this, use the mounting holes
20
of the power tool
as well as the slots in the base unit.
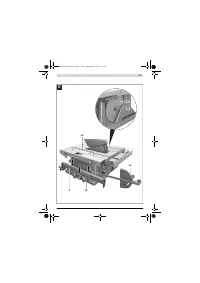
Changing the Saw Blade (see figures i1
–
i4)
Before any work on the machine itself, pull the mains
plug.
When mounting the saw blade, wear protective gloves.
Danger of injury when touching the saw blade.
Use only saw blades whose maximum permitted speed is
higher than the no-load speed of the power tool.
OBJ_BUCH-783-006.book Page 32 Friday, September 28, 2012 2:27 PM
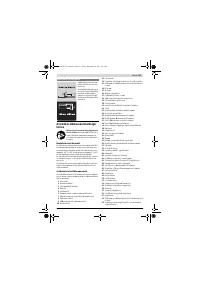
Содержание
- 202 Применение электроинструмента и обращение с ним
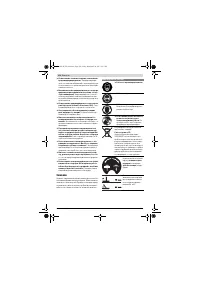
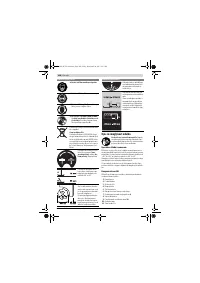
- 203 Символы; Символы и их значение
- 204 Описание продукта и услуг; Применение по назначению
- 205 Технические данные; Применяйте средства защиты органов слуха!; Заявление о соответствии; Сборка; Комплект поставки; В исполнениях электроинструмента с подставкой; Размеры пильных дисков
- 206 Первое включение; Последовательность монтажа; Монтаж снизу
- 207 Отсос пыли и стружки; Избегайте скопления пыли на рабочем месте.; Стационарный или временный монтаж
- 208 Работа с инструментом; Увеличение площади стола
- 209 Настройка параллельных упоров
- 210 Максимальные размеры заготовки; Пиление; Выполнение прямых пропилов; Основные настройки – контроль и коррекция; Настройка угла наклона в 0 °
- 211 Хранение электроинструмента; Техобслуживание и сервис; Техобслуживание и очистка; Очистка; Принадлежности; Товарный No
- 212 Россия; Утилизация


