Видеокамеры Sony DCR-PC110E - инструкция пользователя по применению, эксплуатации и установке на русском языке. Мы надеемся, она поможет вам решить возникшие у вас вопросы при эксплуатации техники.
Если остались вопросы, задайте их в комментариях после инструкции.
"Загружаем инструкцию", означает, что нужно подождать пока файл загрузится и можно будет его читать онлайн. Некоторые инструкции очень большие и время их появления зависит от вашей скорости интернета.


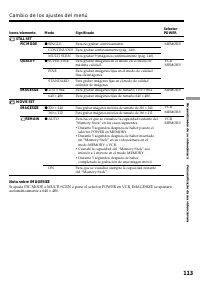

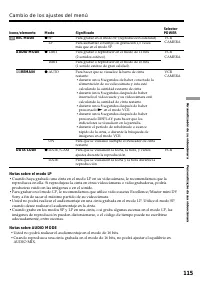
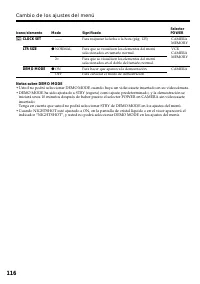
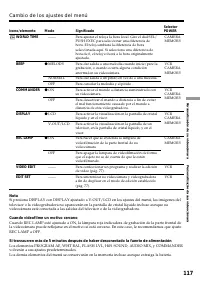


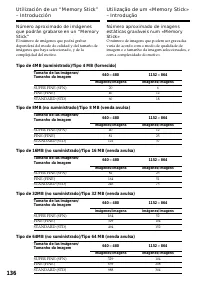
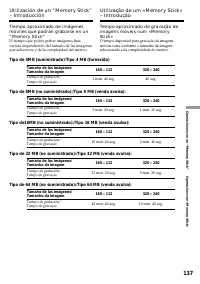


198
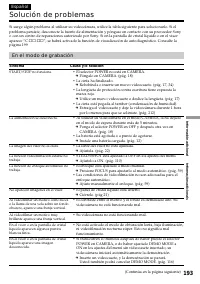
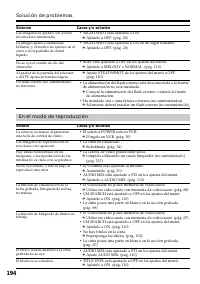
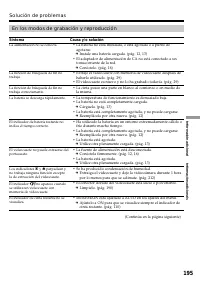
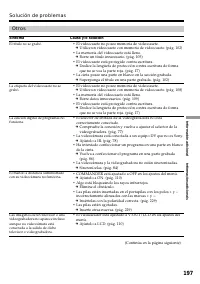
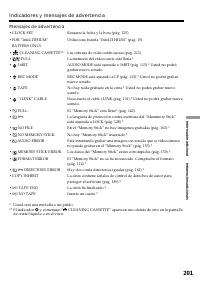
Síntoma
Causa y/o solución
• Se ha producido condensación de humedad.
c
Extraiga el videocasete y deje la videocámara durante 1 hora
por lo menos para que se aclimate. (pág. 212)
• En su videocámara se ha producido algún problema.
c
Extraiga el videocasete, vuelva a insertarlo, y utilice de nuevo
su videocámara.
• La carga ha finalizado. (pág. 13)
• La batería no está apropiadamente instalada.
c
Instálela adecuadamente.
• La batería está averiada.
c
Póngase en contacto con su proveedor Sony o con un centro
de reparaciones autorizado por Sony.
• El selector POWER no está ajustado a OFF (CHG).
c
Póngalo en OFF (CHG).
• La batería no está apropiadamente instalada.
c
Instálela adecuadamente.
• La batería está averiada.
c
Póngase en contacto con su proveedor Sony o con un centro
de reparaciones autorizado por Sony.
• Vuelva a cargar completamente la batería de forma que la
indicación de batería restante sea correcta.
• Desconecte el cable de alimentación del adaptador de
alimentación de CA o extraiga la batería, y vuelva a conectarlos
después de aproximadamente 1 minuto. Conecte la
alimentación. Si las funciones no trabajan, abra el panel de
cristal líquido y presione el botón RESET situado al lado del
altavoz utilizando un objeto puntiagudo. (Si presiona el botón
RESET, todos los ajustes, incluyendo la fecha y la hora,
volverán a sus valores predeterminados.) (pág. 224)
• Su videocámara no está funcionando mal.
La melodía o el pitido suena
durante 5 segundos.
Solución de problemas
Al poner el selector POWER en VCR
u OFF (CHG), si mueve la
videocámara, puede oír ruido de
estrépito del interior de la misma.
Al cargar la batería, no parpadea la
lámpara CHARGE.
La alimentación se desconecta
aunque el indicador de batería
restante señala que la batería posee
energía suficiente como para
funcionar.
Aunque la alimentación está
conectada, no trabaja ninguna
función.
No es posible cargar la batría.
Durante la carga de la batería
parpadea la lámpara CHARGE.
Содержание
- 2 English; camcorder. With your Digital; WARNING; or; For the customers in Germany; Русский; ПРЕДУПРЕЖДЕНИЕ
- 4 Оглавление
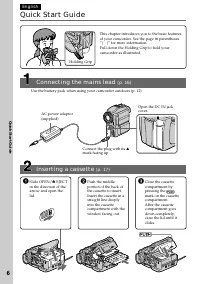
- 8 Руководство по быстрому запуску; Подсоединение провода электропитания; был; Установка кассеты; EJECT в
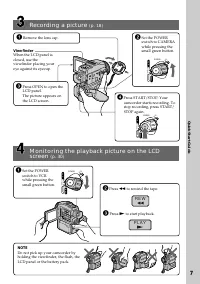
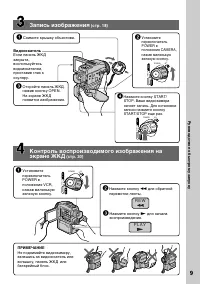
- 9 Запись изображения; ПРИМЕЧАНИЕ
- 10 — Getting started —; Using this manual; Note on Cassette Memory; — Подготовка к эксплуатации —; Примечание о кассетной памяти
- 11 • Do not let your camcorder get wet. Keep your
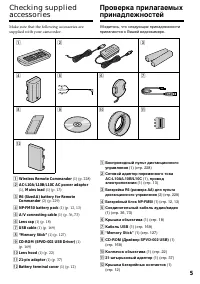
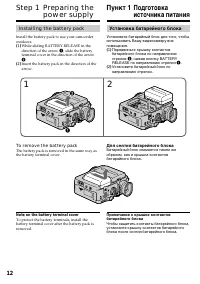
- 12 Installing the battery pack; terminal cover in the direction of the arrow; To remove the battery pack; Note on the battery terminal cover; Пункт 1 Подготовка; Установка батарейного блока; , нажав кнопку BATTERY; Для снятия батарейного блока
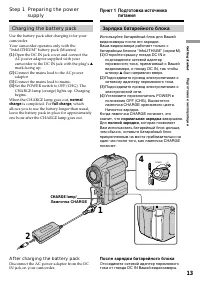
- 13 Charging the battery pack; Connect the mains lead to mains.; normal; After charging the battery pack; Step 1 Preparing the power; Лампочка CHARGE; Пункт 1 Подготовка источника; был направлен вверх.; нормальная зарядка; Для; полной зарядки; После зарядки батарейного блока
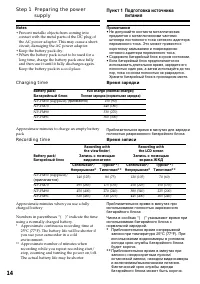
- 14 Notes; • Prevent metallic objects from coming into; Charging time; Recording with; • Не допускайте контакта металлических; Время зарядки; )” указывают время при
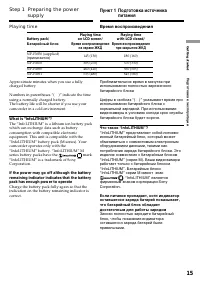
- 15 What is ”InfoLITHIUM”?; Playing time; Время воспроизведения; Что такое “InfoLITHIUM”?; . “InfoLITHIUM” является
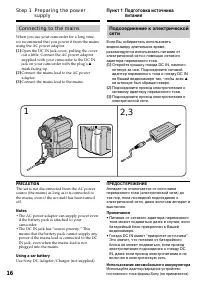
- 16 Connecting to the mains; Connect the mains lead to the mains.; PRECAUTION; • The AC power adaptor can supply power even; Using a car battery; на штекере был обращен вверх.; ПРЕДОСТЕРЕЖЕНИЕ; • Питание от сетевого адаптера переменного; Использование автомобильного аккумулятора
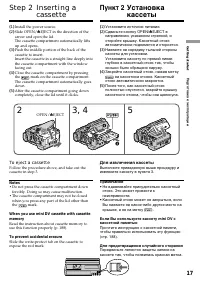
- 17 To eject a cassette; Step 2 Inserting a; Пункт 2 Установка; Для извлечения кассеты; Примечания
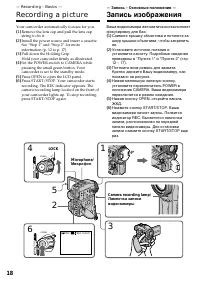
- 18 — Recording – Basics —; Your camcorder automatically focuses for you.
- 19 recording; Note on Recording mode; in the LP mode on one tape.; Recording date and time; • Плотно пристегните ремень для захвата; Примечание по режиму записи; – При замене батарейного блока установите; Дата и время записи
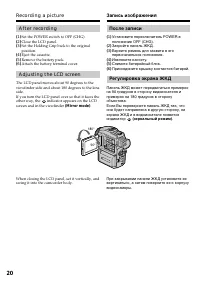
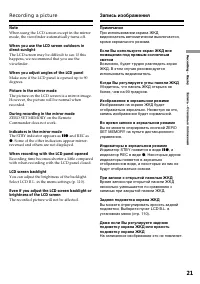
- 20 After recording; Remove the battery pack.; Adjusting the LCD screen; indicator appears on the LCD; Снимите батарейный блок.; Регулировка экрана ЖКД
- 21 The STBY indicator appears as; Индикатор STBY появится в виде
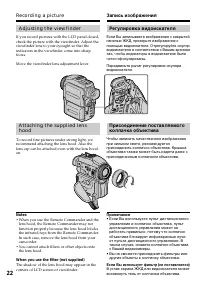
- 22 Adjusting the viewfinder; Move the viewfinder lens adjustment lever.; • When you use the Remote Commander and the; • Если Вы используете пульт дистанционного; Если Вы использует фильтр (не поставляется)
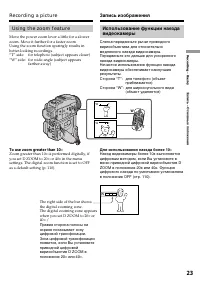
- 23 Using the zoom feature; To use zoom greater than 10; Zoom greater than 10; Сторона “W”: для широкоугольного вида; Для использования наезда более 10
- 24 • Цифровой вариообъектив начинает
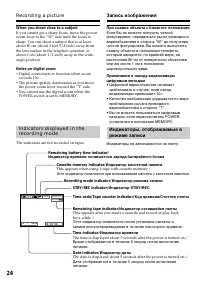
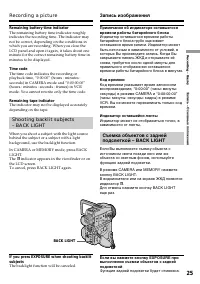
- 25 BACK LIGHT; Remaining battery time indicator; indicator appears in the viewfinder or on; Код времени; Функция задней подсветки будет отменена.
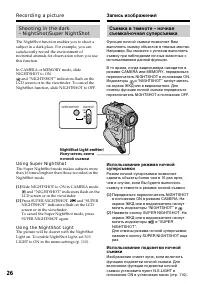
- 26 NightShot Light emitter/; и “NIGHTSHOT” начнут мигать
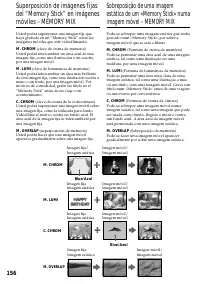
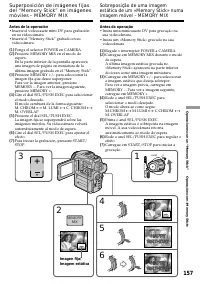
- 27 • Не используйте функцию ночной съемки в; В режиме MEMORY
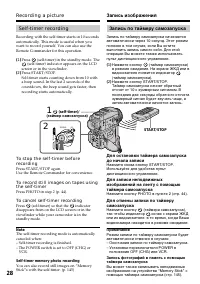
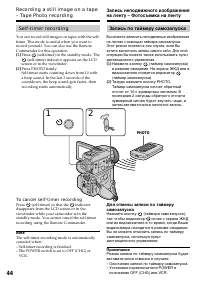
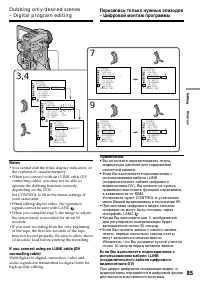
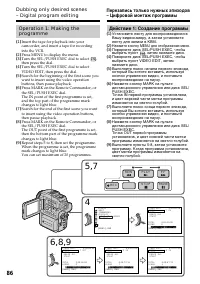
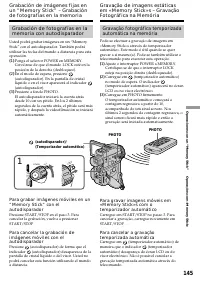
- 28 To cancel self-timer recording; Note; Нажмите кнопку; Примечание
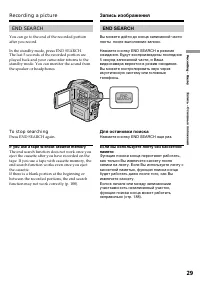
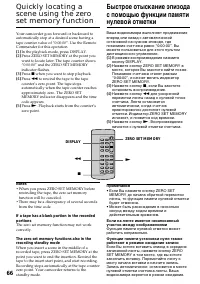
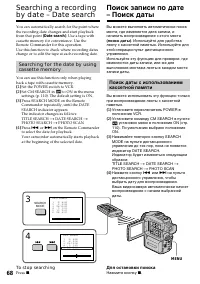
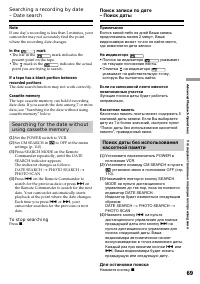
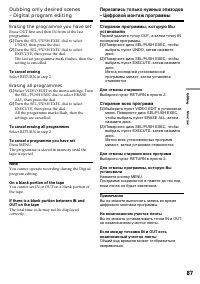
- 29 END SEARCH; To stop searching; Press END SEARCH again.; If you use a tape without cassette memory; Для остановки поиска; Нажмите кнопку END SEARCH еще раз.
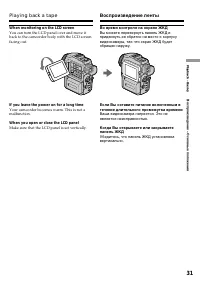
- 30 — Playback – Basics —; Playing back a tape; Open the LCD panel while pressing OPEN.; To stop playback; Воспроизведение ленты; Для остановки воспроизведения
- 31 When monitoring on the LCD screen; Make sure that the LCD panel is set vertically.; Во время контроля на экране ЖКД
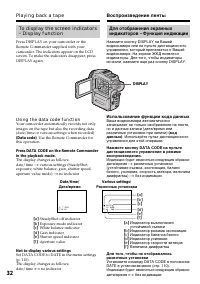
- 32 Using the data code function; Not to display various settings; Использование функции кода данных; Различные установки
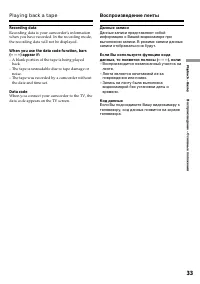
- 33 Recording data; – A blank portion of the tape is being played; Data code; Данные записи; – Воспроизводится незаписанный участок на; Код данных
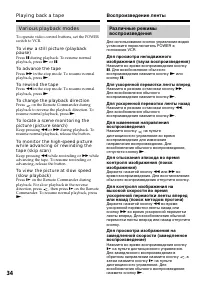
- 34 Various playback modes; To advance the tape; Для ускоренной перемотки ленты вперед
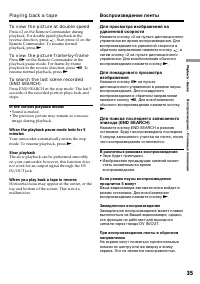
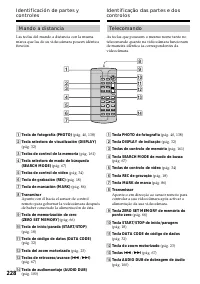
- 35 To view the picture at double speed; In the various playback modes; В различных режимах воспроизведения
- 36 Передача сигнала
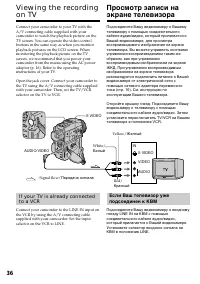
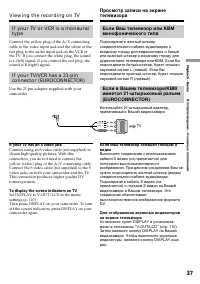
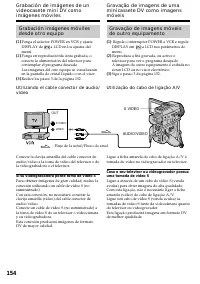
- 37 Viewing the recording on TV; If your TV has an S video jack; TV
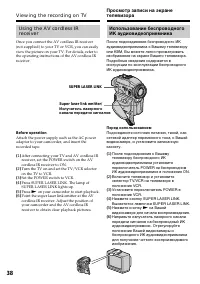
- 38 Before operation; Set the POWER switch to VCR.; SUPER LASER LINK; Перед использованием; Super laser link emitter/
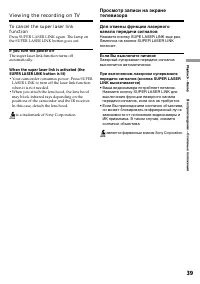
- 39 If you turn the power off; • Your camcorder consumes power. Press SUPER; Если Вы выключите питание; • Ваша видеокамера потребляет питание.
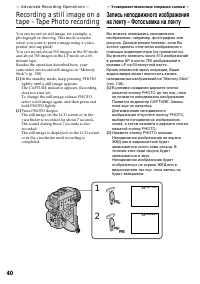
- 40 — Advanced Recording Operations —; — Усовершенствованные операции съемки —
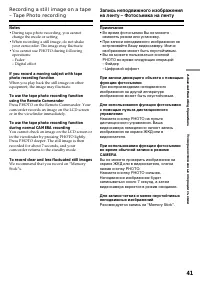
- 41 • During tape photo recording, you cannot; To record clear and less fluctuated still images; • Во время фотосъемки Вы не можете
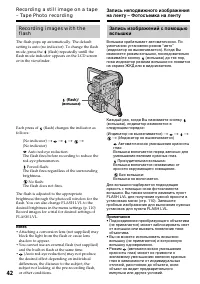
- 42 The flash does not fires.; • Attaching a conversion lens (not supplied) may
- 43 When you record images with the flash; • Действие вспышки может быть затруднено,
- 44 Запись по таймеру самозапуска
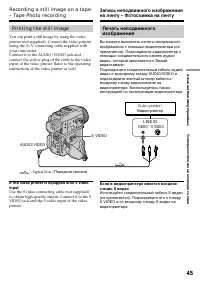
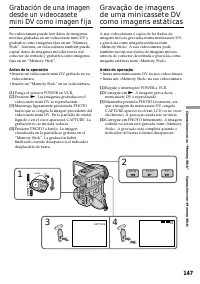
- 45 S VIDEO; Printing the still image
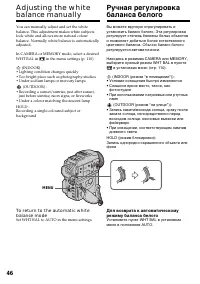
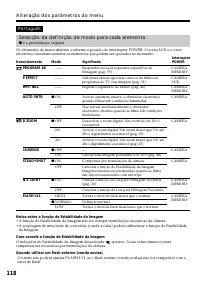
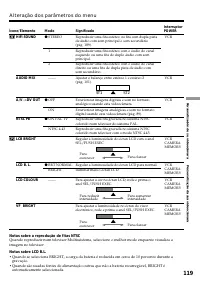
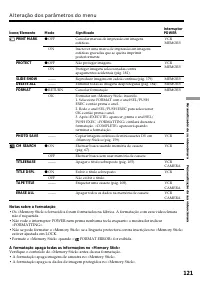
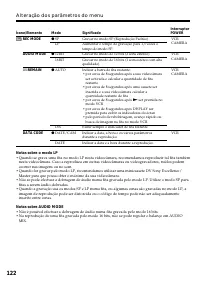
- 46 MENU
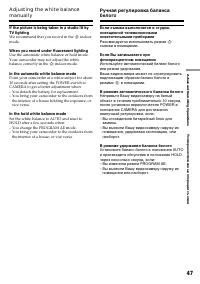
- 47 We recommend that you record in the; When you record under fluorescent lighting; Рекомендуется использовать режим; В режиме автоматического баланса белого; – Вы вынесли Вашу видеокамеру наружу из; В режиме удержания баланса белого; помещения или наоборот.
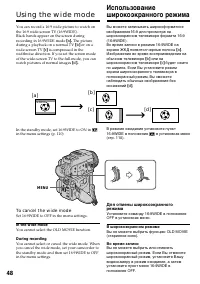
- 48 To cancel the wide mode; In the wide mode; Using the wide mode; или на; В широкоэкранном режиме
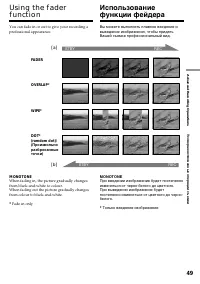
- 49 Fade in only; FADER; MONOTONE; Только введение изображения
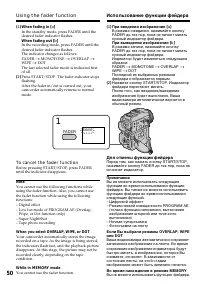
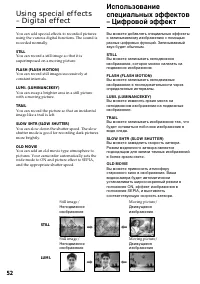
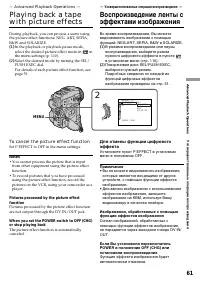
- 50 Using the fader function; To cancel the fader function; You cannot use the fader function.; Использование функции фейдера; При введении изображения; Для отмены функции фейдера; Вы не можете использовать функцию фейдера.
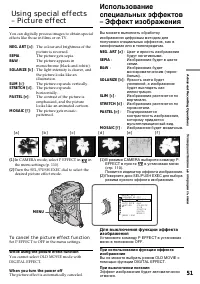
- 51 To cancel the picture effect function; While using the picture effect function; : Цвет и яркость изображения; SEPIA; : Яркость света будет; При выключении питания
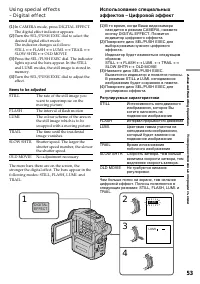
- 53 Items to be adjusted
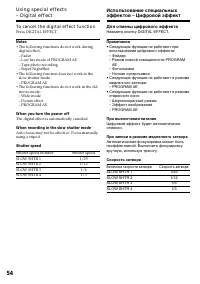
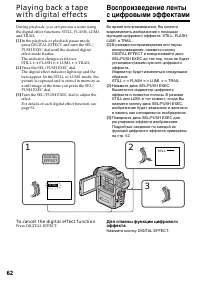
- 54 To cancel the digital effect function; Для отмены цифрового эффекта
- 55 Spotlight mode
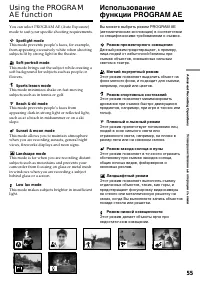
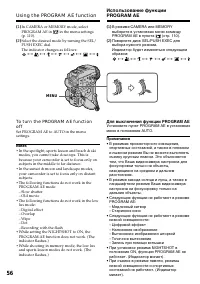
- 56 Using the PROGRAM AE function; Для выключения функции PROGRAM AE
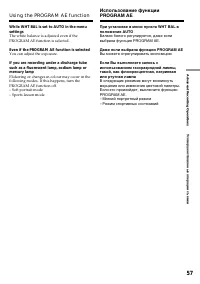
- 57 Even if the PROGRAM AE function is selected; You can adjust the exposure.; Даже если выбрана функция PROGRAM AE; Вы можете отрегулировать экспозицию.
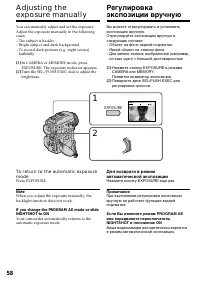
- 58 faithfully; EXPOSURE
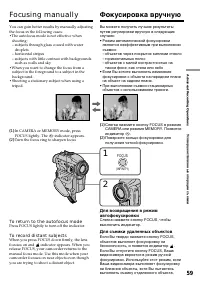
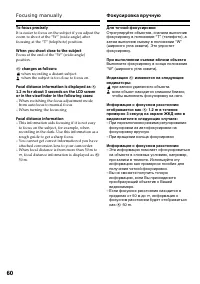
- 59 To return to the autofocus mode; Focusing manually; FOCUS; Фокусировка вручную; таком фоне, как стена или небо; Для съемки удаленных объектов
- 60 To focus precisely; Для точной фокусировки
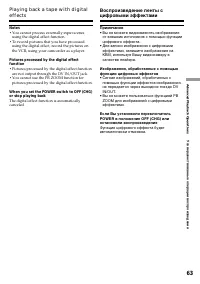
- 61 in; Set P EFFECT to OFF in the menu settings.; • You cannot process the picture that is input; — Advanced Playback Operations —; — Усовершенствованные операции воспроизведения —; • Вы не можете видоизменять изображения,
- 62 Press DIGITAL EFFECT.; FLASH
- 63 • Вы не можете видоизменять изображения
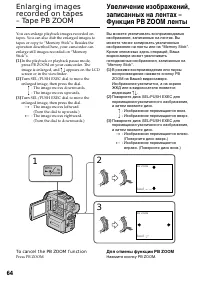
- 64 To cancel the PB ZOOM function; : Изображение перемещается; Для отмены функции PB ZOOM; Нажмите кнопку PB ZOOM.
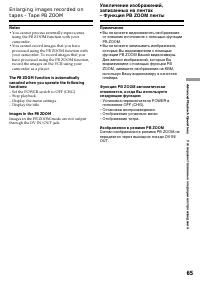
- 65 • You cannot process externally input scenes; Images in the PB ZOOM; Изображения в режиме PB ZOOM
- 67 На индикаторе
- 71 In the
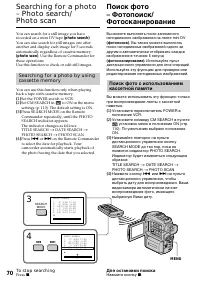
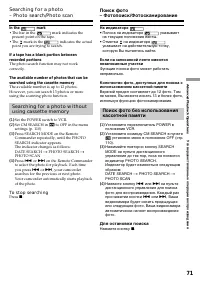
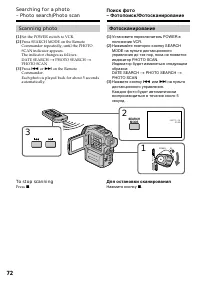
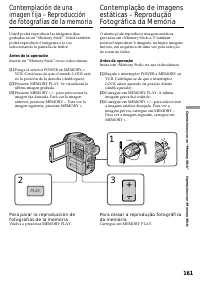
- 72 Scanning photo; To stop scanning; Фотосканирование; Для остановки сканирования
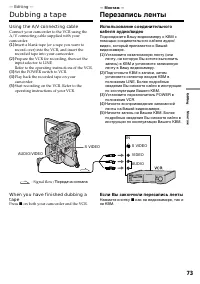
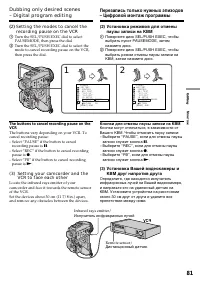
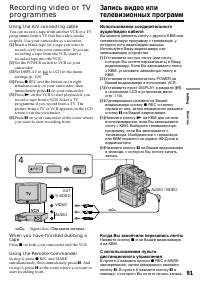
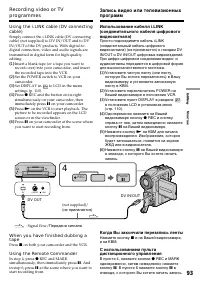
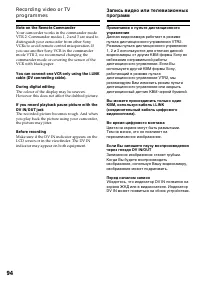
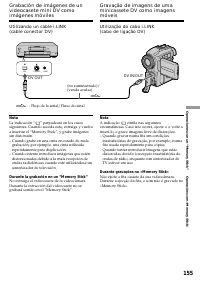
- 73 Using the A/V connecting cable; Dubbing a tape; — Монтаж —; Перезапись ленты; Если Вы закончили перезапись ленты
- 74 mini; If your VCR is a monaural type; До начала перезаписи; управления; Если Ваш КВМ монофонического типа
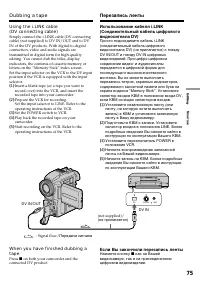
- 75 DV IN
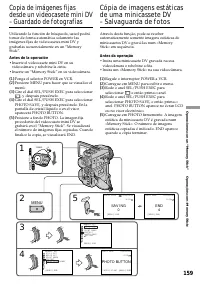
- 76 See page 191 for more information about i.LINK.
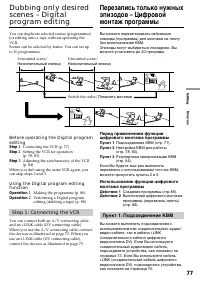
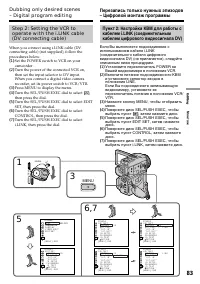
- 77 Step; Step 1: Connecting the VCR; Пункт 1; Пункт 1: Подсоединение КВМ; Нежелательный эпизод
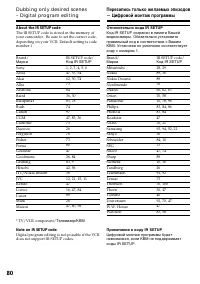
- 80 About the IR SETUP code; Марка; Note on IR SETUP code
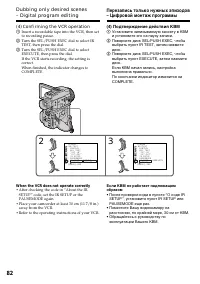
- 81 VCR to face each other; паузы записи на КВМ; Кнопки для отмены паузы записи на КВМ; КВМ друг напротив друга
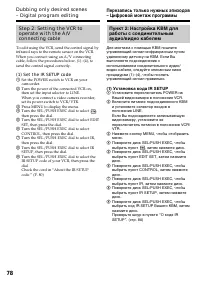
- 82 When the VCR does not operate correctly; • After checking the code in “About the IR
- 83 Press MENU to display the menu.
- 84 Turn the SEL/PUSH EXEC dial to select
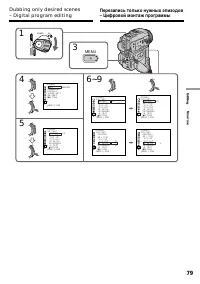
- 85 • Вы не можете перезаписывать титры,
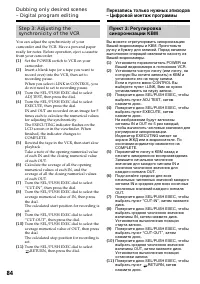
- 86 Действие 1: Создание программы; Нажмите кнопку MENU для отображения меню.
- 87 Erasing the programme you have set; To cancel erasing; Erasing all programmes; To cancel erasing all programmes; Select RETURN in step 2.; To cancel a programme you have set; Выберите пункт RETURN в пункте 2.; Для отмены стирания всех программ; Выберите пункт RETURN в пункте 2.
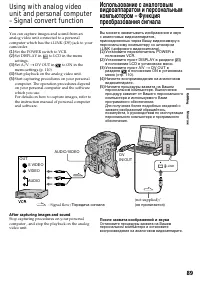
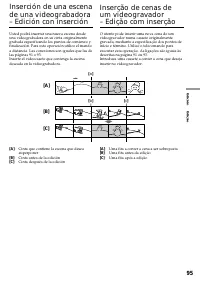
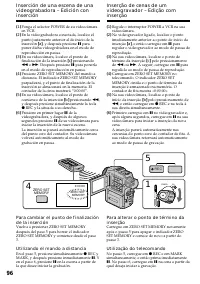
- 89 After capturing images and sound; VIDEO; Использование с аналоговым; Установите пункт A/V; После захвата изображений и звука
- 90 • You need to install software which can; • Вам необходимо установить программное
- 91 Когда Вы закончили перезапись ленты
- 93 Using the Remote Commander; DV OUT


