Кондиционеры Daikin ACQ-D - инструкция пользователя по применению, эксплуатации и установке на русском языке. Мы надеемся, она поможет вам решить возникшие у вас вопросы при эксплуатации техники.
Если остались вопросы, задайте их в комментариях после инструкции.
"Загружаем инструкцию", означает, что нужно подождать пока файл загрузится и можно будет его читать онлайн. Некоторые инструкции очень большие и время их появления зависит от вашей скорости интернета.


1-5
English
Open
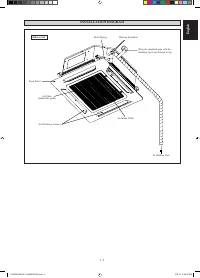
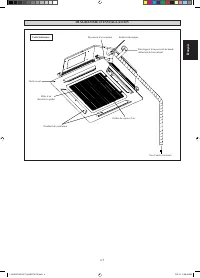
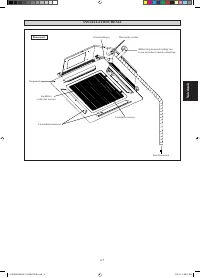
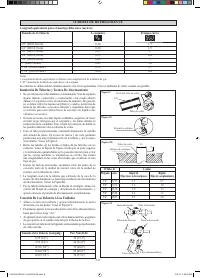
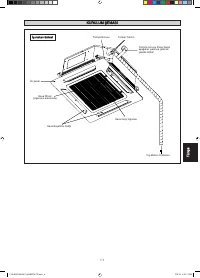
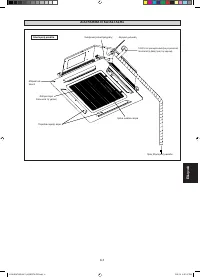
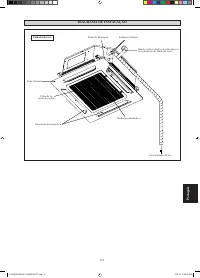
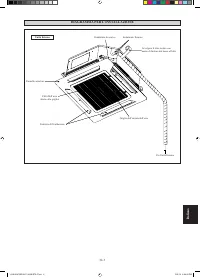
Screw
From
Unit
Control
Box
From
Front
Panel
LED Wire
Air Swing Wire
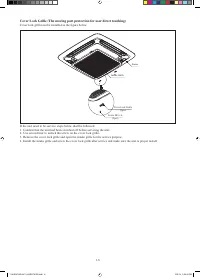
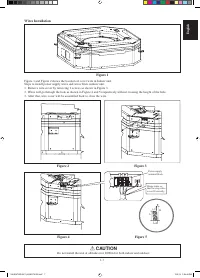
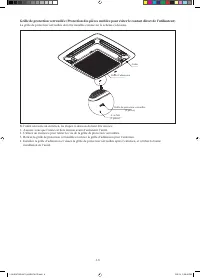
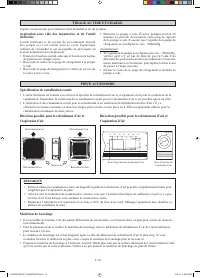
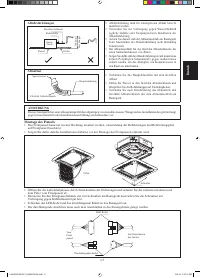
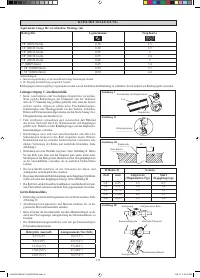
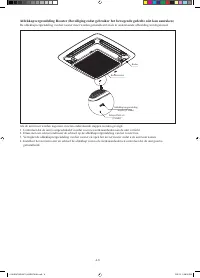
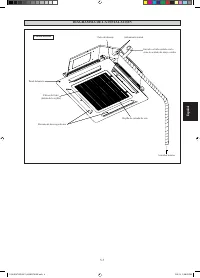
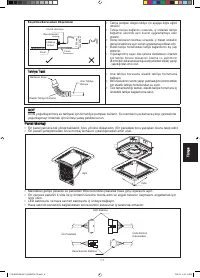
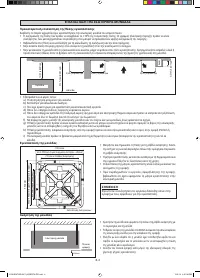
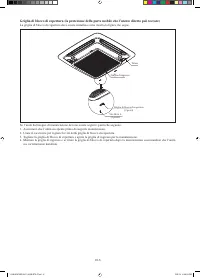
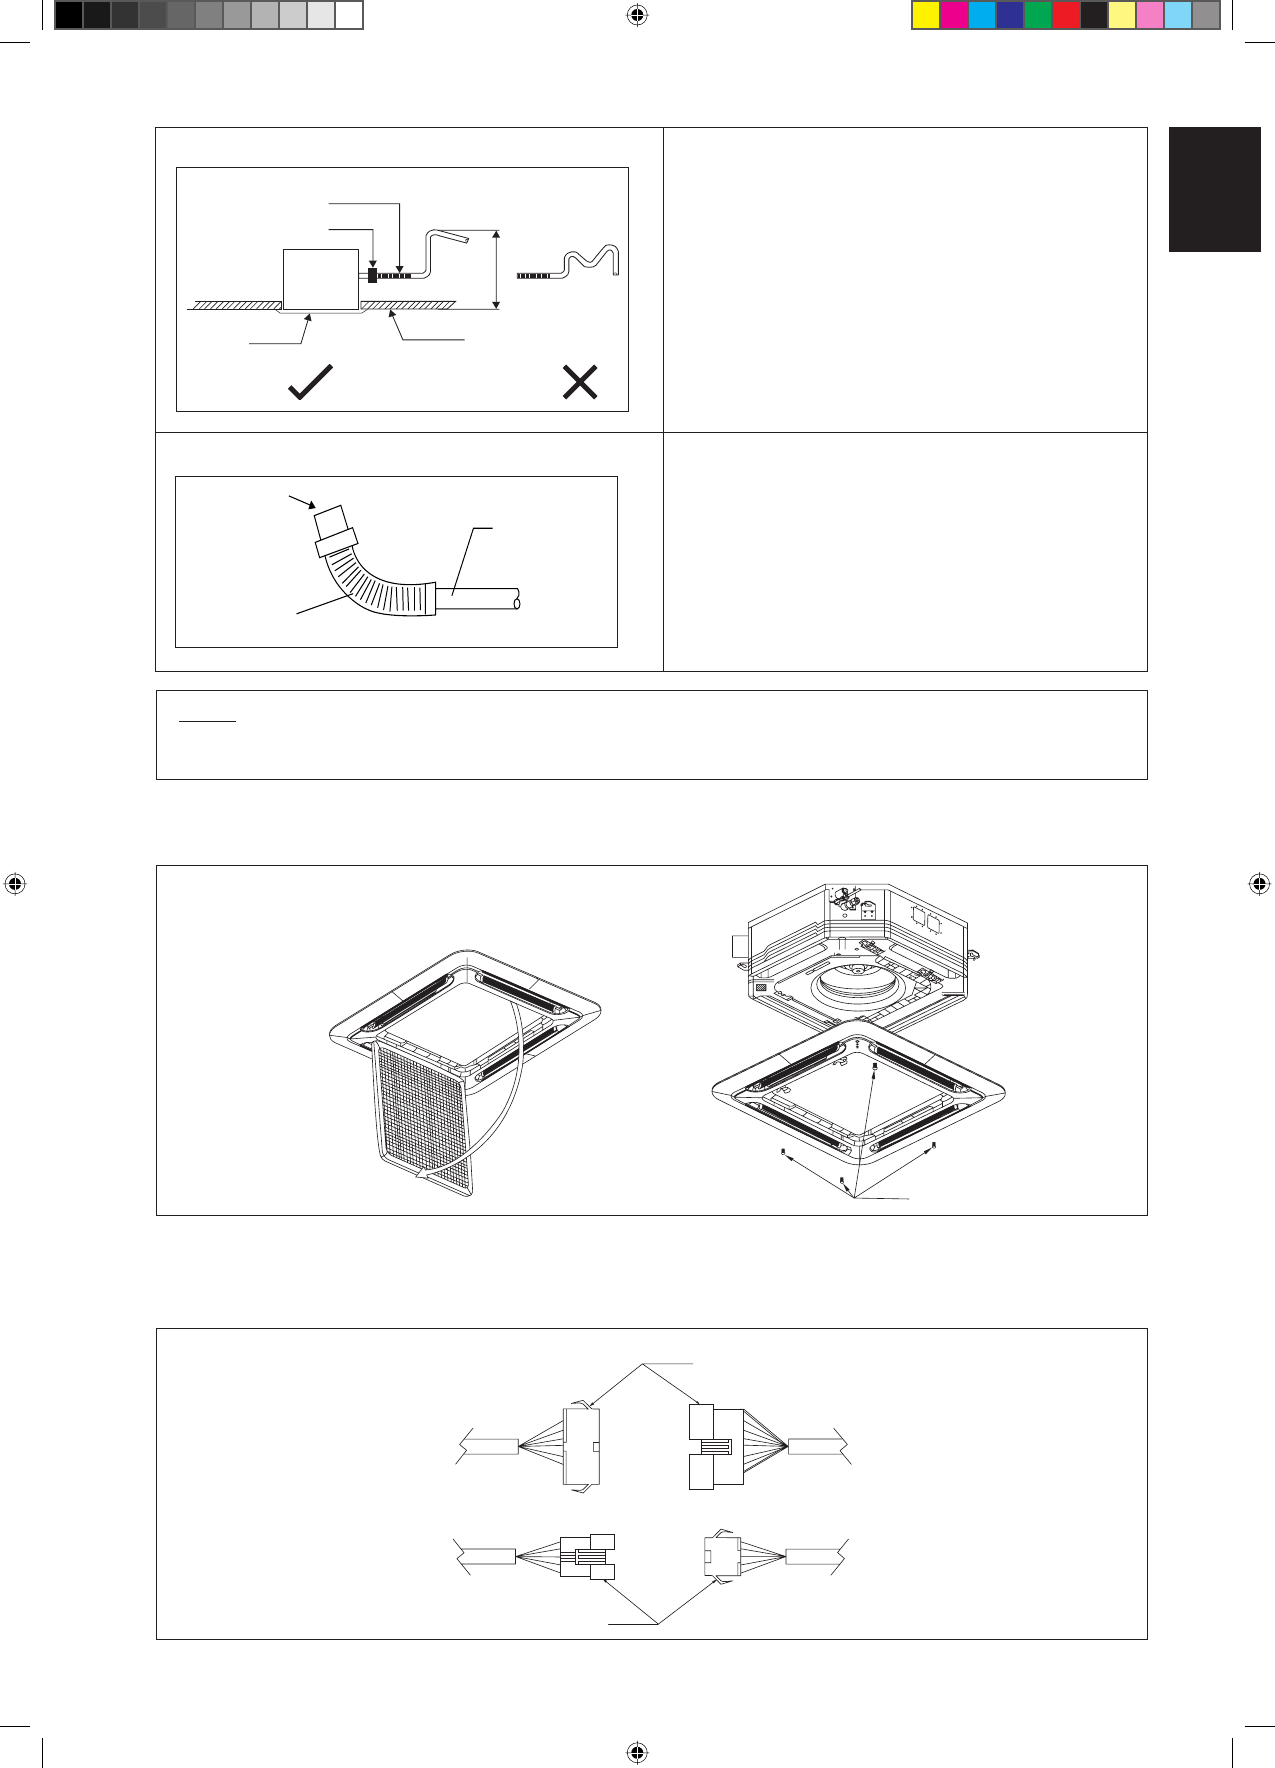
The front panel can only be fitted in one direction, follow the piping direction. (Follow piping arrow sticker on front panel)
Be sure to remove the installation template before installing the front panel.
•
•
Panel Installation
Open the air intake grille by pulling back the catchers and removing it together with filter from panel.
Install the front frame panel onto the indoor unit by 4 screws and tighten it completely to prevent cool air leakage.
Connect the LED wire and air swing wire to the indoor unit.
The air swing connector must put inside the control box after connected.
•
•
•
•
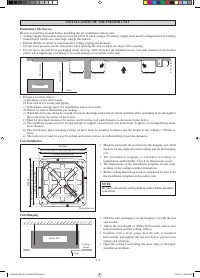
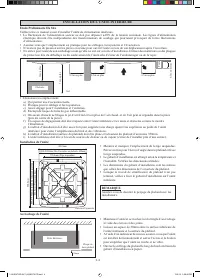
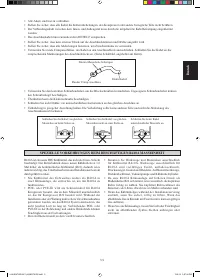
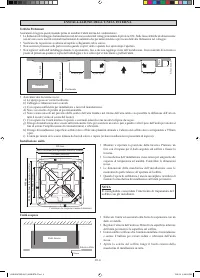
NOTE
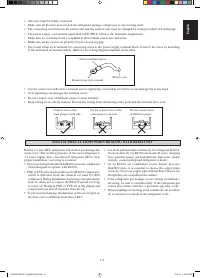
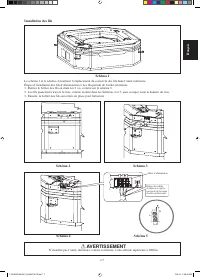
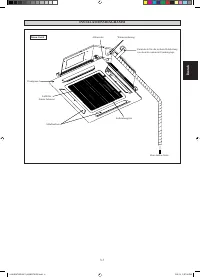
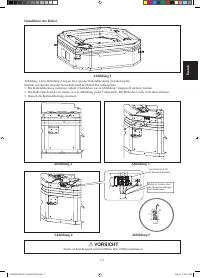
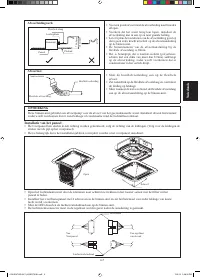
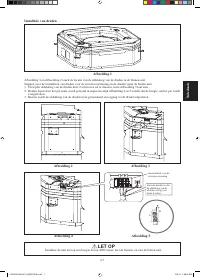
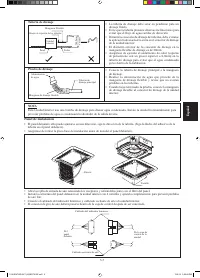
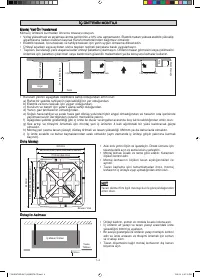
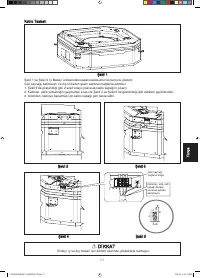
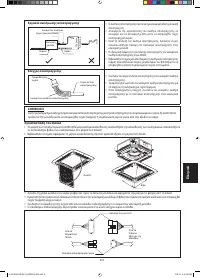
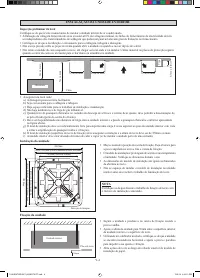
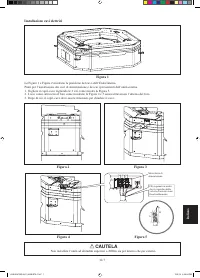
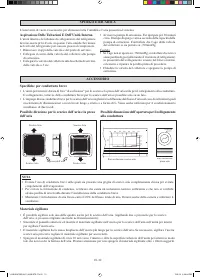
This Indoor Unit uses a drain pump for condensed water drainage. Install the unit horizontally to prevent water leakage
or condensation around the air outlet.
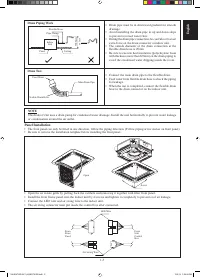
Feed Water
Flexible Drain Hose
Main Drain Pipe
Drain pipe must be in downward gradient for smooth
drainage.
Avoid installing the drain pipe in up and down slope
to prevent reversed water flow.
During the drain pipe connection, be careful not to exert
extra force on the drain connector at indoor unit.
The outside diameter of the drain connection at the
flexible drain hose is 20mm.
Be sure to execute heat insulation (polyethylene foam
with thickness more than 8.0mm) on the drain piping to
avoid the condensed water dripping inside the room.
•
•
•
•
•
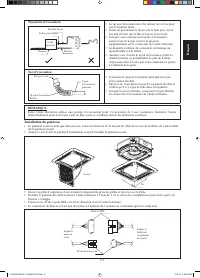
Connect the main drain pipe to the flexible drain.
Feed water from flexible drain hose to check the piping
for leakage.
When the test is completed, connect the flexible drain
hose to the drain connector on the indoor unit.
•
•
•
Drain Piping Work
Drain Test
Pipe Clamp
Ceiling
700.0mm
or less
Panel
Flexible Hose
Indoor
Unit
1 IM-5CKYER-0411(4)SIESTA-EN.ind5 5
1 IM-5CKYER-0411(4)SIESTA-EN.ind5 5
12/5/14 2:54:39 PM
12/5/14 2:54:39 PM
Содержание
- 54 МЕРЫ ПРЕДОСТОРОЖНОСТИ; ВHИMAHИE; РУКОВОДСТВО ПО УСТАНОВКЕ; ПPEДУПPEЖДEHИE
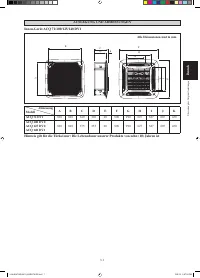
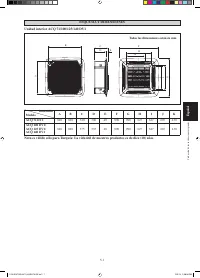
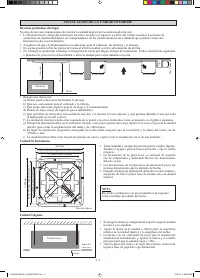
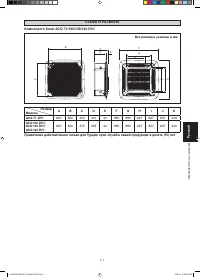
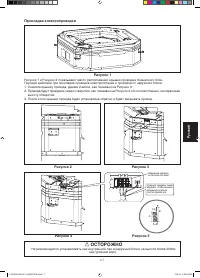
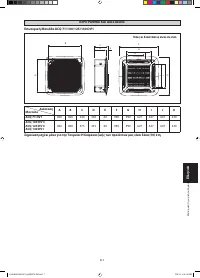
- 55 Комнатного блок
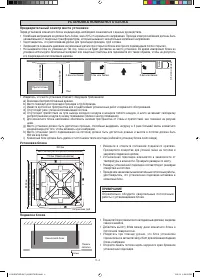
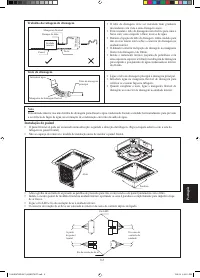
- 56 ПРИМЕЧАНИЕ; УСТАНОВКА КОМНАТНОГО БЛОКА; Предварительный осмотр места установки
- 59 ОCTOPOЖHO
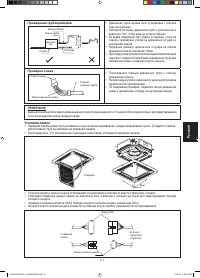
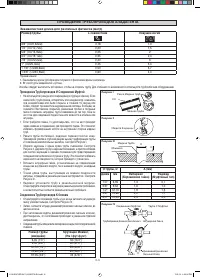
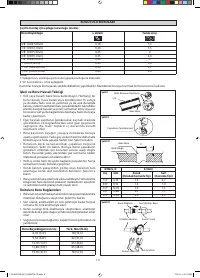
- 60 ПРОВЕДЕНИЕ ТРУБОПРОВОДОВ ХЛАДАГЕНТА; 0° изгиб трубы эквивалентно L сустава.; Проведение Трубопроводов И Соединение Муфтой
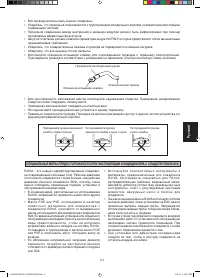
- 62 ОТКАЧКА ВОЗДУХА И ЗАПРАВКА; Осторожно


