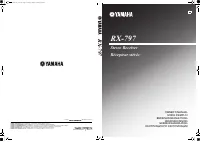
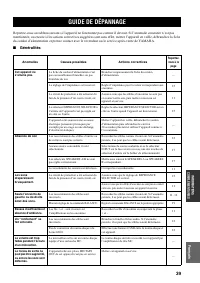
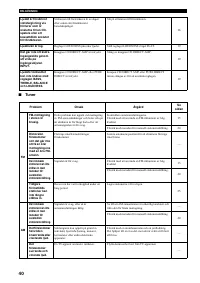
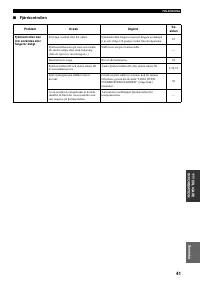
Усилители Yamaha RX-797 - инструкция пользователя по применению, эксплуатации и установке на русском языке. Мы надеемся, она поможет вам решить возникшие у вас вопросы при эксплуатации техники.
Если остались вопросы, задайте их в комментариях после инструкции.
"Загружаем инструкцию", означает, что нужно подождать пока файл загрузится и можно будет его читать онлайн. Некоторые инструкции очень большие и время их появления зависит от вашей скорости интернета.
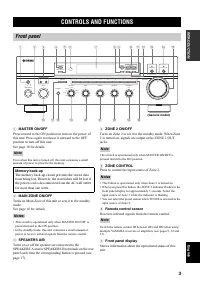


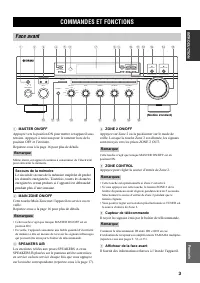
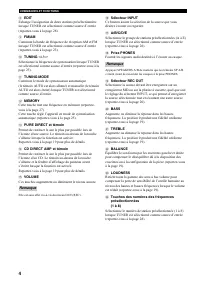


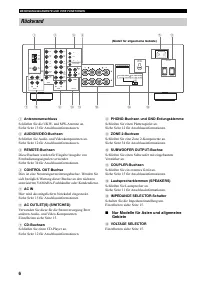


CONTROLS AND FUNCTIONS
10
■
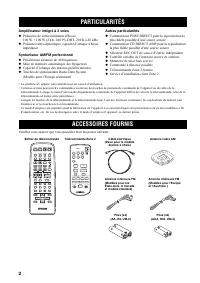
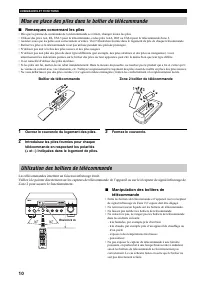
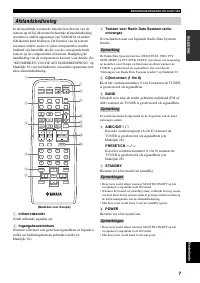
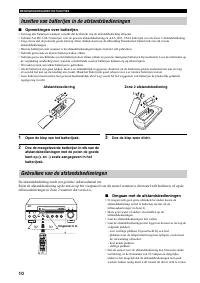
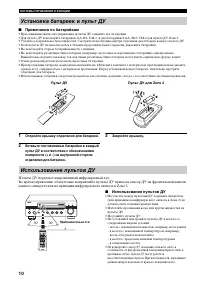
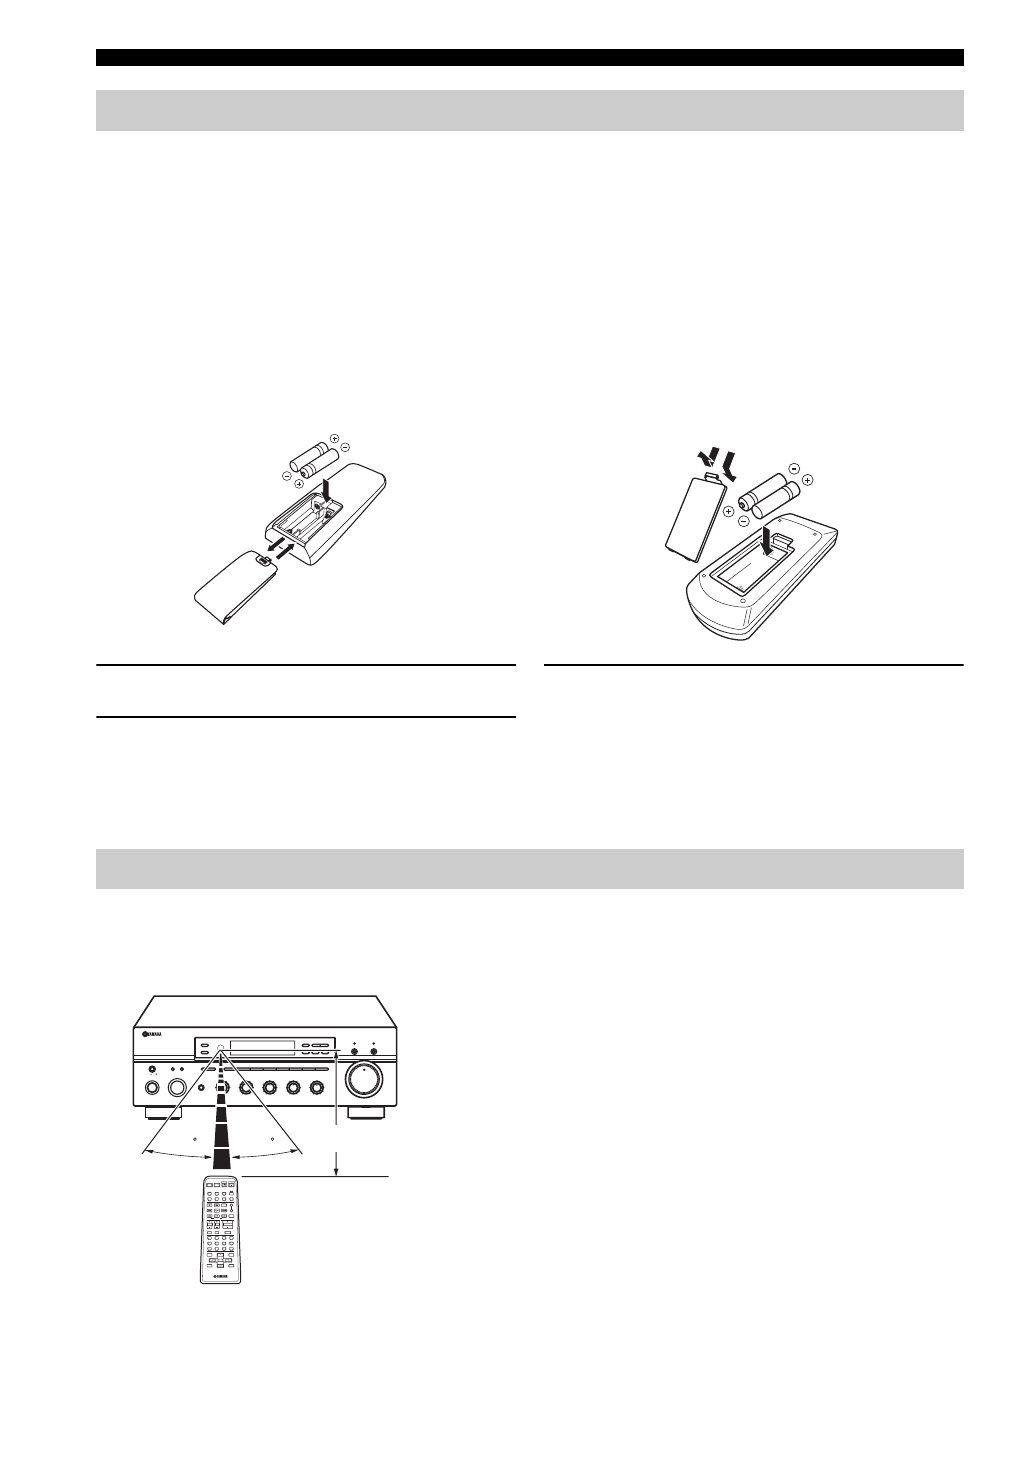
Notes on batteries
• Change all of the batteries if the operation range of the remote controls decreases.
• Use AA, R6, UM-3 batteries for the remote control and AAA, R03, UM-4 batteries for the Zone 2 remote control.
• Make sure that the polarities are correct. See the illustration inside the battery compartment of each remote control.
• Remove the batteries if the remote controls are not used for an extended period of time.
• Do not use old batteries together with new ones.
• Do not use different types of batteries (such as alkaline and manganese batteries) together. Read the packaging carefully as these
different types of batteries may have the same shape and color.
• We strongly recommend using alkaline batteries.
• If the batteries have leaked, dispose of them immediately. Avoid touching the leaked material or letting it come into contact with
clothing, etc. Clean the battery compartment thoroughly before installing new batteries.
• Do not throw away batteries with general house waste; dispose of them correctly in accordance with your local regulations.
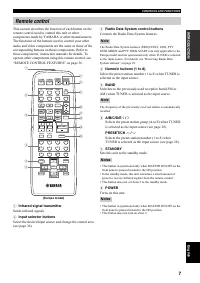
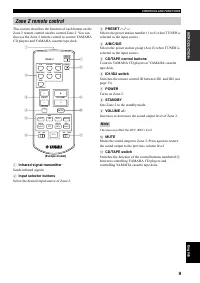
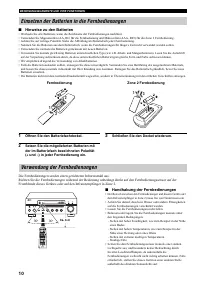
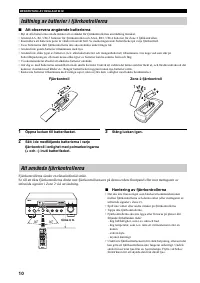
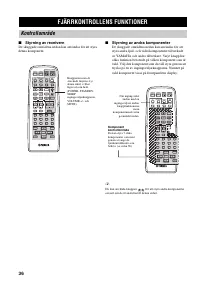
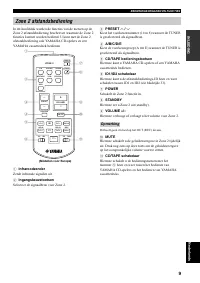
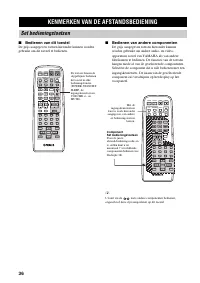
Remote control
Zone 2 remote control
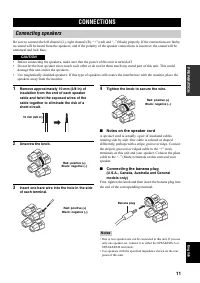
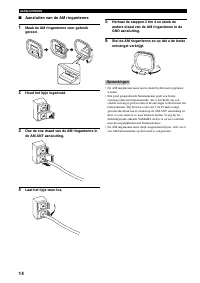
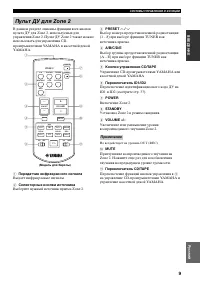
1
Open the battery compartment cover.
2
Insert the supplied batteries in each remote
control according to the polarity markings (+
and –) on the inside of the battery
compartment.
3
Close the cover back.
The remote controls transmit a directional infrared beam.
Be sure to aim the remote controls directly at the remote control sensor on the front panel of this unit or on the infrared
signal receiver in Zone 2 during operation.
■
Handling the remote controls
• The area between the remote controls and this unit (or the
infrared signal receiver in Zone 2) must be clear of large
obstacles.
• Do not spill water or other liquids on the remote controls.
• Do not drop the remote controls.
• Do not leave or store the remote controls in the following types
of conditions:
– places of high humidity, such as near a bath
– places of high temperature, such as near a heater or a stove
– places of extremely low temperatures
– dusty places
• Do not expose the remote control sensor to strong lighting, in
particular, an inverter type fluorescent lamp; otherwise, the
remote controls may not work properly. If necessary, position
this unit away from direct lighting.
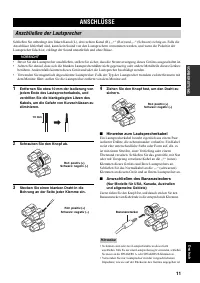
Installing batteries in the remote controls
1
3
2
1
3
2
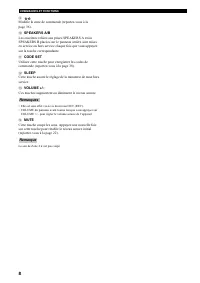
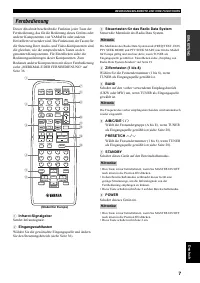
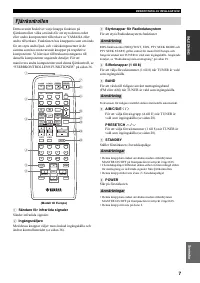
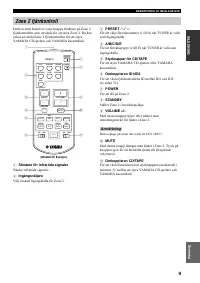
Using the remote controls
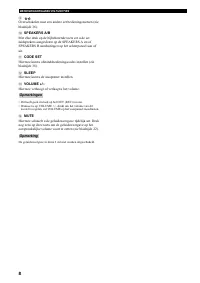
VOLUME
ON/OFF
INPUT
MAIN ZONE
PHONES
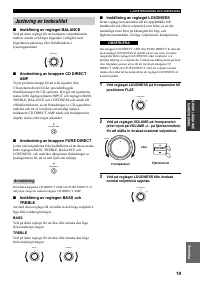
BASS
MASTER
SPEAKERS
ON
OFF
CD DIRECT AMP
PURE DIRECT
5
5
1
0
1
4
4
2
2
3
3
+
–
l
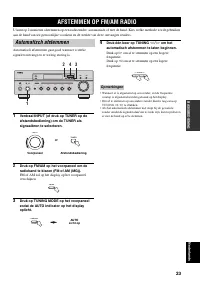
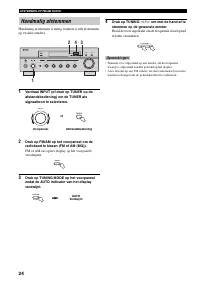
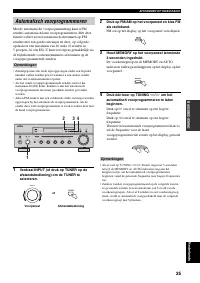
TUNING
h
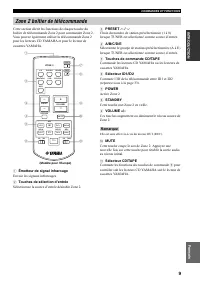
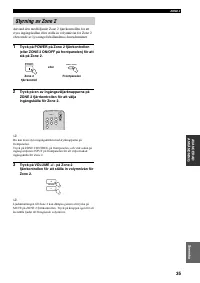
ZONE 2 ON/OFF
ZONE CONTROL
FM/AM
EDIT
A/B/C/D/E
1
2
3
4
5
6
7
8
MEMORY
MAN'L/AUTO FM
TUNING MODE
AUTO/MAN'L
B
A
TREBLE
5
5
1
0
1
4
4
2
2
3
3
+
–
BALANCE
5
5
1
0
1
4
4
2
2
3
3
R
L
LOUDNESS
5
7
1
FLAT
6
4
8
2
10
–30dB
3
9
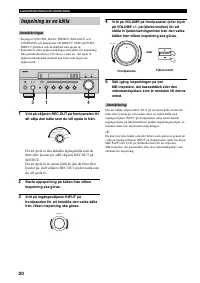
REC OUT
MD/TAPE
SOURCE
CD
DVD
VCR
TUNER
DTV/CBL
PHONO
30
30
STANDBY
POWER
CD
MD/TAPE
TUNER
PHONO
DVD
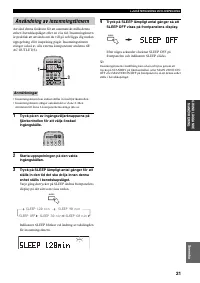
SLEEP
A
B
POWER
POWER
REC
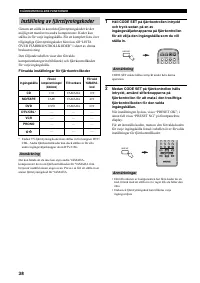
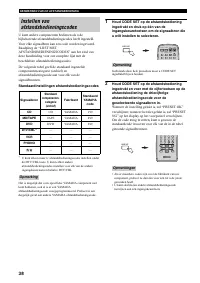
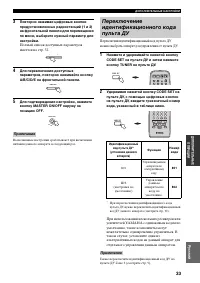
CODE SET
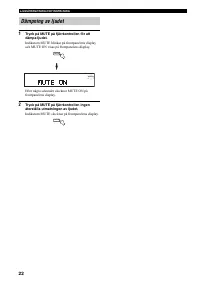
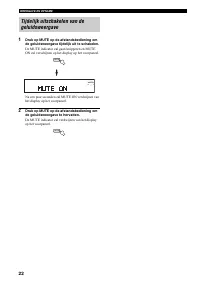
MUTE
MENU
TITLE
VOLUME
DISC SKIP
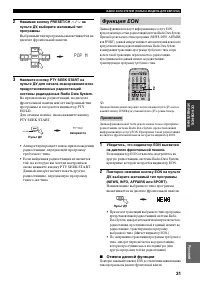
EON
FREQ/TEXT
START
MODE
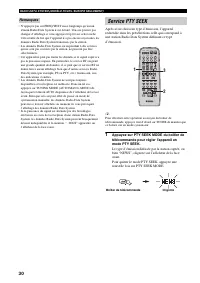
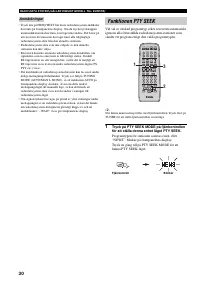
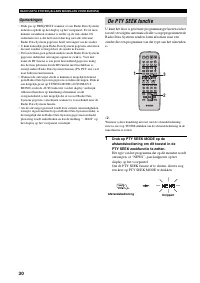
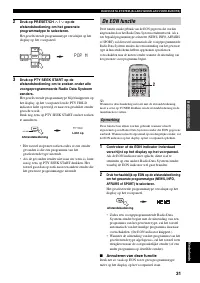
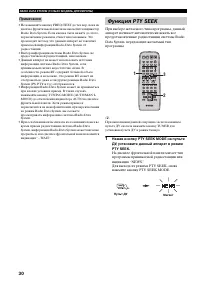
PTY SEEK
BAND
A/B/C/D/E
A/B/C/D/E
PRESET/CH
4
3
2
1
8
10
7
0
9
6
5
ENT.
DISPLAY
RETURN
TV MUTE
TV INPUT
AV
TV
ENTER
VCR
DTV/CBL
SPEAKERS
TV VOL
TV CH
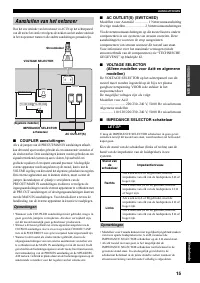
Approximately 6 m (19.7 ft)
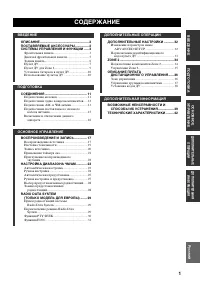
Содержание
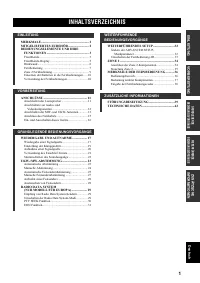
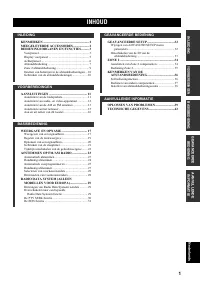
- 223 СОДЕРЖАНИЕ; ВВЕДЕНИЕ
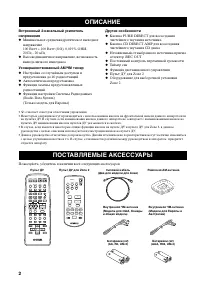
- 224 Усовершенствованный AM/ЧМ тюнер; ОПИСАНИЕ
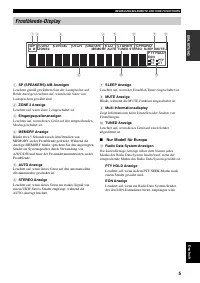
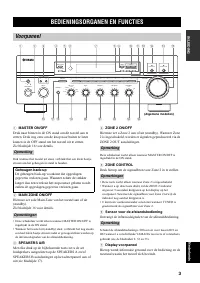
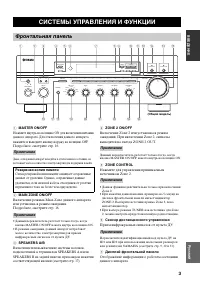
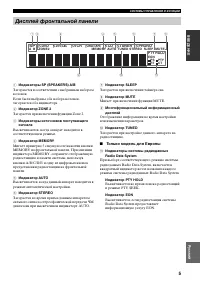
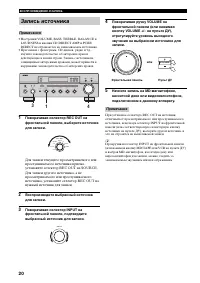
- 225 ВВЕДЕНИ; Прием инфракрасных сигналов от пульта ДУ.; Дисплей фронтальной панели; СИСТЕМЫ УПРАВЛЕНИЯ И ФУНКЦИИ; Фронтальная панель; Резервная копия памяти; Примечания
- 226 Примечание
- 227 Загорается при включении функции Zone 2.; Только модель для Европы
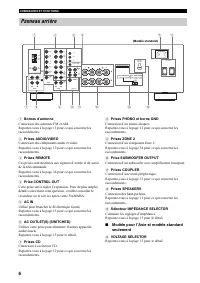
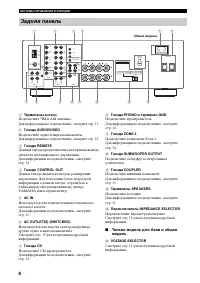
- 228 Задняя панель
- 229 Выдает инфракрасные сигналы.; Селекторные кнопки источника; Установка данного аппарата в режим ожидания.; Включение данного аппарата.
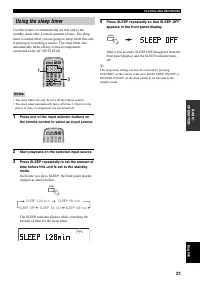
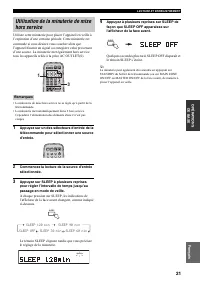
- 230 Установка таймера сна.
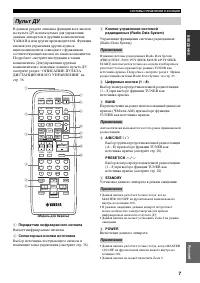
- 231 Пульт ДУ для Zone 2
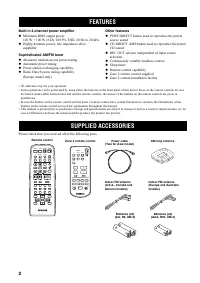
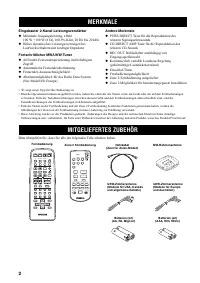
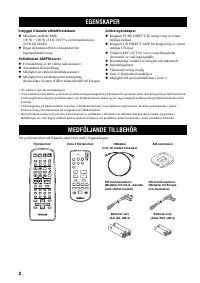
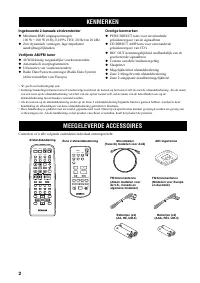
- 232 Примечания по батарейкам; Использование пультов ДУ; Установка батареек в пульт ДУ
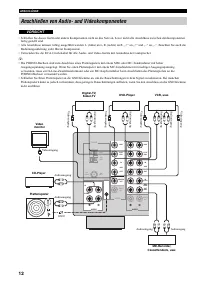
- 233 ОВКА; Примечания по кабелю колонки; СОЕДИНЕНИЯ; Подключение колонок
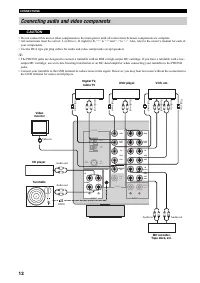
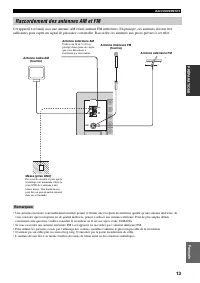
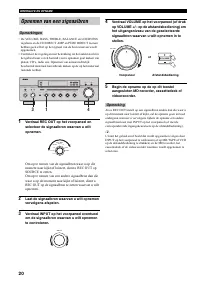
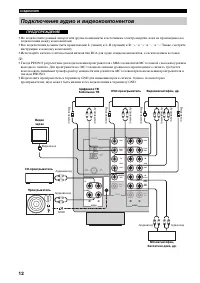
- 234 Подключение аудио и видеокомпонентов
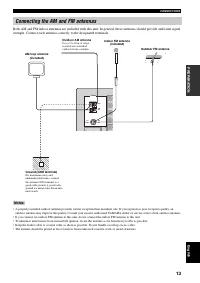
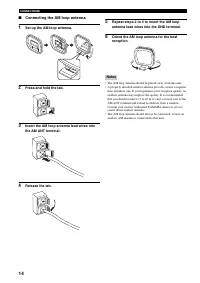
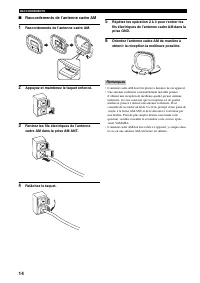
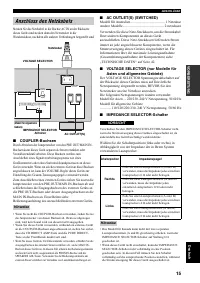
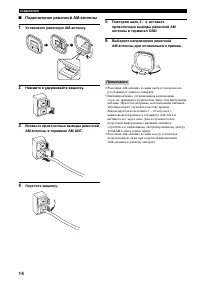
- 236 Подключение рамочной АМ-антенны; Нажмите и удерживайте защелку.
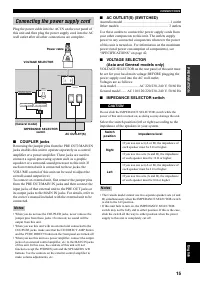
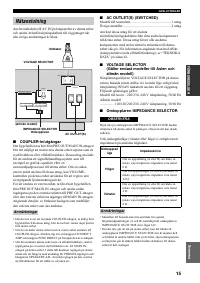
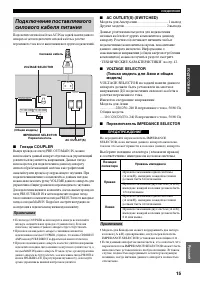
- 237 Гнезда COUPLER; Общая модель; Переключатель IMPEDANCE SELECTOR
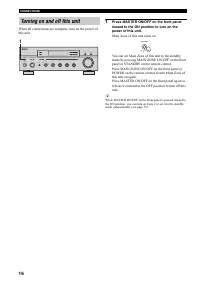
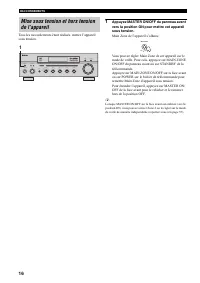
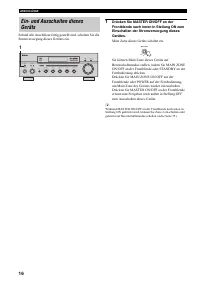
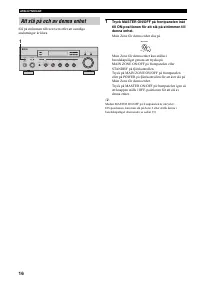
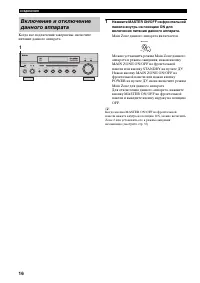
- 238 Main Zone данного аппарата включается.
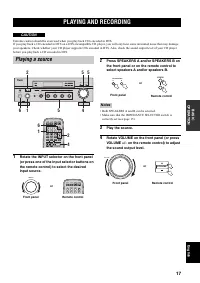
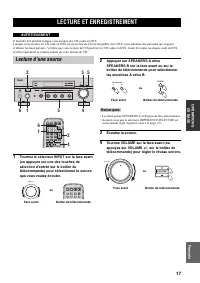
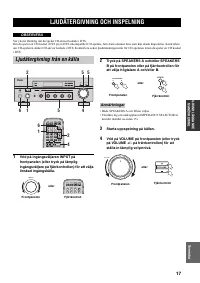
- 239 ОСНОВНОЕ; ВОСПРОИЗВЕДЕНИЕ И ЗАПИСЬ
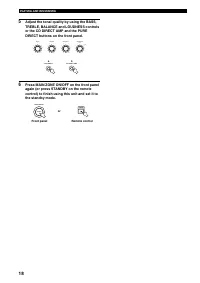
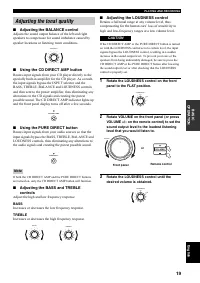
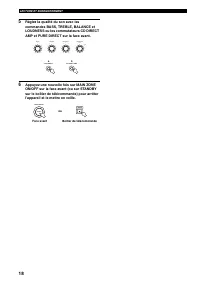
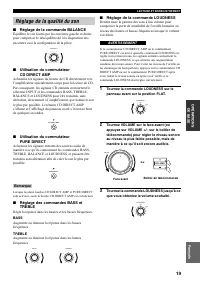
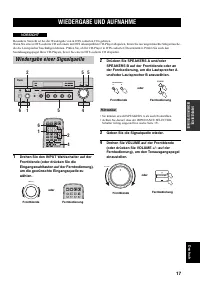
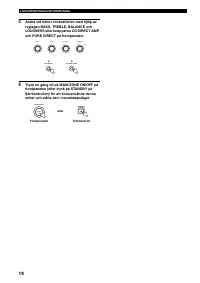
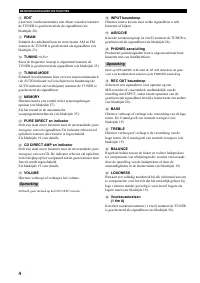
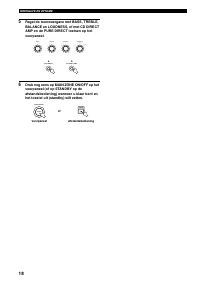
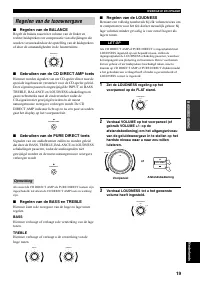
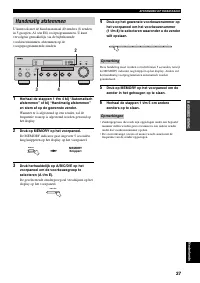
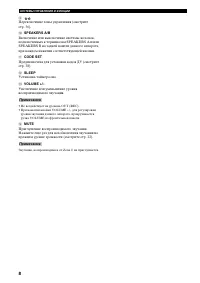
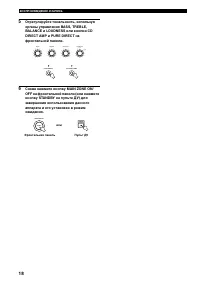
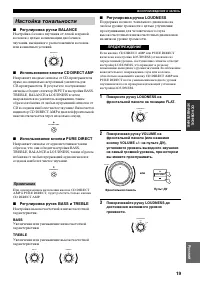
- 241 Регулировка ручки BALANCE; Регулировка ручки LOUDNESS; Настойка тональности
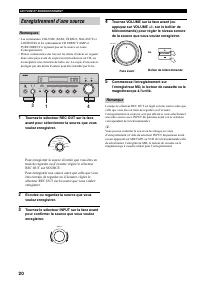
- 242 Запись источника
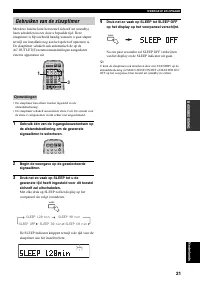
- 243 Применение таймера сна
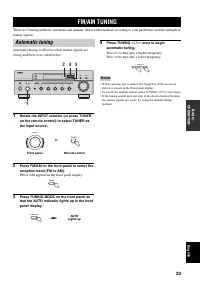
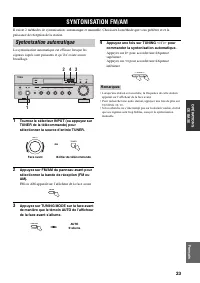
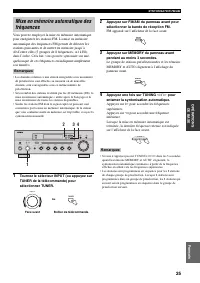
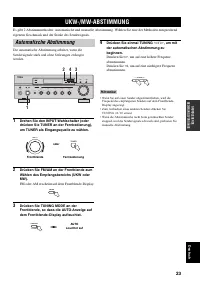
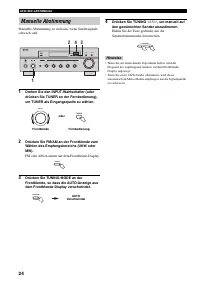
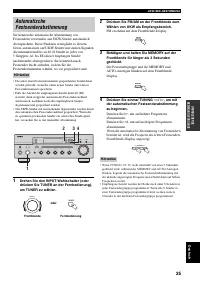
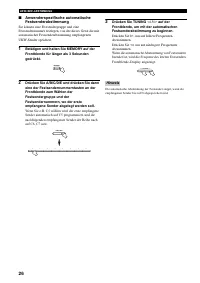
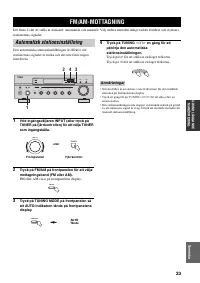
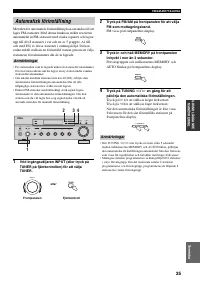
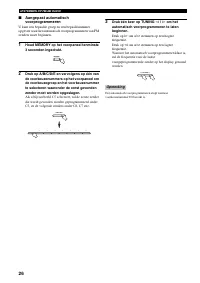
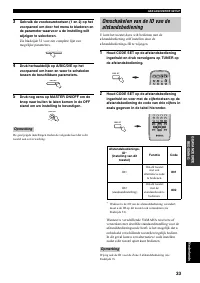
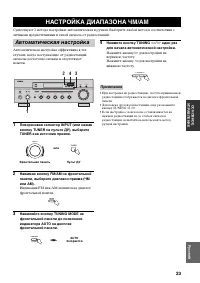
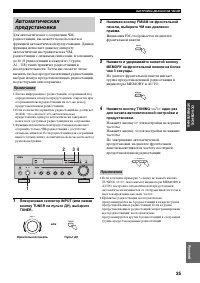
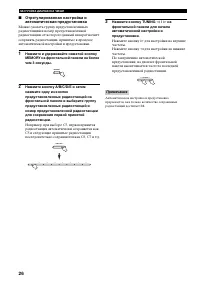
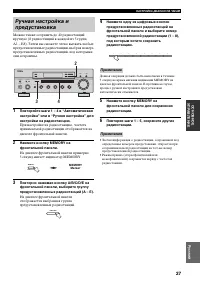
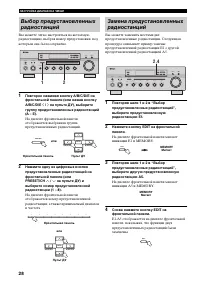
- 245 Нажмите кнопку; НАСТРОЙКА ДИАПАЗОНА ЧМ/AM; Автоматическая настройка
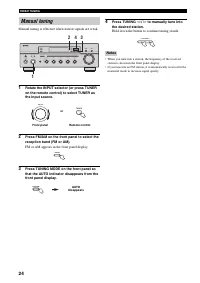
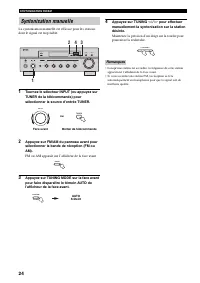
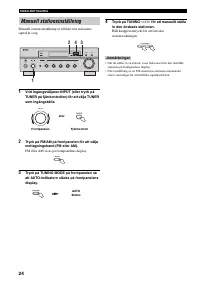
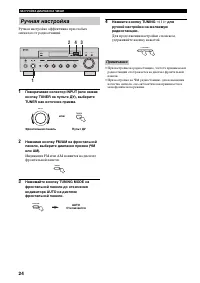
- 246 Нажмите кнопку TUNING; Ручная настройка
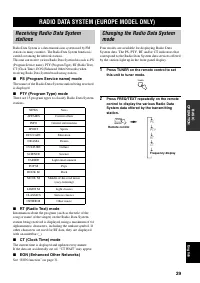
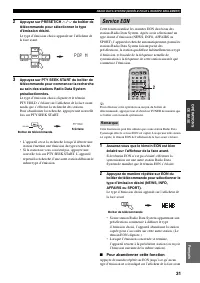
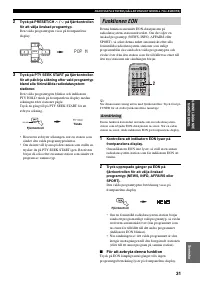
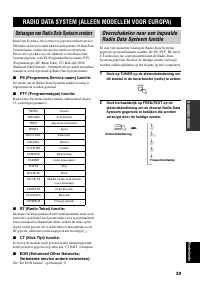
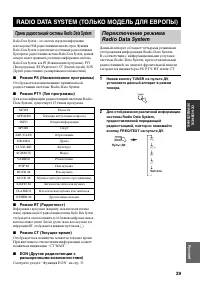
- 251 Смотрите раздел “Функция EON” на стр. 31.; RADIO DATA SYSTEM (ТОЛЬКО МОДЕЛЬ ДЛЯ ЕВРОПЫ); Прием радиостанций системы Radio Data System
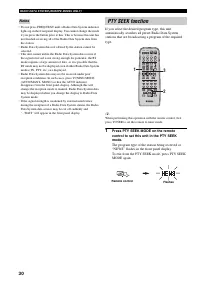
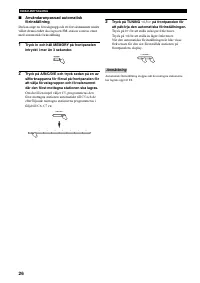
- 252 Функция PTY SEEK
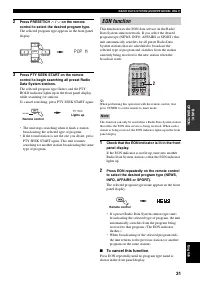
- 253 • Аппарат прекращает поиск при нахождении; Отмена данной функции; Функция EON
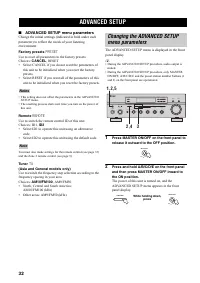
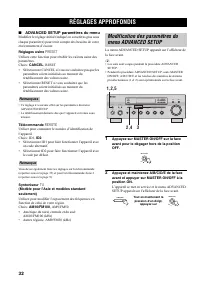
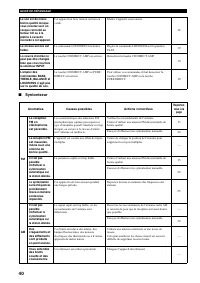
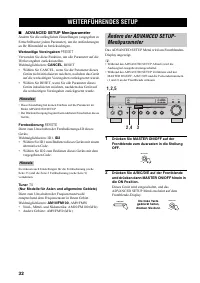
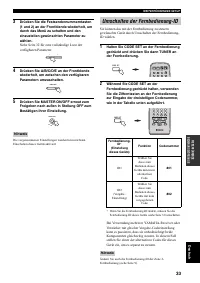
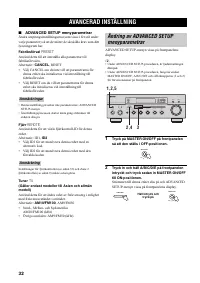
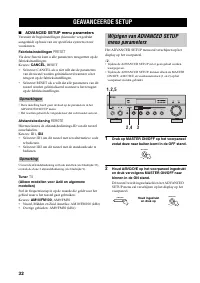
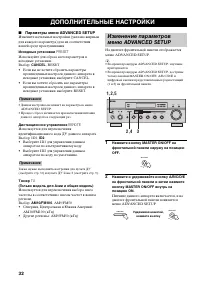
- 254 Параметры меню ADVANCED SETUP; Исходные установки; Дистанционное управление; Тюнер; ДОПОЛНИТЕЛЬНЫЕ НАСТРОЙКИ
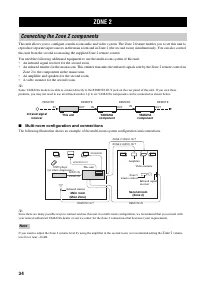
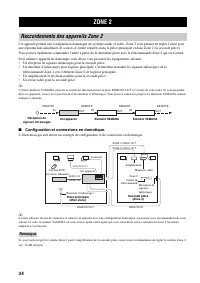
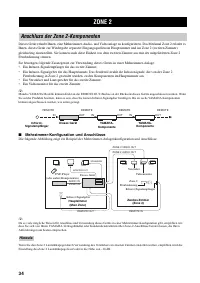
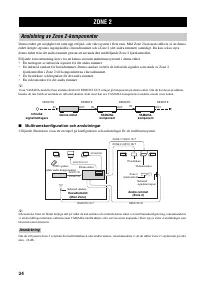
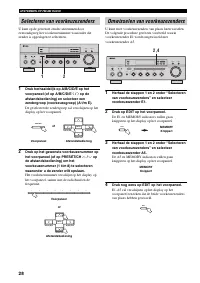
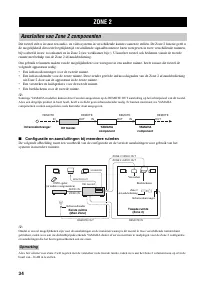
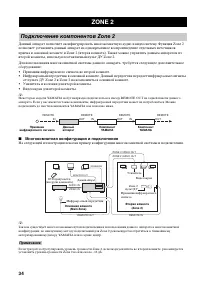
- 256 от пульта ДУ Zone 2 в Zone 2 на компоненты в основной комнате.; Многокомнатная конфигурация и подключения; Подключение компонентов Zone 2
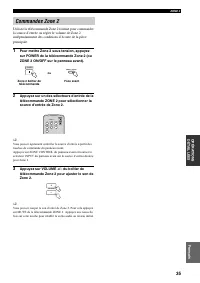
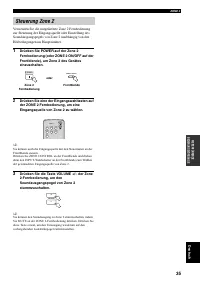
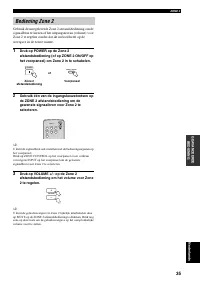
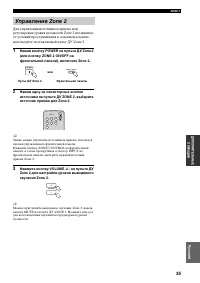
- 257 Управление Zone 2
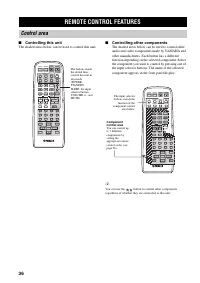
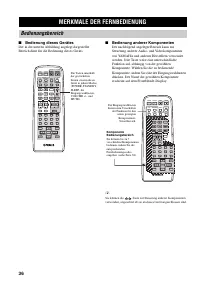
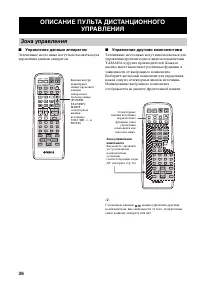
- 258 Управление данным аппаратом; ОПИСАНИЕ ПУЛЬТА ДИСТАНЦИОННОГО; Зона управления
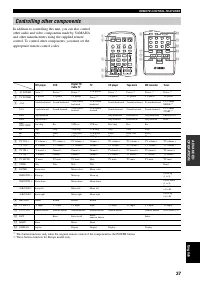
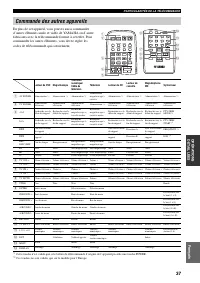
- 259 Управление другими компонентами
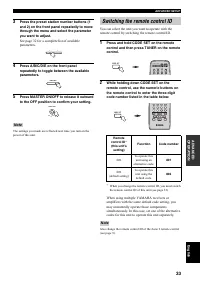
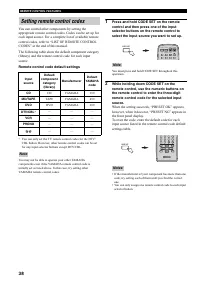
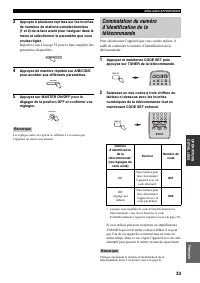
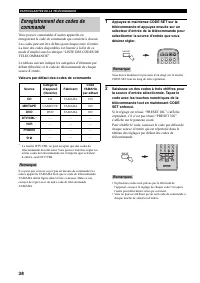
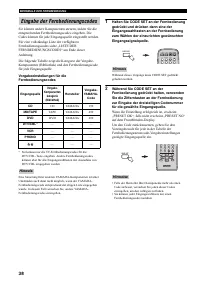
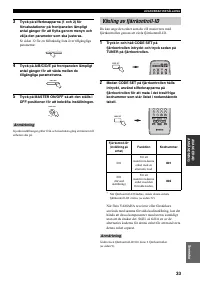
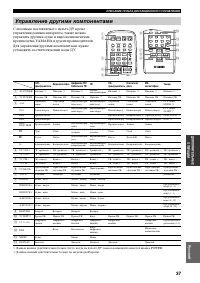
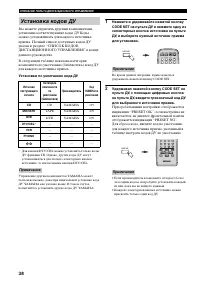
- 260 Установки по умолчанию кода ДУ; Установка кодов ДУ
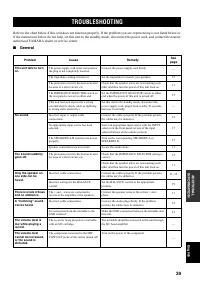
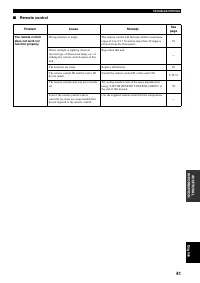
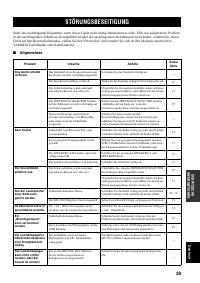
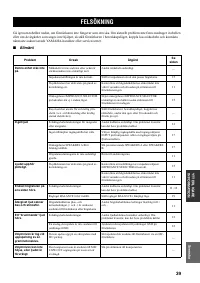
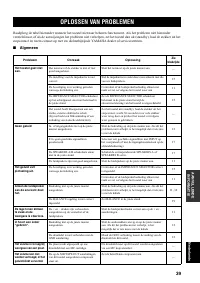
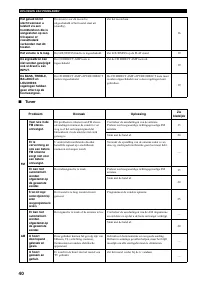
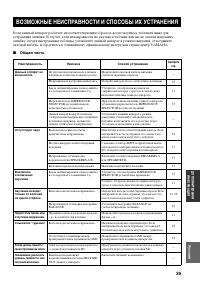
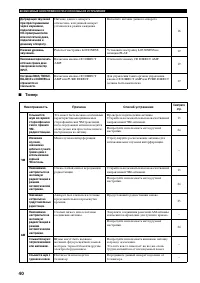
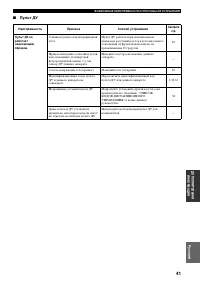
- 261 ПОЛ; Общая часть; ВОЗМОЖНЫЕ НЕИСПРАВНОСТИ И СПОСОБЫ ИХ УСТРАНЕНИЯ
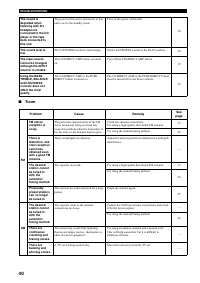
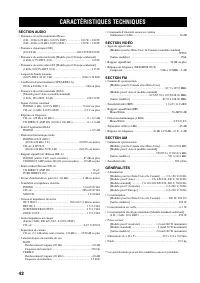
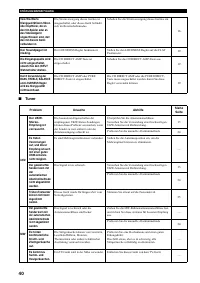
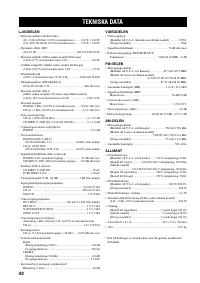
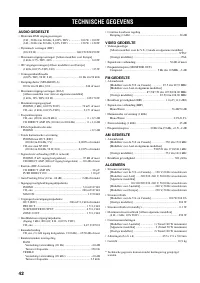
- 264 АУДИОРАЗДЕЛ; ТЕХНИЧЕСКИЕ ХАРАКТЕРИСТИКИ


