Пылесос Bosch BGB 75A59 - инструкция пользователя по применению, эксплуатации и установке на русском языке. Мы надеемся, она поможет вам решить возникшие у вас вопросы при эксплуатации техники.
Если остались вопросы, задайте их в комментариях после инструкции.
"Загружаем инструкцию", означает, что нужно подождать пока файл загрузится и можно будет его читать онлайн. Некоторые инструкции очень большие и время их появления зависит от вашей скорости интернета.


46
Fig.
20*
Op
e
n th
e
dust bag compar tm
e
nt lid.
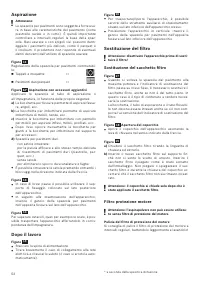
Fig.
18
R
e
l
e
as
e
th
e
motor prot
e
ction filt
e
r by pulling on th
e
sid
e
tabs and pull it out in th
e
dir
e
ction of th
e
arrow.
Cl
e
an th
e
motor prot
e
ction filt
e
r by tapping out th
e
dir t.
If it is v
e
r y dir ty, th
e
motor prot
e
ction filt
e
r should
b
e
rins
e
d.
Th
e
filt
e
r must th
e
n b
e
l
e
ft to dr y for at l
e
ast
24 hours.
Aft
e
r cl
e
aning, r
e
fit th
e
motor prot
e
ction filt
e
r into
th
e
applianc
e
and lock it in plac
e
at th
e
top. Clos
e
th
e
dust bag compar tm
e
nt lid.
Cleaning the foam filter
If your applianc
e
is fitt
e
d with a filt
e
r fram
e
and foam
filt
e
r, th
e
foam filt
e
r should b
e
cl
e
an
e
d at r
e
gular int
e
r-
vals by tapping out th
e
dust.
Fig.
21*
Op
e
n th
e
dust bag compar tm
e
nt lid.
Fig.
18
Pull out th
e
filt
e
r fram
e
and foam filt
e
r in th
e
dir
e
c-
tion of th
e
arrow.
R
e
mov
e
th
e
foam filt
e
r from th
e
filt
e
r fram
e
and
cl
e
an it by tapping out th
e
dust.
Aft
e
r cl
e
aning, plac
e
th
e
foam filt
e
r back in th
e
filt
e
r
fram
e
, ins
e
r t th
e
filt
e
r fram
e
with foam filt
e
r in th
e
applianc
e
and clos
e
th
e
dust bag compar tm
e
nt lid.
!
Caution: The vacuum cleaner must not be operated
without the motor protection filter.
Maintaining the exhaust filter
Th
e
e
xhaust filt
e
r is d
e
sign
e
d so that it do
e
s not n
ee
d
to b
e
r
e
plac
e
d, provid
e
d th
e
applianc
e
is us
e
d as int
e
n-
d
e
d in th
e
hous
e
hold.
To
e
nsur
e
that th
e
vacuum cl
e
an
e
r is working at its op -
timum pow
e
r l
e
v
e
l, th
e
e
xhaust filt
e
r should b
e
rins
e
d
out aft
e
r on
e
y
e
ar. Th
e
filt
e
ring action of th
e
filt
e
r r
e
-
mains intact,
e
v
e
n if th
e
filt
e
r sur fac
e
b
e
com
e
s disco -
lour
e
d.
Bild
22*
Op
e
n th
e
r
e
ar flap.
Unlock th
e
filt
e
r hold
e
r by moving th
e
locking tab in
th
e
dir
e
ction of th
e
arrow.
R
e
mov
e
th
e
foam filt
e
r* from th
e
filt
e
r hold
e
r and
tap it out.
If it is v
e
r y dir ty, th
e
motor prot
e
ction filt
e
r should
b
e
rins
e
d.
Th
e
filt
e
r must th
e
n b
e
l
e
ft to dr y for at l
e
ast 24
hours.
Ins
e
r t th
e
foam filt
e
r into th
e
filt
e
r hold
e
r.
Ins
e
r t th
e
filt
e
r hold
e
r into th
e
applianc
e
and lock it
in plac
e
.
Cleaning the (H)EPA* exhaust filter
Th
e
(H)EPA* filt
e
r is d
e
sign
e
d so that it do
e
s not n
ee
d
to b
e
r
e
plac
e
d, provid
e
d th
e
applianc
e
is us
e
d as int
e
n-
d
e
d in th
e
hous
e
hold.
To
e
nsur
e
that th
e
vacuum cl
e
an
e
r is working at its op -
timum pow
e
r l
e
v
e
l, th
e
(H)EPA* filt
e
r should b
e
rins
e
d
out aft
e
r on
e
y
e
ar. Th
e
filt
e
ring action of th
e
filt
e
r r
e
-
mains intact,
e
v
e
n if th
e
filt
e
r sur fac
e
b
e
com
e
s disco -
lour
e
d.
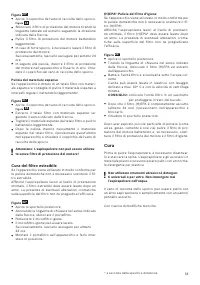
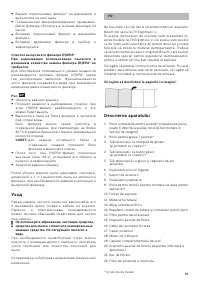
Fig.
23*
Op
e
n th
e
r
e
ar flap.
Unlock th
e
(H)EPA* filt
e
r by moving th
e
locking tab
in th
e
dir
e
ction of th
e
arrow, and r
e
mov
e
it from th
e
applianc
e
.
Tap out th
e
filt
e
r unit and rins
e
it und
e
r running wa-
t
e
r.
Alt
e
rnativ
e
ly, th
e
unit can b
e
cl
e
an
e
d in a washing
machin
e
at max. 30 °C using a g
e
ntl
e
programm
e
and
th
e
low
e
st spin sp
ee
d.
TIP:
To prot
e
ct oth
e
r laundr y it
e
ms, put th
e
filt
e
r
unit into a laundr y bag.
Onc
e
th
e
(H)EPA* filt
e
r has dri
e
d compl
e
t
e
ly (at
l
e
ast 24 hours), ins
e
r t it back into th
e
applianc
e
and
lock it in plac
e
.
Clos
e
th
e
r
e
ar flap.
Aft
e
r vacuuming fin
e
dust par ticl
e
s (
e
.g. g ypsum, c
e
-
m
e
nt,
e
tc.), cl
e
an th
e
motor prot
e
ction filt
e
r by tapping
it out or, if n
e
c
e
ssar y, r
e
plac
e
th
e
motor prot
e
ction fil-
t
e
r and
e
xhaust filt
e
r.
Care
Always switch off th
e
vacuum cl
e
an
e
r and disconn
e
ct
th
e
pow
e
r cord from th
e
mains b
e
for
e
cl
e
aning th
e
va-
cuum cl
e
an
e
r. Th
e
vacuum cl
e
an
e
r and plastic acc
e
s-
sori
e
s can b
e
cl
e
an
e
d with an ordinar y plastic cl
e
an
e
r.
!
Do not use abrasive materials, glass-cleaning agents
or all-purpose cleaning products. Never immerse the
vacuum cleaner in water.
Th
e
dust compar tm
e
nt can, if n
e
c
e
ssar y, b
e
cl
e
an
e
d
with a s
e
cond vacuum cl
e
an
e
r or simply wip
e
d with a
dr y cloth or dusting brush.
Subj
e
ct to t
e
chnical modifications.
* D
e
p
e
nding on mod
e
l


