Бензопилы Sparky TV 1835 - инструкция пользователя по применению, эксплуатации и установке на русском языке. Мы надеемся, она поможет вам решить возникшие у вас вопросы при эксплуатации техники.
Если остались вопросы, задайте их в комментариях после инструкции.
"Загружаем инструкцию", означает, что нужно подождать пока файл загрузится и можно будет его читать онлайн. Некоторые инструкции очень большие и время их появления зависит от вашей скорости интернета.


7
Original instructions
EN
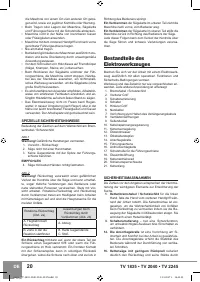
3 Safety lock-off button
4 Switch trigger
5 Rear handle
6 Power cable
7 Extension cable hook
8 Ventilation slots
9 Side cover
10 Chain tensioning ring
11 Locking knob
12 Oil level gauge
13 Oil tank cap
14 Spiked bumper
15 Guide bar
16 Low-kick-back chain
17 Guide bar sheath
18 Oil outlet
19 Drive sprocket
20 Bar fastening bolt
21 Chain catcher
SAFETY FEATURES
Numbers preceding the descriptions correspond with
the numbers on this page to help you locate the safety
feature.
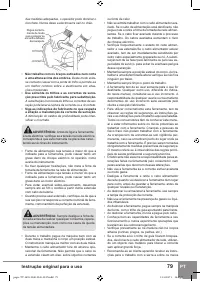
1. Chain brake lever / Guard
protects the operator’s
left hand in the event it slips off the front handle
while saw is running. Chain brake is a safety feature
designed to reduce the possibility of injury due to
kickback by stopping a moving saw chain in milli-
seconds. It is activated by the chain brake lever.
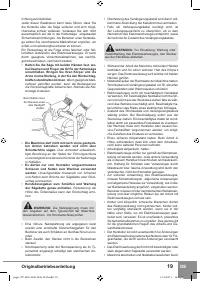
14. Spiked bumper
is used for your personal safety
and ease of cutting. The spiked bumper will in
-
crease your stability while performing vertical cut-
ting.
3. Safety lock-off button
- prevents accidental accel-
eration of the saw motor.
16. Low-kick-back chain
helps significantly reduce
kickback or the intensity of kickback, due to spe-
cially designed depth gauges and guard links.
21. Chain catcher
reduces the danger of injury in the
event saw chain breaks or derails during operation.
The chain catcher is designed to intercept a whip
-
ping chain.
Assembly instructions
WARNING:
Do not connect the chain saw to
the mains until it is completely assembled.
WARNING:
Always wear heavy duty gloves
when handling the chain.
Prior to initial operation your new chain saw will require
guide bar and chain assembly, side cover and filling the
oil tank with lubricating oil.
Read all instructions carefully. Do not install any other
size bar and chain than the recommended for your
model.
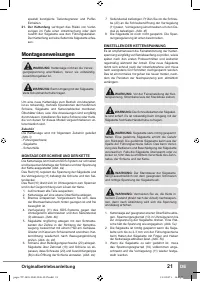
Accessories
The chain saw is delivered with the following accesso-
ries:
(Fig.3)
- Guide bar; Saw chain; Guide bar sheath.
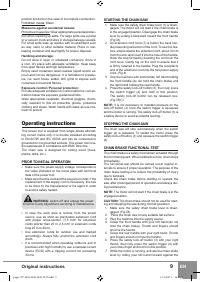
CHAIN AND GUIDE BAR ASSEMBLY
The chain saw is equipped with tool-free system for con-
venient and quick guide bar assembly and adjusting the
chain tension.
(Fig. 4a)
The ring (10) adjusts the chain tension, and the locking
knob (11) tightens the bar.
The ring (10) shall be rotated clockwise for tensioning
and anti-clockwise for loosening the chain.
1. Unpack all parts carefully.
2. Place the chain saw on any suitable flat surface.
3. Deactivate the chain brake. Ensure the chain brake
lever has been pulled back and released.
4. Unscrew anti-clockwise the locking knob (11) of
system and remove the side cover (9).
(Fig.4b)
5. Spread the chain in a loop with the cutting edges (A)
pointing in the direction of rotation, marked with an
arrow on the bar. Slide the chain in the bar groove
around the guide bar. Check that the chain is prop
-
erly mounted in the correct direction of rotation.
(Fig. 4c, 4d)
6. Mount the guide bar onto the fastening bolt (20), fit
the chain onto the drive sprocket (19) and direct the
bar so that the bar fastening bolt and the guide fin
(B) fits into the bar keyway.
(Fig.4e)
7. Place the side cover, ensure the bar fastening bolt
(20) fits into the thread of the locking knob (11).
Screw the locking knob to tighten the side cover.
(Fig.4f)
8. The chain is not tensioned yet. Tensioning the chain
is described below.
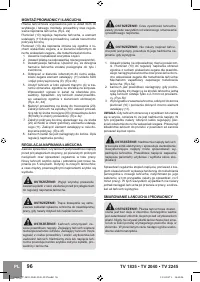
TENSIONING THE CHAIN
Always check the chain tension before use, after the first
cuts and regularly during use, approximately every 5
cuts. New saw chains stretch, requiring adjustment after
as few as 5 cuts. This is normal with a new chain, and
the interval between future adjustments will lengthen
quickly.
WARNING:
Unplug the chain saw from power
source before adjusting the chain tension.
WARNING:
Chain cutting edges are sharp. Al
-
ways wear heavy duty gloves when handling saw chain
or making saw chain adjustments.
WARNING:
Maintain proper chain tension
always. A loose chain increases the risk of kickback.
A loose chain may jump out of guide bar groove. This
may injure operator and damage chain. If the chain is
too loose or too tight, chain, bar and sprocket wear
rapidly.
pages-TV-1835-2040-2245-2017.indd 7
11.5.2017 г. 14:42:51
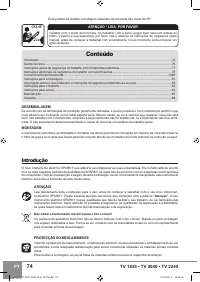
Содержание
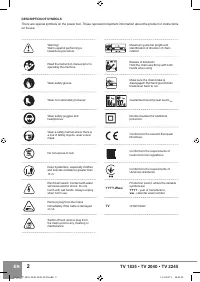
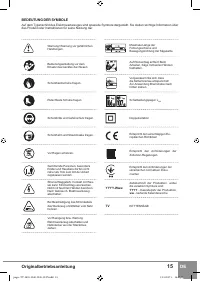
- 106 ОПИСАНИЕ СИМВОЛОВ
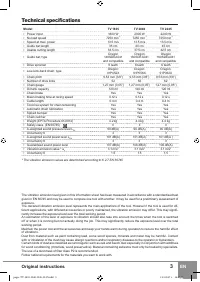
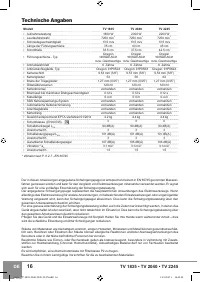
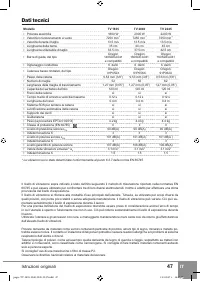
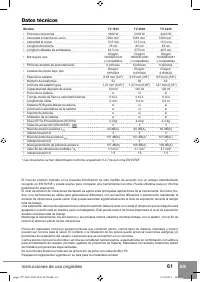
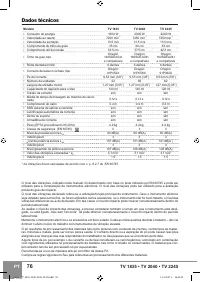
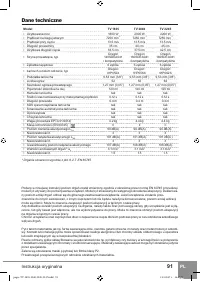
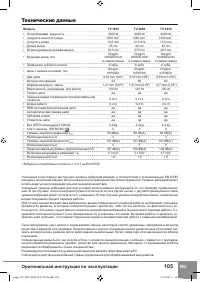
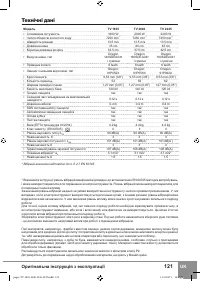
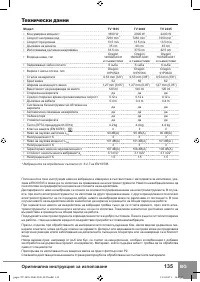
- 107 Технические данные
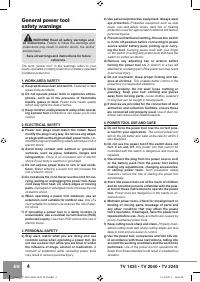
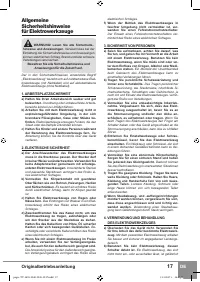
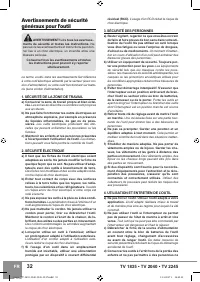
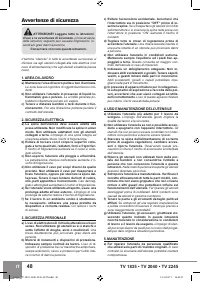
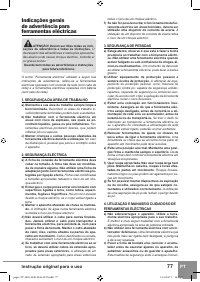
- 108 БЕЗОПАСНОСТЬ РАБОЧЕГО МЕСТА
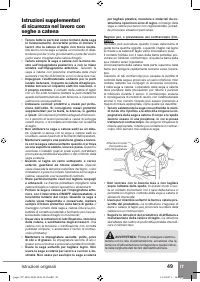
- 109 ЭКСПЛУАТАЦИЯ И УХОД ЗА; Дополнительные указания
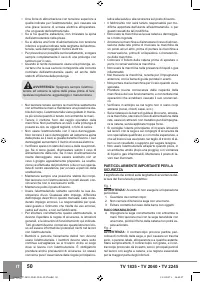
- 111 ОСОБЕННО ВАЖНО ДЛЯ БЕЗОПАСНОСТИ
- 112 МЕРЫ ДЛЯ УЛУЧШЕНИЯ БЕЗОПАСНОСТИ; Указания по монтажу; УСТАНОВКА ШИНЬІ И ЦЕПИ
- 113 РЕГУЛИРОВАНИЕ НАТЯЖЕНИЯ ЦЕПИ
- 114 ПЕРЕДПУСКОВАЯ ПРОВЕРКА
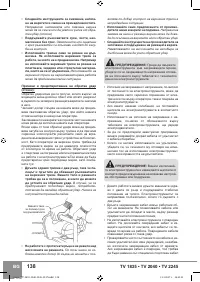
- 115 ПУСК ЦЕПНОЙ ПИЛЬІ; Инструкции по резке пилой; ОТСКОК
- 117 ОБРУБКА ВЕТВЕЙ; Техническое обслуживание
- 119 ХРАНЕНИЕ
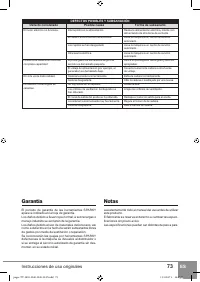
- 120 Гарантия
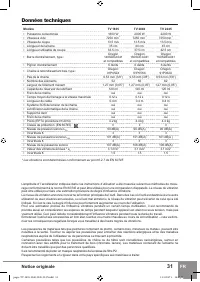
Характеристики

Остались вопросы?Не нашли свой ответ в руководстве или возникли другие проблемы? Задайте свой вопрос в форме ниже с подробным описанием вашей ситуации, чтобы другие люди и специалисты смогли дать на него ответ. Если вы знаете как решить проблему другого человека, пожалуйста, подскажите ему :)


