Шлифмашины Bosch GWS GWS 24 230 LVI - инструкция пользователя по применению, эксплуатации и установке на русском языке. Мы надеемся, она поможет вам решить возникшие у вас вопросы при эксплуатации техники.
Если остались вопросы, задайте их в комментариях после инструкции.
"Загружаем инструкцию", означает, что нужно подождать пока файл загрузится и можно будет его читать онлайн. Некоторые инструкции очень большие и время их появления зависит от вашей скорости интернета.


English |
29
Bosch Power Tools
1 609 929 L56 | (4.6.08)
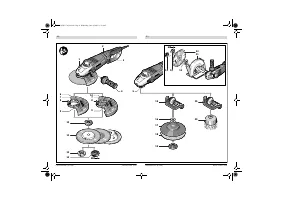
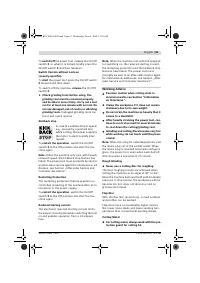
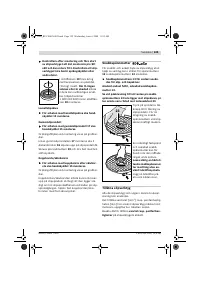
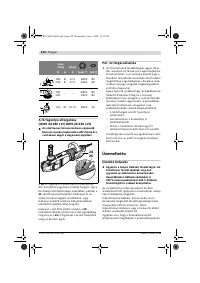
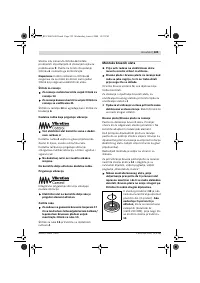
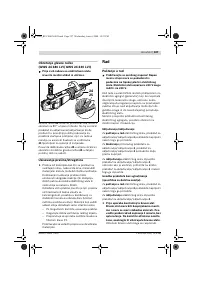
Flap Disc
f
For operations with the flap disc, always
mount the hand guard 15.
Rubber Sanding Plate
f
For operations with the rubber sanding
plate 17, always mount the hand guard 15.
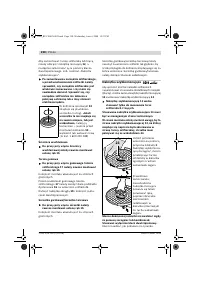
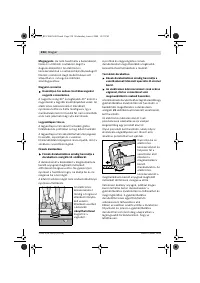
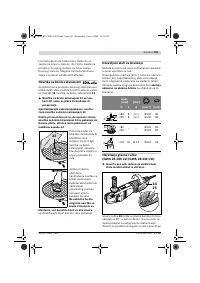
See graphics page for the mounting sequence.
Before mounting the rubber sanding plate
17
,
put the 2 spacer discs
16
onto the grinder spin-
dle
5
.
Screw on the round nut
19
and tighten with the
two-pin spanner.
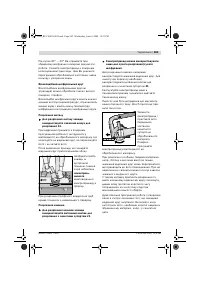
Cup Brush/Disc Brush
f
For operations with the cup brush/wheel
brush, always mount the hand guard 15.
See graphics page for the mounting sequence.
The cup brush/disc brush must be able to be
screwed onto the grinder spindle until it rests
firmly against the grinder spindle flange at the
end of the grinder spindle threads. Tighten the
cup brush/disc brush with an open-end span-
ner.
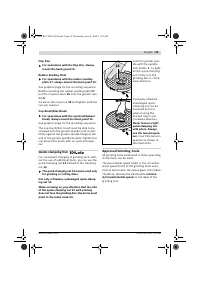
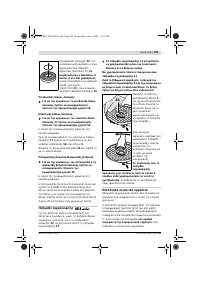
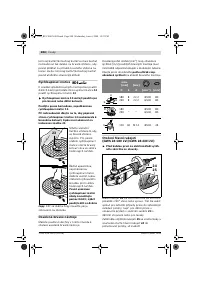
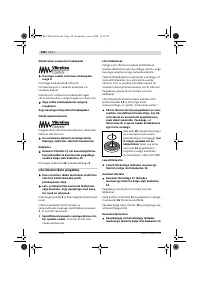
Quick-clamping Nut
For convenient changing of grinding tools with-
out the use of additional tools, you can use the
quick-clamping nut
13
instead of the clamping
nut
12
.
f
The quick-clamping nut 13 may be used only
for grinding or cutting discs.
Use only a flawless, undamaged quick-clamp-
ing nut 13.
When screwing on, pay attention that the side
of the quick-clamping nut 13 with printing
does not face the grinding disc; the arrow must
point to the index mark 23.
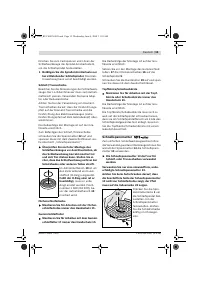
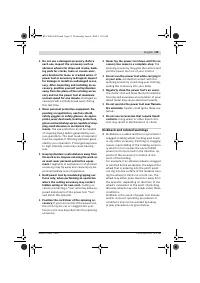
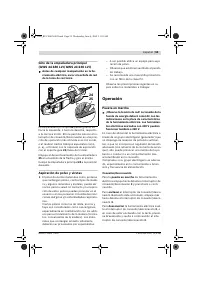
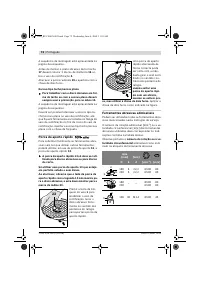
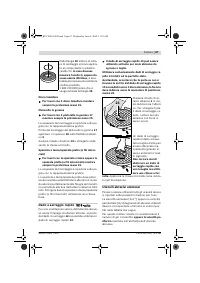
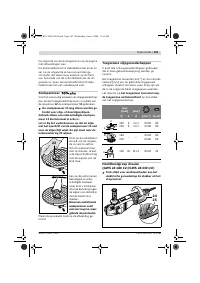
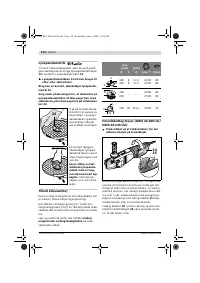
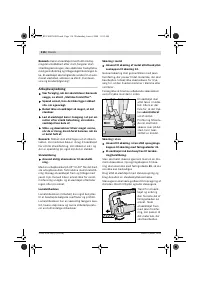
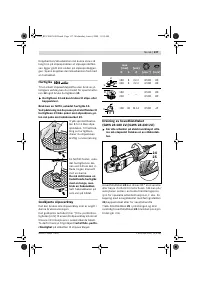
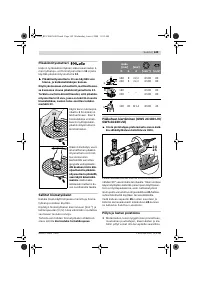
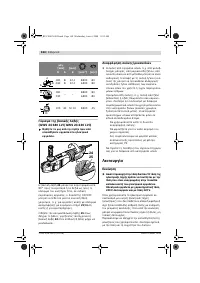
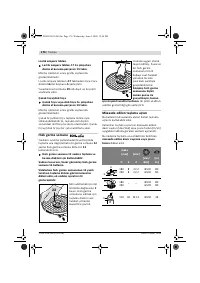
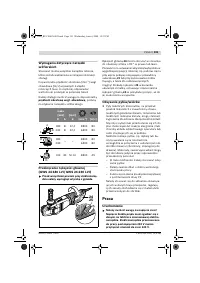
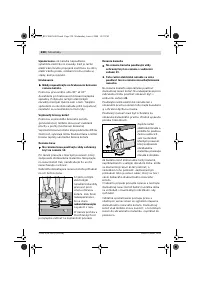
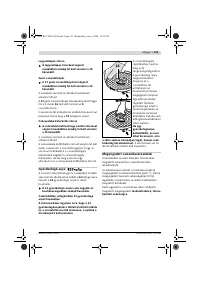
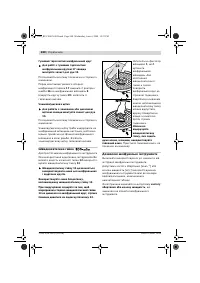
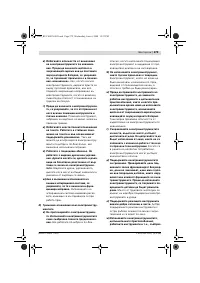
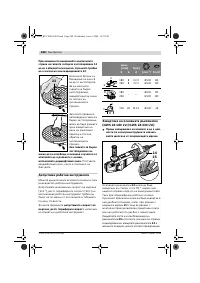
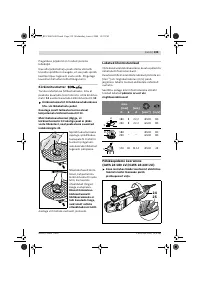
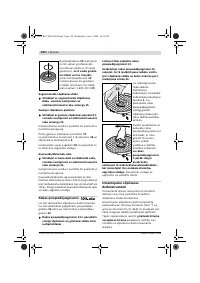
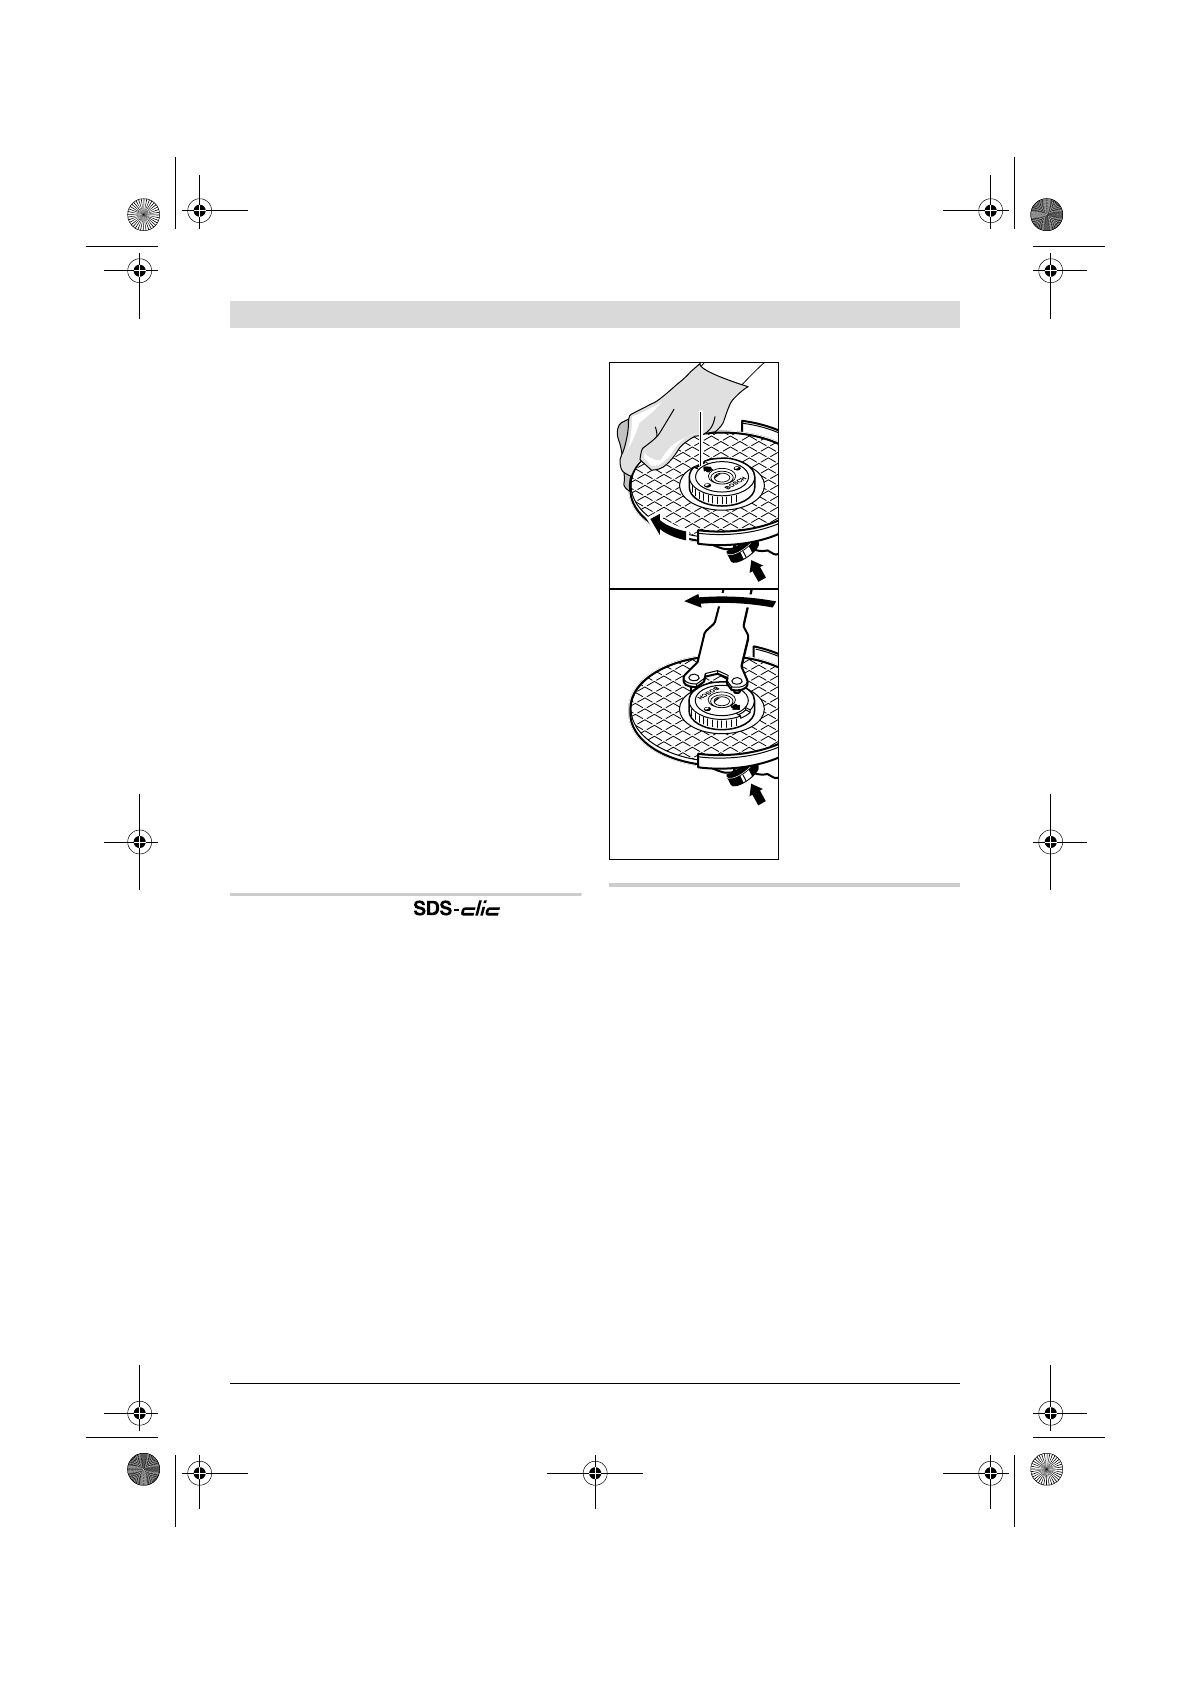
Lock the grinder spin-
dle with the spindle
lock button
1
. To tight-
en the quick-clamping
nut, firmly turn the
grinding disc in clock-
wise direction.
A properly attached,
undamaged quick-
clamping nut can be
loosened by hand
when turning the
knurled ring in anti-
clockwise direction.
Never loosen a tight
quick-clamping nut
with pliers. Always
use the two-pin span-
ner.
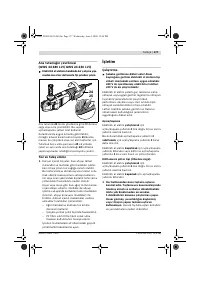
Insert the two-pin
spanner as shown in
the illustration.
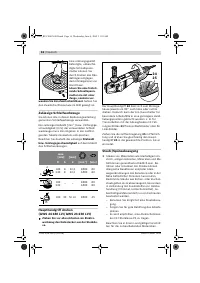
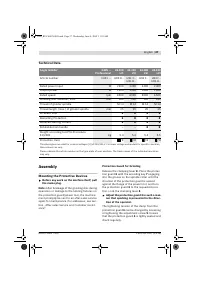
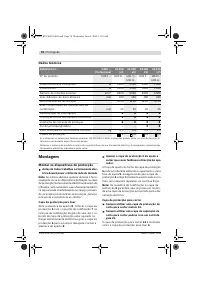
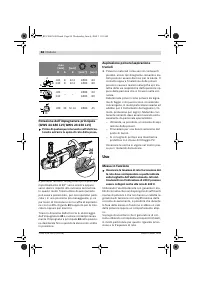
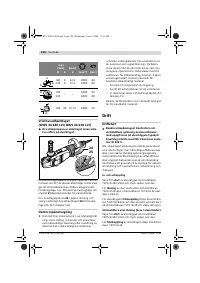
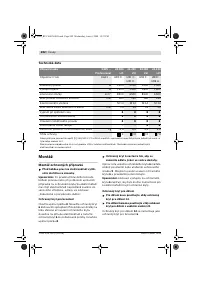
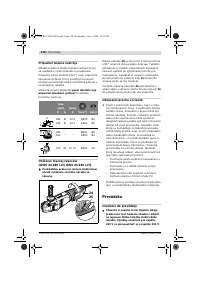
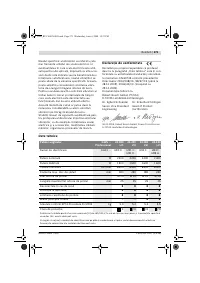
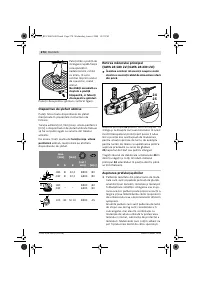
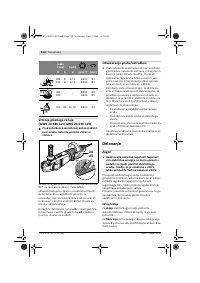
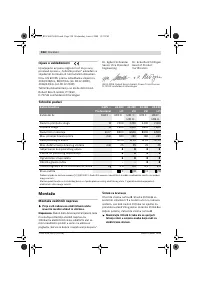
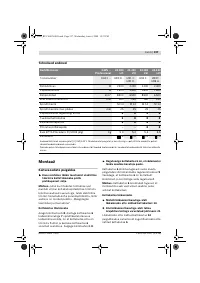
Approved Grinding Tools
All grinding tools mentioned in these operating
instructions can be used.
The permissible speed [rpm] or the circumfer-
ential speed [m/s] of the grinding tools used
must at least match the values given in the table.
Therefore, observe the permissible
rotation-
al/circumferential speed
on the label of the
grinding tool.
23
OBJ_BUCH-429-005.book Page 29 Wednesday, June 4, 2008 11:55 AM
Содержание
- 237 а) Ремонт Вашего электроинструмента
- 238 частиц и частиц материала.
- 240 Применяйте защитный очки.
- 241 Держите Ваше рабочее место в чистоте.; Описание функции; Применение по назначению; Применяйте средства защиты органов слуха!
- 242 Заявление о соответствии
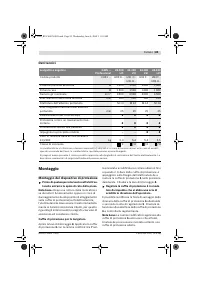
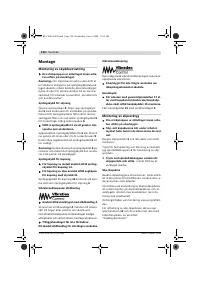
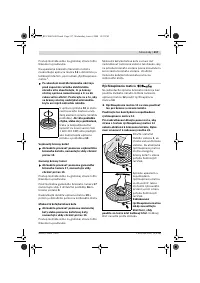
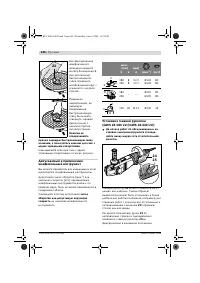
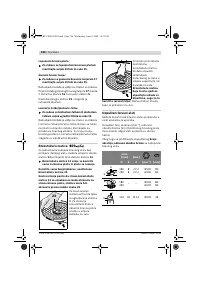
- 243 Сборка; Установка защитных устройств; Защитный кожух для шлифования
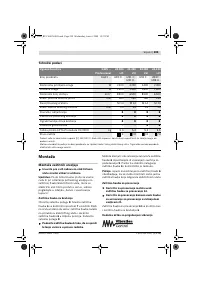
- 244 Шлифовальный круг/oтрезной круг; Лепестковый шлифовальный круг; Быстрозажимная гайка
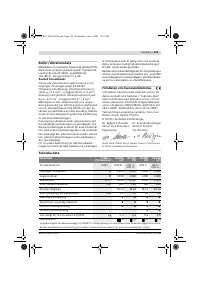
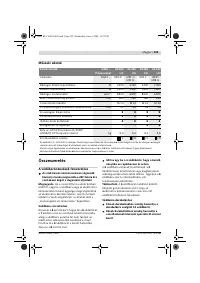
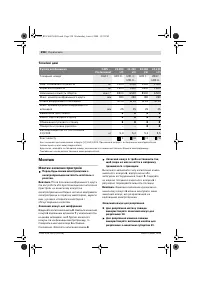
- 245 число
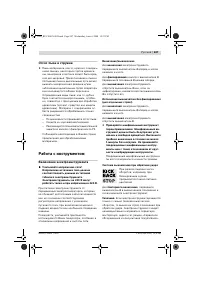
- 246 Отсос пыли и стружки; Работа с инструментом; Включение электроинструмента
- 247 Указания по применению
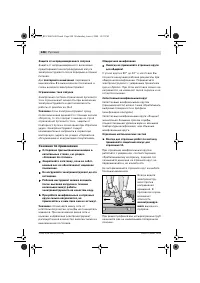
- 248 Резание камня; Техобслуживание и сервис; Техобслуживание и очистка
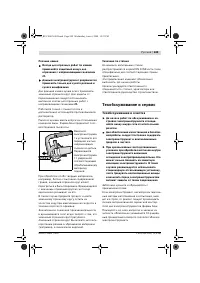
- 249 Россия; Утилизация


