Кондиционеры Daikin ATXN-MB - инструкция пользователя по применению, эксплуатации и установке на русском языке. Мы надеемся, она поможет вам решить возникшие у вас вопросы при эксплуатации техники.
Если остались вопросы, задайте их в комментариях после инструкции.
"Загружаем инструкцию", означает, что нужно подождать пока файл загрузится и можно будет его читать онлайн. Некоторые инструкции очень большие и время их появления зависит от вашей скорости интернета.

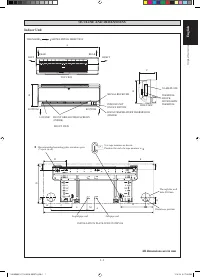


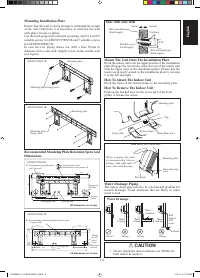


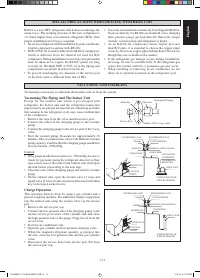


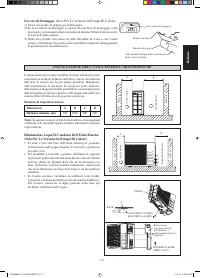

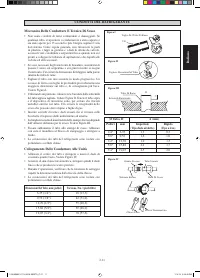

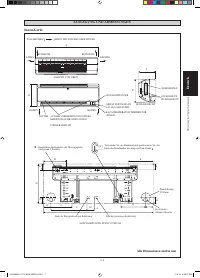


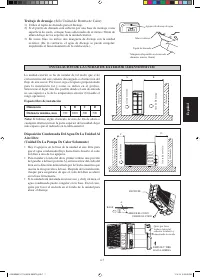
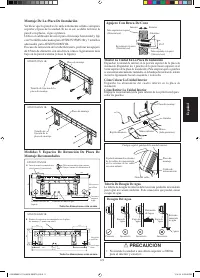


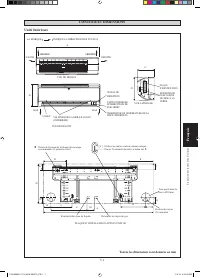

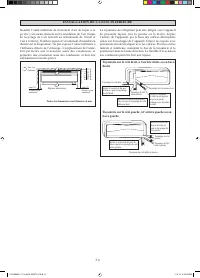
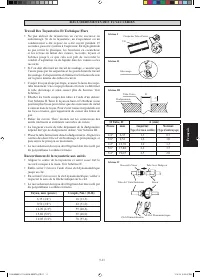

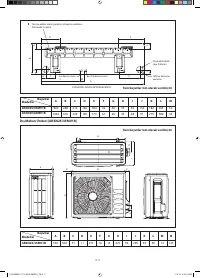
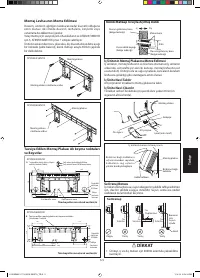
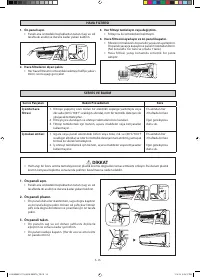

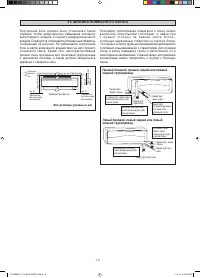

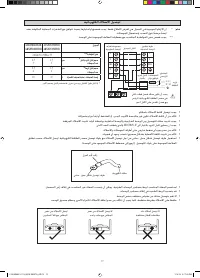

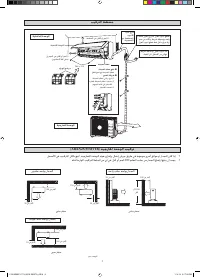

Drain work.
(Heat Pump Unit Only)
1) Use drain plug for drainage.
2) If the drain port is covered by a mounting base or floor surface, place
additional foot bases of at least 30mm in height under the outdoor
unit’s feet.
3) In cold areas, do not use a drain hose with the outdoor unit. (Otherwise,
drain water may freeze, impairing heating performance.)
Drain water hole
Bottom frame
Drain Plug
Hose (available comercially,
inner dia. 16mm)
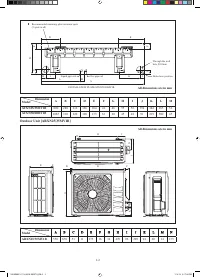
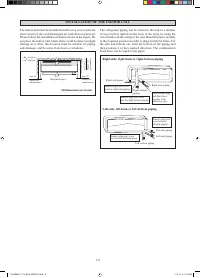
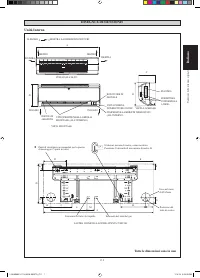
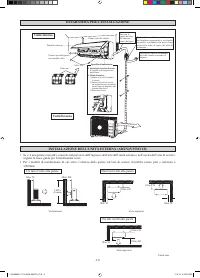
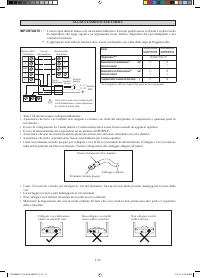
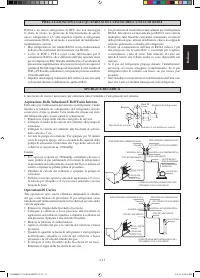
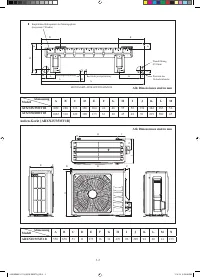
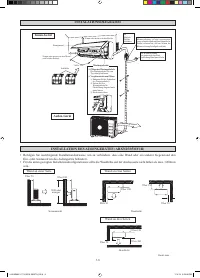
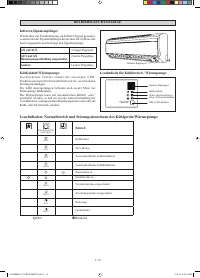
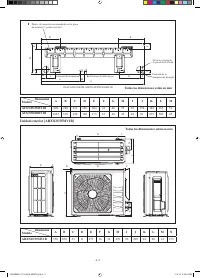
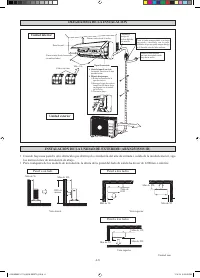
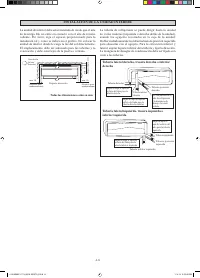
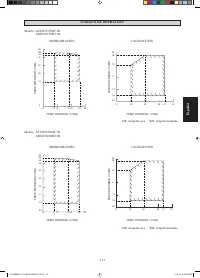
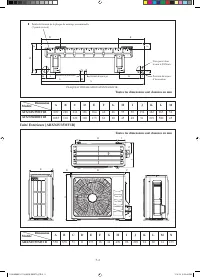
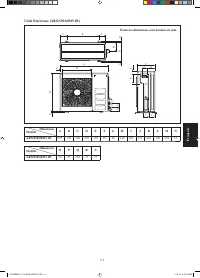
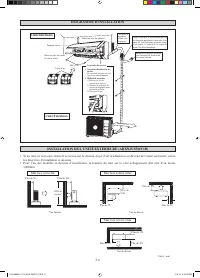
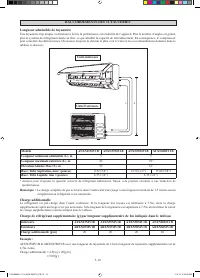
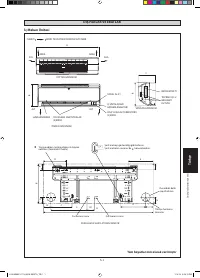
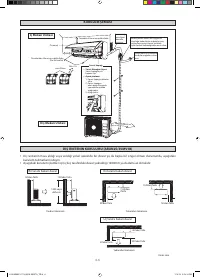
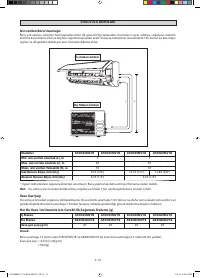
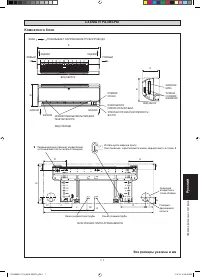
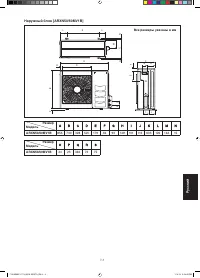
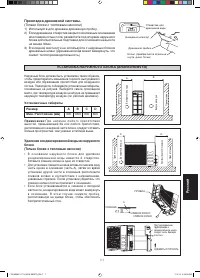
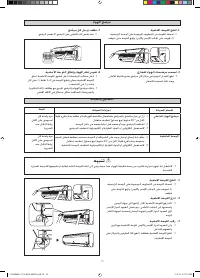
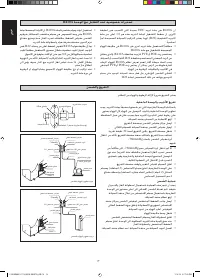
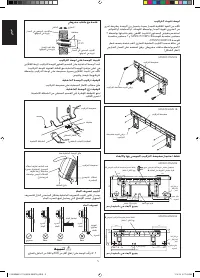
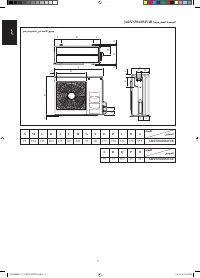
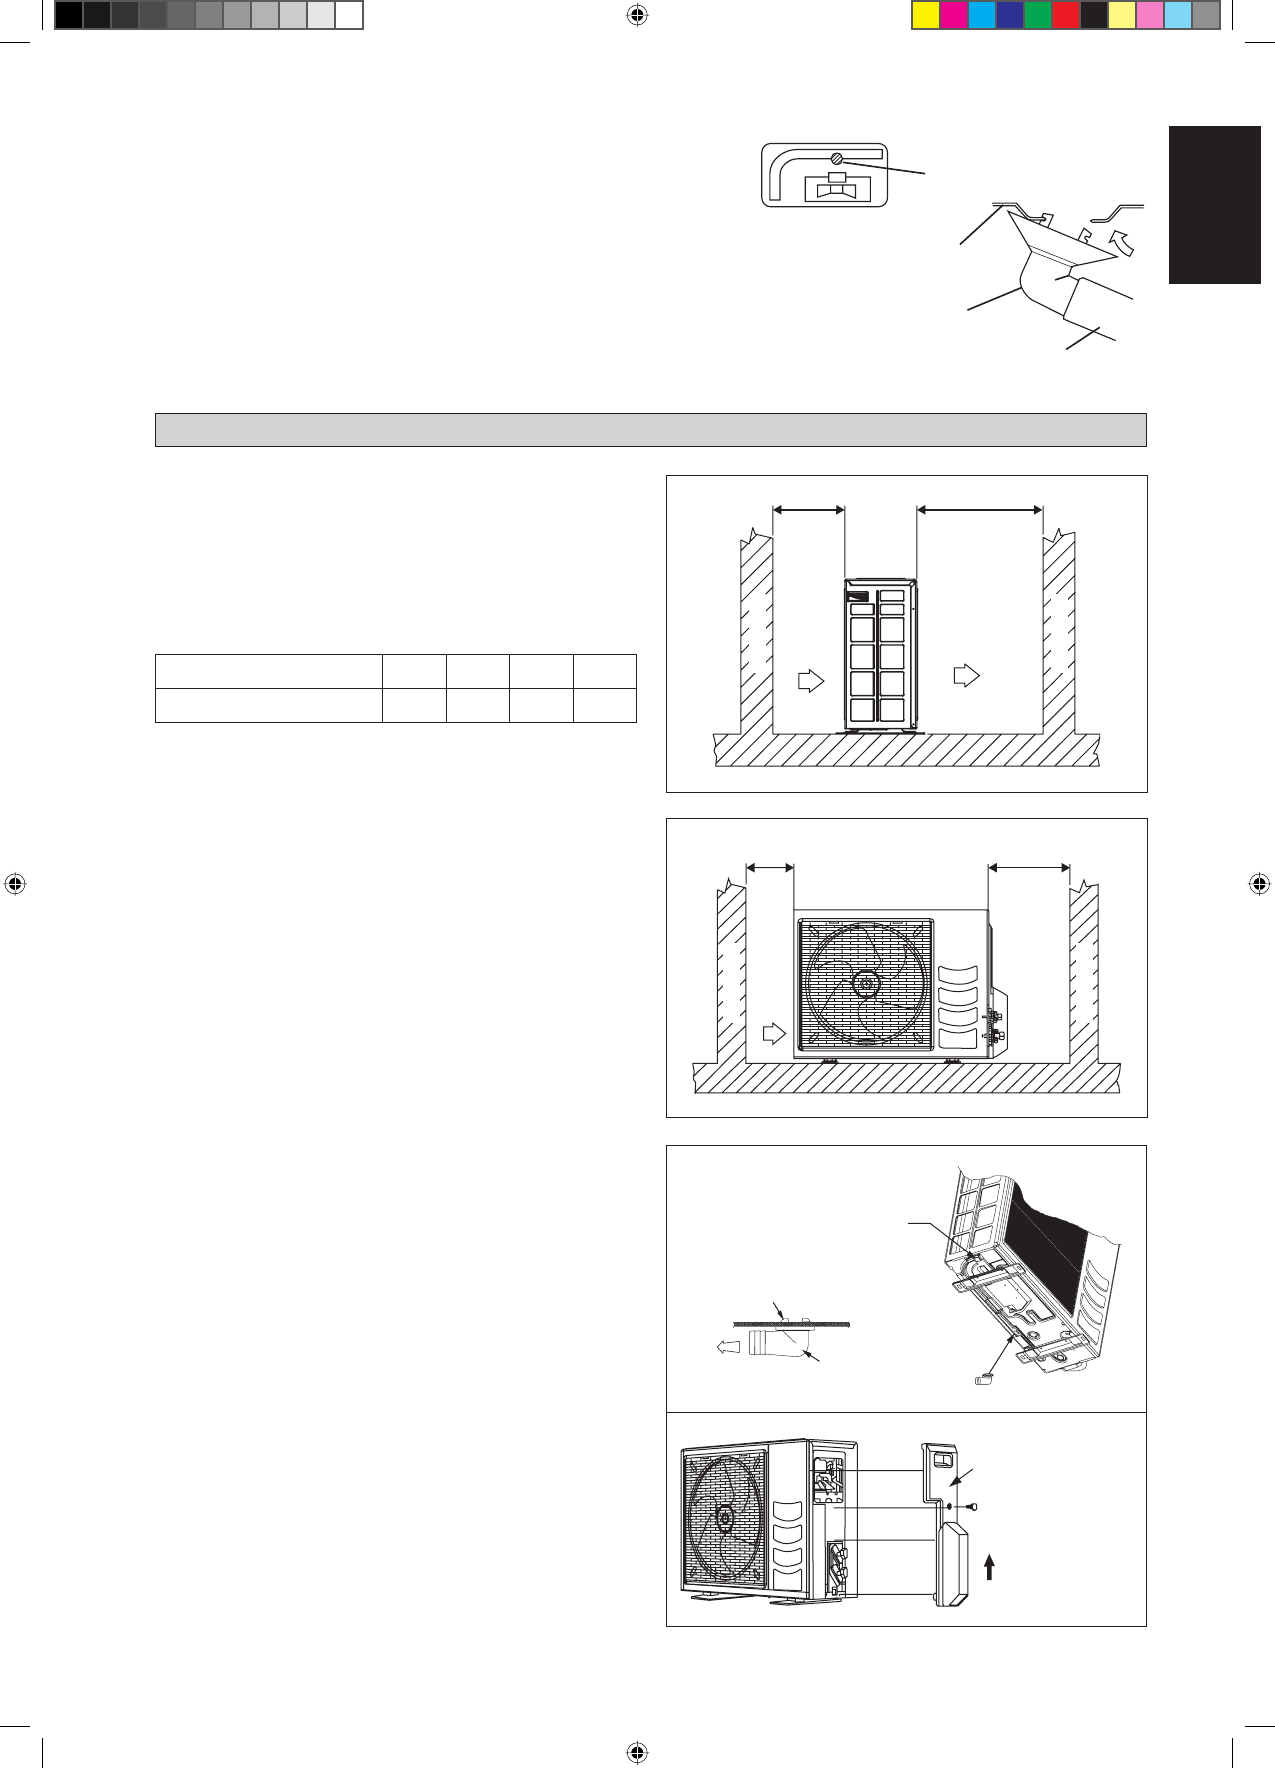
INSTALLATION OF THE OUTDOOR UNIT (ARXN50/60MV1B)
The outdoor unit must be installed in such a way, so as to
prevent short circuit of the hot discharged air or obstruction to
the smooth air flow. Please follow the installation clearances
shown in the figure. Select the coolest possible place where
intake air temperature is not greater than the outside air
temperature (Refer to operating range).
Installation clearances
Note:
If there is any obstacle higher than 2m, or if there is any
obstruction at the upper part of the unit, please allow more
space than the figure indicated in the above table.
Dimension
A
B
C
D
Minimum Distance, mm
300
1000
300
500
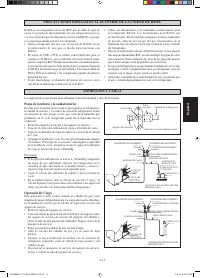
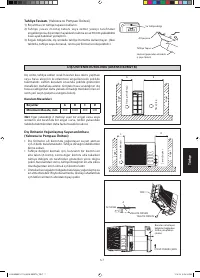
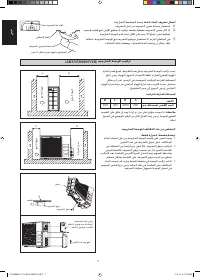
Condensed Water Disposal Of Outdoor Unit
(Heat Pump Unit Only)
There are 2 holes on the base of Outdoor Unit for condensed
water to flow out. Insert the drain elbow to one of the
holes.
To install the drain elbow, first insert one portion of the
hook to the base (portion A), then pull the drain elbow in
the direction shown by the arrow while inserting the other
portion to the base. After installation, check to ensure that
the drain elbow clings to base firmly.
If the unit is installed in a snowy and chilly area, condensed
water may freeze in the base. In such case, please remove
plug at the bottom of unit to smooth the drainage.
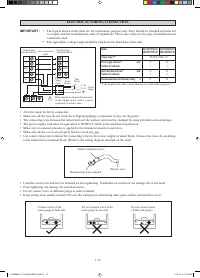
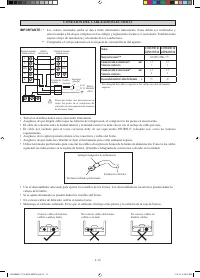
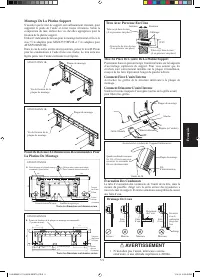
•
•
•
Please remove side
plate when connecting
the piping and
connecting cord
PUSH & PULL UP
BASE
A
DRAIN ELBOW
DRAIN ELBOW
PLUG
English
1-7
Return air
Dischar
ge air
A
B
Obstacle
Return air
Service access
C
D
Obstacle
Obstacle
Obstacle
1 IM-5WMYJ-1113(0)DK SIESTA_EN.i7 7
1 IM-5WMYJ-1113(0)DK SIESTA_EN.i7 7
1/13/14 5:17:28 PM
1/13/14 5:17:28 PM
Содержание
- 113 Размер
- 114 МЕРЫ ПРЕДОСТОРОЖНОСТИ; РУКОВОДСТВО ПО УСТАНОВКЕ; ПPEДУПPEЖДEHИE
- 116 РИСУНОК УСТАНОВКИ; Наружный блок; Одна сторона обращена к стене
- 117 Прокладка дренажной системы.; Установочные габариты; П р и н а л и ч и и л ю б о г о п р е п я т с т в и я; Ру
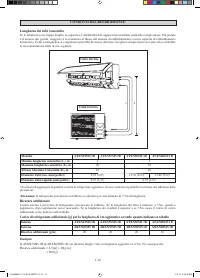
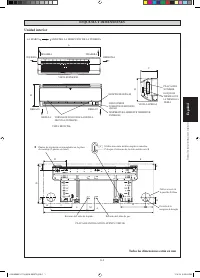
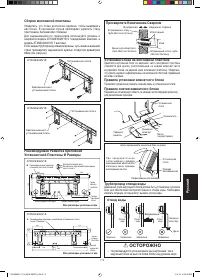
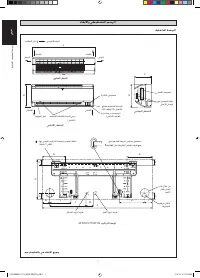
- 118 УСТАНОВКА КОМНАТНОГО БЛОКА
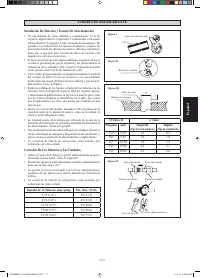
- 119 Отвод воды; Прицепите кулачковые захваты нижней рамы к установочной плате.; ОCTOPOЖHO
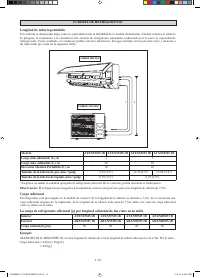
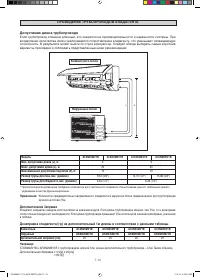
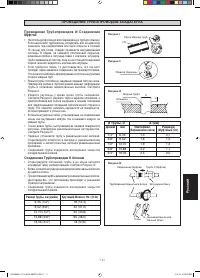
- 120 ухудшением качества функционирования.; Допустимая длина трубопровода
- 121 Дюйм; ПРОВЕДЕНИЕ ТРУБОПРОВОДОВ ХЛАДАГЕНТА
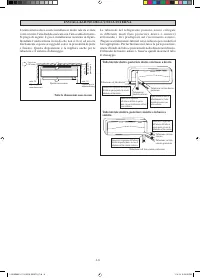
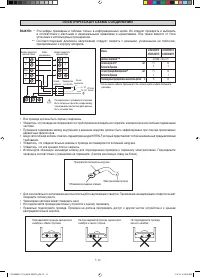
- 122 ЭЛЕКТРИЧЕСКАЯ СХЕМА СОЕДИНЕНИЙ; прикрепленной к корпусу аппарата.; Прикрепите изоляционный рукав
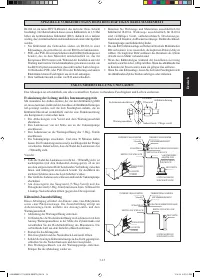
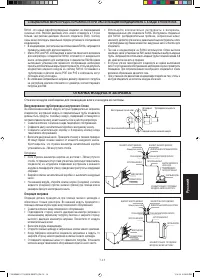
- 123 Осторожно; Операция заправки
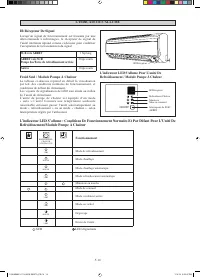
- 124 Операция; ВКЛ; Модуль Охлаждения/Обогревательный Насос; долгий звуковой сигнал; Дополнительная информация; коротких звуковых сигнала
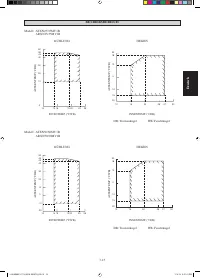
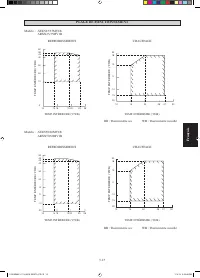
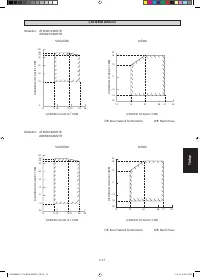
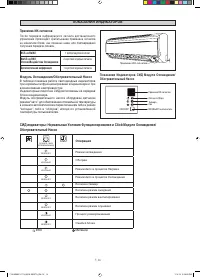
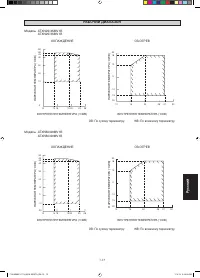
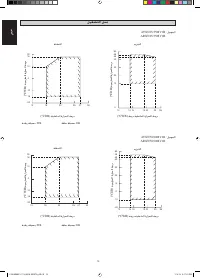
- 125 ВНУТРЕННЯЯ ТЕМПЕРАТУРА (; РАБОЧИЙ ДИАПАЗОН
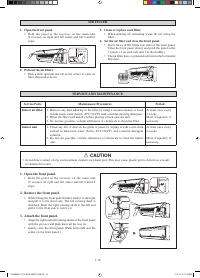
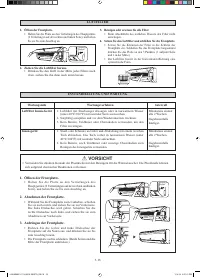
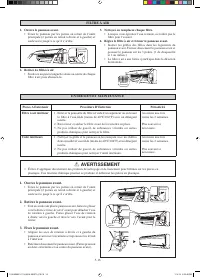
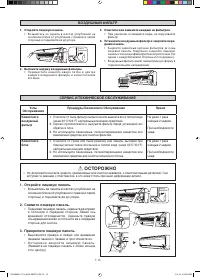
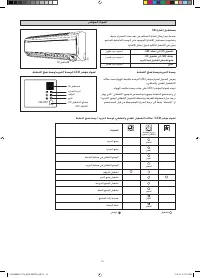
- 126 СЕРВИС И ТЕХНИЧЕСКОЕ ОБСЛУЖИВАНИЕ; Узлы; ВОЗДУШНЫЙ ФИЛЬТР; Откройте лицевую панель.
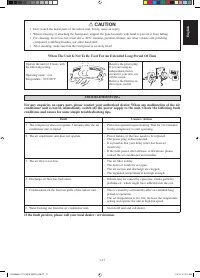
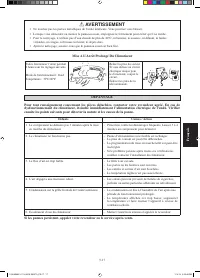
- 127 Неисправность; Длительный перерыв в использовании кондиционера
- 133 Importer for Turkey


