Кондиционеры Daikin ATXN-MB - инструкция пользователя по применению, эксплуатации и установке на русском языке. Мы надеемся, она поможет вам решить возникшие у вас вопросы при эксплуатации техники.
Если остались вопросы, задайте их в комментариях после инструкции.
"Загружаем инструкцию", означает, что нужно подождать пока файл загрузится и можно будет его читать онлайн. Некоторые инструкции очень большие и время их появления зависит от вашей скорости интернета.

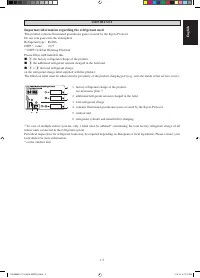


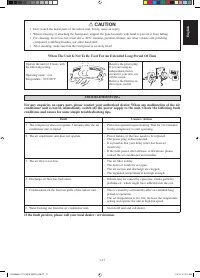


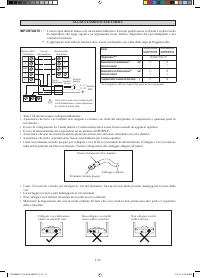
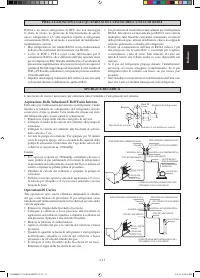
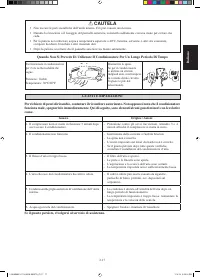


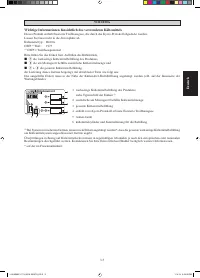
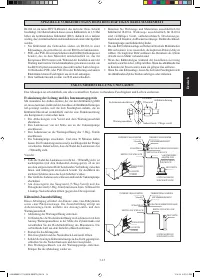
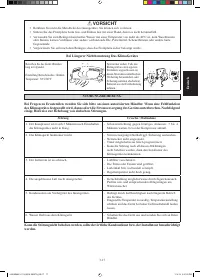

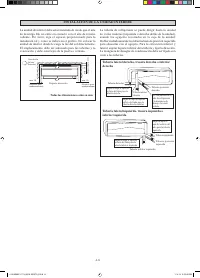
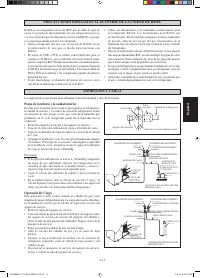


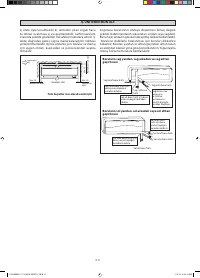
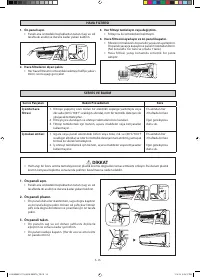

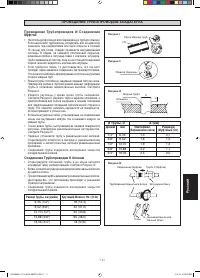

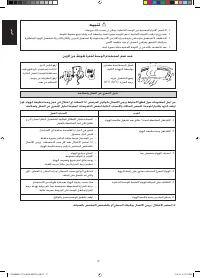
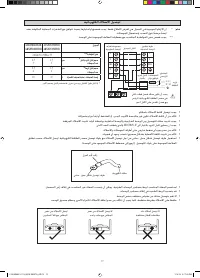
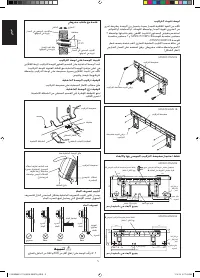

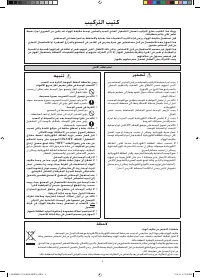

Water
leaking
Water
retention
End
dipped
into
water
Drain
Correct
Wrong
Water
leaking
Water
leaking
Wrong
Wrong
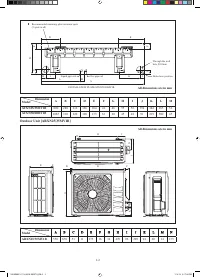
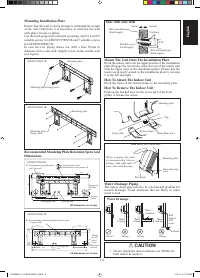
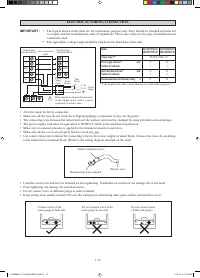
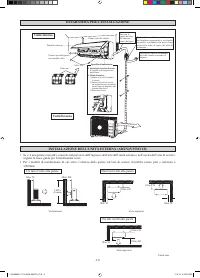
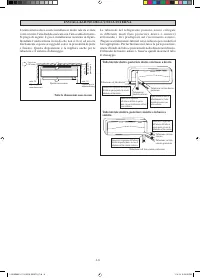
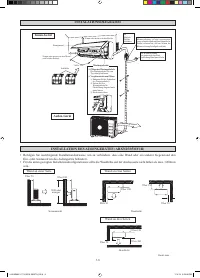
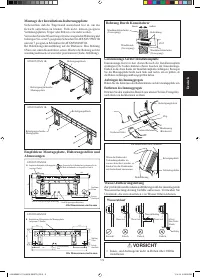
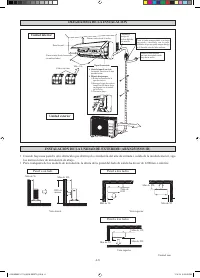
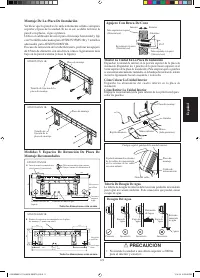
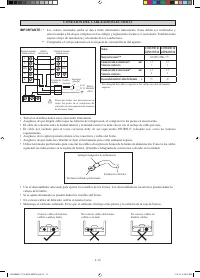
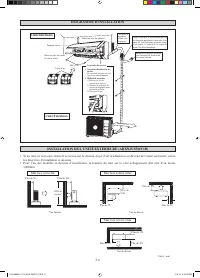
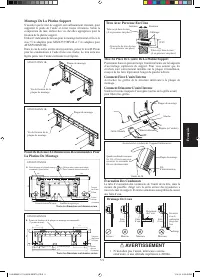
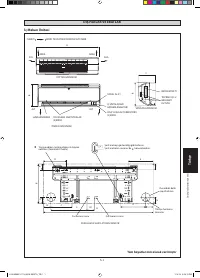
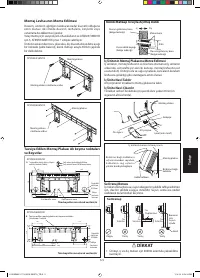
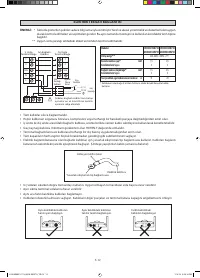
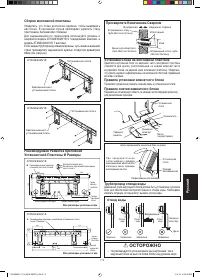
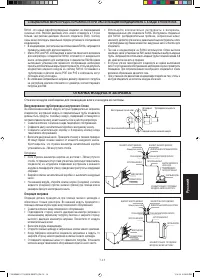
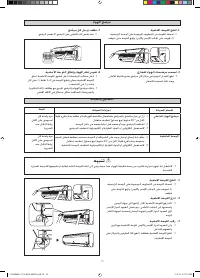
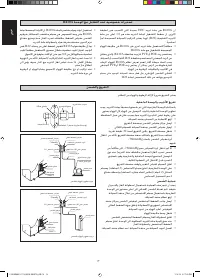
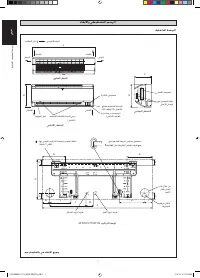
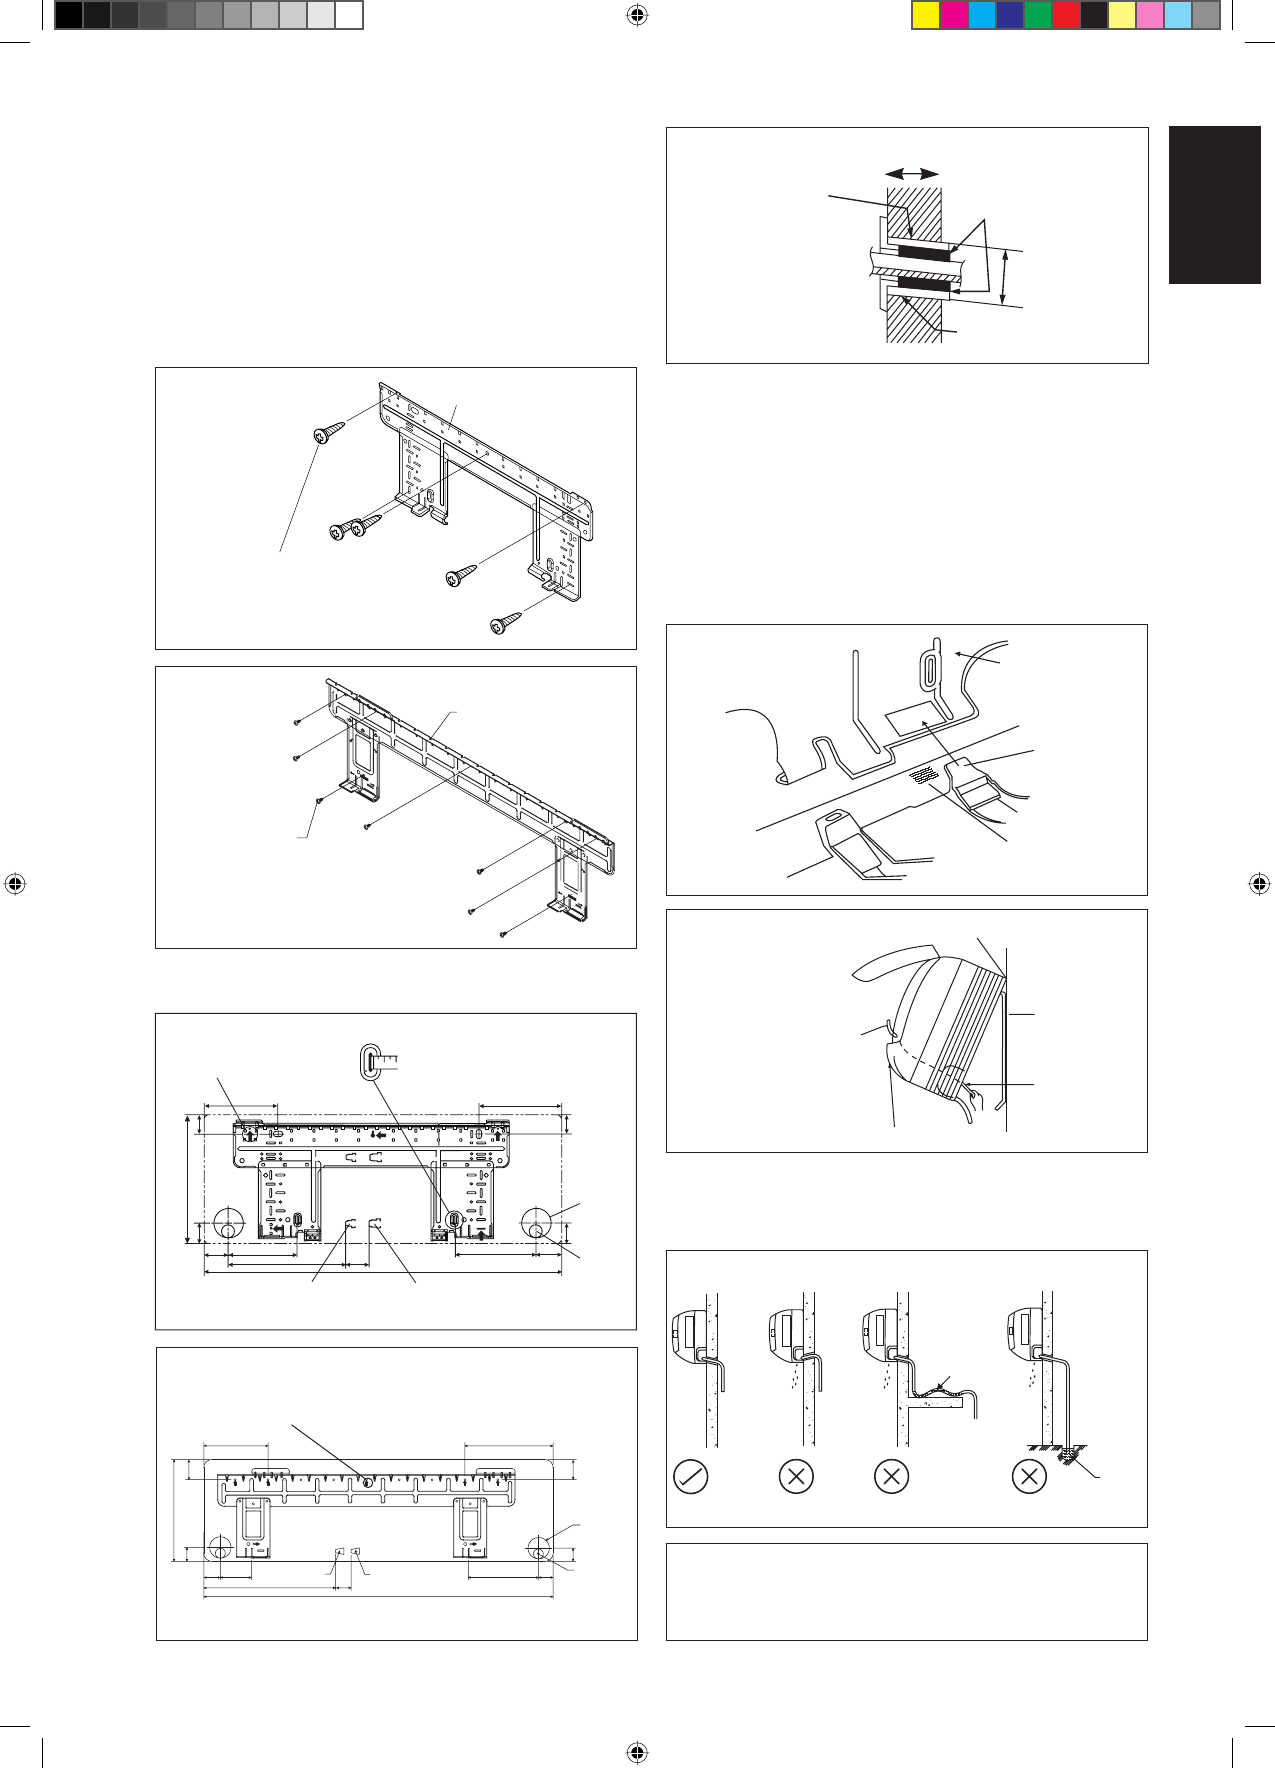
Mounting Installation Plate
Ensure that the wall is strong enough to withstand the weight
of the unit. Otherwise, it is necessary to reinforce the wall
with plates, beams or pillars.
Use the level gauge for horizontal mounting, and fix it with 5
suitable screws for ATXN25/35MV1B and 7 suitable screws
for ATXN50/60MV1B.
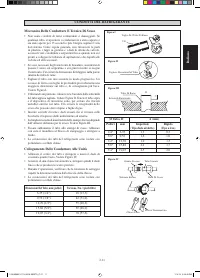
In case the rear piping draws out, drill a hole 65mm in
diameter with a cone drill, slightly lower on the outside wall
(see figure).
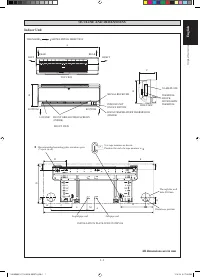
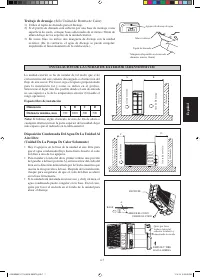
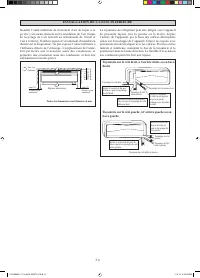
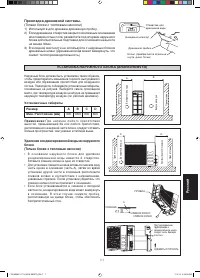
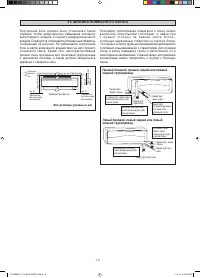
Water Drainage Piping
The indoor drain pipe must be in a downward gradient for
smooth drainage. Avoid situations that are likely to cause
water to leak.
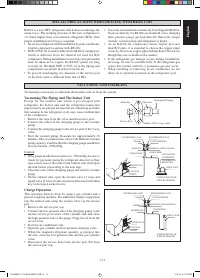
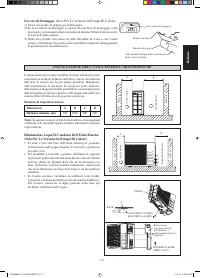
Water Drainage
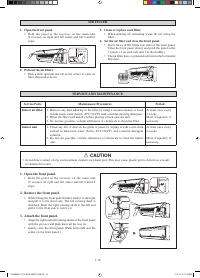
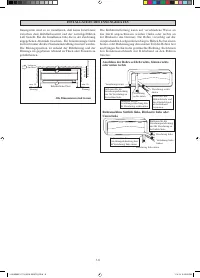
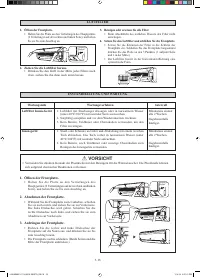
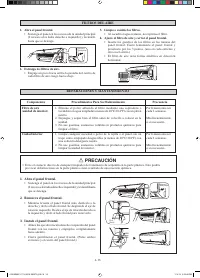
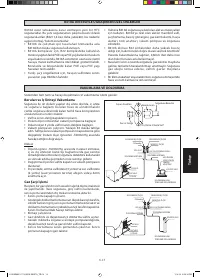
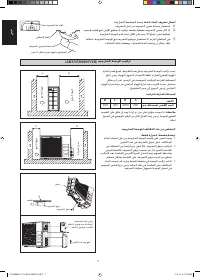
How To Attach The Indoor Unit
Hook the claws of the bottom frame to the mounting plate.
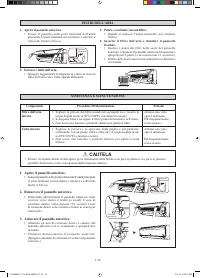
How To Remove The Indoor Unit
Push up the marked area (at the lower part of the front
grille) to release the claws.
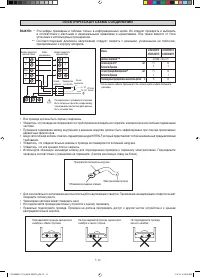
Mount The Unit Onto The Installation Plate
Hook the indoor unit onto the upper portion of the installation
plate (Engage the two hooks at the rear top of the indoor unit
with the upper edge of the installation plate). Ensure that the
hooks are properly seated on the installation plate by moving
it to the left and right.
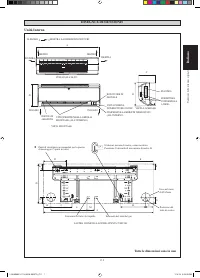
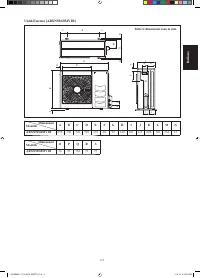
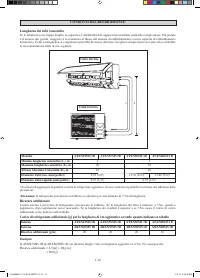
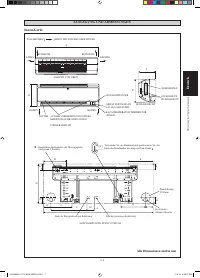
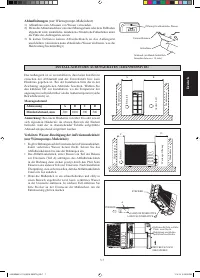
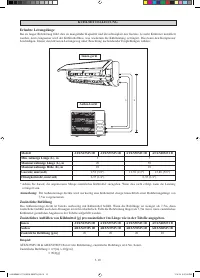
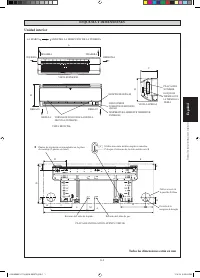
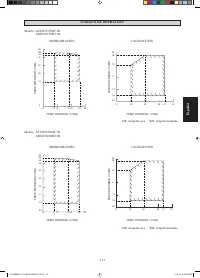
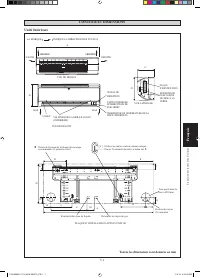
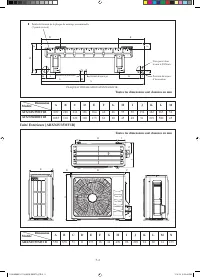
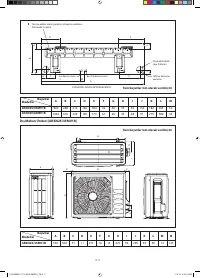
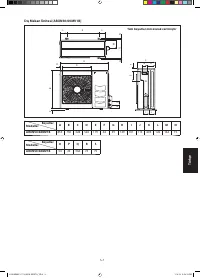
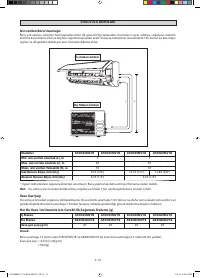
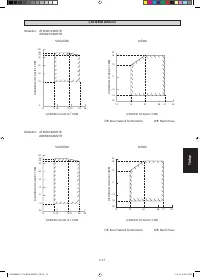
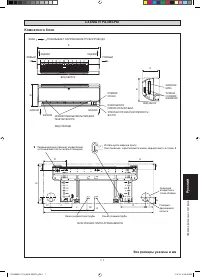
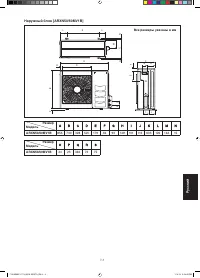
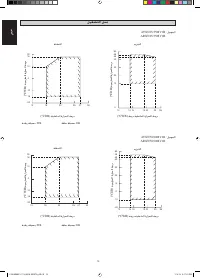
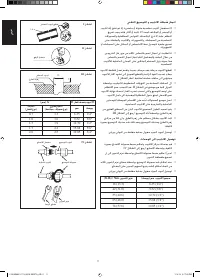
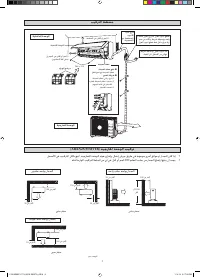
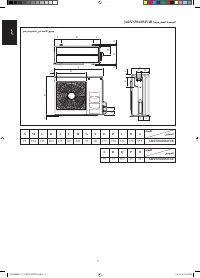
Recommended Mounting Plate Retention Spots And
Dimensions
Mounting plate
Mounting plate
fixing screw
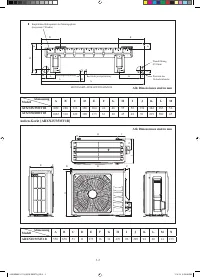
ATXN50/60MV1B
Mounting plate
Mounting plate fixing screw
ATXN25/35MV1B
Through
the wall
hole Ø
65mm
190
173
61
310
61
Drain hose
position
Gas pipe end
Liquid pipe end
48
45
580
1065
219
40
40
91
45
Through the wall
hole Ø 65mm
Drain hose
position
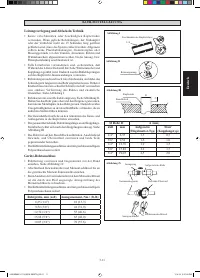
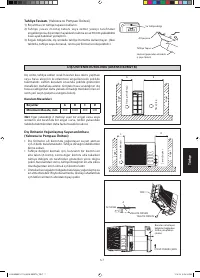
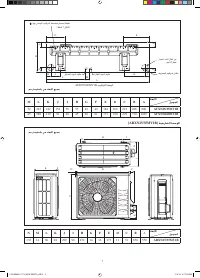
Use tape measure as shown.
Position the end of a tape measure at
Ñ
Gas pipe end
Liquid pipe end
166
184
181.7
55.5
54.5
153.8
263
51.9
800
45.9
42.2
288
42.2
45.9
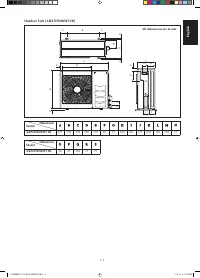
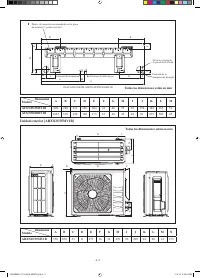
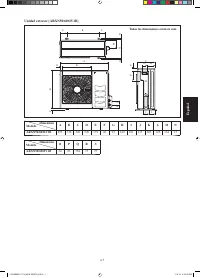
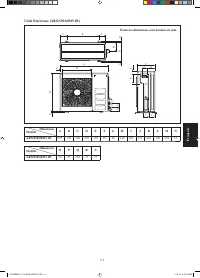
All dimensions are in mm
ATXN50/60MV1B
ATXN25/35MV1B
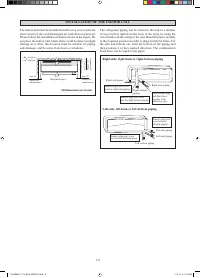
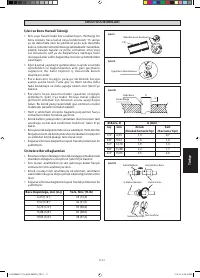
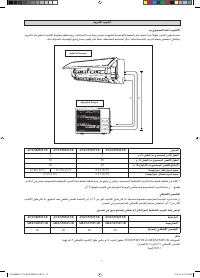
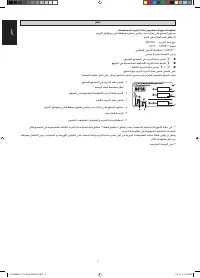
Hole with cone drill
Inside
Ø 65
Wall embedded pipe
(Field supply)
Wall hole cover
(Field supply)
Wall embedded pipe
(Field supply)
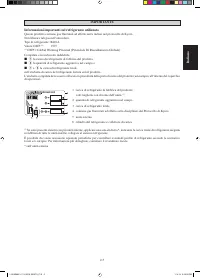
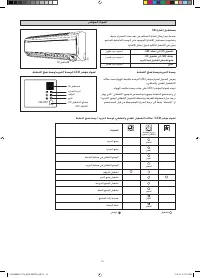
W h e n s t r i p p i n g t h e e n d s
of interconnecting wires in
advance, bind right ends of
wires with insulating tape.
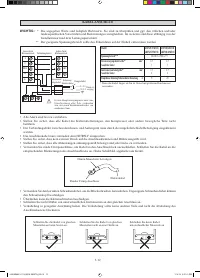
Hand indoor unit’s hook here.
Mounting plate
Interconnecting
wires
Wire guide
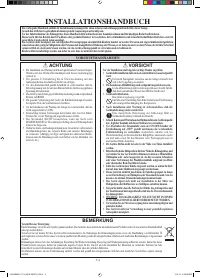
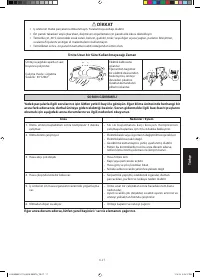
!
CAUTION
• Do not install the unit at altitude over 2000m for
both indoor & outdoor.
All dimensions are in mm
Outside
Caulking
«
Recommended mounting plate retention spots
(7 spots in all)
«
Recommended mounting plate retention
spots (5 spots in all)
English
1-9
Mounting plate
Clip
Bottom frame
Mark (Rear side)
Front grille
1 IM-5WMYJ-1113(0)DK SIESTA_EN.i9 9
1 IM-5WMYJ-1113(0)DK SIESTA_EN.i9 9
1/13/14 5:17:29 PM
1/13/14 5:17:29 PM
Содержание
- 113 Размер
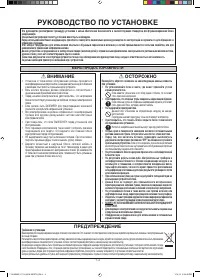
- 114 МЕРЫ ПРЕДОСТОРОЖНОСТИ; РУКОВОДСТВО ПО УСТАНОВКЕ; ПPEДУПPEЖДEHИE
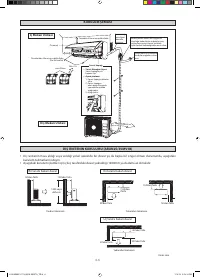
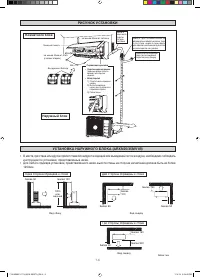
- 116 РИСУНОК УСТАНОВКИ; Наружный блок; Одна сторона обращена к стене
- 117 Прокладка дренажной системы.; Установочные габариты; П р и н а л и ч и и л ю б о г о п р е п я т с т в и я; Ру
- 118 УСТАНОВКА КОМНАТНОГО БЛОКА
- 119 Отвод воды; Прицепите кулачковые захваты нижней рамы к установочной плате.; ОCTOPOЖHO
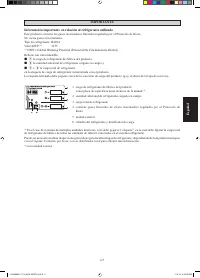
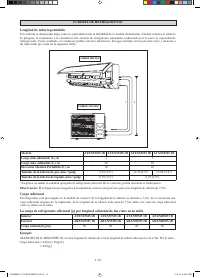
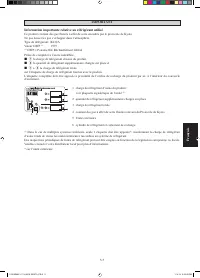
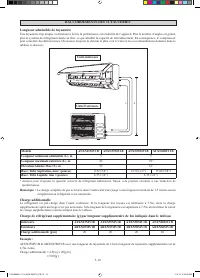
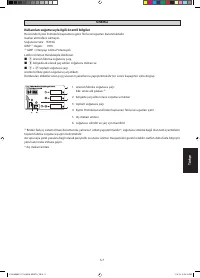
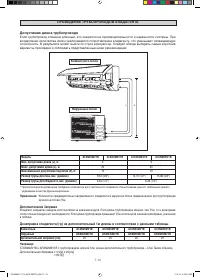
- 120 ухудшением качества функционирования.; Допустимая длина трубопровода
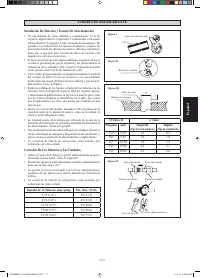
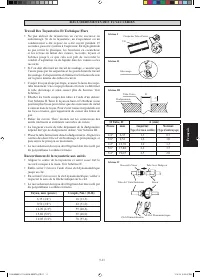
- 121 Дюйм; ПРОВЕДЕНИЕ ТРУБОПРОВОДОВ ХЛАДАГЕНТА
- 122 ЭЛЕКТРИЧЕСКАЯ СХЕМА СОЕДИНЕНИЙ; прикрепленной к корпусу аппарата.; Прикрепите изоляционный рукав
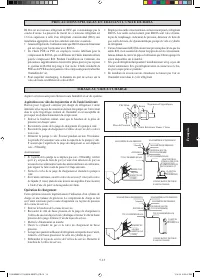
- 123 Осторожно; Операция заправки
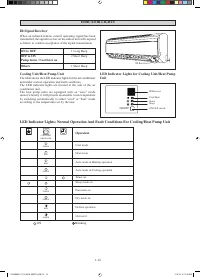
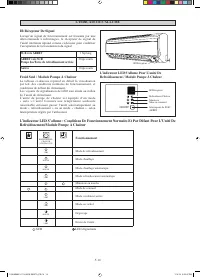
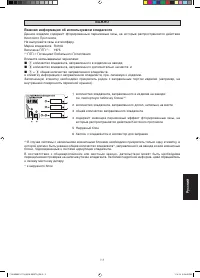
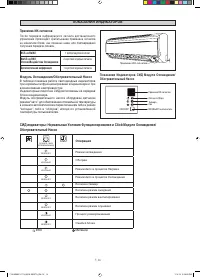
- 124 Операция; ВКЛ; Модуль Охлаждения/Обогревательный Насос; долгий звуковой сигнал; Дополнительная информация; коротких звуковых сигнала
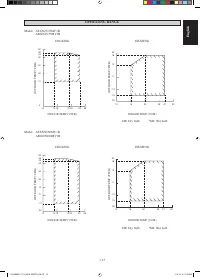
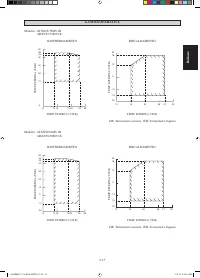
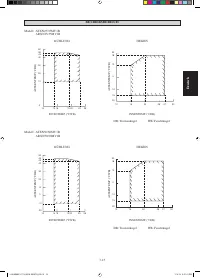
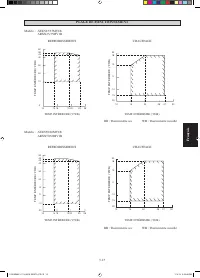
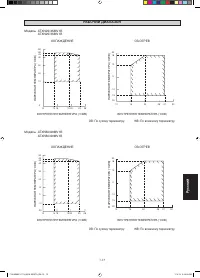
- 125 ВНУТРЕННЯЯ ТЕМПЕРАТУРА (; РАБОЧИЙ ДИАПАЗОН
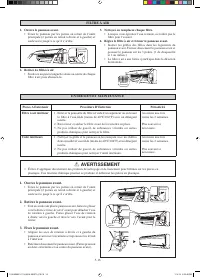
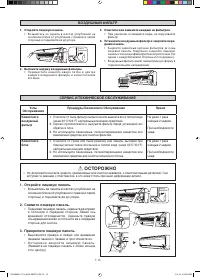
- 126 СЕРВИС И ТЕХНИЧЕСКОЕ ОБСЛУЖИВАНИЕ; Узлы; ВОЗДУШНЫЙ ФИЛЬТР; Откройте лицевую панель.
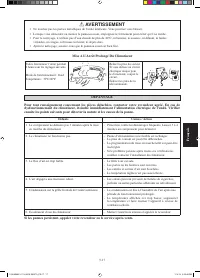
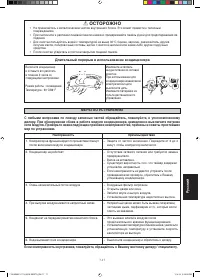
- 127 Неисправность; Длительный перерыв в использовании кондиционера
- 133 Importer for Turkey


