Усилители Yamaha AX-397 - инструкция пользователя по применению, эксплуатации и установке на русском языке. Мы надеемся, она поможет вам решить возникшие у вас вопросы при эксплуатации техники.
Если остались вопросы, задайте их в комментариях после инструкции.
"Загружаем инструкцию", означает, что нужно подождать пока файл загрузится и можно будет его читать онлайн. Некоторые инструкции очень большие и время их появления зависит от вашей скорости интернета.

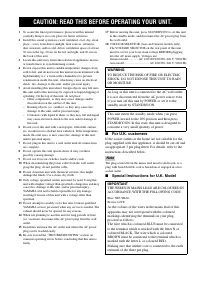


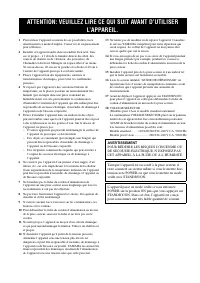


CAUTION: READ THIS BEFORE OPERATING YOUR UNIT.
1
To assure the finest performance, please read this manual
carefully. Keep it in a safe place for future reference.
2
Install this sound system in a well ventilated, cool, dry, clean
place – away from direct sunlight, heat sources, vibration,
dust, moisture, and/or cold. Allow ventilation space of at least
30 cm on the top, 20 cm on the left and right, and 20 cm on
the back of this unit.
3
Locate this unit away from other electrical appliances, motors,
or transformers to avoid humming sounds.
4
Do not expose this unit to sudden temperature changes from
cold to hot, and do not locate this unit in an environment with
high humidity (i.e. a room with a humidifier) to prevent
condensation inside this unit, which may cause an electrical
shock, fire, damage to this unit, and/or personal injury.
5
Avoid installing this unit where foreign objects may fall onto
this unit and/or this unit may be exposed to liquid dripping or
splashing. On the top of this unit, do not place:
–
Other components, as they may cause damage and/or
discoloration on the surface of this unit.
–
Burning objects (i.e. candles), as they may cause fire,
damage to this unit, and/or personal injury.
–
Containers with liquid in them, as they may fall and liquid
may cause electrical shock to the user and/or damage to
this unit.
6
Do not cover this unit with a newspaper, tablecloth, curtain,
etc. in order not to obstruct heat radiation. If the temperature
inside this unit rises, it may cause fire, damage to this unit,
and/or personal injury.
7
Do not plug in this unit to a wall outlet until all connections
are complete.
8
Do not operate this unit upside-down. It may overheat,
possibly causing damage.
9
Do not use force on switches, knobs and/or cords.
10
When disconnecting the power cable from the wall outlet,
grasp the plug; do not pull the cable.
11
Do not clean this unit with chemical solvents; this might
damage the finish. Use a clean, dry cloth.
12
Only voltage specified on this unit must be used. Using this
unit with a higher voltage than specified is dangerous and may
cause fire, damage to this unit, and/or personal injury.
YAMAHA will not be held responsible for any damage
resulting from use of this unit with a voltage other than
specified.
13
Do not attempt to modify or fix this unit. Contact qualified
YAMAHA service personnel when any service is needed. The
cabinet should never be opened for any reasons.
14
When not planning to use this unit for long periods of time
(i.e. vacation), disconnect the AC power plug from the wall
outlet.
15
Install this unit near the AC outlet and where the AC power
plug can be reached easily.
16
Be sure to read the “TROUBLESHOOTING” section on
common operating errors before concluding that this unit is
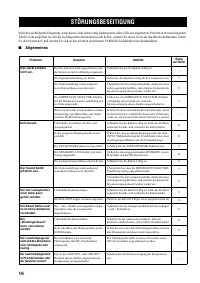
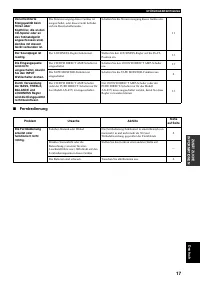
faulty.
17
Before moving this unit, press STANDBY/ON to set this unit
in the standby mode, and disconnect the AC power plug from
the wall outlet.
18
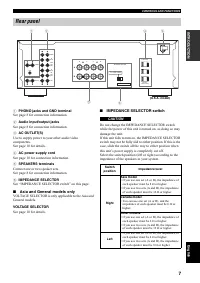
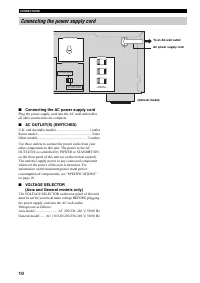
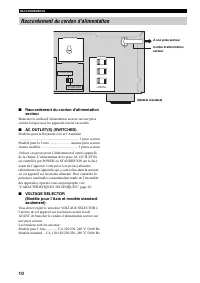
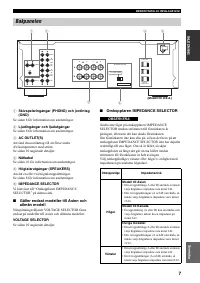
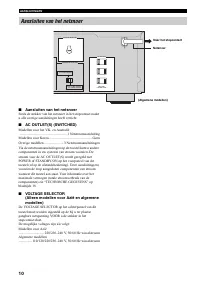
VOLTAGE SELECTOR (Asia and General models only)
The VOLTAGE SELECTOR on the rear panel of this unit
must be set for your local main voltage BEFORE plugging
into the AC main supply. Voltages are:
General model ............. AC 110/120/220/230–240 V, 50/60 Hz
Asia model ................................ AC 220/230–240 V, 50/60 Hz
■
For U.K. customers
If the socket outlets in the home are not suitable for the
plug supplied with this appliance, it should be cut off and
an appropriate 3 pin plug fitted. For details, refer to the
instructions described below.
The plug severed from the mains lead must be destroyed, as a
plug with bared flexible cord is hazardous if engaged in a live
socket outlet.
■
Special Instructions for U.K. Model
CAUTION: READ THIS BEFORE OPERATING YOUR UNIT.
WARNING
TO REDUCE THE RISK OF FIRE OR ELECTRIC
SHOCK, DO NOT EXPOSE THIS UNIT TO RAIN
OR MOISTURE.
As long as this unit is connected to the AC wall outlet,
it is not disconnected from the AC power source even
if you turn off this unit by POWER or set it to the
standby mode by STANDBY/ON.
This unit enters the standby mode when you press
POWER inward to the ON position and then press
STANDBY/ON. In this state, this unit is designed to
consume a very small quantity of power.
Note
IMPORTANT
THE WIRES IN MAINS LEAD ARE COLOURED IN
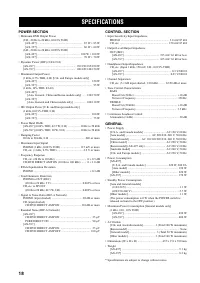
ACCORDANCE WITH THE FOLLOWING CODE:
Blue: NEUTRAL
Brown: LIVE
As the colours of the wires in the mains lead of this
apparatus may not correspond with the coloured
markings identifying the terminals in your plug,
proceed as follows:
The wire which is coloured BLUE must be connected
to the terminal which is marked with the letter N or
coloured BLACK. The wire which is coloured
BROWN must be connected to the terminal which is
marked with the letter L or coloured RED.
Making sure that neither core is connected to the earth
terminal of the three pin plug.
Содержание
- 98 ВОЗМОЖНЫЕ НЕИСПРАВНОСТИ И; СОДЕРЖАНИЕ; ВВЕДЕНИЕ
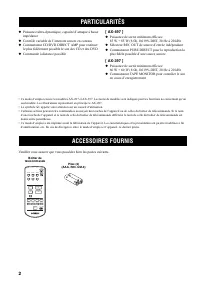
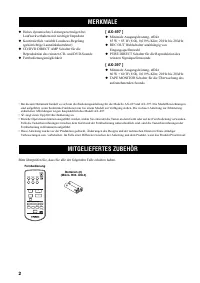
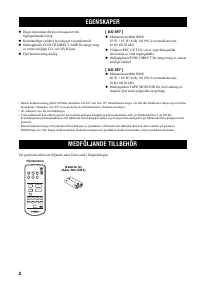
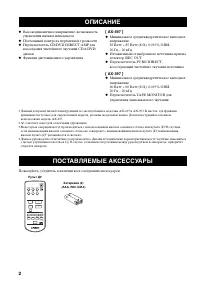
- 99 Постоянный контроль переменной громкости; Пожалуйста, убедитесь в наличии всех следующих аксессуаров.; ОПИСАНИЕ
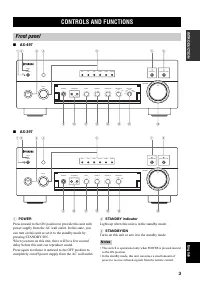
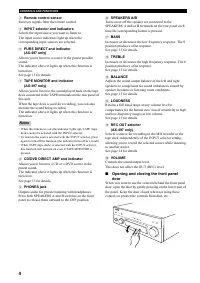
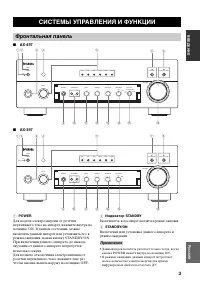
- 100 ВВЕДЕНИ; Высвечивается, когда аппарат находится в режиме ожидания.; СИСТЕМЫ УПРАВЛЕНИЯ И ФУНКЦИИ; Фронтальная панель; Примечания
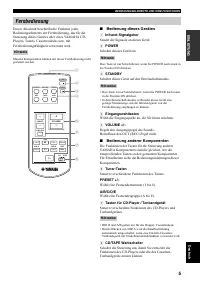
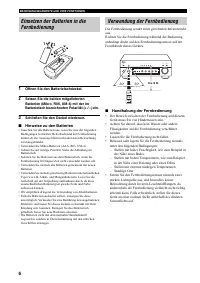
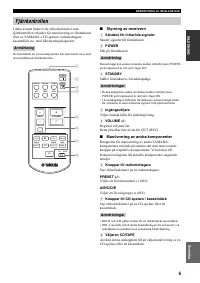
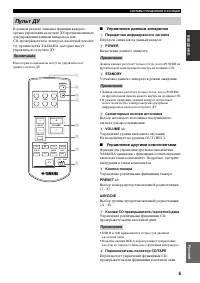
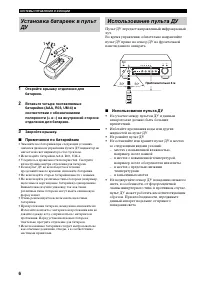
- 101 Прием сигналов от пульта ДУ.
- 102 Управление данным аппаратом; Передача сигналов на данный аппарат.; Управление другими компонентами; Управление различными функциями тюнера.; Примечание
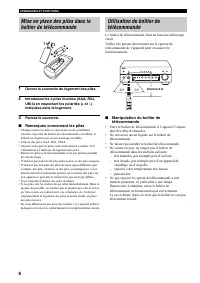
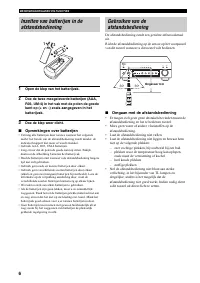
- 103 Примечания по батарейкам; Использование пульта ДУ
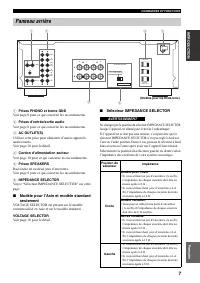
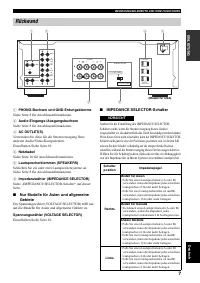
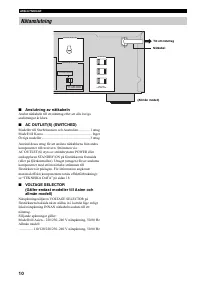
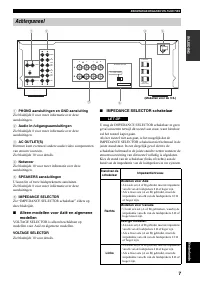
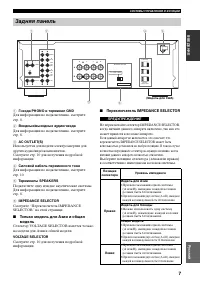
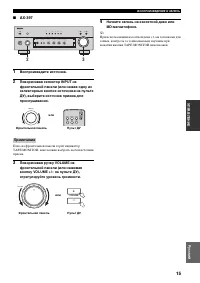
- 104 Переключатель IMPEDANCE SELECTOR; Задняя панель
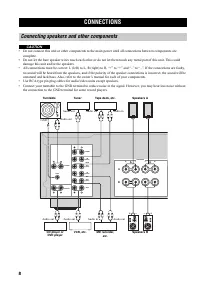
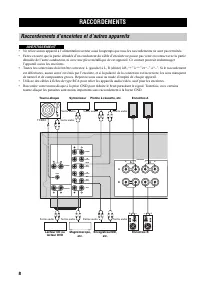
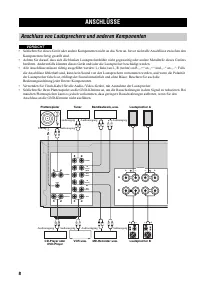
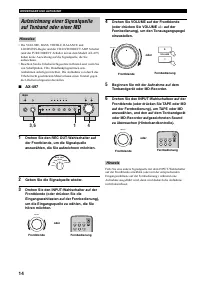
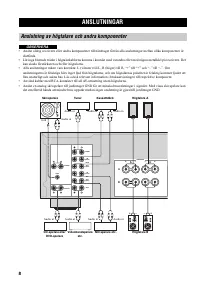
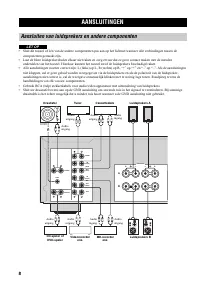
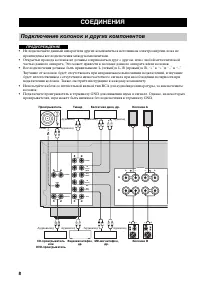
- 105 произведены все подключения между компонентами.; СОЕДИНЕНИЯ; Подключение колонок и других компонентов
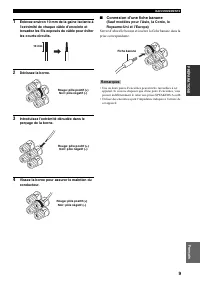
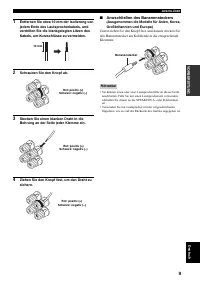
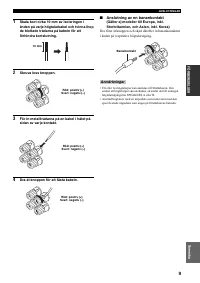
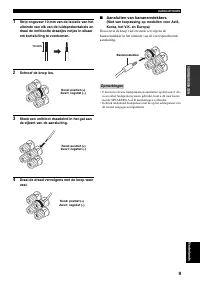
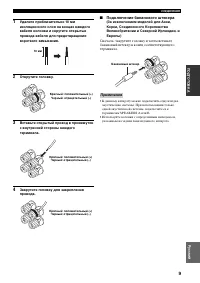
- 106 ОВКА; Подключение бананового штекера
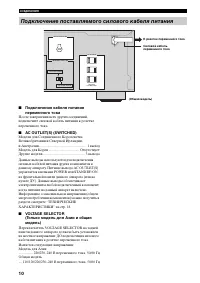
- 107 Общая модель; Подключение поставляемого силового кабеля питания
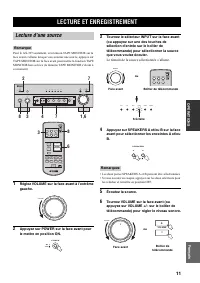
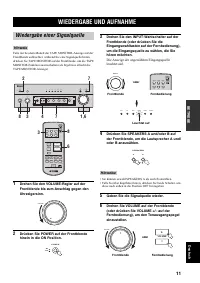
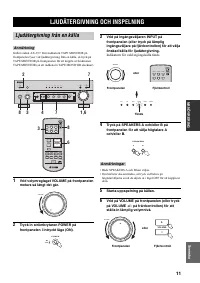
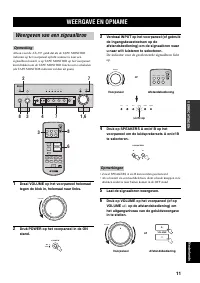
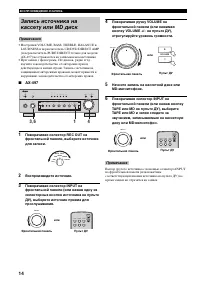
- 108 ВЛЕНИЕ; ВОСПРОИЗВЕДЕНИЕ И ЗАПИСЬ; Воспроизведение источника
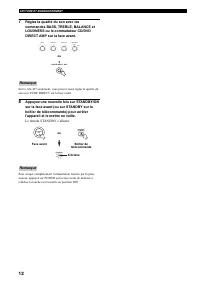
- 109 Высвечивается индикатор STANDBY.
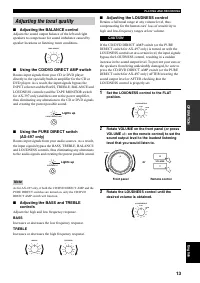
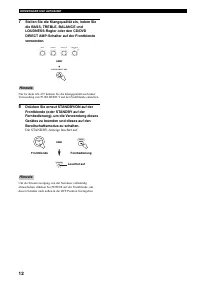
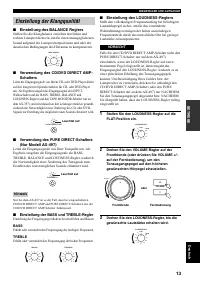
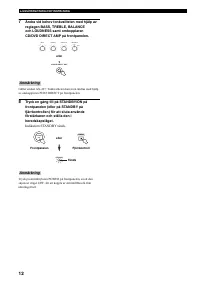
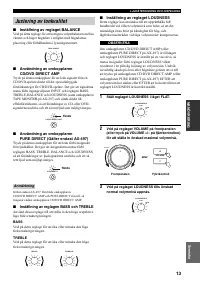
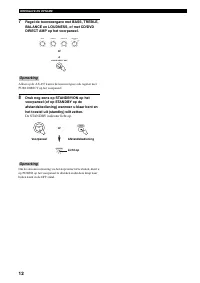
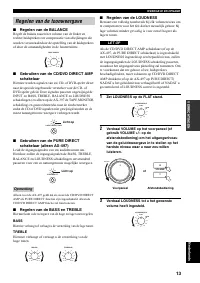
- 110 Регулировка ручки BALANCE; Настройка высокочастотной и низкочастотной характеристик.; Увеличение или уменьшение низкочастотной характеристики.; Увеличение или уменьшение высокочастотной характеристики.; Регулировка ручки LOUDNESS; Настойка тональности
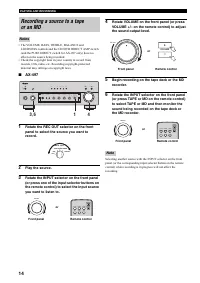
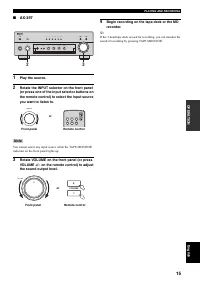
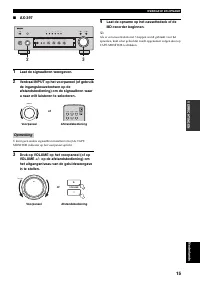
- 111 Воспроизведите источник.
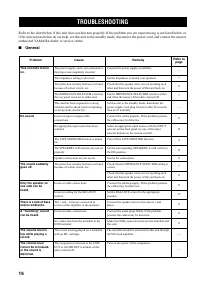
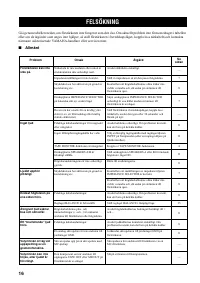
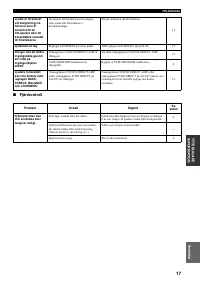
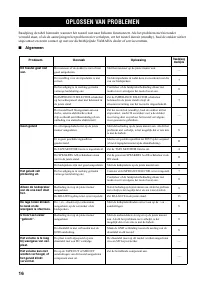
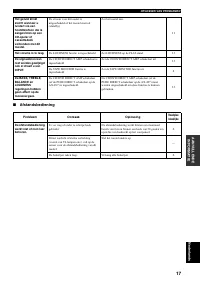
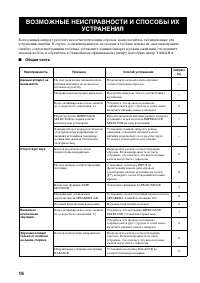
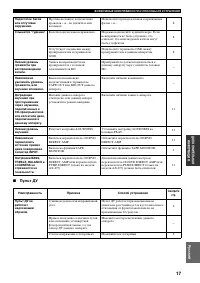
- 113 Общая часть; ВОЗМОЖНЫЕ НЕИСПРАВНОСТИ И СПОСОБЫ ИХ
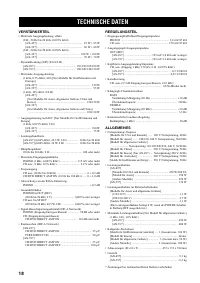
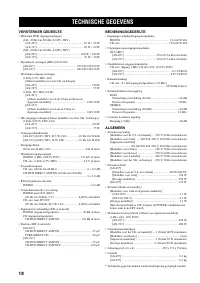
- 115 РАЗДЕЛ НАПРЯЖЕНИЯ; ТЕХНИЧЕСКИЕ ХАРАКТЕРИСТИКИ


