Швейная машина Janome Clio 320 - инструкция пользователя по применению, эксплуатации и установке на русском языке. Мы надеемся, она поможет вам решить возникшие у вас вопросы при эксплуатации техники.
Если остались вопросы, задайте их в комментариях после инструкции.
"Загружаем инструкцию", означает, что нужно подождать пока файл загрузится и можно будет его читать онлайн. Некоторые инструкции очень большие и время их появления зависит от вашей скорости интернета.


9
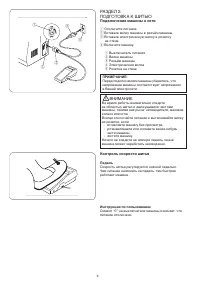
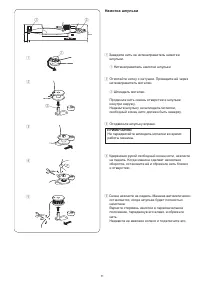
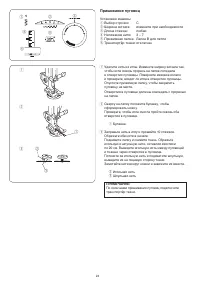
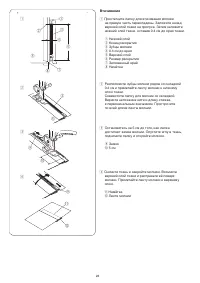
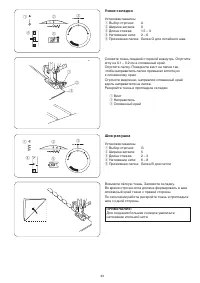
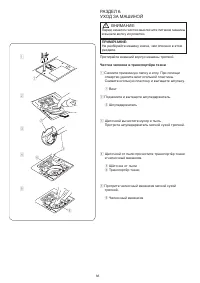
Держатель лапки
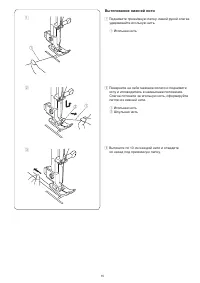
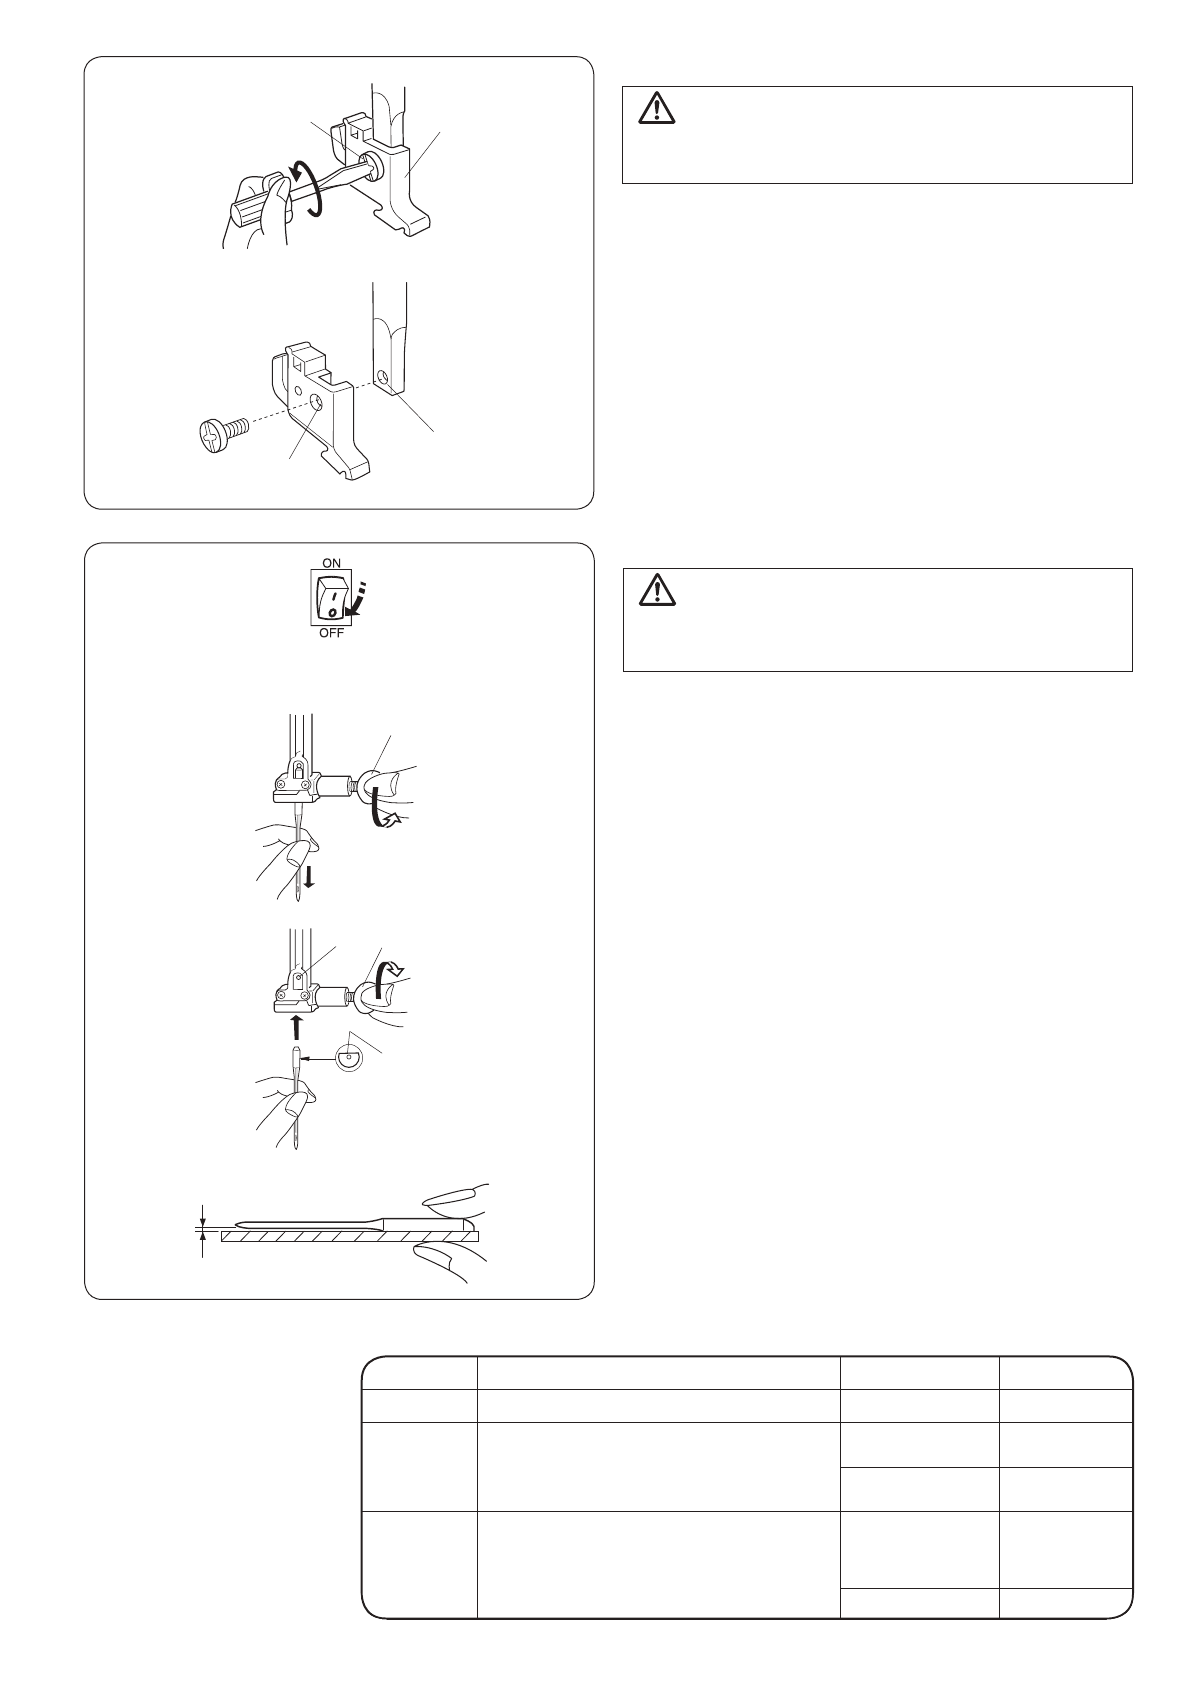
Чтобы снять держатель лапки:
Удалите установочный винт при помощи отвёртки,
повернув его против часовой стрелки. Снимите
держатель лапки.
Чтобы установить держатель лапки:
Сопоставьте отверстия на держателе и прижимном
стержне. Установите в отверстие винт. Затяните его
отвёрткой по часовой стрелке.
q
Винт
w
Держатель лапки
e
Отверстие
r
Отверстие в стержне
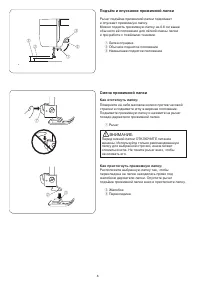
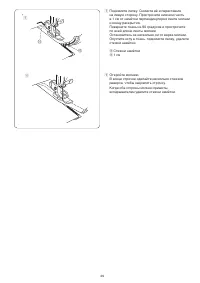
Замена игл
Поверните на себя маховое колесо, поднимите иглу
и опустите прижимную лапку.
Отключите питание.
z
Ослабьте игольный винт, поворачивая его против
часовой стрелки. Выньте иглу из зажима.
q
Винт игольного стержня
x
Вставьте новую иглу плоской стороной от себя.
Вставляя новую иглу, подтолкните её вверх
до стопора и отвёрткой затяните игольный винт.
w
Плоская сторона
e
Стопор
Чтобы проверить качество иглы, положите её
плоской стороной на какую-нибудь ровную
поверхность (игольная пластина, стекло и т.д.).
Зазор между иглой и ровной поверхностью должен
быть везде одинаковым.
Никогда не пользуйтесь гнутыми или тупыми иглами.
r
Зазор
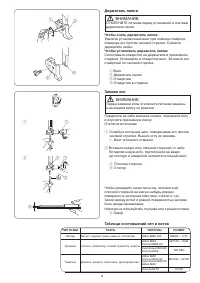
ВНИМАНИЕ:
ОТКЛЮЧИТЕ питание перед установкой и снятием
держателя лапки.
ВНИМАНИЕ:
Перед заменой иглы отключите питание машины
и вытащите вилку из розетки.
8
Changing Needles
CAUTION:
Always make sure to turn the power switch
off and disconnect the machine from power
supply before changing the needle.
Raise the needle by turning the handwheel and
lower the presser foot.
Turn off the power switch.
z
Loosen the needle clamp screw by turning it
counterclockwise.
Remove the needle from the clamp.
q
Needle clamp screw
q
q
e
w
Removing and Attaching the Foot Holder
WARNING:
Turn OFF the power switch before detaching
or attaching the foot holder.
To remove:
Remove the setscrew by turning it
counterclockwise with a screwdriver and remove
the foot holder.
To attach:
Match the hole in the foot holder with the
threaded hole in the presser bar. Fit the setscrew
into the hole. Tighten the screw by turning it
clockwise with a screwdriver.
q
Setscrew
w
Foot holder
e
Hole
r
Threaded hole
q
w
e
r
x
Insert a new needle into the needle clamp
with the flat side of the needle to the rear.
When inserting the needle into the needle
clamp, push it up against the stopper pin and
tighten the needle clamp screw firmly.
q
Needle clamp screw
w
Flat side
e
Stopper pin
z
x
9
To check needle straightness, place the flat
side of the needle onto something flat (a needle
plate, glass etc.) The gap between the needle
and the flat surface should be consistent.
Never use a blunt needle.
r
Gap
r
Fabric
Thread
Needle
Fine
Lawn
Georgette
Tricot
Organza
Crepe
Silk #80-100
Cotton #80-100
Synthetic #80-100
#9/65-11/75
Blue tip needle
Medium
Sheeting
Jersey
Broadcloth
Fleece
Silk #50
Cotton #50-80
Synthetic #50-80
#11/75-14/90
Heavy
weight
Denim
Tweed
Coating
Quilting
Silk #30-50
Cotton #40-50
Synthetic #40-50
#14/90-16/100
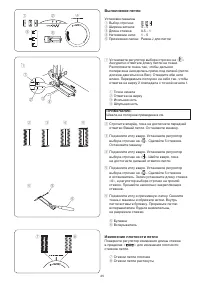
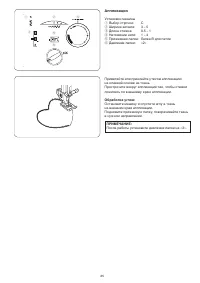
Needle and Thread Chart
• For general sewing, use needle size 11/75 or 14/90.
• A fine thread and needle should be used for sewing lightweight fabrics, so the fabric will not be
marred.
• Heavy fabrics require a needle large enough to pierce the fabric without fraying the needle thread.
• Always test the needle size on a small scrap of the fabric that will be used for actual sewing.
• In general, use the same thread for the needle and bobbin.
• When sewing stretch fabrics, very fine fabrics and synthetics, use a blue tip needle.
• The blue tip needle effectively prevents skipped stitches.
NOTE:
1 x blue tip needles (#11/75), 2 x #11/75 needles and 2 x
#14/90 needles are included in the needle case (Part No.
540401026).
Таблица соотношений игл и ниток
ТИП ТКАНИ
ТКАНЬ
ТИП ИГЛЫ
РАЗМЕР
Лёгкие
Батист, жоржет, трико, шерсть, полиэстер
Шёлк №60-100
№9/65 – 11/75
Средние
Хлопок, полиэстер, тонкий трикотаж, шерсть
Шёлк №50
Хлопок №60-80
№11/75 – 14/90
Синтетика №50-80
Хлопок №50
№14/90
Тяжёлые
Джинса, джерси, пальтовая, драпировочная
Шёлк №50
Хлопок №40-50
Синтетика №40-50
Шёлк №30
№14/90 – 16/100
Хлопок № 50
16/100
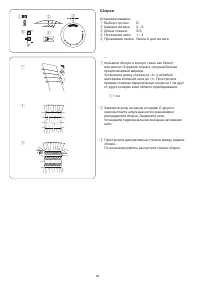
Содержание
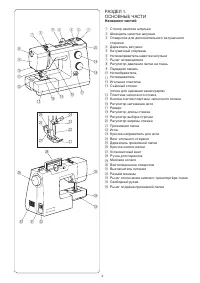
- 5 ОСНОВНЫЕ ЧАСТИ; Названия частей; ESSENTIAL PARTS; Names of Parts
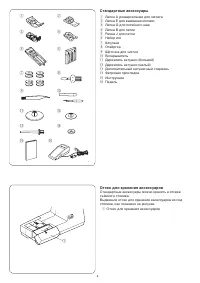
- 6 Отсек для хранения аксессуаров; Standard Accessories
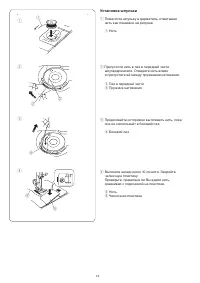
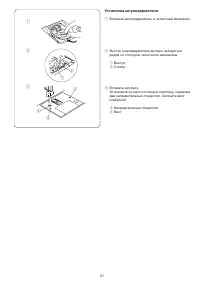
- 7 Съёмный столик; Чтобы установить столик:; Сопоставьте выступы с отверстиями на машине; Свободный рукав; Extension Table; q w
- 8 Operating Instructions:; Controlling the Sewing Speed; Connecting the Power Supply; GETTING READY TO SEW; Foot control; ПОДГОТОВКА К ШИТЬЮ; Подключение машины к сети; Педаль
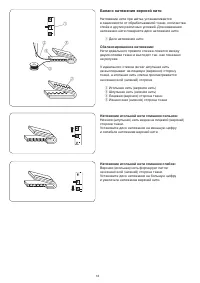
- 9 Установочная отметка; Отключение нижнего транспортёра ткани; Рычаг нижнего транспортёра ткани
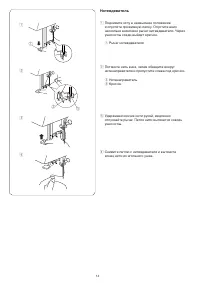
- 10 Как отстегнуть лапку:; Raising and Lowering the Presser Foot
- 11 Держатель лапки; Чтобы снять держатель лапки:; Замена игл
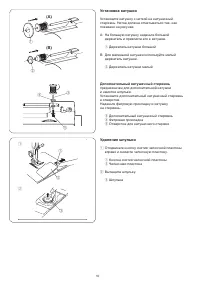
- 12 Установка катушки; Дополнительный катушечный стержень; Удаление шпульки; Extra spool pin; Extra spool pin
- 13 Намотка шпульки; Winding the bobbin
- 14 the thread to the left, sliding it between the
- 15 Заправка верхней нити; Как заправить игольную нить:; Threading the Machine
- 16 Нитевдеватель; Needle threader
- 17 Pull 4 ̋ (10 cm) of both threads back and
- 18 Stitch pattern selector dial
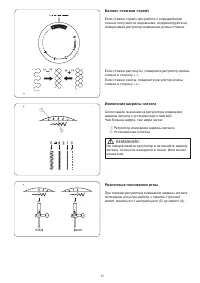
- 19 Регулятор изменения ширины зигзага; Различные положения иглы
- 20 Баланс натяжения верхней нити; Диск натяжения нити; Сбалансированное натяжение:; Balancing Needle Thread Tension
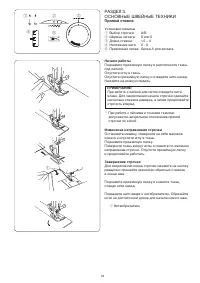
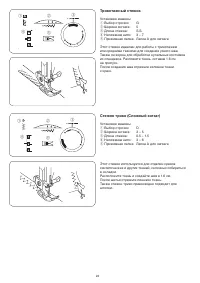
- 21 ОСНОВНЫЕ ШВЕЙНЫЕ ТЕХНИКИ; Прямой стежок; Начало работы; Starting to sew; BASIC SEWING; To fasten the beginning of the seam, first sew; Прямой стежок стрейч
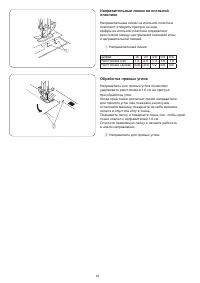
- 22 Направительные линии; Обработка прямых углов; Направитель для прямых углов; The cornering guide helps you maintain a 5/8 ̋; The cornering guide helps you maintain a 5/8 ̋
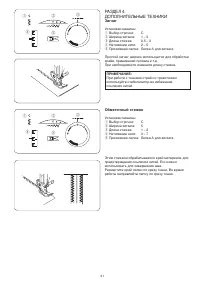
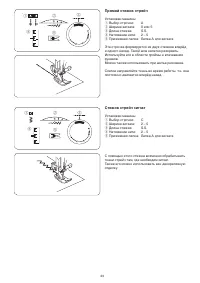
- 23 ДОПОЛНИТЕЛЬНЫЕ ТЕХНИКИ; Зигзаг; Обметочный стежок; Установки машины; UTILITY STITCHES
- 24 Трикотажный стежок; This stitch is used to finish a raw edge on; This stitch is used to finish a raw edge on; Knit Stitch; This stitch is used to finish a raw edge on; Knit Stitch; This stitch is used to finish a raw edge on
- 25 Стежок стрейч зигзаг
- 27 To adjust buttonhole stitch density:
- 28 Зажгутованная петля; Corded Buttonhole
- 29 Втачивание молнии; Установка лапки для молнии; e r; Zipper Application; Fabric preparation; Zipper Application; e r; Fabric preparation
- 30 Stop the machine 2 ̋ (5 cm) before reaching
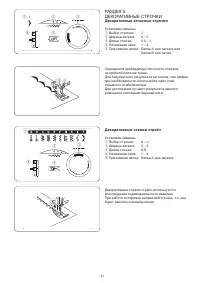
- 33 ДЕКОРАТИВНЫЕ СТРОЧКИ; Декоративные атласные строчки; Decorative Satin Stitches; Decorative Stretch Stitches
- 34 DECORATIVE STITCHES; DECORATIVE STITCHES; Smocking; DECORATIVE STITCHES; Smocking; DECORATIVE STITCHES; Smocking; DECORATIVE STITCHES; Smocking; DECORATIVE STITCHES; Smocking; DECORATIVE STITCHES; Smocking; DECORATIVE STITCHES
- 35 Узкие складки
- 37 После работы установите давление лапки на «3».; Аппликация
- 38 УХОД ЗА МАШИНОЙ; Чистка челнока и транспортёра ткани; Wipe the hook race with a soft, dry cloth.; CARE AND MAINTENANCE; Cleaning the Hook Race and Feed Dog
- 39 Make sure the knob of the bobbin holder fits
- 41 Куәлік нөмірі


