
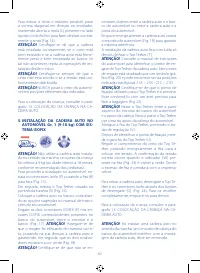
Автокресла Chicco Seat Up 012 Red Passion - инструкция пользователя по применению, эксплуатации и установке на русском языке. Мы надеемся, она поможет вам решить возникшие у вас вопросы при эксплуатации техники.
Если остались вопросы, задайте их в комментариях после инструкции.
"Загружаем инструкцию", означает, что нужно подождать пока файл загрузится и можно будет его читать онлайн. Некоторые инструкции очень большие и время их появления зависит от вашей скорости интернета.


29
28
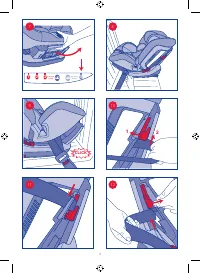
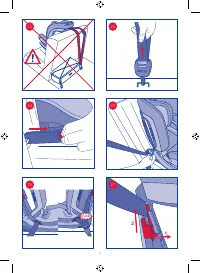
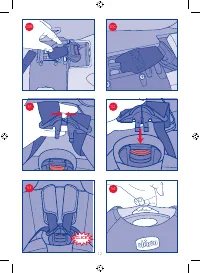
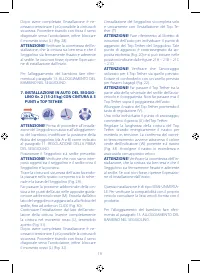
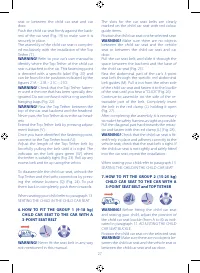
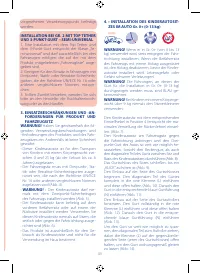
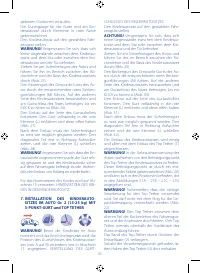
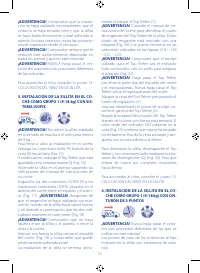
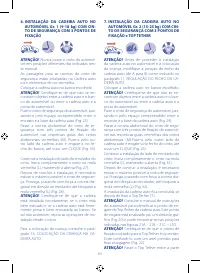
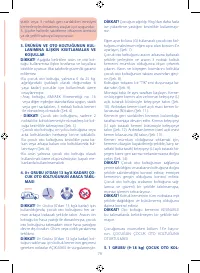
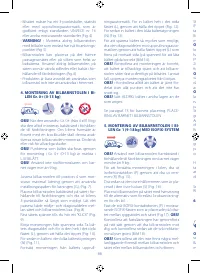
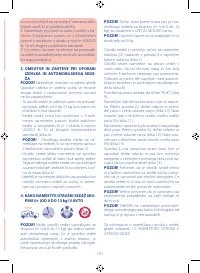
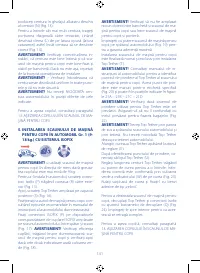
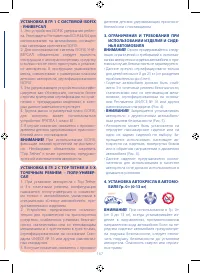
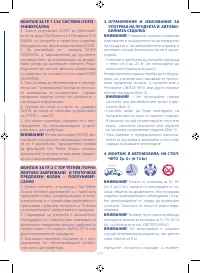
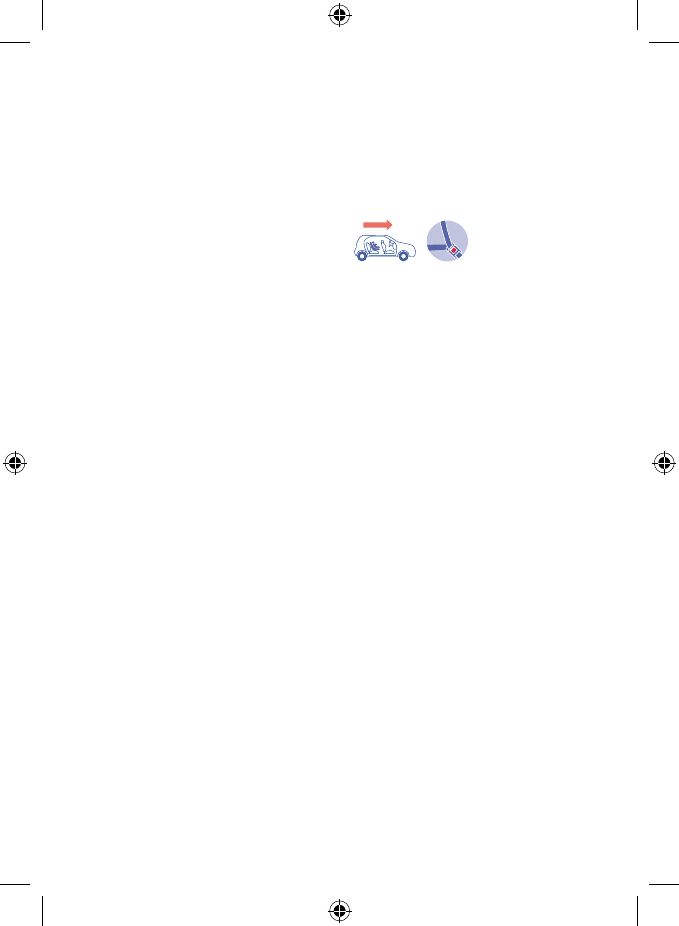
Pull the car seat belt, and slide it through the
space between the backrest and the base of
the child car seat (Fig. 29).
Pass the abdominal part of the car’s 3-point
seat belt through the specific red abdominal
belt guides (M). Pull it out from the other side
of the child car seat and fasten it to the buckle
of the seat until you hear a “CLICK” (Fig. 30).
Continue to assemble on the side of the re-
tractable part of the belt. Completely insert
the belt in the red clamp (L), holding it open
(Fig. 31).
After completing the assembly it is necessary
to make the safety harness as tight as possible.
Pull the diagonal part hard towards the retrac-
tor and fasten with the red clamp (L) (Fig. 32).
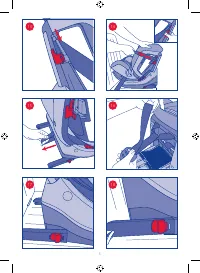
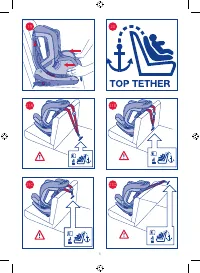
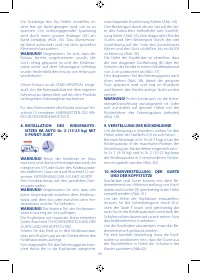
The assembly of the child car seat is complet-
ed exclusively with the installation of the Top
Tether ( T ).
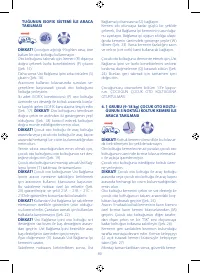
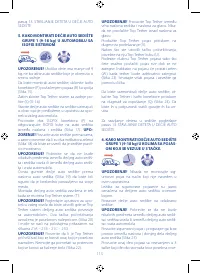
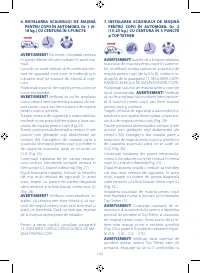
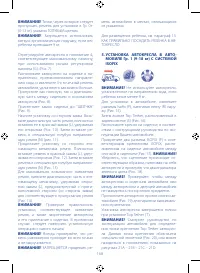
WARNING!
Refer to your car’s user manual to
identify where the Top Tether of the child car
sear is attached to the car. This fastening point
is denoted with a specific label (Fig. 20) and
can be found in the positions indicated by the
figures 21A – 21B – 21C – 21D.
WARNING!
Check that the Top Tether fasten-
er used is the one that has been specially des-
ignated. Do not confuse it with a ring used for
hanging bags (Fig. 22).
WARNING!
Pass the Top Tether between the
top of the car seat backrest and the headrest.
Never pass the Top Tether above the car head-
rest.
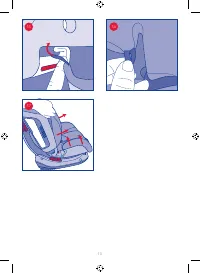
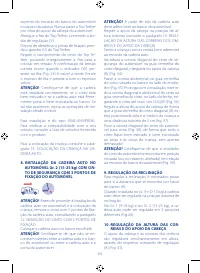
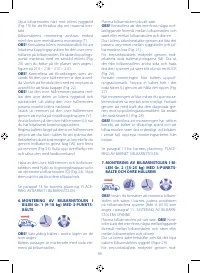
Extend the Top Tether belt by pressing adjust-
ment button ( V ).
Once you have identified the fastening point,
connect to the Top Tether hook (U).
Adjust the length of the Top Tether belt by
forcefully pulling the belt until it is tight. The
indicator on the belt goes green ( W ) when
the tether is suitably tight (Fig. 33). Roll up any
excess belt and tie up using the velcro.
WARNING!
Check that the child car seat is fit-
ted firmly in place and adheres correctly to the
vehicle seat; check that the seat belt is tight. If
the child car seat is not tightly and safely fitted
into the car seat, repeat the installation.
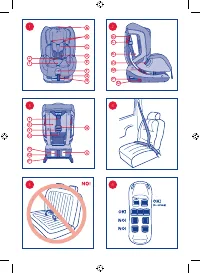
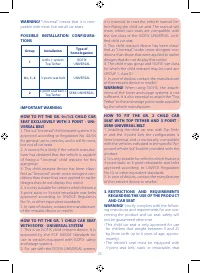
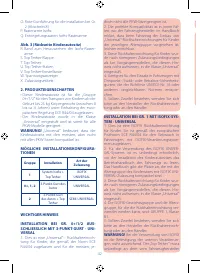
This type of installation is SEMI-UNIVERSAL. To
check the compatibility with your vehicle refer
to the vehicle list supplied with the product.
When seating your child refer to paragraph 13.
SEATING THE CHILD IN THE CHILD CAR SEAT.
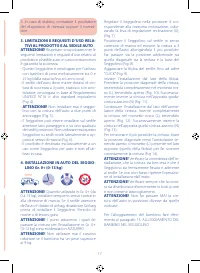
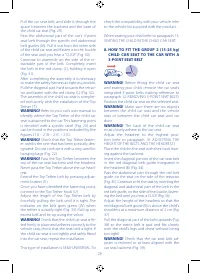
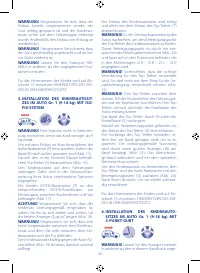
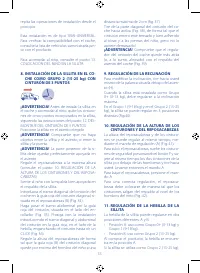
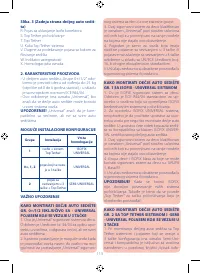
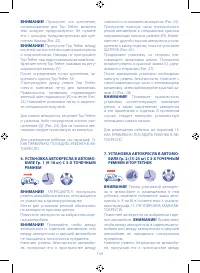
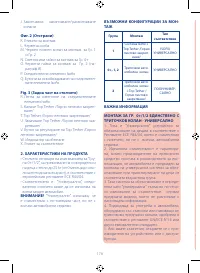
8. HOW TO FIT THE GROUP 2 (15-25 kg)
CHILD CAR SEAT TO THE CAR WITH A
3-POINT SEAT BELT
WARNING!
Before fitting the child car seat
and seating your child, remove the car seat’s
integrated 5-point belts making reference to
paragraph 12. REMOVING 5-POINT SEAT BELTS
Position the child car seat on the selected seat.
WARNING!
Make sure there are no objects
between the child car seat and the vehicle
seat or between the child car seat and car
door.
WARNING!
The back of the child car seat
must closely adhere to the car seat.
Adjust the headrest to the highest posi-
tion (refer to paragraph 10. ADJUSTING THE
HEIGHT OF THE BELTS AND THE HEADREST )
Place the child in the seat with their back lean-
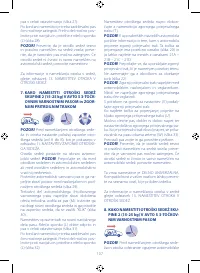
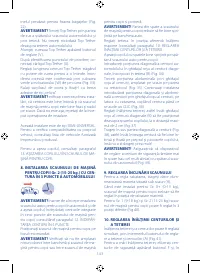
ing against the backrest.
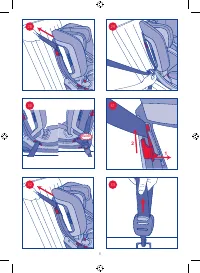
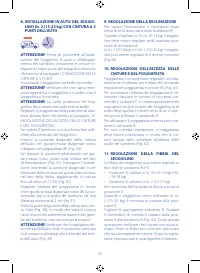
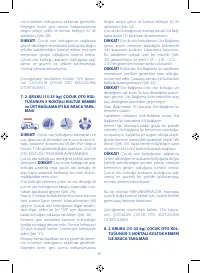
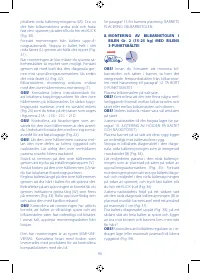
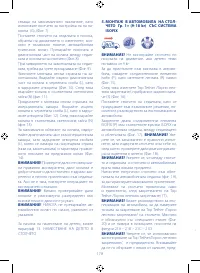
Insert the diagonal portion of the car seat belt
in the red diagonal belt guide integrated in
the headrest (B) (Fig. 34).
Pass the abdominal part through the red belt
guide on the seat on the side of the retractor
(Fig. 35). Continue to fit the seat by inserting the
diagonal and abdominal part of the belt in the
red belt guide, on the side of the buckle, fasten-
ing the belt until you hear a CLICK (Fig. 36)
Adjust the height of the headrest so that the
red diagonal belt guide (B) is above the child’s
shoulders at a maximum distance of 2 cm (fig.
37).
Pull the diagonal part of the belt upwards (Fig.
38) so the entire belt is taut and fits closely
over the child’s legs and chest without being
too tight!
WARNING!
Check that the car seat belt ad-
juster is reclined or at least aligned with the
car seat backrest (Fig. 39).
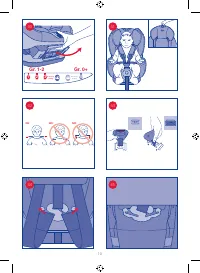
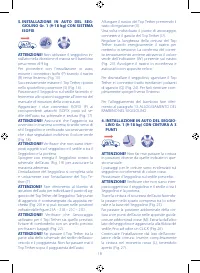
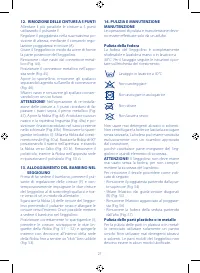
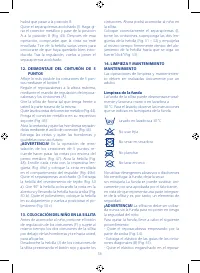
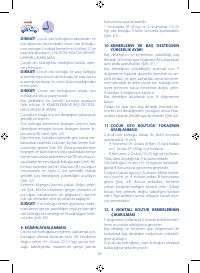
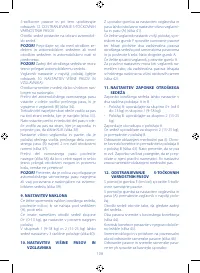
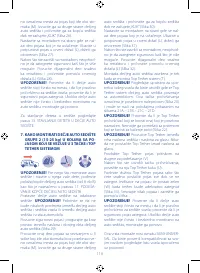
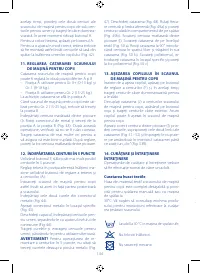
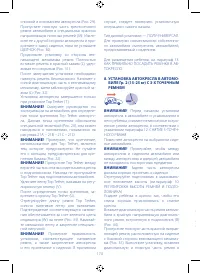
9. ADJUSTING THE INCLINATION
To adjust the inclination of the child car seat,
pull the lever located under the seat (H) to-
wards you. When the Gr. 0+ (0-13 kg) child
seat is fitted, it must be adjusted to the maxi-
mum recline position.
In Gr. 1 (9-18 kg) and Gr. 2 (15-25 kg) the car
seat can be adjusted to 3 different positions
(Fig. 40).
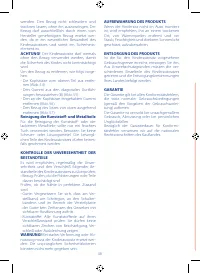
10.
ADJUSTING THE HEIGHT OF THE
BELTS AND THE HEADREST
The height of the headrest and belts can be
simultaneously adjusted using the headrest
and belt adjustment button (A) (Fig. 41).
To increase the height of the headrest release
the safety belts by pressing button F and, at
the same time, hold the two child car seat
harnesses under the shoulder straps and pull
them towards you. Then lift button A.
To lower the headrest press button A.
To adjust them correctly, the headrest must
be fitted so the harnesses come out from the
backrest at the height of the child’s shoulders
(Fig. 42).
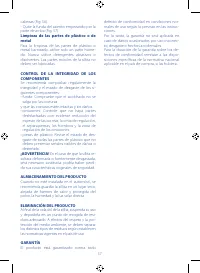
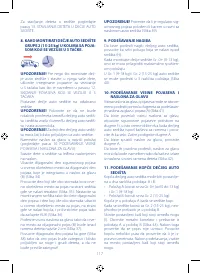
11.
ADJUSTING THE CHILD CAR SEAT
BUCKLE
The child car seat buckle can be adjusted to
two different positions: A and B.
• Position A: use for Gr. 0+ (from 0 up to 13
kg) and Gr. 1 (9-18 kg).
• Position B: use for Gr. 2 (15-25 kg).
The buckle is in position A when purchased.
When the car seat is used for Gr. 2 (15-25 kg) it
is necessary to switch to position B.
Remove the padded crotch strap (I). Turn the
metal connector and switch from position A
to position B (Fig. 43). After this check that the
belt has not rolled up. Pull the buckle several
times to check it is inserted correctly. After ad-
justing, replace the padded crotch strap.
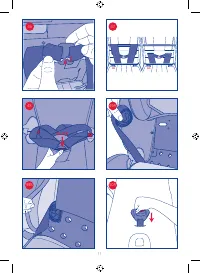
12. REMOVING 5-POINT SEAT BELTS
Loosen the 5-point seat belts as much as pos-
sible using button F.
Adjust the headrest to its maximum height
using the headrest and belts adjustment but-
ton (A).


