Роутеры TP-Link TD-W8151N - инструкция пользователя по применению, эксплуатации и установке на русском языке. Мы надеемся, она поможет вам решить возникшие у вас вопросы при эксплуатации техники.
Если остались вопросы, задайте их в комментариях после инструкции.
"Загружаем инструкцию", означает, что нужно подождать пока файл загрузится и можно будет его читать онлайн. Некоторые инструкции очень большие и время их появления зависит от вашей скорости интернета.


Загружаем инструкцию

Руководство пользователя
TD-W8151N
TD-W8151N
150Mbps Wireless N ADSL2+ Modem
Router
Беспроводной машрутизатор серии N со встроенным модемом ADSL2+ со
скоростью передачи данных до 150 Мбит/с
Rev: 1.0.0
1910010402
Содержание
- 3 COPYRIGHT & TRADEMARKS; АВТОРСКОЕ ПРАВО И ТОРГОВЫЕ МАРКИ; Спецификации могут меняться без уведомления.; FCC STATEMENT
- 4 СЕРТИФИКАЦИЯ FCC; Изменить положение или передвинуть принимающую антенну.; FCC RF Radiation Exposure Statement
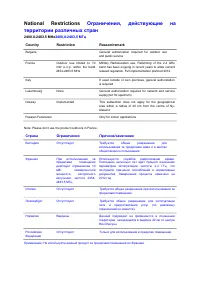
- 6 Country
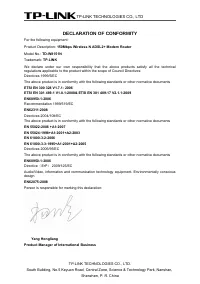
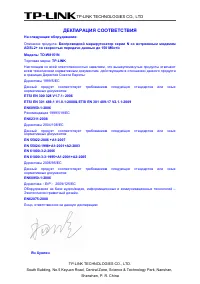
- 8 ДЕКЛАРАЦИЯ СООТВЕТСТВИЯ; На следующее оборудование:; нормативных документов:; Ян Хунлян
- 9 Менеджер по продукции в сфере международного бизнеса
- 10 CONTENTS
- 11 СОДЕРЖАНИЕ
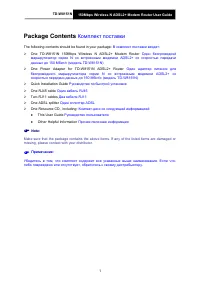
- 12 50Mbps Wireless N ADSL2+ Modem Router User Guide; Package Contents; Комплект поставки
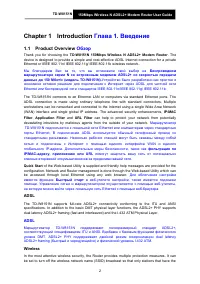
- 13 Chapter 1 Introduction; Обзор; Thank you for choosing the; Беспроводном; and; фильтрация по; ADSL
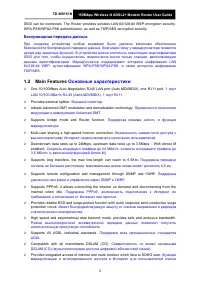
- 14 Беспроводная передача данных; Основные характеристики
- 15 Допущения
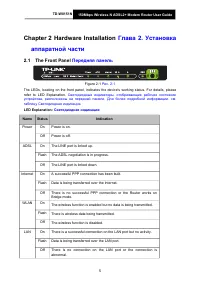
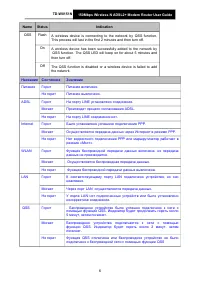
- 16 Chapter 2 Hardware Installation; Передняя панель; Светодиодные индикаторы, отображающие рабочее состояние; Светодиодная индикация:
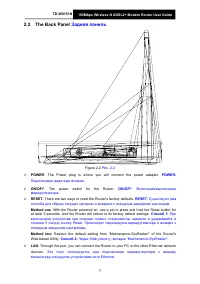
- 18 Задняя панель; POWER; : The Power plug is where you will connect the power adapter.; : There are two ways to reset the Router's factory defaults.; RESET; При; Method two; Эти порт используется для подключения маршрутизатора к вашему
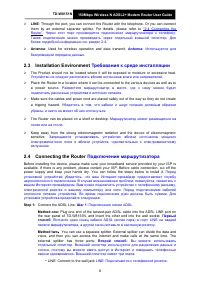
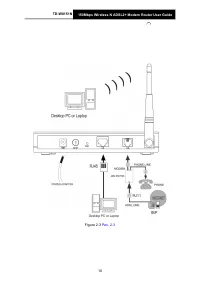
- 19 them by an external separate splitter. For details, please refer to; Antenna; Used for wireless operation and data transmit.; Installation Environment; The Router can be placed on a shelf or desktop.; Connecting the Router; Connect the ADSL Line.; Первый; LINE: Connect to the wall jack
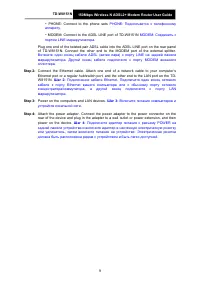
- 20 PHONE: Connect to the phone sets; Шаг 2; Power on the computers and LAN devices.; Шаг 4
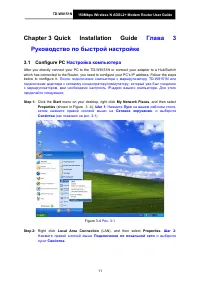
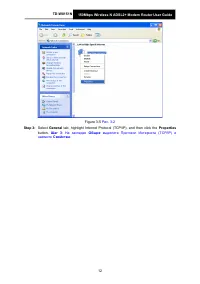
- 22 Chapter 3 Quick; Настройка компьютера; Click the; Start; menu on your desktop, right click; My Network Places; Right click; Local Area Connection
- 23 Select; General; На закладке; Общие; нажмите; Свойства
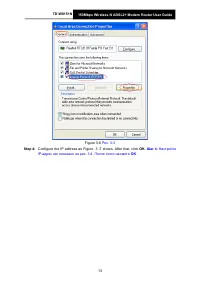
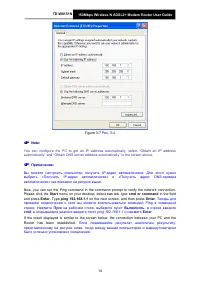
- 24 Configure the IP address as Figure 3 -7 shows. After that, click; Настройте; OK
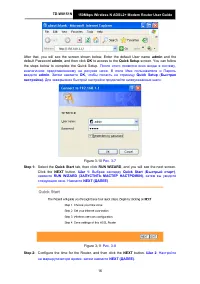
- 25 menu on your desktop, select; run; in the field; on the next screen, and then press; Enter
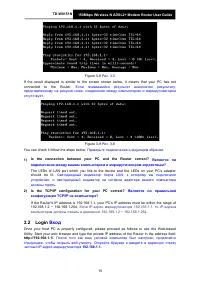
- 26 Если появившийся результат аналогичен результату,; ) Is the connection between your PC and the Router correct?; Светодиодный индикатор порта LAN, к которому вы подключили; ) Is the TCP/IP configuration for your PC correct?; Вход; После того как ваш узловой компьютер был настроен, проделайте
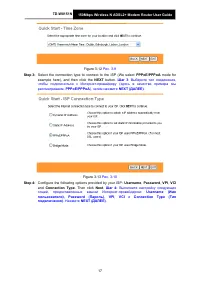
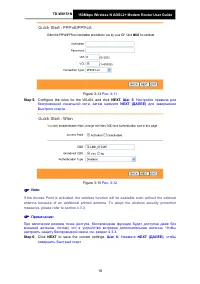
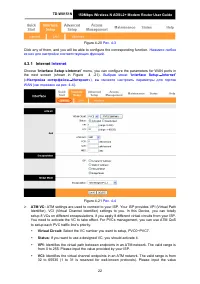
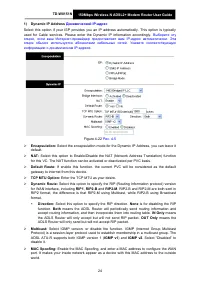
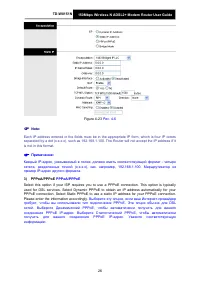
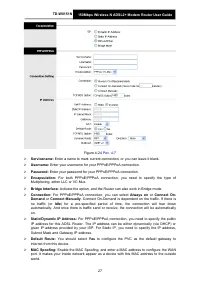
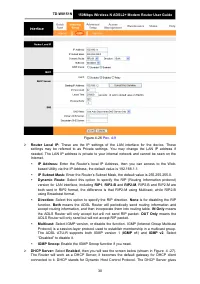
- 28 Select the connection type to connect to the ISP (We select; Шаг 3; Configure the following options provided by your ISP:; VPI
- 29 Configure the rules for the WLAN, and click; Click; NEXT; to save the current settings.
- 30 CLOSE; чтобы завершить
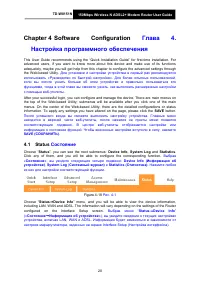
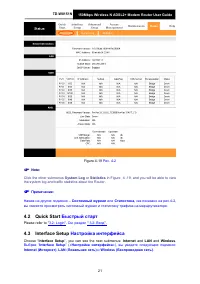
- 31 Chapter 4 Software; Состояние; Choose “
- 34 provided by your ISP.; ATM VC
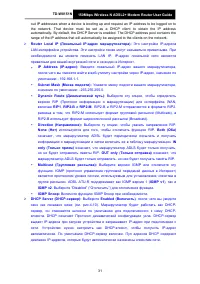
- 37 Выберите эту опцию, если ваш Интернет-провайдер
- 40 После того, как вы закончите настройку Интернет, нажмите; Локальная сеть; ” menu, and you will see the LAN screen (shown in Figure 4
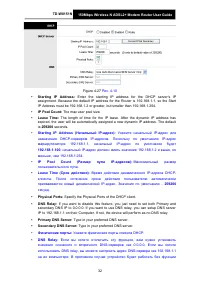
- 44 Введите значение; Use Auto Discovered DNS Server Only; is selected in DNS Relay, this Router will accept the; Use User Discovered DNS Server Only; is selected in; SAVE; button to save it and invoke it.; Relay; Выбрав
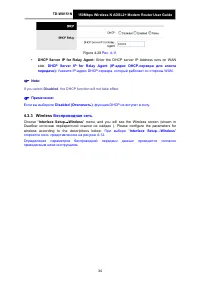
- 45 Enter the DHCP server IP Address runs on WAN; DHCP Server IP for Relay Agent (IP-адрес DHCP-сервера для агента; If you select; Disabled; , the DHCP function will not take effect.; Беспроводная сеть; ” menu, and you will see the Wireless screen (shown in; Interface Setup→Wireless
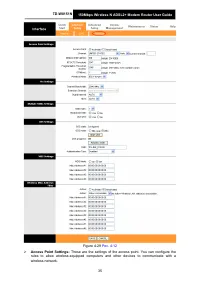
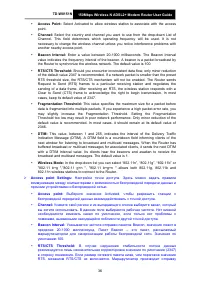
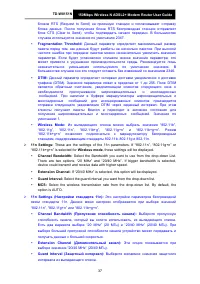
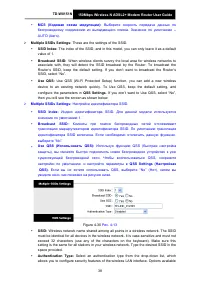
- 47 Enter a value between 20-1000 milliseconds. The Beacon Interval; Fragmentation Threshold:; This value specifies the maximum size for a packet before; Access point Settings:; Настройки точки доступа. Здесь можно задать правила
- 48 Select the Bandwidth you want to use from the drop-down List.
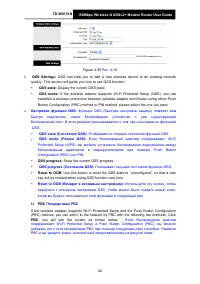
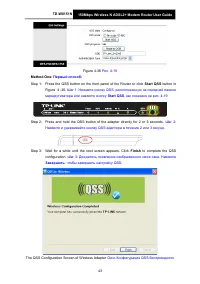
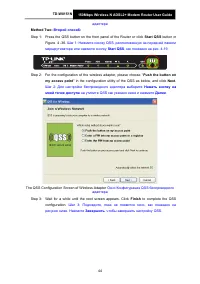
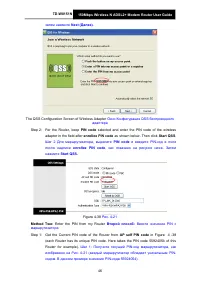
- 49 These are the settings of the SSID.; QSS Settings; then you will see the screen as shown below.; Multiple SSIDs Settings:; Select an authentication type from the drop-down list, which
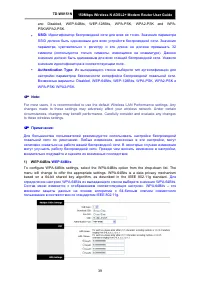
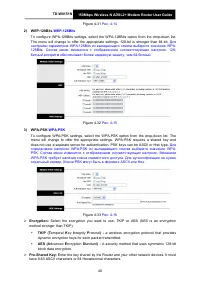
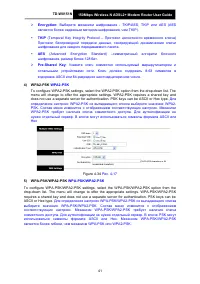
- 50 Из выпадающего списка выберите тип аутентификации для
- 51 Для
- 52 (Advanced Encryption Standard) –симметричный алгоритм блочного
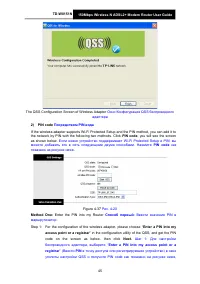
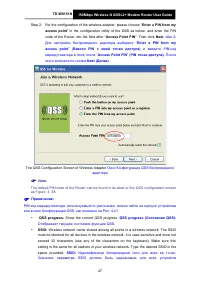
- 58 in the; Access Point PIN
- 59 Расширенные настройки; Advanced Setup
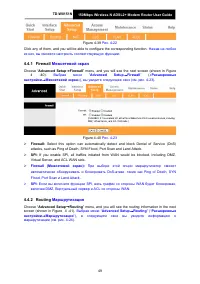
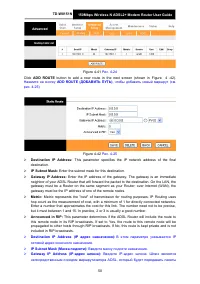
- 60 Межсетевой экран; ” menu, and you will see the next screen (shown in Figure; Маршрутизация; Advanced Setup; ” menu, and you will see the routing information in the next
- 61 button to add a new route in the next screen (shown in Figure 4 -42).; ADD ROUTE; This parameter specifies the IP network address of the final
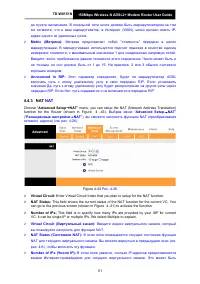
- 62 NAT; ” menu, you can setup the NAT (Network Address Translation); Advanced Setup; VC. It can be single IP or multiple IPs. We select Multiple to explain.
- 63 Выбрав “
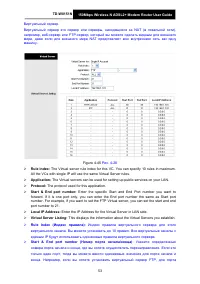
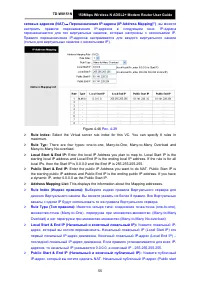
- 64 All the VCs with single IP will use the same Virtual Server rules.; Enter the specific Start and End Port number you want to; Virtual Server Listing:; : Индекс правила виртуального сервера для этого; : Укажите определенные
- 65 For VCs with single IP, select; Single
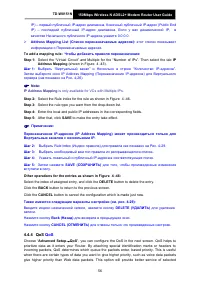
- 66 Enter the local IP Address you plan to map to. Local Start IP is the; Address Mapping List:; This displays the information about the Mapping addresses.
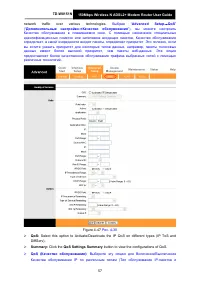
- 67 is only available for VCs with Multiple IPs.; QoS
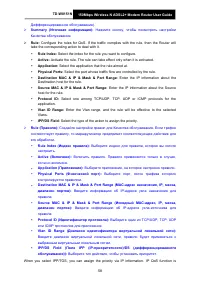
- 68 network traffic over various technologies.; Advanced; QoS Settings Summary; button to view the configurations of QoS.
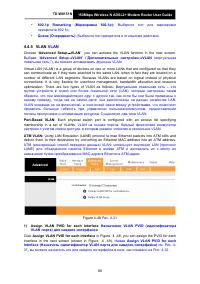
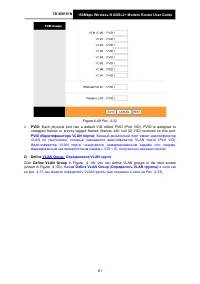
- 71 VLAN; ”, you can activate the VLAN function in the next screen.; ) Assign VLAN PVID for each Interface; Assign VLAN PVID for each Interface; in Figure 4 -48, you can assign the PVID for each
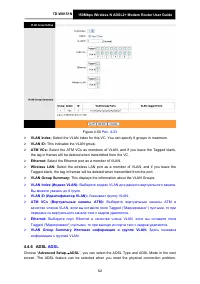
- 72 Каждый физический порт имеет идентификатор; VLAN Group Определение VLAN групп; Define VLAN Group; in Figure 4 -48, you can define VLAN groups in the next screen; Define VLAN Group (Определить VLAN группы); в окне как
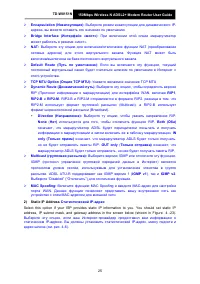
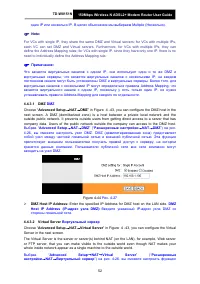
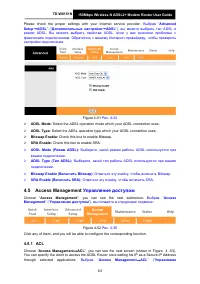
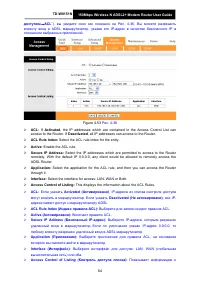
- 74 Access Management
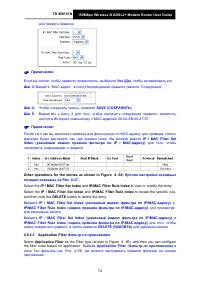
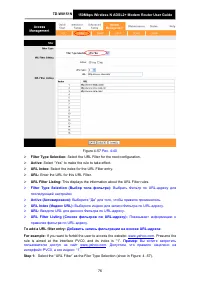
- 76 Фильтр
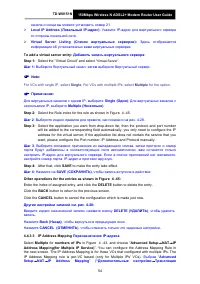
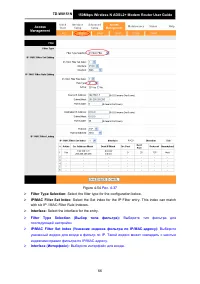
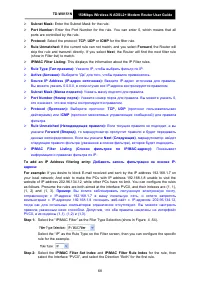
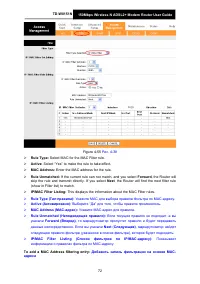
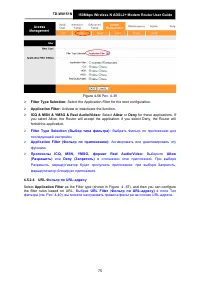
- 77 Select the filter type for the configuration below.
- 78 Выберите направления для данного правила фильтра по IP.; IP/MAC Filter Rule Index; together to appoint; IP/MAC Filter Set Index; вместе; Source IP Address:; means that all IP addresses are controlled by the rule.; Destination IP Address:; Enter the destination IP address for the rule. You can enter
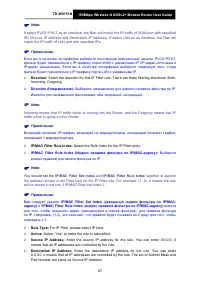
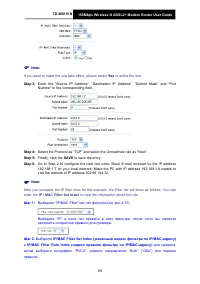
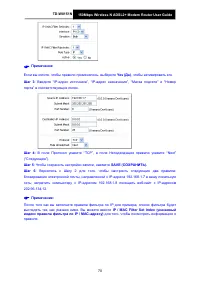
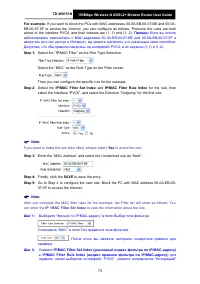
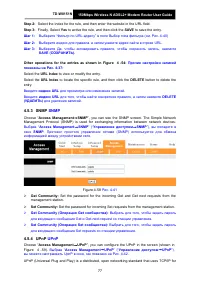
- 80 If you want to make the rule take effect, please select; Yes; Select the Protocol as “TCP” and select the Unmatched rule as “Next”.; to view the information about the rule.
- 81 Если вы хотите, чтобы правило применялось, выберите; порта” в соответствующих полях.; Шаг 6; : Вернитесь к Шагу 2 для того, чтобы настроить следующие два правила:; IP / MAC Filter Set Index; для того, чтобы посмотреть информацию о
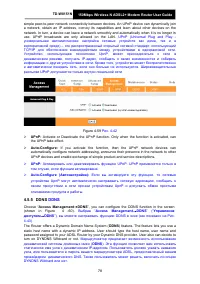
- 88 SNMP
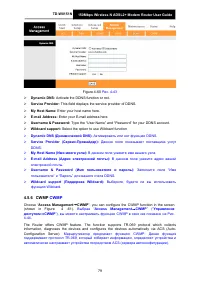
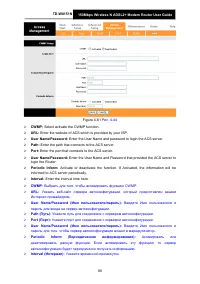
- 89 the UPnP take effect.; ”, you can configure the DDNS function in the screen; DDNS; Маршрутизатор предлагает возможность использования
- 90 CWMP; Access Management
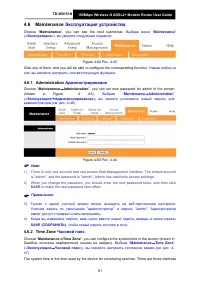
- 92 Эксплуатация устройства; Администрирование; Maintenance; to make the new password take effect.; Часовой пояс; Maintenance
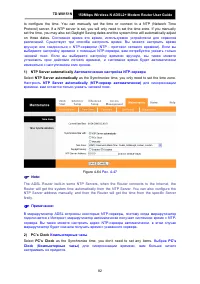
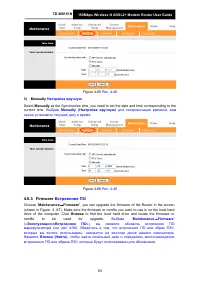
- 93 as the Synchronize time, you only need to set the time zone.; NTP Server automatically; PC’s Clock; as the Synchronize time, you don’t need to set any items.; PC’s
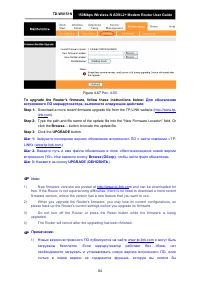
- 94 Manually; Встроенное ПО; ”, you can upgrade the firmware of the Router in the screen; Browse; to find the local hard drive and locate the firmware or
- 95 button to locate the update file.; UPGRADE; New firmware versions are posted at
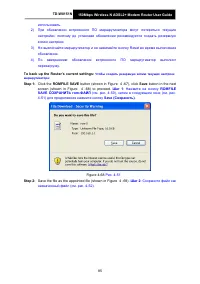
- 96 ROMFILE SAVE; button in the next; Шаг 1; : Нажмите на кнопку; ROMFILE; : Сохраните файл как
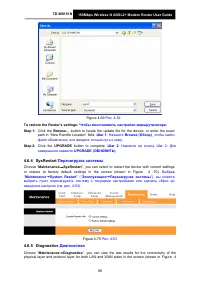
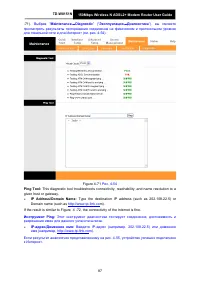
- 97 файл обновления, или введите точный путь к нему.; Перезагрузка системы; Диагностика
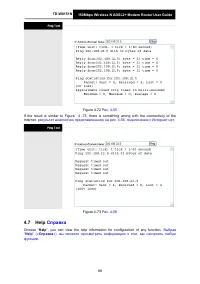
- 98 given host or gateway.
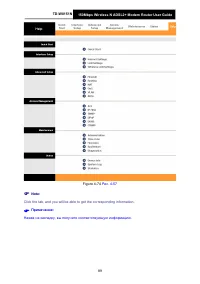
- 99 Справка; Help; »), вы сможете просмотреть информацию о том, как настроить любую
- 100 Нажав на закладку, вы получите соответствующую информацию.
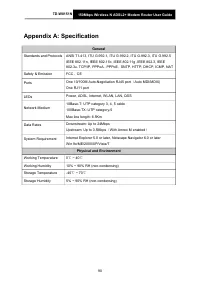
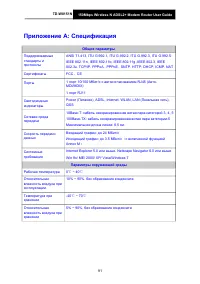
- 102 Приложение A: Спецификация; Общие параметры


