Пылесос Zanussi ZANS710_ZANS715_ZANS730_ZANS731_ZANS750 - инструкция пользователя по применению, эксплуатации и установке на русском языке. Мы надеемся, она поможет вам решить возникшие у вас вопросы при эксплуатации техники.
Если остались вопросы, задайте их в комментариях после инструкции.
"Загружаем инструкцию", означает, что нужно подождать пока файл загрузится и можно будет его читать онлайн. Некоторые инструкции очень большие и время их появления зависит от вашей скорости интернета.


1
7
12
13*
14*
15*
16*
10*
11*
4
7
8
1
3
2
5
6
20
21
22
23
24
25
2
7
28
31
29
30
* Depending on the model
* Nur bestimmte Modelle
* Alleen bepaalde modellen
* Suivant les modèles
* Solo per alcuni modelli
* Sólo algunos modelos
* Apenas para alguns modelos
* Yalnýzca belirli modellerde
* Μόνο ορισµένα µοντέλα.
* Тол
ько
для
отдельных
моделей
* В
з
а
лежності
в
ід
моделі
* Samo određeni modeli
* Pouze u některých model
ů
*
Са
мо
з
а
някои
модели
* Tylko niektóre modele
* Disponibil numai pentru unele modele
* Len niektoré modely
* Samo nekateri modeli
* Samo nekateri modeli
* Ainult teatud mudelid
* Tikai noteiktiem modeļiem
* Tinka tik kai kuriems modeliams
* Csak egyes típusok esetén
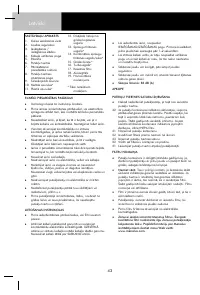
IMPORTANT SAFEGUARDS
•
Read this instruction booklet carefully
.
•
Before
using the appliance, check that the mains power
voltage corresponds to the voltage shown on the rating
plate
.
•
Do
not switch the appliance on if it appears to be faulty
in any way or it has a damaged cord or plug
.
Do not try
to repair the appliance by yourself
.
For repairs and
accessories we are at your service from Monday to
Friday from 8am to 6pm
•
Always remove the plug from the power socket when
the appliance is not in use and before carrying out any
cleaning or maintenance operations
.
•
Never
leave the appliance unattended when it is
switched on
.
Keep the appliance out of reach of
children
.
•
This
appliance is for domestic use only
.
Use as
described in this instruction booklet
.
•
Do
not pull the appliance by the cord
.
Do not unplug by
pulling on the cord
.
Do not use the cleaner with a
damaged cable
.
If the cable damaged, it should be
replaced at a service center
.
This is not covered by the
warranty
.
•
Do
not use appliance on wet surfaces or to vacuum
liquids, mud, ash and burning cigarette butts
.
Do not
vacuum up any highly flammable or explosive
substances or gases
.
These materials can cause serious damage to the
motor - a damage which is not covered by the
warranty.
•
Do
not unplug the vacuum cleaner with wet hands
.
•
Do
not operate the vacuum cleaner too close to heaters
and radiators, stoves etc
.
•
Before
you start using the vacuum cleaner, please
remove large or sharp objects from the floor to prevent
damage to the dust container and hose
.
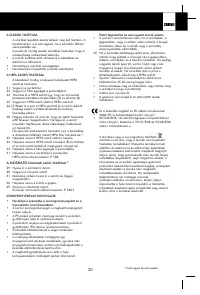
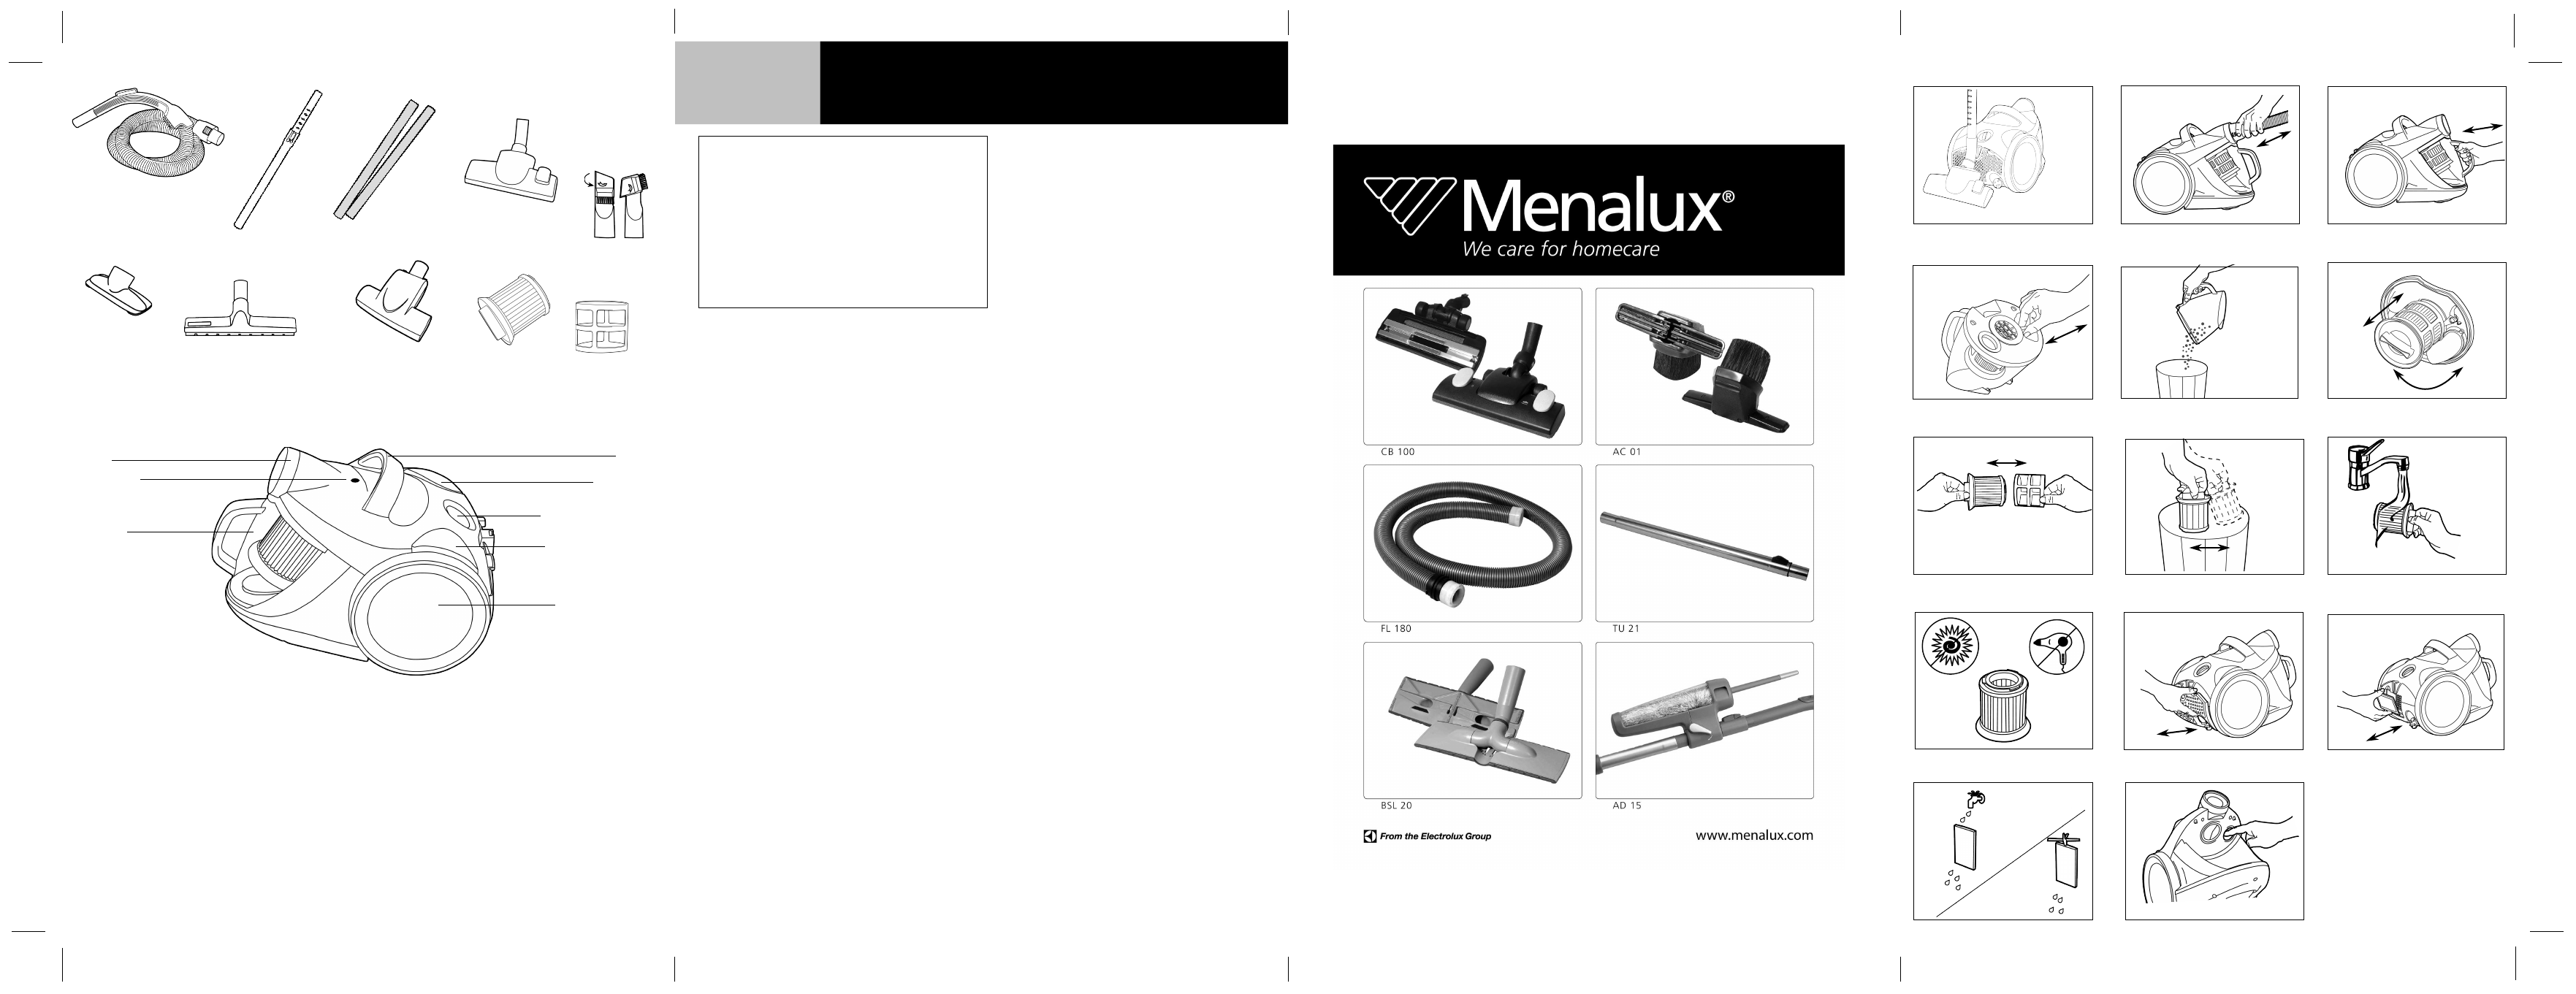
INSTRUCTIONS FOR USE
•
Before
placing into operation make certain that the
filters are in the proper position
.
2
0 To connect the hose into the suction inlet push it until it
clicks
.
2
0 To disconnect the hose from the suction inlet push the
button at the end of the hose
.
•
Unwind
a sufficient length of cable and insert the plug
into the power socket
.
A YELLOW mark on the power
cable shows the ideal cable length
.
Do not extend the
cable beyond the RED mark
.
•
Press
the ON/OFF button to switch the appliance on
.
On initial start up full power is reached after
approximately 1-2 seconds
.
•
To
rewind the power cable, press the rewind button with
foot, and guide the cable with hand to ensure that it
does not whip causing damage
.
•
By
moving the variable power control, the suction
power can be adjusted
.
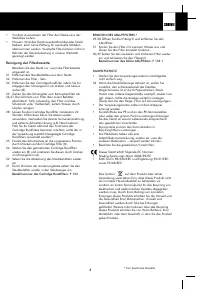
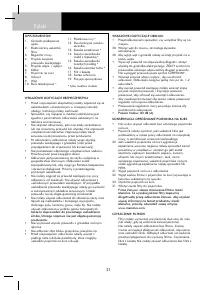
MAINTENANCE
REMOVING THE CONTENTS OF THE DUST CONTAINER
Never
operate the cleaner without the dust container
installed
.
The dust container must be emptied if the window of the
dust container indicator changes into red when the
cleaner is operating at maximum power and the nozzle
is raised from the floor
.
32 If
the dustbin indicator is activated than firstly check the
air inlet channel of the appliance
.
If it is clogged by big
pieces of paper, dust, hair or other materials then clean
it
.
If after cleaning the dustbin indicator stayes
activated check the HEPA
.
21 Remove
the dust container from the cleaner
.
22 Remove
the filter set from the dust container by taking it
in the way indicated in the icon
.
23 Remove
the contents of the dust container
.
22 Put
the filter set back into the dust container
.
21 Put
the dust container back into the cleaner
.
Menalux branded filters are strongly recommended
by Zanussi. Those high quality filters will ensure a
long lifetime of your Zanussi vacuum cleaner. For
more information about Menalux products, please
visit our website: www.menalux.com.
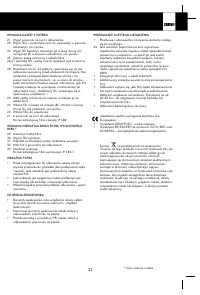
CLEANING THE FILTERS
•
Filters
should be replaced at least twice a year or when
they become visibly soiled
.
•
Disconnect
from electrical outlet before changing the
filters
.
Cleaning the cartridge filter
Always
operate the cleaner with the cartridge filter
installed
.
21 Remove
the dust container from the cleaner
.
22 Remove
the filter set from the dust container by taking it
as indicated in the icon
.
24 Remove
the cartridge filter by turning it counter -
clockwise (A
) and pull it out (B) as indicated in the icon.
25 Remove the protector mesh from the cartridge filter.
26,27 Shake the dirt from the filter and the mesh into a bin,
if necessary the filter and mesh can be rinsed, with cold
water, under a tap.
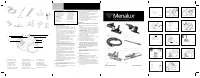
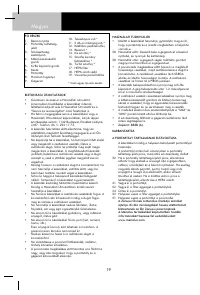
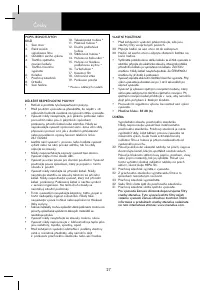
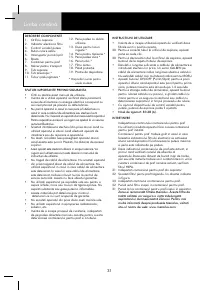
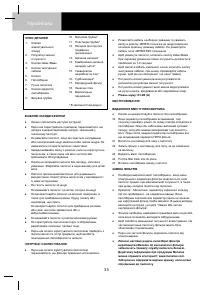
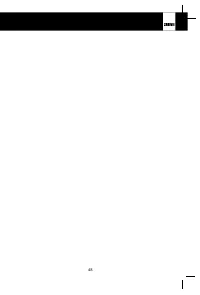
DESCRIPTION OF PARTS
1. Suction inlet
2. Dust container indicator
3. Variable power control
4. Cable rewind button
5. On/off switch
6. Wheel
7. Dust container
8. Carrying handle
9. Hose
10. Telescopic tube *
11. Plastic tubes *
12. Dual purpose floor
nozzle
13. Combination crevice
nozzle / brush *
14. Upholstery nozzle *
15. Hard floor nozzle *
16. Turbo nozzle *
17. Cartridge filter
18. Protector mesh
19. Parking position
*
Depending on the model
1
English
19
9
A
B
26
18
32


