
Хлебопечки BRAYER BR2700 - инструкция пользователя по применению, эксплуатации и установке на русском языке. Мы надеемся, она поможет вам решить возникшие у вас вопросы при эксплуатации техники.
Если остались вопросы, задайте их в комментариях после инструкции.
"Загружаем инструкцию", означает, что нужно подождать пока файл загрузится и можно будет его читать онлайн. Некоторые инструкции очень большие и время их появления зависит от вашей скорости интернета.


17
DE
•
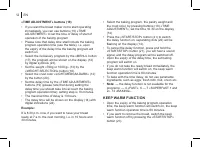
Recommendation:
— after 5-minute dough
kneading, it is recommended to check its
consistency. The dough should form a soft glutinous
lump, if the dough lump is very dry, add some liquid
to it, if the dough lump is too damp, add some flour
(from 1/2 to 1 teaspoon or as necessary).
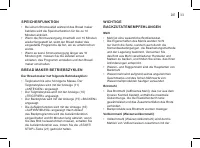
• You can control the bread baking process through the
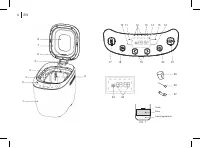
viewing window (8) in the lid (7).
ATTENTION!
During the baking program operation, never open the
lid (7), in case of sudden change of temperature, the
dough can drop and will not rise any more.
•
After finishing of the baking program, you will hear
sound signals and the keep warm function will switch
on, the keep warm function operation time is 60
minutes.
• To cancel the keep warm function and to switch the
bread maker off, press and hold the «START/STOP»
button (21) within 3 seconds.
• Remove the power plug from the mains socket.
• Open the lid (7) using heat-resistant kitchen
potholders, lift slightly and take the handle (4), turn
the baking form (3) counterclockwise and remove it
from the bread maker.
• Leave the form to cool, for approximately 10-15
minutes.
• Separate the pastry from the form (3) walls using a
plastic kitchen spatula.
• Do not use metal objects that can damage the non-
stick coating of the form (3).
• To remove the pastry turn the form (3) upside down
and shake it.
• Before cutting the bread, remove the paddle (9) with
the hook (26).
• Cut the bread with a sharp bread knife.
• After use wash the form (3) and the paddle (9) with
warm water using neutral detergent, rinse and dry
them. Install the paddle (9) in the form (3), install the
form (3) in the bread maker, close the lid (7).
CLEANING AND MAINTENANCE
•
Switch the bread maker off, unplug it, open the lid (7)
and let the bread maker cool down.
• Clean the body (1) and the lid (7) with a slightly damp
cloth, then wipe it dry.
• Wash the baking form (3), the paddle (9), the
measuring cup (25), the hook (26) and the spoon
(27) with warm water with neutral detergent, rinse
and dry them.
•
Note:
— if the paddle (9) can not be removed from
the axle, fill the form (3) with warm water and wait for
about 20-30 minutes.
• Do not use metal objects or scourers, abrasive
detergents and solvents for cleaning the bread maker
and the baking form (3).
• Dry the baking form (3) and the paddle (9) thoroughly
before installing them in the bread maker.
Содержание
- 43 Домашняя хлебопечь предназначена для выпечки; ОПИСАНИЕ; Панель управления
- 45 Перед использованием хлебопечки внимательно
- 48 Перед использованием хлебопечки, пожалуйста,
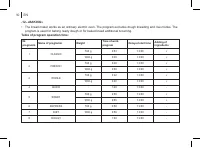
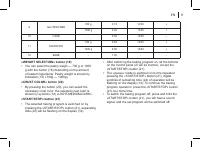
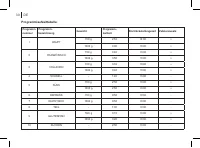
- 51 Таблица времени работы программ:
- 54 Мука
- 56 ПОРЯДОК ЗАКЛА ДКИ ИНГРЕДИЕНТОВ В
- 57 ДОБАВЛЕНИЕ ИНГРЕДИЕНТОВ; ВЫПЕЧКА ХЛЕБА
- 59 ТЕХНИЧЕСКИЕ ХАРАКТЕРИСТИКИ
- 63 УТИЛИЗАЦИЯ; Срок службы устройства — 3 года


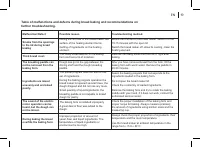
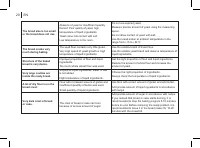
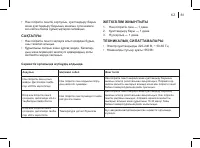
Кнопки не реагируют на нажатия, что делать