
Электропилы Bosch UniversalChain 18 0.600.8B8.001 - инструкция пользователя по применению, эксплуатации и установке на русском языке. Мы надеемся, она поможет вам решить возникшие у вас вопросы при эксплуатации техники.
Если остались вопросы, задайте их в комментариях после инструкции.
"Загружаем инструкцию", означает, что нужно подождать пока файл загрузится и можно будет его читать онлайн. Некоторые инструкции очень большие и время их появления зависит от вашей скорости интернета.


English |
21
Bosch Power Tools
F 016 L81 719 | (21.12.17)
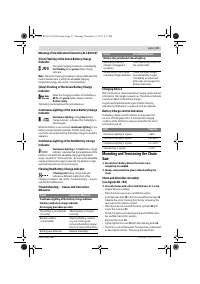
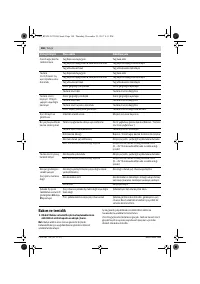
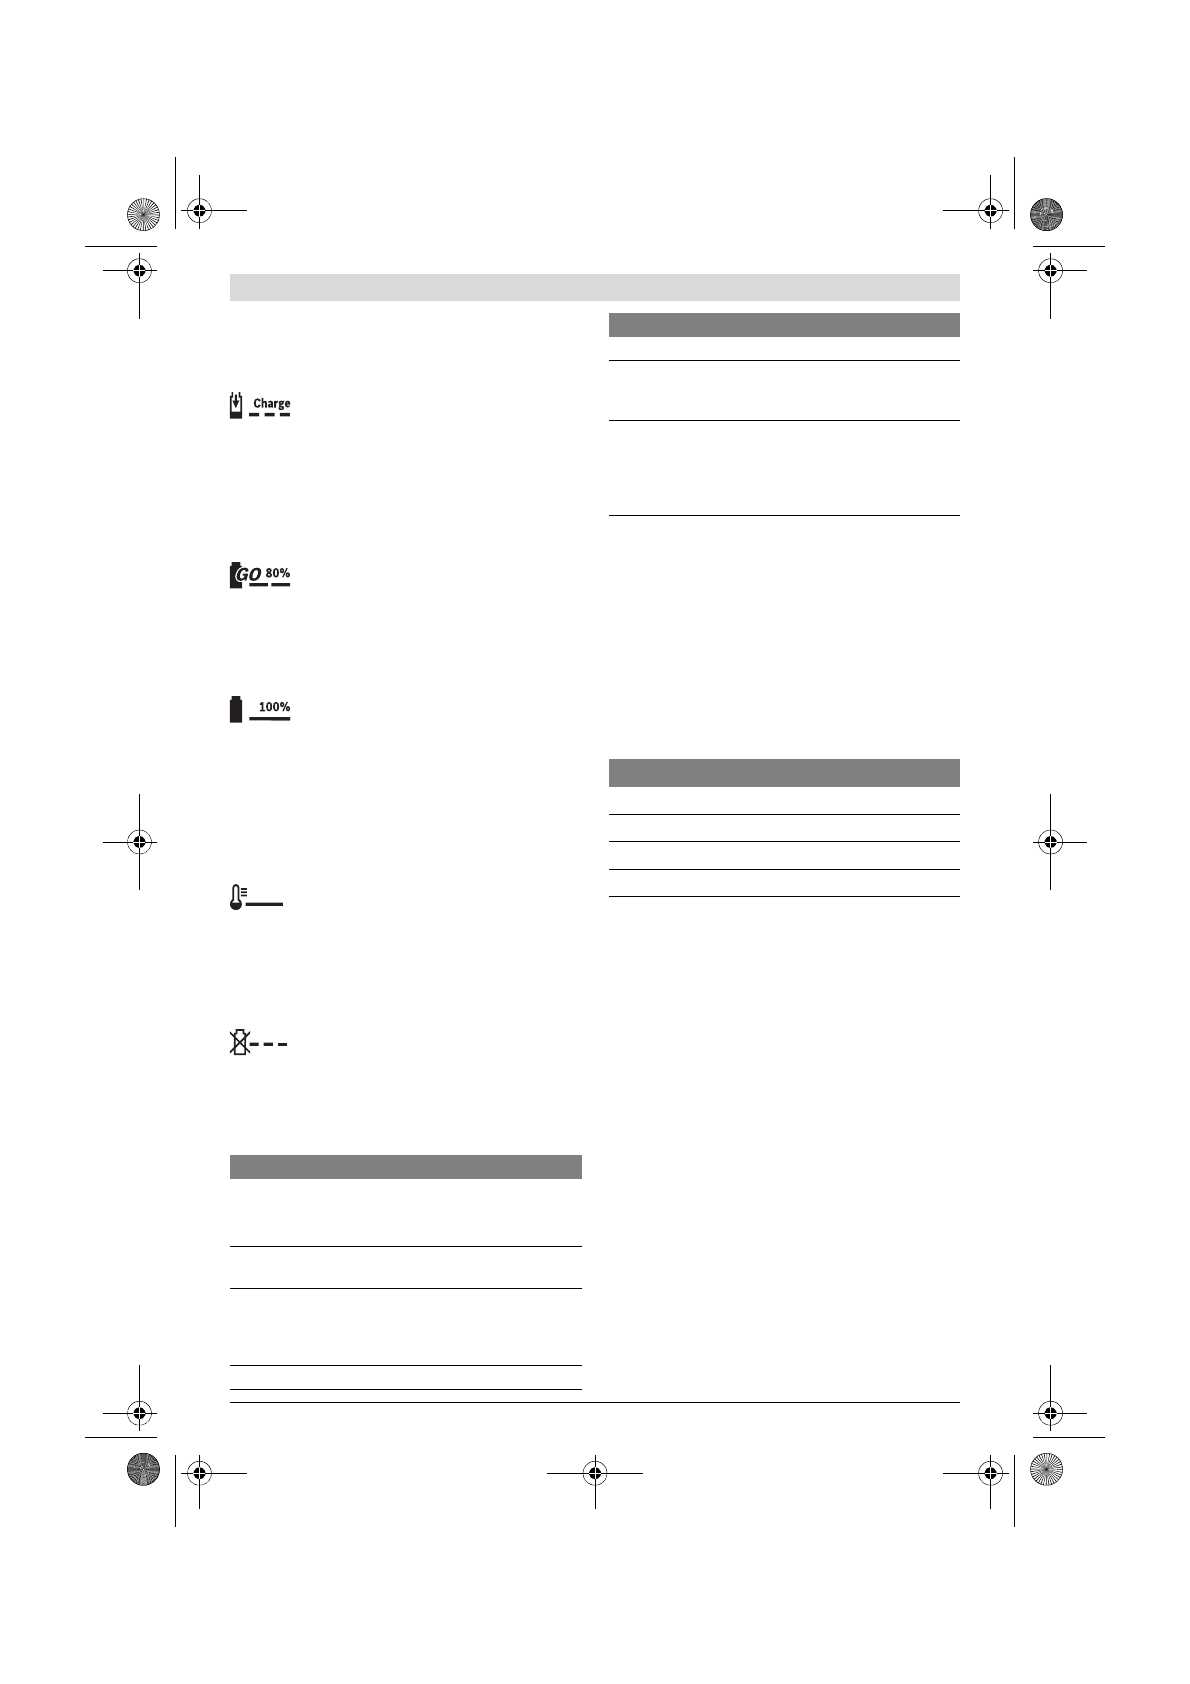
Meaning of the Indication Elements (AL 1830 CV)
(Fast) Flashing of the Green Battery Charge
Indicator
The rapid-charging procedure is indicated by
fast flashing
of the
green
battery charge
indicator.
Note:
The rapid-charging procedure is only possible when the
battery temperature is within the allowable charging
temperature range, see section “Technical Data”.
(Slow) Flashing of the Green Battery Charge
Indicator
When the charging condition of the battery is
80 %
, the
green
battery charge indicator
flashes slowly
.
The battery can be removed for immediate use.
Continuous Lighting of the Green Battery Charge
Indicator
Continuous lighting
of the
green
battery
charge indicator
indicates that the battery is
fully charged.
When the battery is not inserted,
continuous lighting
of the
battery charge indicator indicates that the mains plug is
inserted in the socket and that the battery charger is ready for
operation.
Continuous Lighting of the Red Battery Charge
Indicator
Continuous lighting
of the
red
battery charge
indicator indicates that the temperature of the
battery is not within the allowable charging temperature
range, see section “Technical Data”. As soon as the allowable
charging temperature range is reached, the battery charger
automatically switches to rapid charging.
Flashing Red Battery Charge Indicator
A
flashing
red
battery charge indicator
indicates a different malfunction of the
charging procedure, see section “Troubleshooting – Causes
and Corrective Measures”.
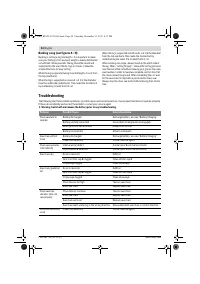
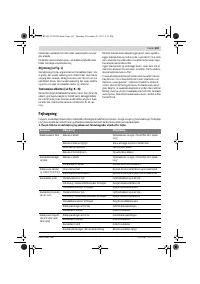
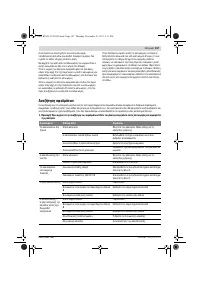
Troubleshooting – Causes and Corrective
Measures
Charging Advice
With continuous or several repetitive charging cycles without
interruption, the charger can warm up. This does not indicate
a technical defect of the battery charger.
A significantly reduced working period after charging
indicates that the battery is used and must be replaced.
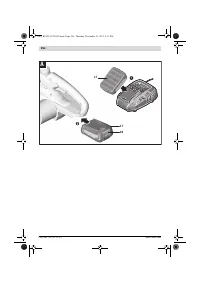
Battery Charge-control Indication
The battery charge-control indicator on the power tool
consists of three green LEDs. It indicates the charging
condition of the battery for a few seconds after the tool is
switched on and off.
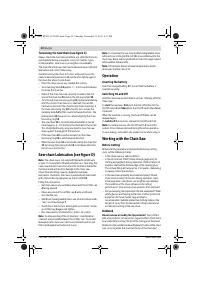
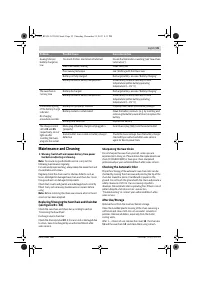
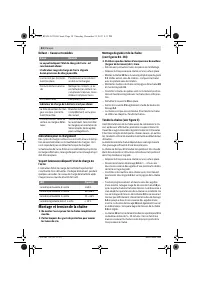
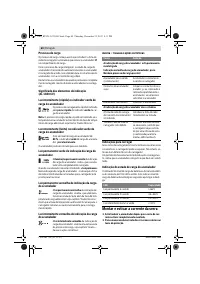
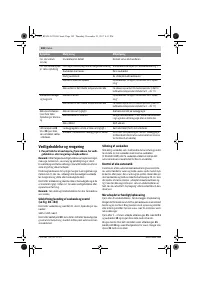
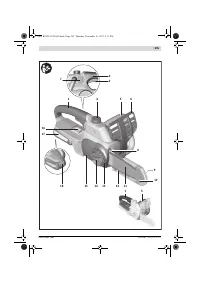
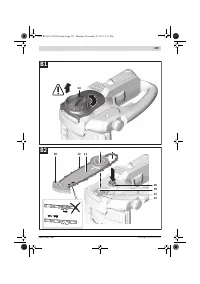
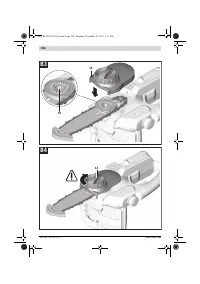
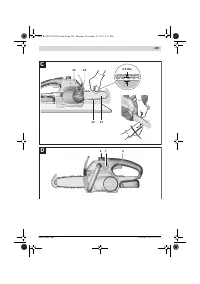
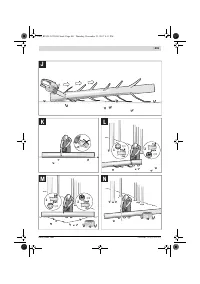
Mounting and Tensioning the Chain
Saw
Do not insert battery before the chain saw is
completely assembled.
Always wear protective gloves when handling the
chain.
Chain and Chain Bar Assembly
(see figures B1 – B4)
Use only chains with a drive link thickness of 1,1 mm.
– Unpack all parts carefully.
– Place the chain saw on any suitable flat surface.
– Insert the saw chain
12
in the slot around the chain bar
11
.
Observe the correct running direction by comparing the
saw chain to the rotation symbol.
– Place the chain links around the drive sprocket
20
and
mount the chain bar
11
.
– Check if all parts are seated properly and hold the chain
bar and the chain in this position.
– Remount the cover
15
.
– Lightly tighten the cover
15
with the clamping knob
14
.
– The chain is not yet tensioned. The saw chain is tensioned
as described in section “Tensioning the Saw Chain”.
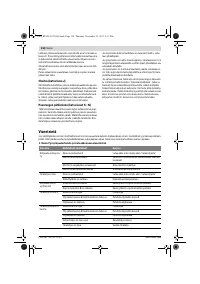
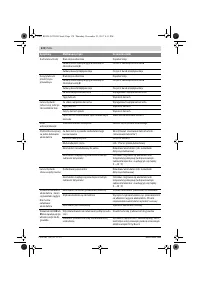
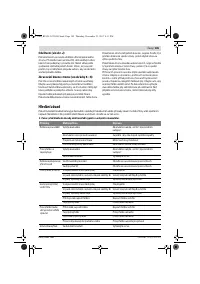
Cause
Corrective Measure
Continuous lighting of the battery charge indicator
Flashing red battery charge indicator
No charging procedure possible
The battery is not attached
(correctly)
Attach battery to charger
correctly
Battery contacts
contaminated
Clean the battery contacts
(e. g. by inserting and
removing the battery several
times) or replace the battery
Battery pack defective
Replace the battery
Battery charge indicators do not light up
Mains plug of battery
charger not plugged in
(properly)
Insert mains plug (fully) into
the socket outlet
Socket outlet, mains cable
or battery charger defective
Check the mains voltage;
have the battery charger
checked by an authorised
after-sales service agent for
Bosch power tools
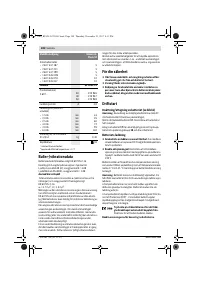
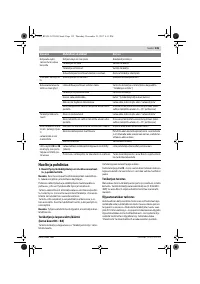
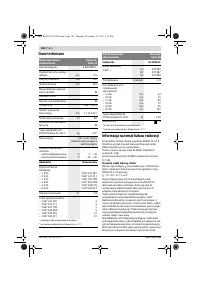
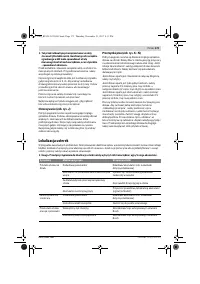
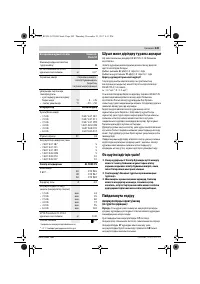
LED
Capacity
Continuous lighting 3 x green
≥ 66 %
Continuous lighting 2 x green
33 — 66 %
Continuous lighting 1 x green
11 — 33 %
Slow flashing 1 x green
≤ 10 %
Cause
Corrective Measure
OBJ_BUCH-3472-001.book Page 21 Thursday, December 21, 2017 4:11 PM
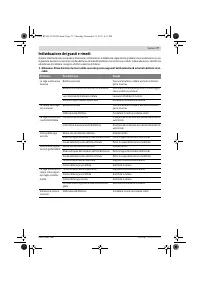
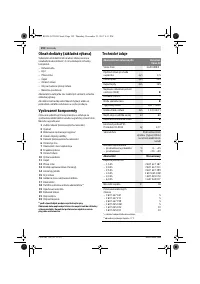
Содержание
- 215 Безопасность рабочего места; Безопасность людей
- 216 Сервис
- 218 Упущения в
- 219 Детям не; Применение по назначению
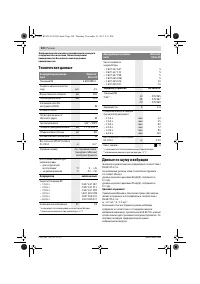
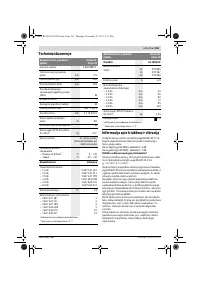
- 220 Технические данные
- 221 Для Вашей безопасности; Зарядка аккумулятора
- 222 Неисправность – Причины и устранение; Монтаж и натяжение пильной цепи
- 223 Работа с инструментом; Установка аккумулятора
- 224 Работа с цепной пилой; Перед пилением
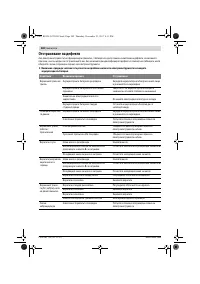
- 226 Поиск неисправностей
- 227 Техобслуживание и очистка; Затачивание пильной цепи
- 228 После окончания работы и хранение; Пильная цепь
- 229 Транспортировка; Українська; Вказівки з техніки безпеки; Пояснення щодо символів


