Усилители Yamaha R-840 - инструкция пользователя по применению, эксплуатации и установке на русском языке. Мы надеемся, она поможет вам решить возникшие у вас вопросы при эксплуатации техники.
Если остались вопросы, задайте их в комментариях после инструкции.
"Загружаем инструкцию", означает, что нужно подождать пока файл загрузится и можно будет его читать онлайн. Некоторые инструкции очень большие и время их появления зависит от вашей скорости интернета.


39
En
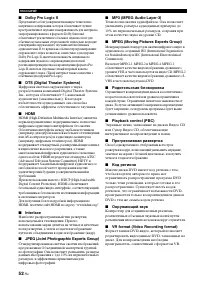
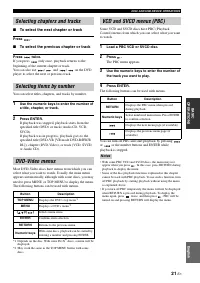
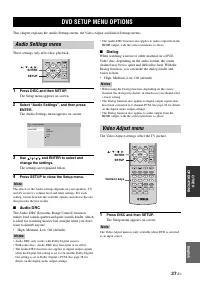
DVD SETUP MENU OPTIONS
Eng
lish
O
T
HE
R
OP
ERA
T
IO
NS
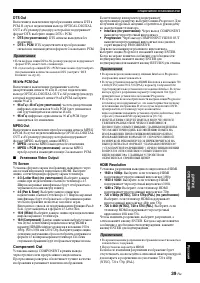
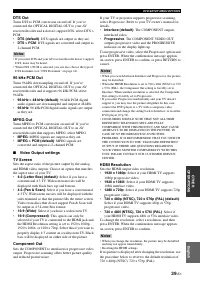
DTS Out
Turns DTS to PCM conversion on and off. If you’ve
connected the OPTICAL DIGITAL OUT to your AV
receiver/decoder and it doesn’t support DTS, select DTS >
PCM.
•
DTS (default)
: DTS signals are output as they are.
•
DTS > PCM
: DTS signals are converted and output as
2-channel PCM.
Notes
• If you select DTS and your AV receiver/decoder doesn’t support
DTS, noise may be heard.
• When DTS > PCM is selected, you can also choose the type of
DTS downmix (see “DTS Downmix” on page 41).
96 kHz PCM Out
Turns 96 kHz downsampling on and off. If you’ve
connected the OPTICAL DIGITAL OUT to your AV
receiver/decoder and it supports 96 kHz PCM, select
96 kHz.
•
96 kHz > 48 kHz (default)
: 96 kHz PCM digital
audio signals are downsampled and output at 48 kHz.
•
96 kHz
: 96 kHz PCM digital audio signals are output
as they are.
MPEG Out
Turns MPEG to PCM conversion on and off. If you’ve
connected the OPTICAL DIGITAL OUT to an AV
receiver/decoder that supports MPEG, select MPEG.
•
MPEG
: MPEG signals are output as they are.
•
MPEG > PCM (default)
: MPEG signals are
converted and output as 2-channel PCM.
■
Video Output settings
TV Screen
Sets the aspect ratio of the picture output by the analog
and HDMI video outputs. Choose an option that matches
the aspect ratio of your TV.
•
4:3 (Letter Box) (default)
: Select if you have a
conventional 4:3 TV. Widescreen movies will be
displayed with black bars top and bottom.
•
4:3 (Pan & Scan)
: Select if you have a conventional
4:3 TV. Widescreen movies will be displayed with the
sides trimmed so that the picture fills the entire screen.
Video from discs that do not support Pan & Scan will
be output in 4:3 Letter Box format.
•
16:9 (Wide)
: Select if you have a widescreen TV.
•
16:9 (Compressed)
: This option can only be
selected if your TV is connected to the HDMI jack and
the HDMI Resolution setting is set to 1920 x 1080p,
1920 x 1080i, or 1280 x 720p. Select this if you want to
properly display 4:3 content on a widescreen TV. Black
bars will be displayed on either side of the picture.
Component Out
Sets the COMPONENT to interlaced or progressive video
output. Progressive scanning offers better picture quality
and reduced picture noise.
If your TV or projector supports progressive scanning,
select Progressive. Refer to your TV owner’s manual for
details.
•
Interlace (default)
: The COMPONENT outputs
interlaced video.
•
Progressive
: The COMPONENT VIDEO OUT
outputs progressive video and the PROGRESSIVE
indicator on the display lights up.
To use progressive video, select the Progressive option and
press ENTER. When the confirmation message appears
on-screen, press ENTER to confirm, or press RETURN to
cancel.
Notes
• When you switch between Interlace and Progressive, the picture
may be disturbed.
• When the HDMI Resolution is set to 720 x 480i (NTSC) or 720
x 576i (PAL), the Component Out setting is forcibly set to
Interlace. When another resolution is selected, the Component
Out setting is forcibly set to Progressive.
• If you select Progressive inadvertently and your TV doesn’t
support it, you may lose the picture altogether. In this case,
connect the DVD player to a TV with a composite video
connection and change the setting back to Interlace, or reset the
DVD player (
• CONSUMERS SHOULD NOTE THAT NOT ALL HIGH
DEFINITION TELEVISION SETS ARE FULLY
COMPATIBLE WITH THIS PRODUCT AND MAY CAUSE
ARTIFACTS TO BE DISPLAYED IN THE PICTURE. IN
CASE OF 525 PROGRESSIVE SCAN PICTURE
PROBLEMS, IT IS RECOMMENDED THAT YOU SWITCH
THE CONNECTION TO THE “STANDARD DEFINITION”
OUTPUT. IF THERE ARE QUESTIONS REGARDING
YOUR VIDEO MONITOR COMPATIBILITY WITH THIS
UNIT, PLEASE CONTACT OUR CUSTOMER SERVICE
CENTER.
HDMI Resolution
Sets the HDMI output video resolution.
•
1920 x 1080p
: Select if your HDMI TV supports
1080p progressive video.
•
1920 x 1080i
: Select if your HDMI TV supports
1080i interlace video.
•
1280 x 720p
: Select if your HDMI TV supports 720p
progressive video.
•
720 x 480p (NTSC), 720 x 576p (PAL) (default)
:
Select if your HDMI TV supports 480p or 576p
progressive video.
•
720 x 480i (NTSC), 720 x 576i (PAL)
: Select if
your HDMI TV supports 480i or 576i interlace video.
To change the resolution, select a resolution, and then
press ENTER. When the confirmation message appears
on-screen, press ENTER to confirm.
Notes
• When you change the resolution, the picture may be disturbed
and may not appear immediately.
• Resetting the HDMI settings
If no picture is displayed after changing the resolution, use
the procedure below to revert to the default resolution of
720 x 480p (NTSC), 720 x 576p (PAL).
Содержание
- 3 НАЯ; СОДЕРЖАНИЕ
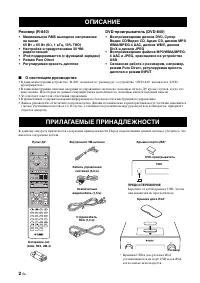
- 4 Минимальное; О настоящем руководстве; ОПИСАНИЕ
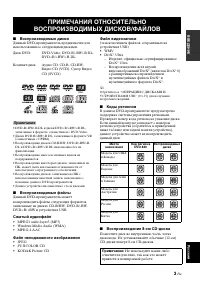
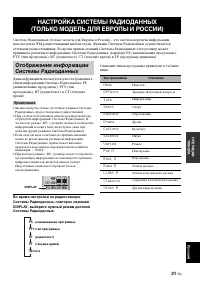
- 5 ВВЕДЕНИ; Примечания; – Изделие, официально сертифицированное; ПРИМЕЧАНИЯ ОТНОСИТЕЛЬНО; Не используйте какие-либо
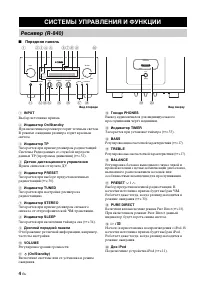
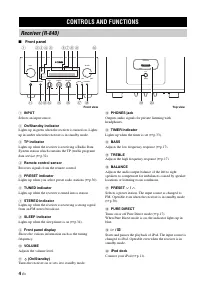
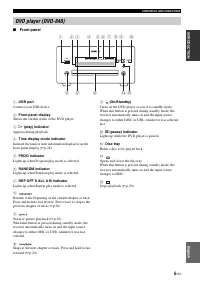
- 6 Передняя панель; СИСТЕМЫ УПРАВЛЕНИЯ И ФУНКЦИИ; BC D
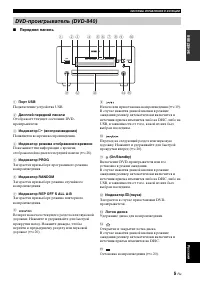
- 7 Подключение устройства USB.; D E
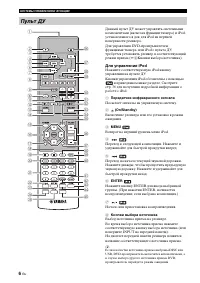
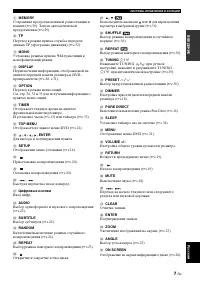
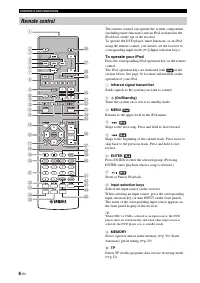
- 8 Для управления iPod; в приведенном ниже разделе. Смотрите; Передатчик инфракрасного сигнала; Посылает сигналы на управляемую систему.; MENU; Возврат на верхний уровень меню iPod.; ENTER; Начало или приостановка воспроизведения.; Кнопки выбора источника; Пульт ДУ
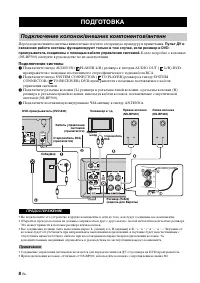
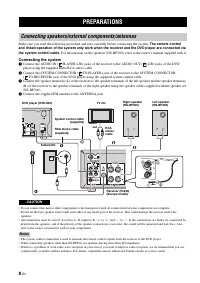
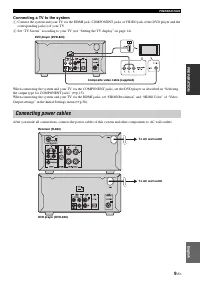
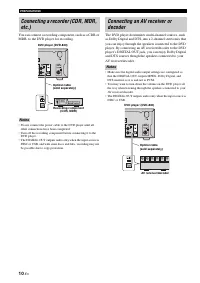
- 10 Пульт ДУ и; Более подробно о колонках; Подключение системы; Подключите гнезда AUDIO IN (; ПОДГОТОВКА; Подключение колонок/внешних компонентов/антенн; ПРЕДОСТЕРЕЖЕНИЕ
- 11 ПОД; Подключение телевизора к системе; Подключение силовых кабелей
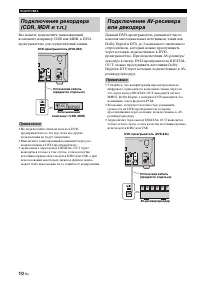
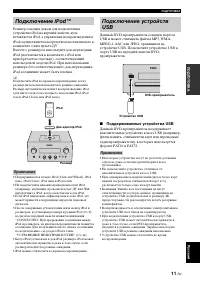
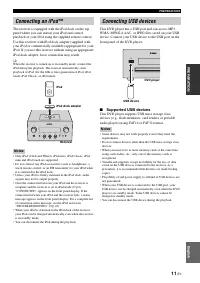
- 13 ПОДГ; Поддерживаемые устройства USB; Подключение iPodTM
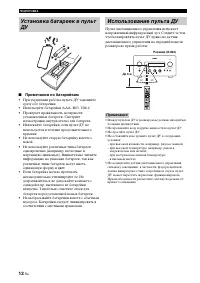
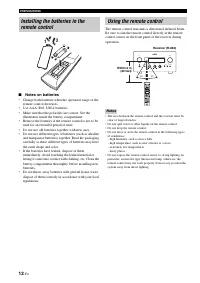
- 14 Примечания по батарейкам; Использование пульта ДУ
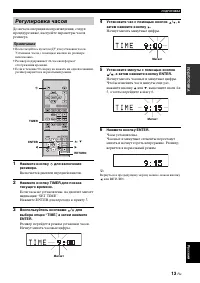
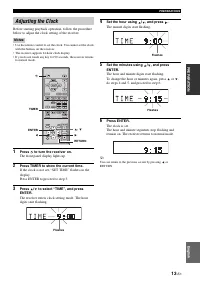
- 15 Включается дисплей передней панели.; Установите минуты с помощью кнопок; Регулировка часов
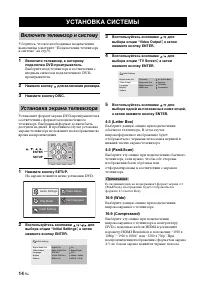
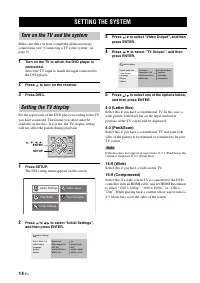
- 16 На экране появится меню установки DVD.; УСТАНОВКА СИСТЕМЫ; Включите телевизор и систему
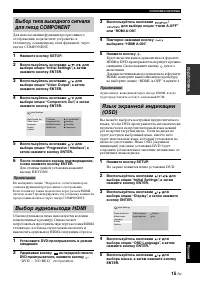
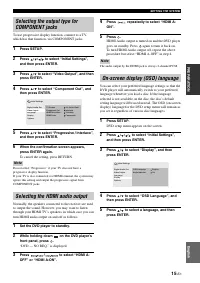
- 17 Примечание; Выбор аудиовыхода HDMI
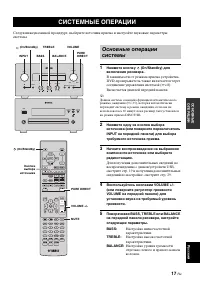
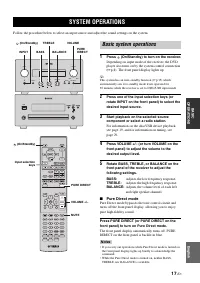
- 19 ОСНО; BASS; СИСТЕМНЫЕ ОПЕРАЦИИ
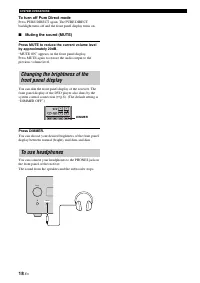
- 20 Режим Pure Direct; Для отключения режима Pure Direct; Нажмите кнопку DIMMER.; Для использования наушников
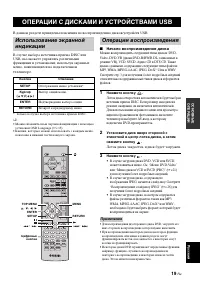
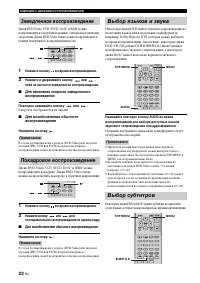
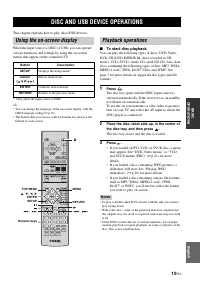
- 21 ОСНОВ; Начало воспроизведения диска; Нажмите кнопку; ОПЕРАЦИИ С ДИСКАМИ И УСТРОЙСТВАМИ USB; Операции воспроизведения
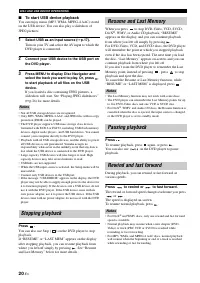
- 22 Начало воспроизведения с устройства USB; Остановка воспроизведения
- 23 Если вы нажмете кнопку; Выбор разделов и звуковых дорожек
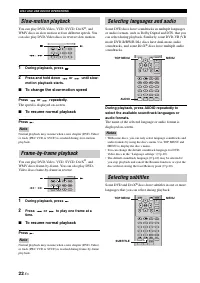
- 24 Скорость отображается на экране.; Для возобновления обычного воспроизведения; Замедленное воспроизведение
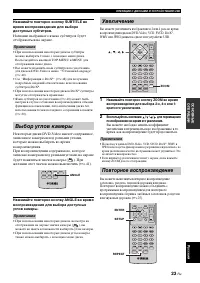
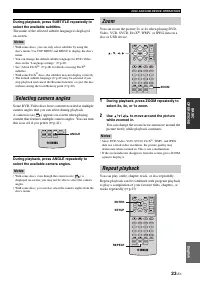
- 25 Воспользуйтесь кнопками; Выбор углов камеры; Увеличение
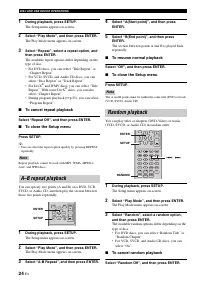
- 26 Для отмены функции повторного воспроизведения; Для отмены функции случайного воспроизведения; Повторное воспроизведение A–B; Случайное воспроизведение
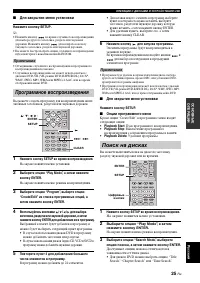
- 27 Для закрытия меню установки; Программное воспроизведения
- 28 • Для дисков VCD, SVCD и Аудио CD можно; Нажмите кнопку SETUP.; На экране появится меню установки.; Воспроизведение слайд-шоу JPEG
- 29 Воспользуйтесь кнопками
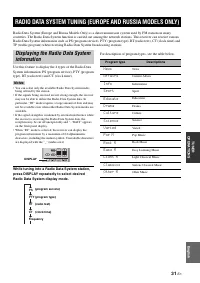
- 30 Для скрытия данной информации; Просмотр аудиоформата; DTS CD
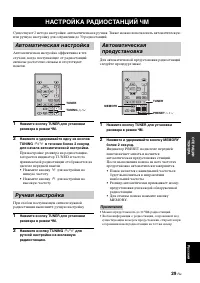
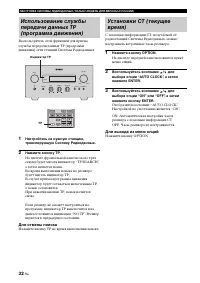
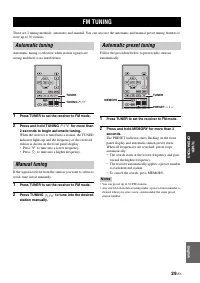
- 31 ОПЕ; в течение более 2 секунд; для настройки на; Нажмите кнопку TUNING; • Ресивер автоматически присваивает номер; НАСТРОЙКА РАДИОСТАНЦИЙ ЧМ; Автоматическая настройка
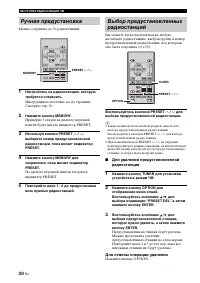
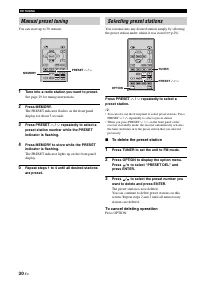
- 32 Можно сохранять до 30 радиостанций.; Для отмены операции удаления; Нажмите кнопку OPTION.; Ручная предустановка
- 33 ОПЕР
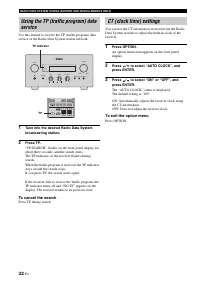
- 34 Для отмены поиска; Нажмите кнопку TP во время выполнения поиска.; Для выхода из меню опций
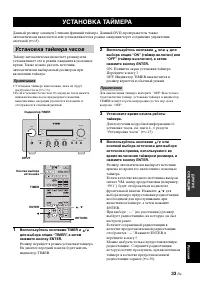
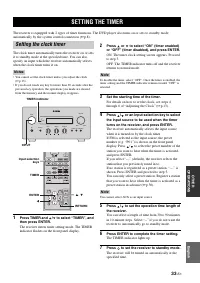
- 35 Воспользуйтесь; УСТАНОВКА ТАЙМЕРА; Установка таймера часов
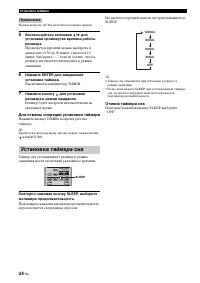
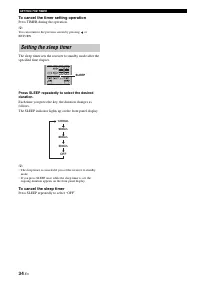
- 36 Высвечивается индикатор TIMER.; Для отмены операции установки таймера; Отмена таймера сна; Установка таймера сна
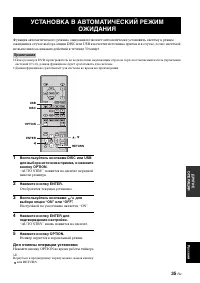
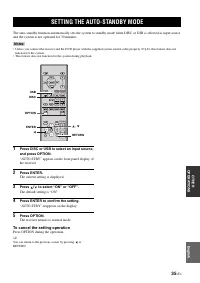
- 37 Нажмите кнопку ENTER.; Отобразится текущая установка.; Ресивер вернется в нормальный режим.; Для отмены операции установки; Нажмите кнопку OPTION во время работы таймера.; УСТАНОВКА В АВТОМАТИЧЕСКИЙ РЕЖИМ
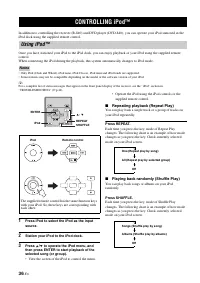
- 38 Подключите iPod к доку iPod.; управления iPod или поставляемого пульта ДУ.; Нажмите кнопку REPEAT.; УПРАВЛЕНИЕ iPodTM; Использование iPodTM
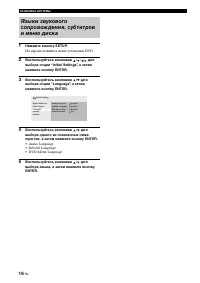
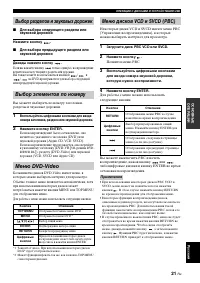
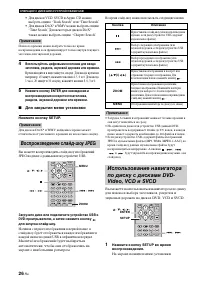
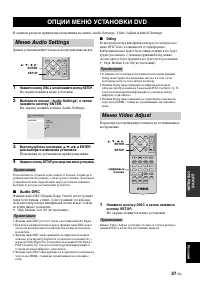
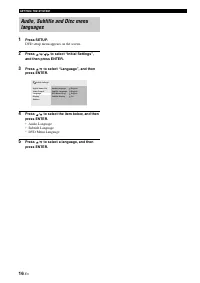
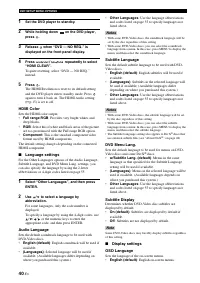
- 39 Данные установки влияют только на воспроизведение дисков.; Нажмите кнопку DISC а затем нажмите кнопку SETUP.; Пояснения по установкам приведены ниже.; Нажмите кнопку SETUP для закрытия меню установки.; Audio DRC; ОПЦИИ МЕНЮ УСТАНОВКИ DVD; Меню Audio Settings; Меню Video Adjust
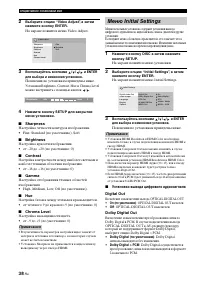
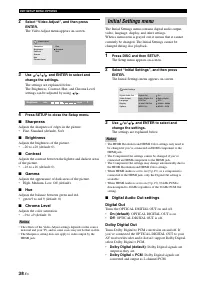
- 40 Off; Меню Initial Settings
- 41 MPEG
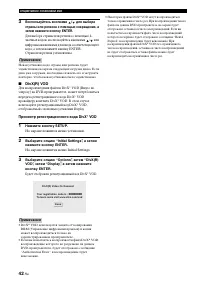
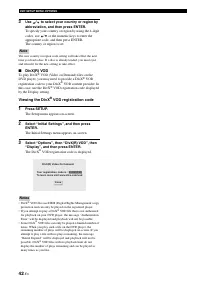
- 44 Просмотр регистрационного кода DivX® VOD
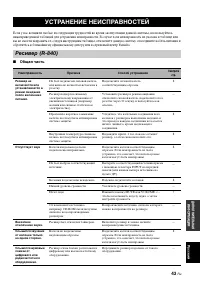
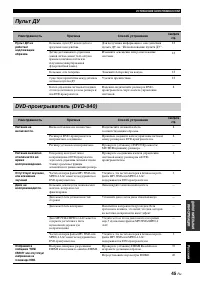
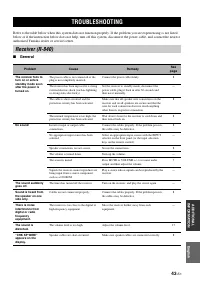
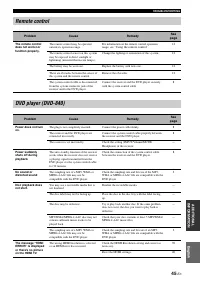
- 45 Общая часть; УСТРАНЕНИЕ НЕИСПРАВНОСТЕЙ
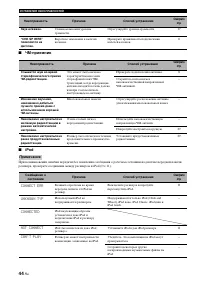
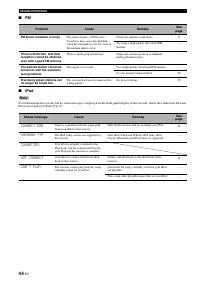
- 46 CONNECT ERR
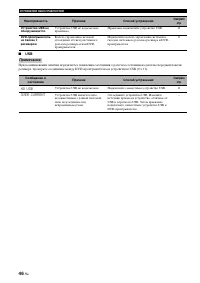
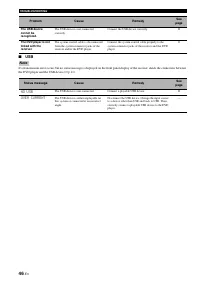
- 48 NO USB; OVER CURRENT
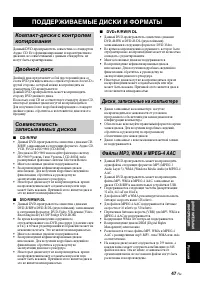
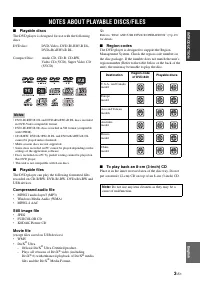
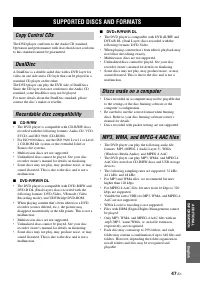
- 49 ПОДДЕРЖИВАЕМЫЕ ДИСКИ И ФОРМАТЫ; Двойной диск
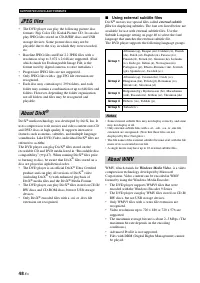
- 50 заголовками; Использование внешних файлов субтитров; внешними файлами субтитров; Windows Media Video; Файлы JPEG; Информация о WMV
- 51 Advanced Audio; Информация о MPEG-4 AAC
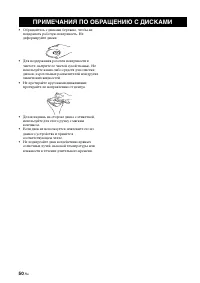
- 52 ПРИМЕЧАНИЯ ПО ОБРАЩЕНИЮ С ДИСКАМИ
- 53 высококачественный видеосигнал.; ГЛОССАРИЙ
- 55 ТЕХНИЧЕСКИЕ ПАРАМЕТРЫ
- 56 iPodTM
- 57 СПИСКИ ЯЗЫКОВ, СТРАН И РЕГИОНОВ; Список языков


