Усилители Yamaha R-840 - инструкция пользователя по применению, эксплуатации и установке на русском языке. Мы надеемся, она поможет вам решить возникшие у вас вопросы при эксплуатации техники.
Если остались вопросы, задайте их в комментариях после инструкции.
"Загружаем инструкцию", означает, что нужно подождать пока файл загрузится и можно будет его читать онлайн. Некоторые инструкции очень большие и время их появления зависит от вашей скорости интернета.


i
En
1
To assure the finest performance, please read this manual
carefully. Keep it in a safe place for future reference.
2
Install this sound system in a well ventilated, cool, dry, clean
place and away from direct sunlight, heat sources, vibration, dust,
moisture and cold. For proper ventilation, allow the following
minimum clearances.
Top: 30 cm (R-840 Only)
Rear: 10 cm
Sides: 10 cm
3
Locate this unit away from other electrical appliances, motors, or
transformers to avoid humming sounds.
4
Do not expose this unit to sudden temperature changes from cold
to hot, and do not locate this unit in an environment with high
humidity (i.e. a room with a humidifier) to prevent condensation
inside this unit, which may cause an electrical shock, fire,
damage to this unit, and/or personal injury.
5
Avoid installing this unit where foreign object may fall onto this
unit and/or this unit may be exposed to liquid dripping or
splashing. On the top of this unit, do not place:
– Other components, as they may cause damage and/or
discoloration on the surface of this unit.
– Burning objects (i.e. candles), as they may cause fire, damage
to this unit, and/or personal injury.
– Containers with liquid in them, as they may fall and liquid
may cause electrical shock to the user and/or damage to this
unit.
6
Do not cover this unit with a newspaper, tablecloth, curtain, etc.
in order not to obstruct heat radiation. If the temperature inside
this unit rises, it may cause fire, damage to this unit, and/or
personal injury.
7
Do not plug in this unit to a wall outlet until all connections are
complete.
8
Do not operate this unit upside-down. It may overheat, possibly
causing damage.
9
Do not use force on switches, knobs and/or cords.
10 When disconnecting the power cable from the wall outlet, grasp
the plug; do not pull the cable.
11 Do not clean this unit with chemical solvents; this might damage
the finish. Use a clean, dry cloth.
12 Only voltage specified on this unit must be used. Using this unit
with a higher voltage than specified is dangerous and may cause
fire, damage to this unit, and/or personal injury. Yamaha will not
be held responsible for any damage resulting from use of this unit
with a voltage other than specified.
13 To prevent damage by lightning, keep the power cable and
outdoor antennas disconnected from a wall outlet or this unit
during a lightning storm.
14 Do not attempt to modify or fix this unit. Contact qualified
Yamaha service personnel when any service is needed. The
cabinet should never be opened for any reasons.
15 When not planning to use this unit for long periods of time (i.e.
vacation), disconnect the AC power plug from the wall outlet.
16 Be sure to read the “TROUBLESHOOTING” section on
common operating errors before concluding that this unit is
faulty.
17 Before moving this unit, press
to set it to standby mode and
disconnect the AC power plug from the wall outlet.
18 Condensation will form when the surrounding temperature
changes suddenly. Disconnect the power cable from the outlet,
then leave this unit alone.
19 When using this unit for a long time, this unit may become warm.
Turn the power off, then leave this unit alone for cooling.
20 Install this unit near the AC outlet and where the AC power plug
can be reached easily.
21 The batteries shall not be exposed to excessive heat such as
sunshine, fire or the like.
22 Excessive sound pressure from earphones and headphones can
cause hearing loss.
LASER SAFETY
This unit employs a laser. Due to possible eye injury, only a
qualified service person should remove the cover or attempt to
service this device.
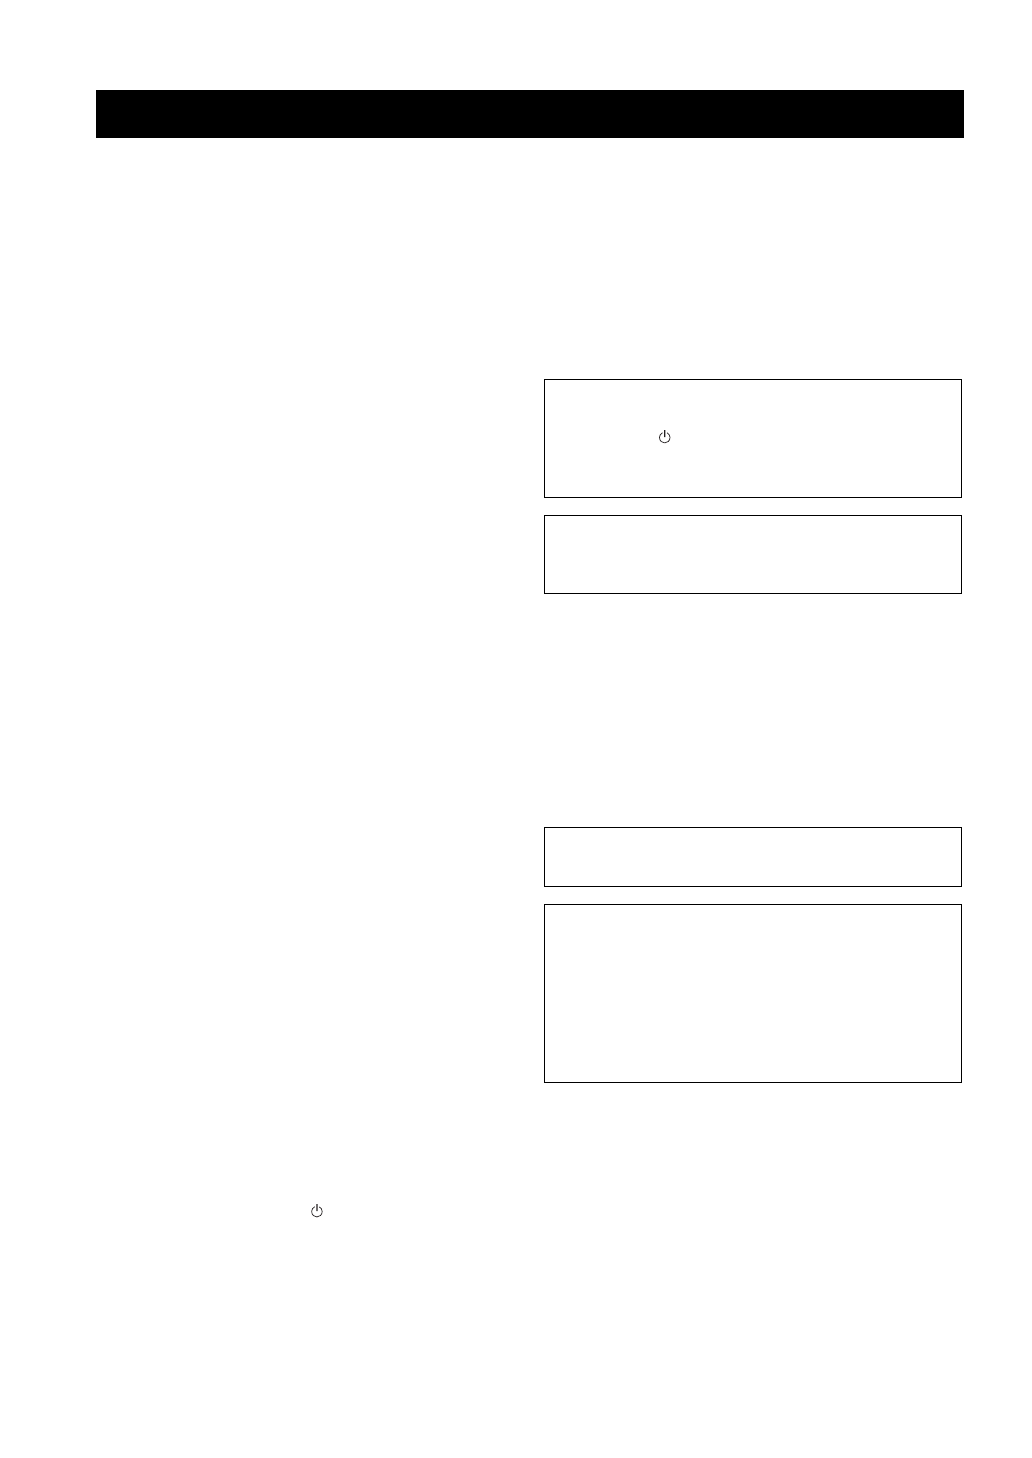
DANGER
This unit emits visible laser radiation when open. Avoid direct
eye exposure to beam. When this unit is plugged into the wall
outlet, do not place your eyes close to the opening of the disc tray
and other openings to look into inside.
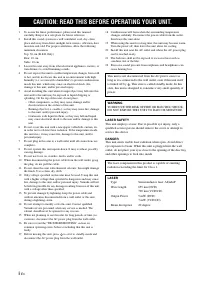
CAUTION: READ THIS BEFORE OPERATING YOUR UNIT.
This unit is not disconnected from the AC power source as
long as it is connected to the wall outlet, even if this unit itself
is turned off by
. This state is called standby mode. In this
state, this unit is designed to consume a very small quantity of
power.
WARNING
TO REDUCE THE RISK OF FIRE OR ELECTRIC SHOCK,
DO NOT EXPOSE THIS UNIT TO RAIN OR MOISTURE.
The laser component in this product is capable of emitting
radiation exceeding the limit for Class 1.
LASER
Type
Semiconductor laser AlGaInP
Wave length
655 nm (DVD)
790 nm (VCD/CD)
Output Power
5 mW (DVD)
7 mW (VCD/CD)
Beam divergence
20 degree
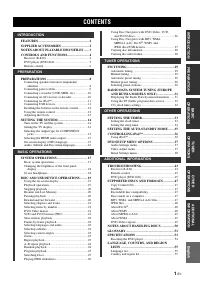
Содержание
- 3 НАЯ; СОДЕРЖАНИЕ
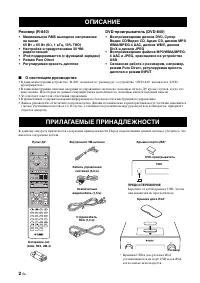
- 4 Минимальное; О настоящем руководстве; ОПИСАНИЕ
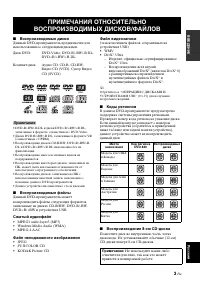
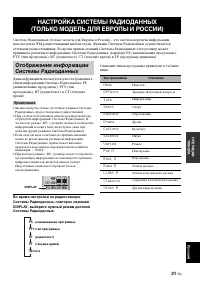
- 5 ВВЕДЕНИ; Примечания; – Изделие, официально сертифицированное; ПРИМЕЧАНИЯ ОТНОСИТЕЛЬНО; Не используйте какие-либо
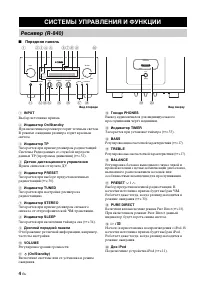
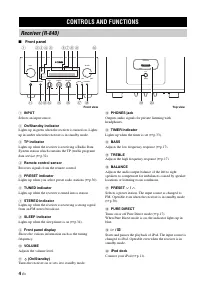
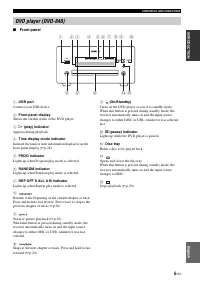
- 6 Передняя панель; СИСТЕМЫ УПРАВЛЕНИЯ И ФУНКЦИИ; BC D
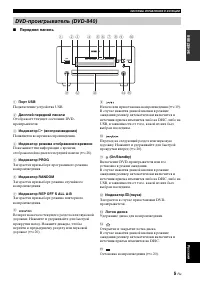
- 7 Подключение устройства USB.; D E
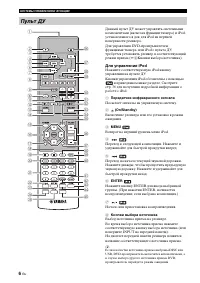
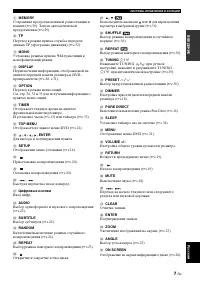
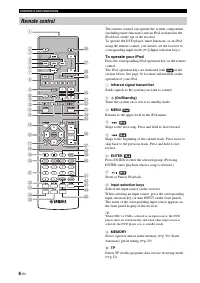
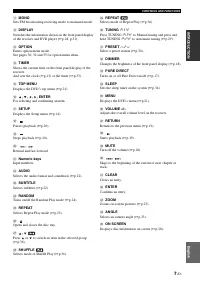
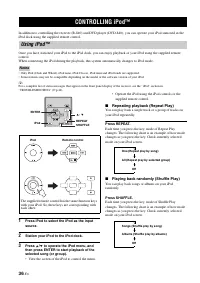
- 8 Для управления iPod; в приведенном ниже разделе. Смотрите; Передатчик инфракрасного сигнала; Посылает сигналы на управляемую систему.; MENU; Возврат на верхний уровень меню iPod.; ENTER; Начало или приостановка воспроизведения.; Кнопки выбора источника; Пульт ДУ
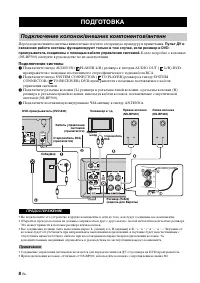
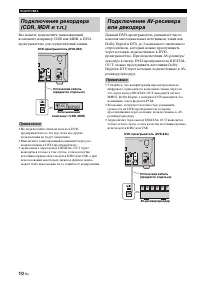
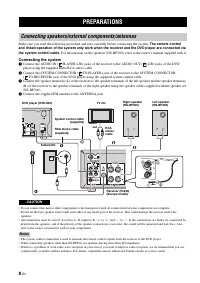
- 10 Пульт ДУ и; Более подробно о колонках; Подключение системы; Подключите гнезда AUDIO IN (; ПОДГОТОВКА; Подключение колонок/внешних компонентов/антенн; ПРЕДОСТЕРЕЖЕНИЕ
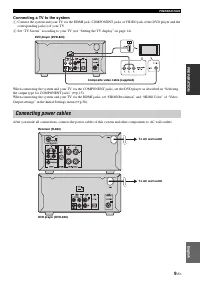
- 11 ПОД; Подключение телевизора к системе; Подключение силовых кабелей
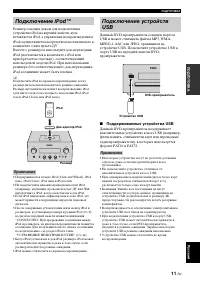
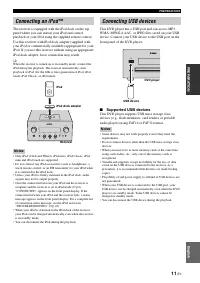
- 13 ПОДГ; Поддерживаемые устройства USB; Подключение iPodTM
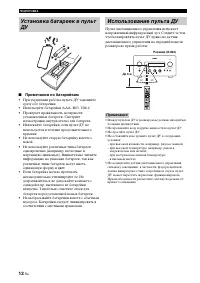
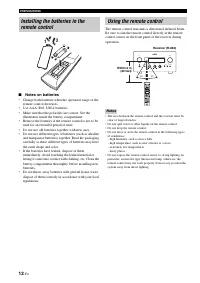
- 14 Примечания по батарейкам; Использование пульта ДУ
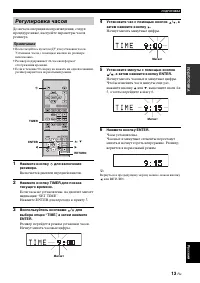
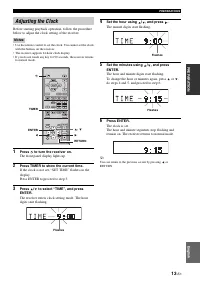
- 15 Включается дисплей передней панели.; Установите минуты с помощью кнопок; Регулировка часов
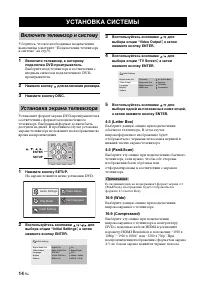
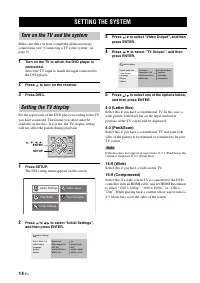
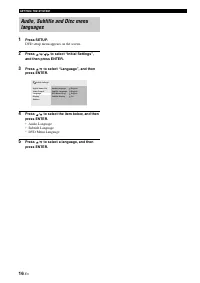
- 16 На экране появится меню установки DVD.; УСТАНОВКА СИСТЕМЫ; Включите телевизор и систему
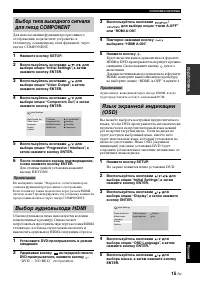
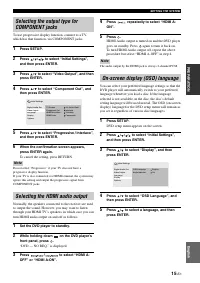
- 17 Примечание; Выбор аудиовыхода HDMI
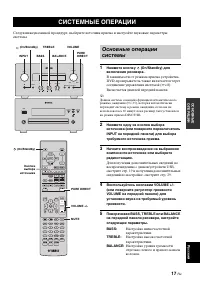
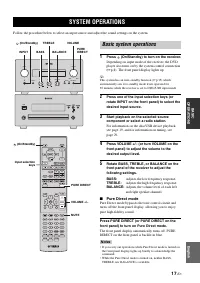
- 19 ОСНО; BASS; СИСТЕМНЫЕ ОПЕРАЦИИ
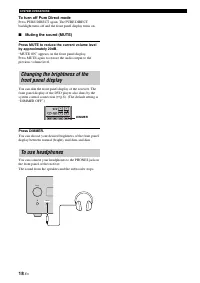
- 20 Режим Pure Direct; Для отключения режима Pure Direct; Нажмите кнопку DIMMER.; Для использования наушников
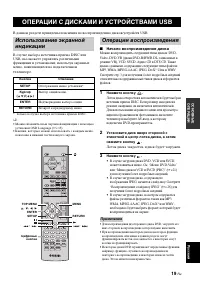
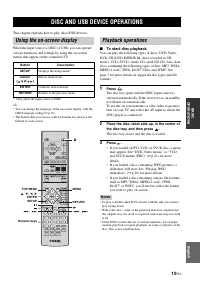
- 21 ОСНОВ; Начало воспроизведения диска; Нажмите кнопку; ОПЕРАЦИИ С ДИСКАМИ И УСТРОЙСТВАМИ USB; Операции воспроизведения
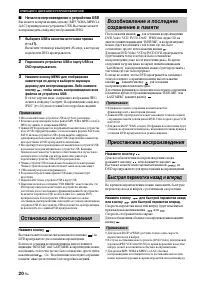
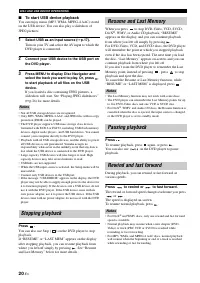
- 22 Начало воспроизведения с устройства USB; Остановка воспроизведения
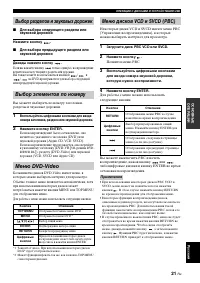
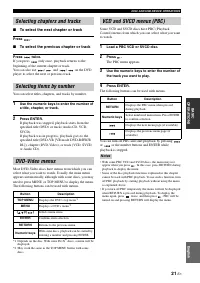
- 23 Если вы нажмете кнопку; Выбор разделов и звуковых дорожек
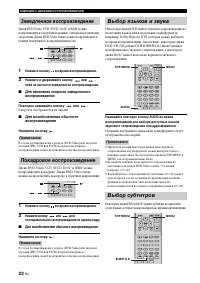
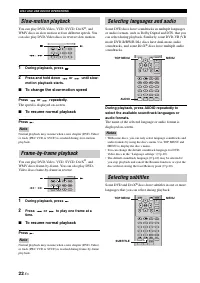
- 24 Скорость отображается на экране.; Для возобновления обычного воспроизведения; Замедленное воспроизведение
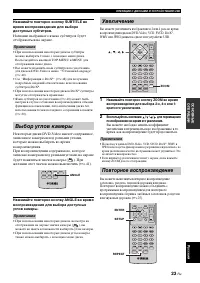
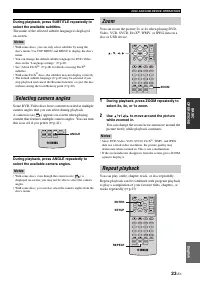
- 25 Воспользуйтесь кнопками; Выбор углов камеры; Увеличение
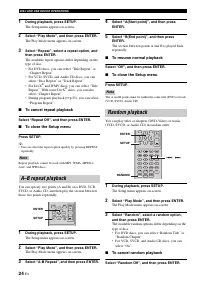
- 26 Для отмены функции повторного воспроизведения; Для отмены функции случайного воспроизведения; Повторное воспроизведение A–B; Случайное воспроизведение
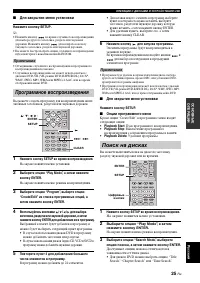
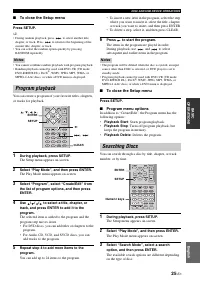
- 27 Для закрытия меню установки; Программное воспроизведения
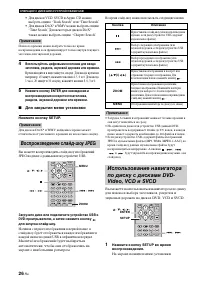
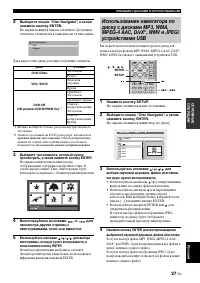
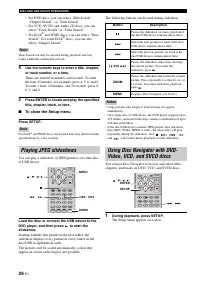
- 28 • Для дисков VCD, SVCD и Аудио CD можно; Нажмите кнопку SETUP.; На экране появится меню установки.; Воспроизведение слайд-шоу JPEG
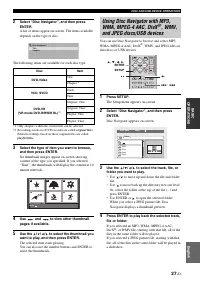
- 29 Воспользуйтесь кнопками
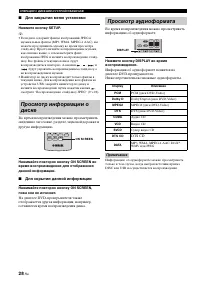
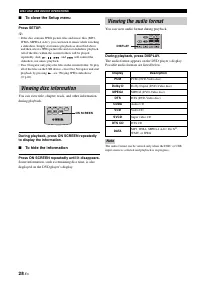
- 30 Для скрытия данной информации; Просмотр аудиоформата; DTS CD
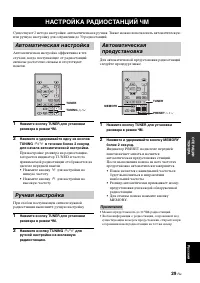
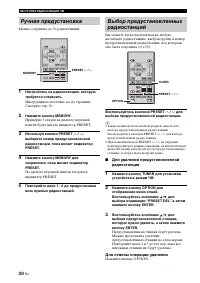
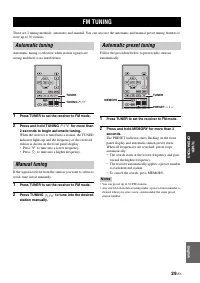
- 31 ОПЕ; в течение более 2 секунд; для настройки на; Нажмите кнопку TUNING; • Ресивер автоматически присваивает номер; НАСТРОЙКА РАДИОСТАНЦИЙ ЧМ; Автоматическая настройка
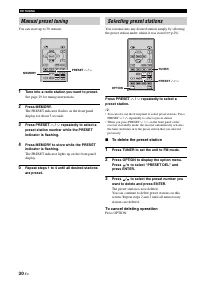
- 32 Можно сохранять до 30 радиостанций.; Для отмены операции удаления; Нажмите кнопку OPTION.; Ручная предустановка
- 33 ОПЕР
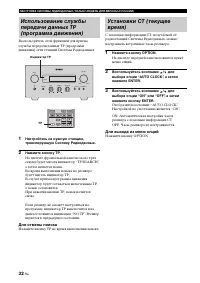
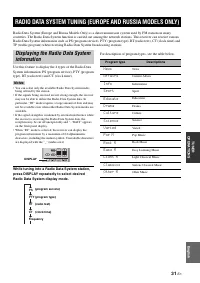
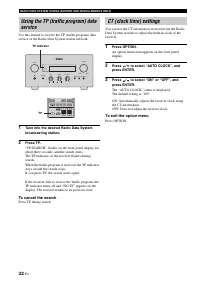
- 34 Для отмены поиска; Нажмите кнопку TP во время выполнения поиска.; Для выхода из меню опций
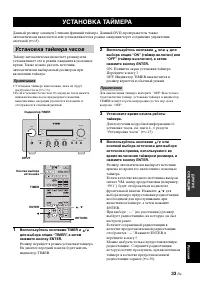
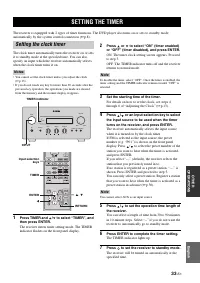
- 35 Воспользуйтесь; УСТАНОВКА ТАЙМЕРА; Установка таймера часов
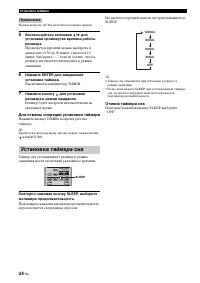
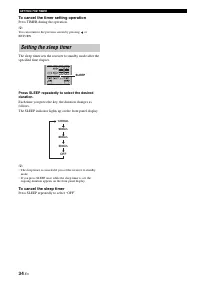
- 36 Высвечивается индикатор TIMER.; Для отмены операции установки таймера; Отмена таймера сна; Установка таймера сна
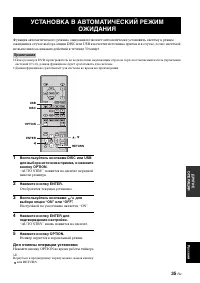
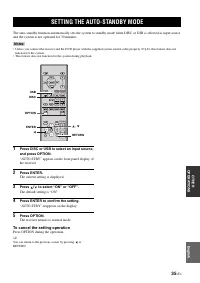
- 37 Нажмите кнопку ENTER.; Отобразится текущая установка.; Ресивер вернется в нормальный режим.; Для отмены операции установки; Нажмите кнопку OPTION во время работы таймера.; УСТАНОВКА В АВТОМАТИЧЕСКИЙ РЕЖИМ
- 38 Подключите iPod к доку iPod.; управления iPod или поставляемого пульта ДУ.; Нажмите кнопку REPEAT.; УПРАВЛЕНИЕ iPodTM; Использование iPodTM
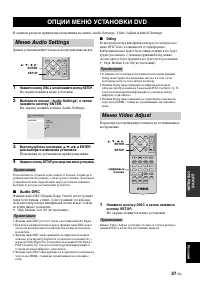
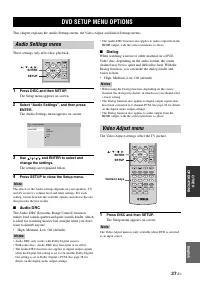
- 39 Данные установки влияют только на воспроизведение дисков.; Нажмите кнопку DISC а затем нажмите кнопку SETUP.; Пояснения по установкам приведены ниже.; Нажмите кнопку SETUP для закрытия меню установки.; Audio DRC; ОПЦИИ МЕНЮ УСТАНОВКИ DVD; Меню Audio Settings; Меню Video Adjust
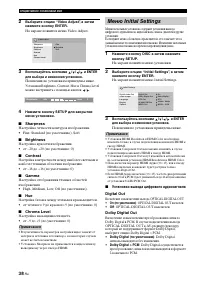
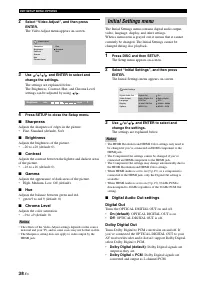
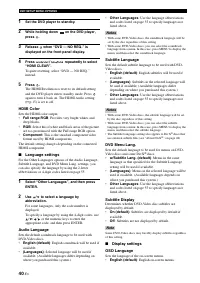
- 40 Off; Меню Initial Settings
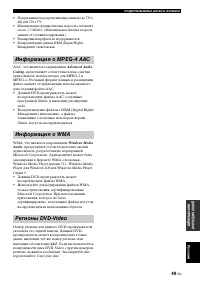
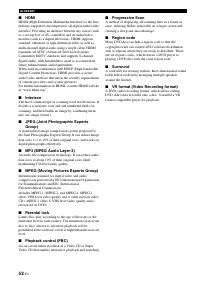
- 41 MPEG
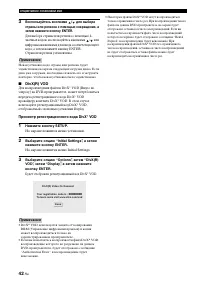
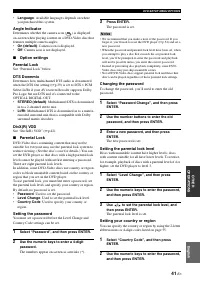
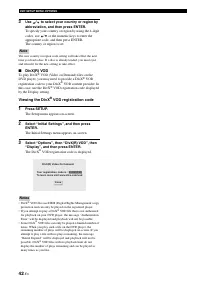
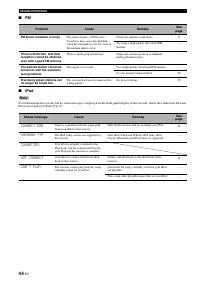
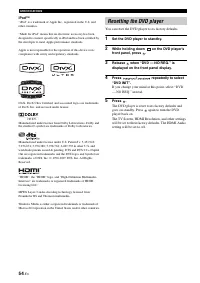
- 44 Просмотр регистрационного кода DivX® VOD
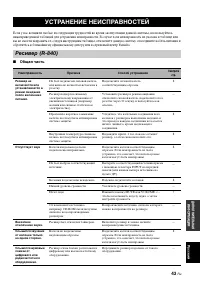
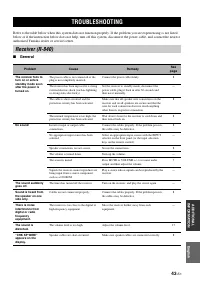
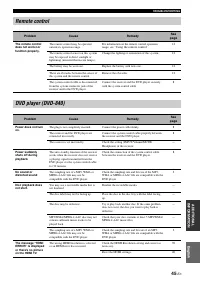
- 45 Общая часть; УСТРАНЕНИЕ НЕИСПРАВНОСТЕЙ
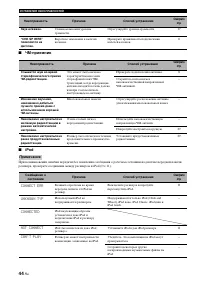
- 46 CONNECT ERR
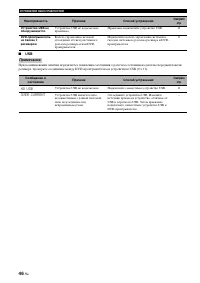
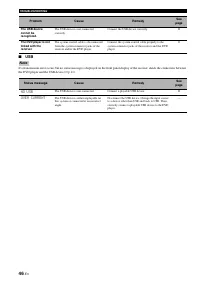
- 48 NO USB; OVER CURRENT
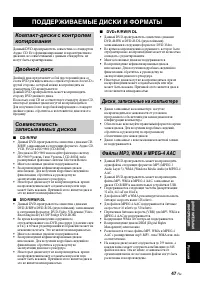
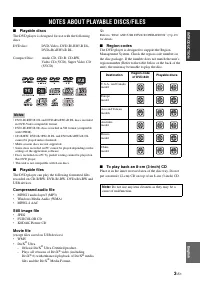
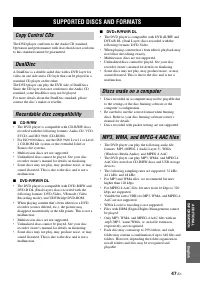
- 49 ПОДДЕРЖИВАЕМЫЕ ДИСКИ И ФОРМАТЫ; Двойной диск
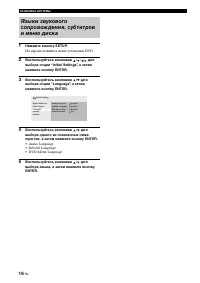
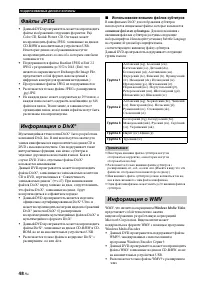
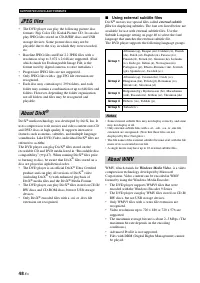
- 50 заголовками; Использование внешних файлов субтитров; внешними файлами субтитров; Windows Media Video; Файлы JPEG; Информация о WMV
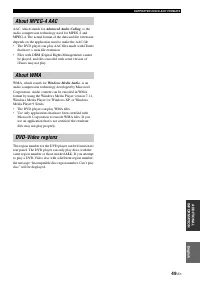
- 51 Advanced Audio; Информация о MPEG-4 AAC
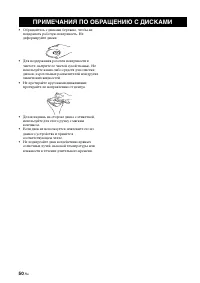
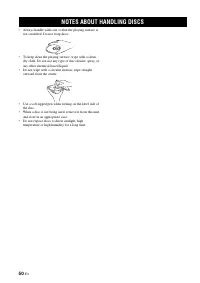
- 52 ПРИМЕЧАНИЯ ПО ОБРАЩЕНИЮ С ДИСКАМИ
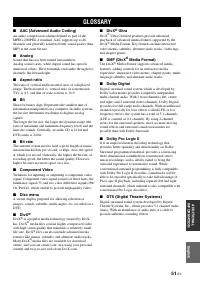
- 53 высококачественный видеосигнал.; ГЛОССАРИЙ
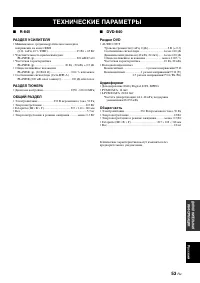
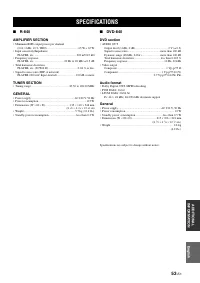
- 55 ТЕХНИЧЕСКИЕ ПАРАМЕТРЫ
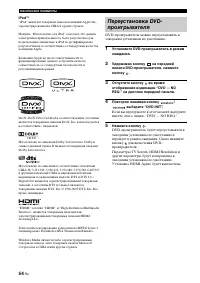
- 56 iPodTM
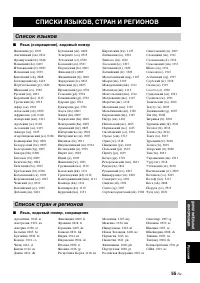
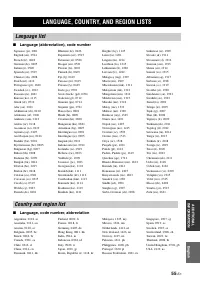
- 57 СПИСКИ ЯЗЫКОВ, СТРАН И РЕГИОНОВ; Список языков


