Коммутаторы D-Link DGS-1210-28/FL 24xGE, 2xSFP, L2 - инструкция пользователя по применению, эксплуатации и установке на русском языке. Мы надеемся, она поможет вам решить возникшие у вас вопросы при эксплуатации техники.
Если остались вопросы, задайте их в комментариях после инструкции.
"Загружаем инструкцию", означает, что нужно подождать пока файл загрузится и можно будет его читать онлайн. Некоторые инструкции очень большие и время их появления зависит от вашей скорости интернета.

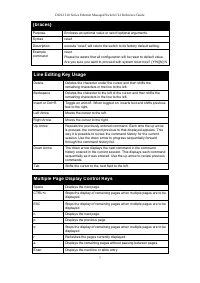
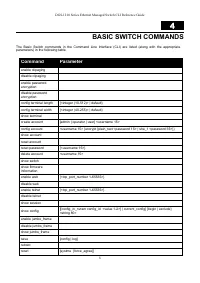
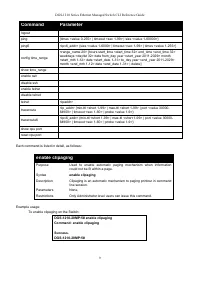
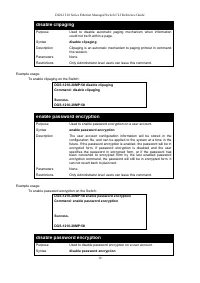


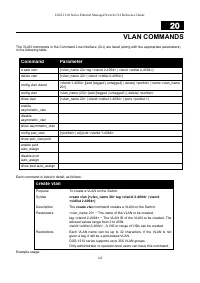
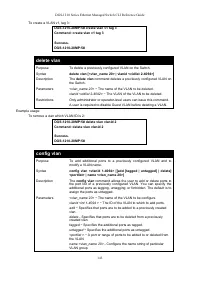

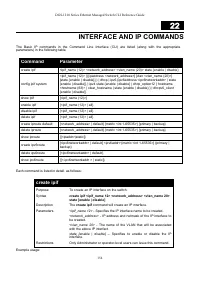
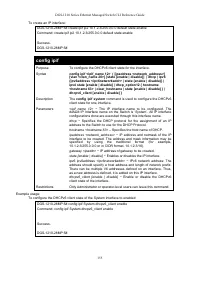
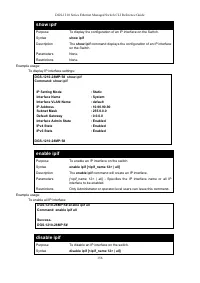

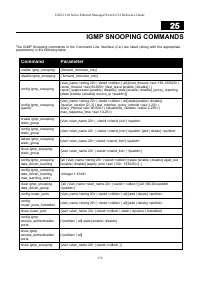

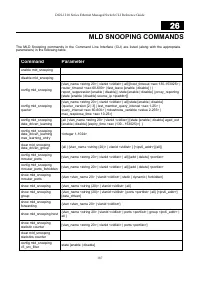
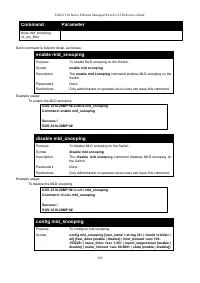
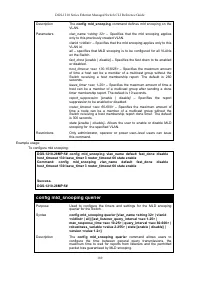
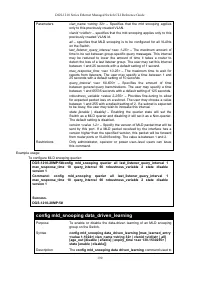


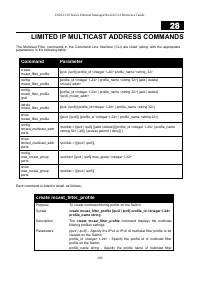

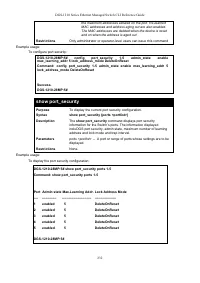
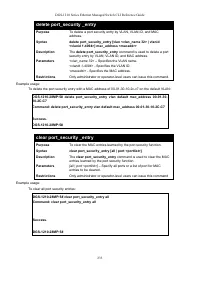
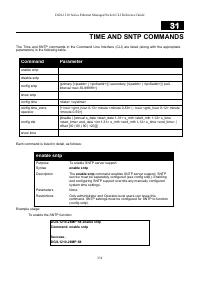
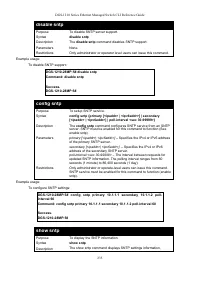
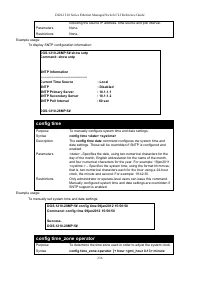

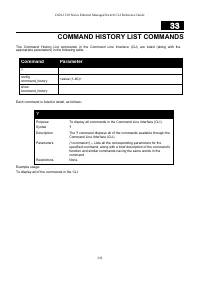
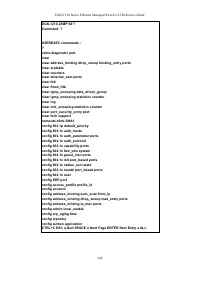
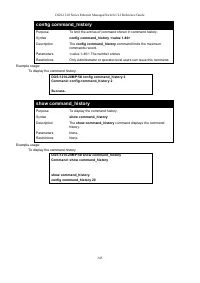
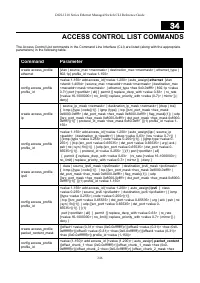


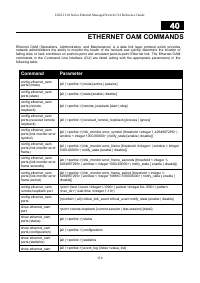
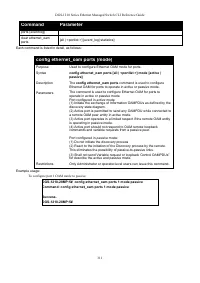
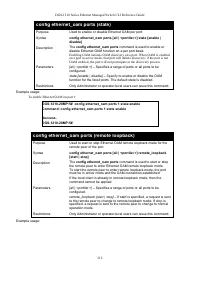


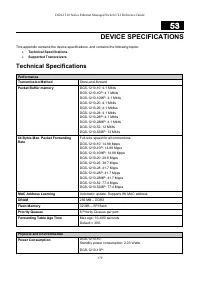
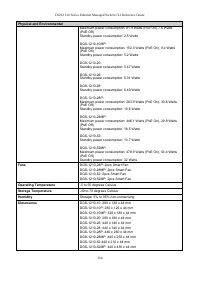
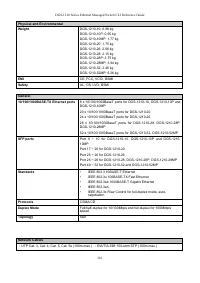
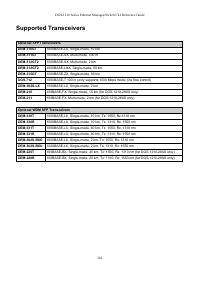

DGS-1210 Series Ethernet Managed Switch CLI Reference Guide
258
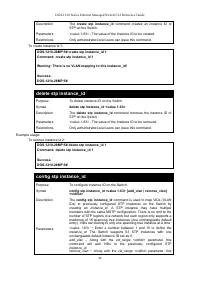
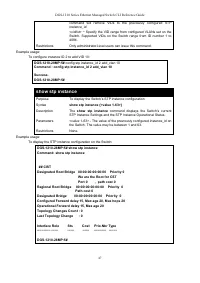
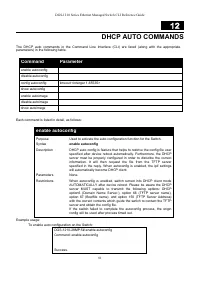
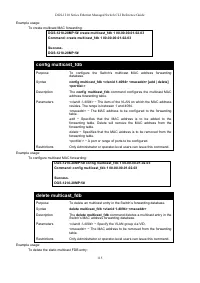
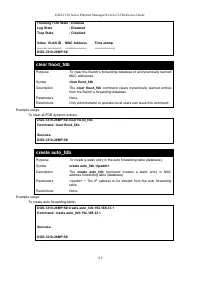
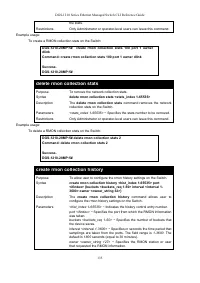
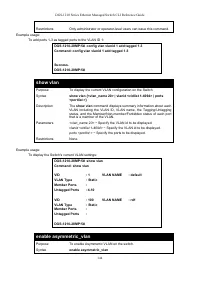
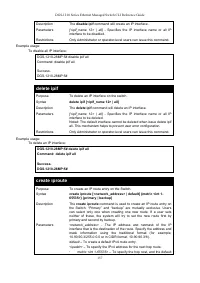
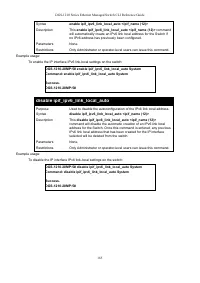
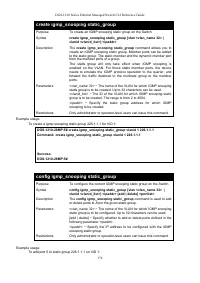
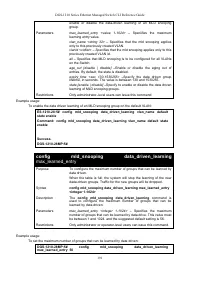
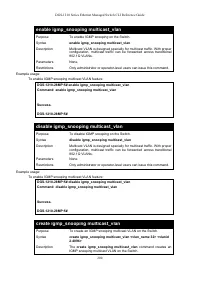
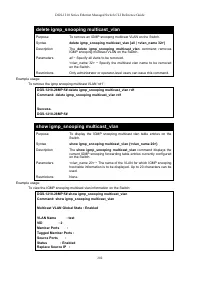
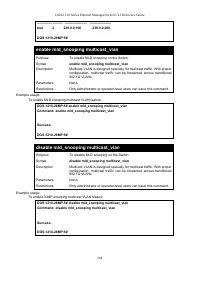
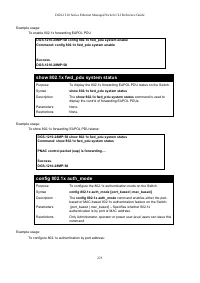
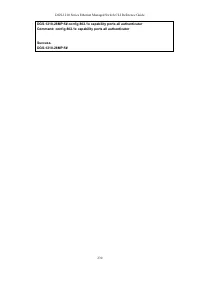
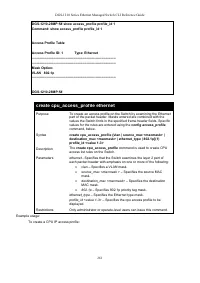
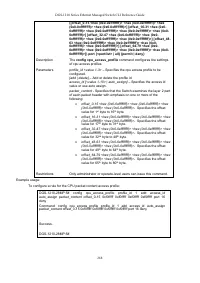
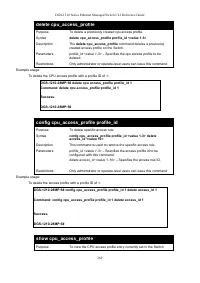
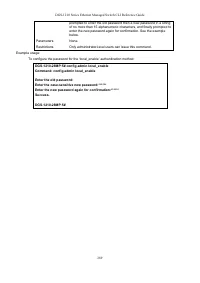
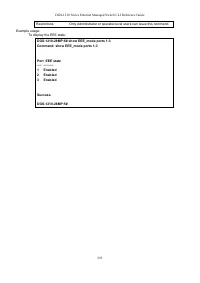
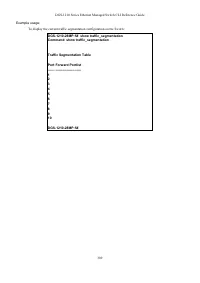
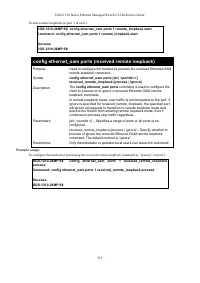
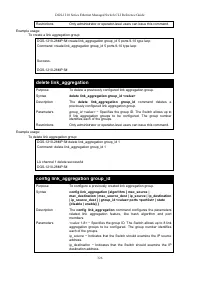
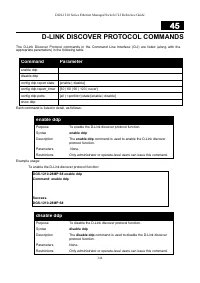
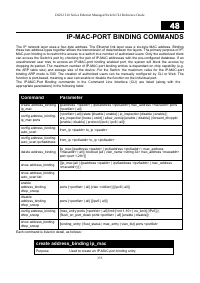
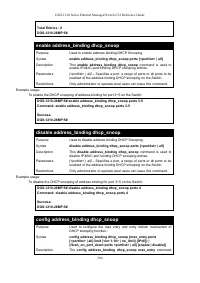
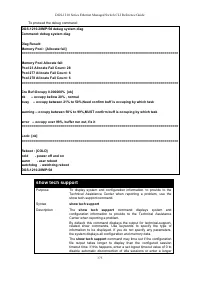
DGS-1210-28MP:5# create access_profile packet_content_mask offset1 30 0xffffffff
profile_id 4
Command: create access_profile packet_content_mask offset1 30 0xffffffff profile_id
4
Success.
DGS-1210-28MP:5#
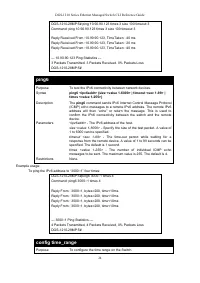
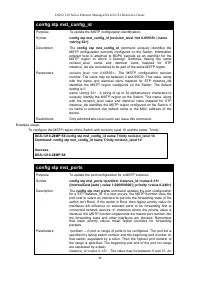
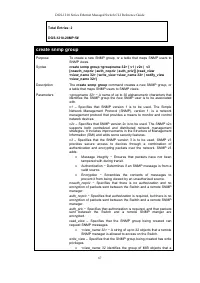
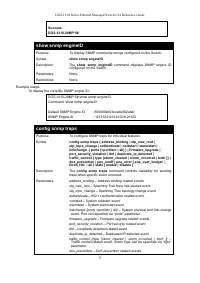
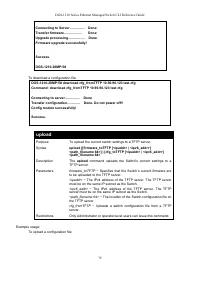
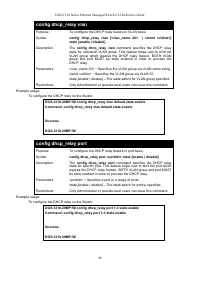
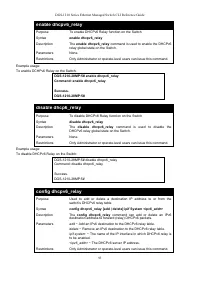
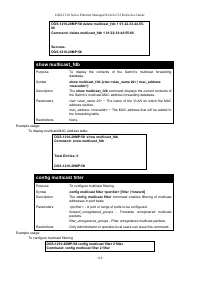
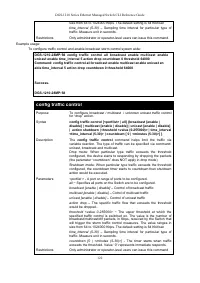
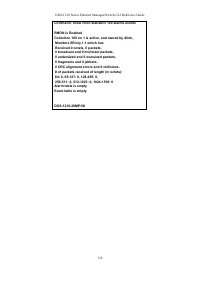
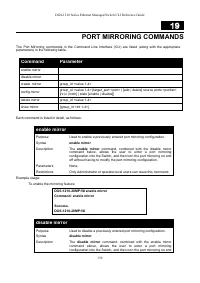
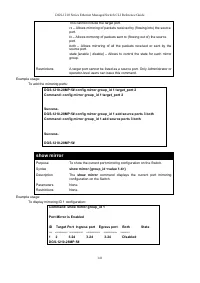
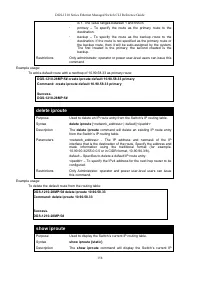
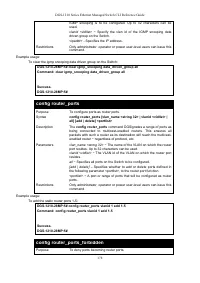
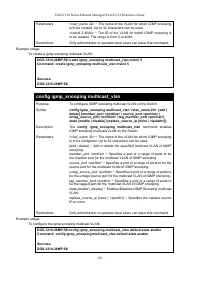
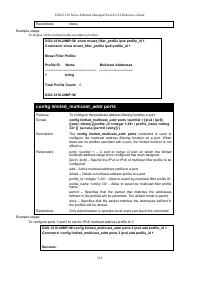
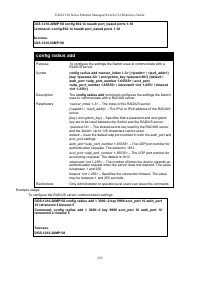
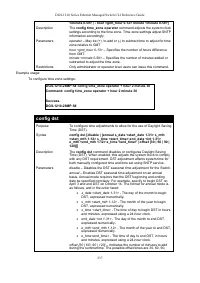
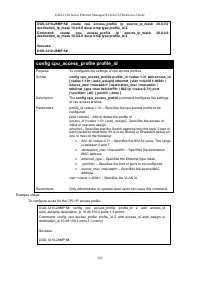
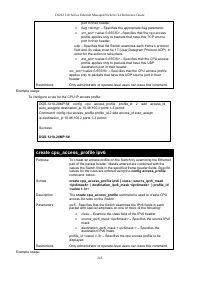
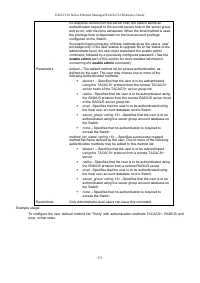
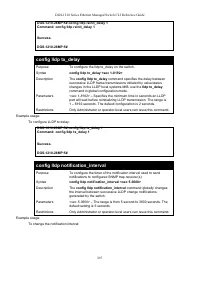
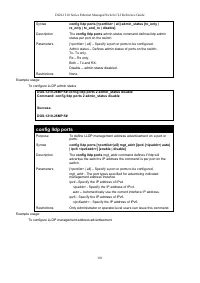
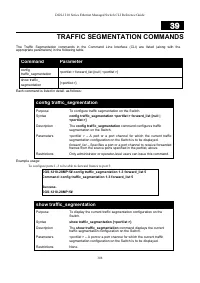
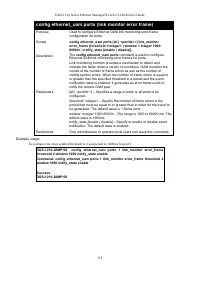
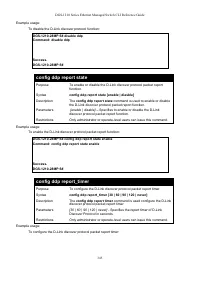
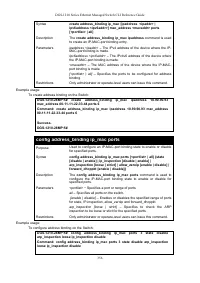
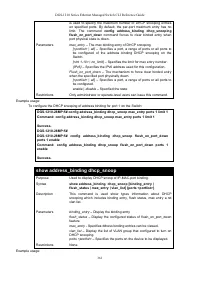
config access_profile profile_id
Purpose
To create an access profile on the Switch by examining the Ethernet
part of the packet header. Masks entered are combined with the
values the Switch finds in the specified frame header fields. Specific
values for the rules are entered using the
config access_profile
command, below.
Syntax
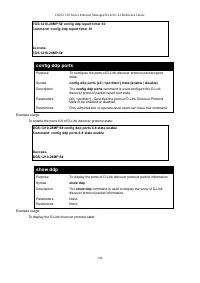
config access_profile profile_id <value (1-150)> add access_id
{<value (1-200)> | auto_assign} packet_content
([offset_chunk_1 <hex (0x0-0xffffffff)>] [offset_chunk_1_mask
<hex (0x0-0xffffffff)>] [offset_chunk_2 <hex (0x0-0xffffffff)>]
[offset_chunk_2_mask <hex (0x0-0xffffffff)>] [offset_chunk_3
<hex (0x0-0xffffffff)>] [offset_chunk_3_mask <hex (0x0-
0xffffffff)>] [offset_chunk_4 <hex (0x0-0xffffffff)>]
[offset_chunk_4_mask <hex (0x0-0xffffffff)>]) port {<portlist> |
all} {permit [{replace_dscp_with <value (0-63)> | rx_rate {<value
(16-1000000)> | no_limit} | replace_priority_with <value (0-7)> |
mirror}] | deny}
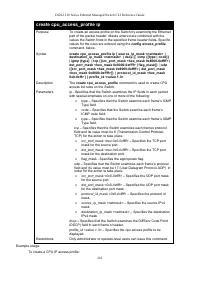
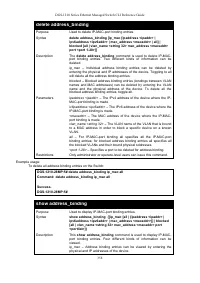
Description
The
config access_profile ethernet
command defines the rules
used by the Switch to either filter or forward packets based on the
Ethernet part of each packet header.
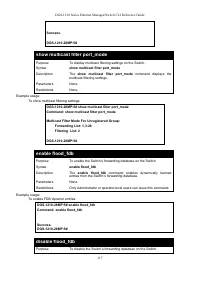
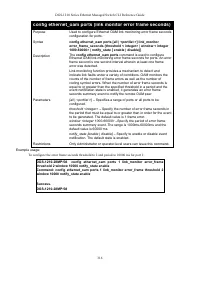
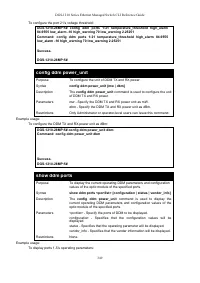
Parameters
profile_id <value 1-150>
– Specifies the access profile id to be
configured with this command. This value is assigned to the access
profile when it is created with the
create access_profile
command.
The lower the profile ID, the higher the priority the rule will be given.
add access_id <value 1-200> –
Adds an additional rule to the above
specified access profile. The value specifies the relative priority of
the additional rule. Up to 200
rules may be configured for the access
profile.
•
auto_assign –
Configures the Switch to automatically assign
a numerical value (between 1 and 128) for the rule being
configured.
packet_content
– Specifies particular packet partner:
•
offset_chunk_1
- Specifies the contents of the offset chunk 1
to be monitored. - Enter the contents of the offset trunk 1 to
be monitored here.
•
offset_chunk_1_mask
- Specifies an additional mask for
each field. - Enter the additional mask value used here.
•
offset_chunk_2
- Specifies the contents of the offset chunk 2
to be monitored. - Enter the contents of the offset trunk 2 to
be monitored here.
•
offset_chunk_2 _mask - Specifies an additional mask for
Характеристики

Остались вопросы?Не нашли свой ответ в руководстве или возникли другие проблемы? Задайте свой вопрос в форме ниже с подробным описанием вашей ситуации, чтобы другие люди и специалисты смогли дать на него ответ. Если вы знаете как решить проблему другого человека, пожалуйста, подскажите ему :)


