Измерительные приборы Skil 0530 - инструкция пользователя по применению, эксплуатации и установке на русском языке. Мы надеемся, она поможет вам решить возникшие у вас вопросы при эксплуатации техники.
Если остались вопросы, задайте их в комментариях после инструкции.
"Загружаем инструкцию", означает, что нужно подождать пока файл загрузится и можно будет его читать онлайн. Некоторые инструкции очень большие и время их появления зависит от вашей скорости интернета.


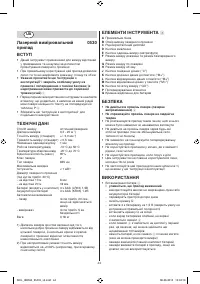


7
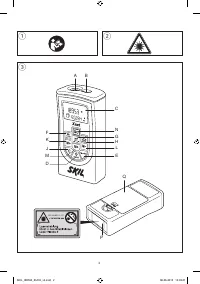
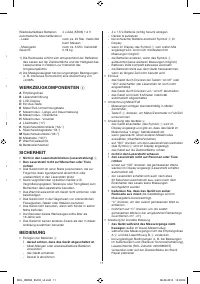
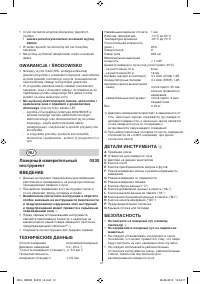
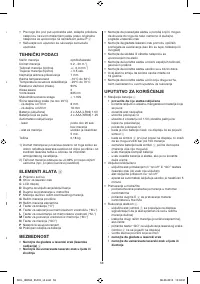
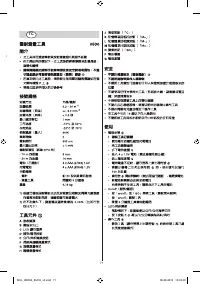
K
Memory add button (“M+”)
L
Memory subtract button (“M-”)
M
Memory retrieve button (“M=”)
N
Measuring button (“GO”)
P
Warning label
Q
Battery compartment cover
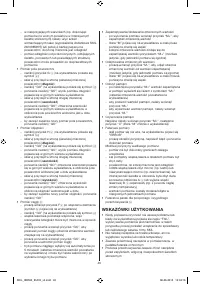
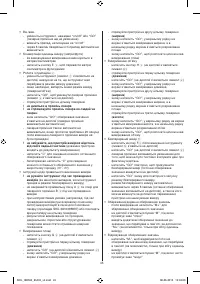
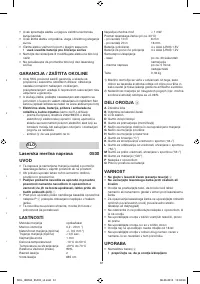
SAFETY
•
Do not look into the laser beam (laser radiation)
2
• Do not point the laser beam at persons or animals
• Do not place the tool in a position that may cause
anyone to look into the laser beam intentionally or
unintentionally
• Do not use any magnifying optical tools (such as
magnifying glasses, telescopes, or binoculars) to view
the laser beam
• Do not remove or damage the warning label on the tool
• Do not operate the tool in the presence of flammable
liquids, gases or dust
• Do not operate the tool with children around
• This tool should not be used by people under the age of
16 years
• Do not use the tool for any purpose other than those
mentioned in this instruction manual
USE
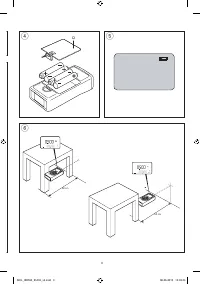
• Mounting of batteries
4
! ensure that the tool is switched off
- use exclusively alkaline-manganese or rechargeable
batteries
- turn tool upside down
- remove cover Q
- insert 4 x 1,5V battery (pay attention to correct
polarisation)
- mount cover Q
- when battery level is low, symbol
5
will appear in
display
- when symbol
5
appears in the display for the first
time, then at least 100 measurements are still
possible
- replace the batteries when symbol
5
starts flashing
(measuring no longer possible)
- always replace the complete set of batteries
- always remove the batteries from the tool, if the tool
will not be used for a long period
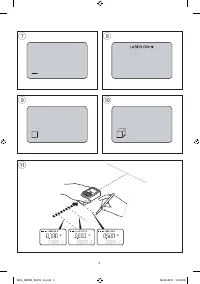
• On/off
- switch on the tool by either pressing “on/off” or “GO”
(the laser beam is not switched on yet)
- switch off the tool by pressing “on/off”
- the tool automatically switches off after 5 minutes of
inactivity
• Metre/feet conversion
- measurements are in metres/centimetres by default
- press button E
3
for converting metres/centimetres
into feet/inches
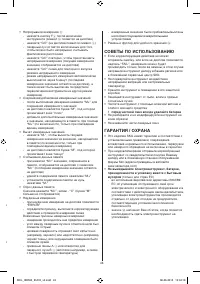
• Operating the tool
6
- switch on the tool (symbol
7
appears in display
indicating that the tool is already in the length
measurement mode)
- select other measurement mode (surface/volume), if
desired
- press “GO” to switch on the laser beam (symbol
8
will appear in display)
- aim the tool towards the target surface
! do not look into the laser beam
! do not point the laser beam at persons or animals
- press “GO” again; measured value appears in display
(laser beam switches off automatically)
- the laser beam also automatically switches off when
during approximately 20 seconds after switching on
the laser beam no measurements have been taken
! keep in mind that the tool measures from its rear
(the tool length is included in the measuring result)
- press “C” for clearing the last individual measured
value
- press “C” repeatedly for clearing the last individual
measured values in reverse order (m³ - m²)
• Instructions for proper measurement
! do not move the tool during measuring
(except in
continuous measurement mode)
- do not cover reception lens A
3
and laser beam
opening B
3
when measuring
- in unfavorable conditions (e.g. when measuring
outdoors at intense sunlight) use laser enhancing
glasses (SKIL accessory 2610395907) or place a
piece of paper on the target surface
- measuring against transparent, reflecting, porous or
structured surfaces may lead to faulty measurements
• Surface measurement
- press button G
3
(symbol
9
will appear in display)
- aim the tool towards the first target surface (
length
)
- press “GO” (symbol
8
will appear in display)
- press “GO” again; measured length appears on top
line of display
- aim the tool towards the second target surface
(
width
)
- press “GO” again; measured width appears on top
line of display while calculated surface appears on
bottom line of display
- press “GO” again for starting a completely new
surface measurement
• Volume measurement
- press button H
3
(symbol
0
will appear in display)
- aim the tool towards the first target surface (
length
)
- press “GO” (symbol
8
will appear in display)
- press “GO” again; measured length appears on top
line of display
- aim the tool towards the second target surface (
width
)
- press “GO” again; measured width appears on top
line of display while calculated surface appears on
bottom line of display
- aim the tool towards the third target surface (
height
)
- press “GO” again; measured height appears on top
line of display while calculated volume appears on
bottom line of display
- press “GO” again for starting a completely new
volume measurement
• Continuous measurement
!
- press button F
3
after switching on the tool
(symbol
@
will appear in display)
- press “GO” (symbol
8
will appear in display)
- the laser beam remains switched on, so that the
actual distance can be read out continuously
- press “GO” again for interrupting the continuous
measurement (the current measured value is
indicated in the display)
- press “GO” again for restarting the continuous
measurement
- the continuous measurement mode automatically
switches off after 5 minutes (the last measured value
remains indicated in the display) and can also be
ended by selecting another measurement mode
• Storing/adding measured values
- after taking a measurement press “M+” for storing
the measured value
- the letter “M” appears in the display and the plus-
sign underneath briefly flashes
- add additional measured values to the memory value
with “M+” (possible only when the measuring units
correspond)
• Subtracting measured values
- press “M-” in order to subtract the current measured
value from the memory value (possible only when the
measuring units correspond)
- the letter “M” appears in the display and the minus-
sign underneath briefly flashes
• Reading memory
- when pressing “M=”, the value stored in the memory
is displayed together with symbol “M=” (the last
measured value remains indicated in the display)
- double the memory contents by pressing “M+”
- set memory contents to zero by pressing “M-”
• Clearing memory
First press “M=”, then press “C” (the letter “M” is no
longer displayed)
• Faulty measurement
- when the measurement is unsuccessful, “ERROR”
appears in display
- determine the cause, take corrective action, and take
the measurement again
Possible causes for faulty measurement:
- the measurement took place outside the measuring
range
- the angle between laser beam and target was too
acute
- the target surface reflected too intensely (e.g. mirror)
or insufficiently (e.g. black fabric), or the ambient light
was too bright
- the reception lens A
3
or the laser beam opening
B
3
was misted up (e.g. due to a rapid temperature
change)
- measured values were added/subtracted with non-
corresponding measuring units
• Belt bag for easy and convenient storage
#
APPLICATION ADVICE
• When corrective action cannot correct an error, or when
“FAIL” appears in display, measuring is no longer
possible; in this case send the tool to your dealer or the
nearest SKIL service-station
• Do not expose the tool to continuous vibration or
extremely hot or cold temperatures
• Always store the tool indoors in its protective carton/
case
SKIL_IB0530_EUCH_v3.indd 7
08-06-2010 13:03:50
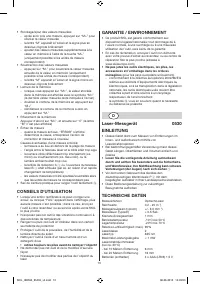
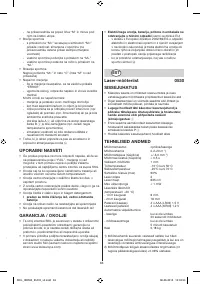
Характеристики

Остались вопросы?Не нашли свой ответ в руководстве или возникли другие проблемы? Задайте свой вопрос в форме ниже с подробным описанием вашей ситуации, чтобы другие люди и специалисты смогли дать на него ответ. Если вы знаете как решить проблему другого человека, пожалуйста, подскажите ему :)


