
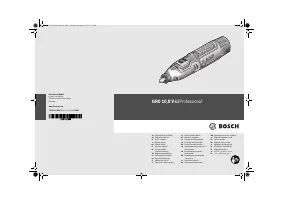
Гравировальные машинки Bosch 0.601.9C5.000 - инструкция пользователя по применению, эксплуатации и установке на русском языке. Мы надеемся, она поможет вам решить возникшие у вас вопросы при эксплуатации техники.
Если остались вопросы, задайте их в комментариях после инструкции.
"Загружаем инструкцию", означает, что нужно подождать пока файл загрузится и можно будет его читать онлайн. Некоторые инструкции очень большие и время их появления зависит от вашей скорости интернета.


18
| English
1 619 P11 460 | (26.11.13)
Bosch Power Tools
Note:
The battery is supplied partially charged. To ensure full
capacity of the battery, completely charge the battery in the
battery charger before using your power tool for the first time.
The lithium-ion battery can be charged at any time without re-
ducing its service life. Interrupting the charging procedure
does not damage the battery.
The lithium ion battery is protected against deep discharging
by the “Electronic Cell Protection (ECP)”. When the battery is
empty, the machine is switched off by means of a protective
circuit: The inserted tool no longer rotates.
Do not continue to press the On/Off switch after the
machine has been automatically switched off.
The bat-
tery can be damaged.
Observe the notes for disposal.
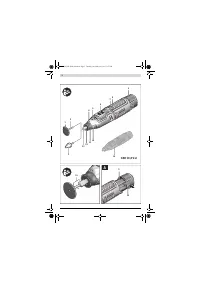
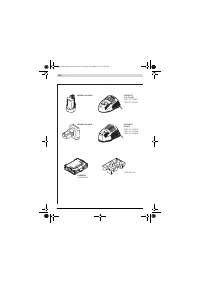
Removing the battery (see figure A)
– To remove the battery
9
, press the unlocking buttons
16
and pull the battery out of the machine to the rear.
Do not
exert any force.
Battery Charge-control Indication
The three green LEDs of the battery charge-control indicator
8
indicate the charge condition of the battery
9
.
Changing the Tool
When inserting an application tool, pay attention that
the shank of the application tool is firmly seated in the
tool holder.
When the shank of the application tool is not
inserted deep enough in the tool holder, the application
tool can become loose again and not be controlled.
Use only flawless tool bits that are not worn.
Defective
tool bits can break, for example, and cause injury or dam-
age.
Only use brand accessories for grinding, sanding,
brushing, polishing, routing and cut-off grinding from
the dealer for the power tool, which are approved for a
speed of 35000 rpm and which have a shank with an
outside diameter of 3.2 mm.
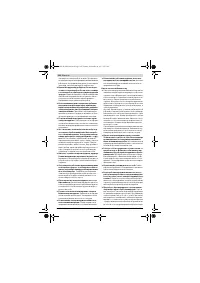
Inserting (see figure B)
– Press the spindle lock
5
and turn the clamping nut
12
by
hand until locked.
– Press and hold the spindle lock and loosen the clamping
nut
12
with the open-end spanner
17
by turning it in an an-
ticlockwise direction.
– Insert the dust-free application tool (e.g. holding rod
2
,
grinding accessory
3
or drill bit)
into the collet
13
of the
collet chuck
19
.
Note:
Ensure that the shank
18
of the application tool sits in
as far as possible, but at least 10 mm into the collet chuck.
– Press and hold the spindle lock
5
and tighten the applica-
tion tool by turning the clamping nut
12
with the open-end
spanner
17
in a clockwise direction.
Removing
– Loosen the clamping nut
12
as previously described and
remove the application tool.
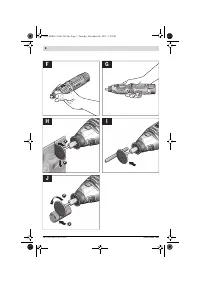
Mounting a Cutting Disc (see figure C)
Cutting discs reinforced with fibreglass are included in the
scope of delivery. They can be used for grooving, routing and
cutting metal, wood and plastic.
– Insert the holding rod
2
into the collet (see “Inserting”,
page 18).
– Press and hold the spindle lock
5
and completely unscrew
the screw on the holding rod
2
using the screwdriver
17
.
– Attach the cutting disc
1
to the holding rod
2
and reinsert
and tighten the screw.
Changing the Collet Chuck (see figure D)
– Press the spindle lock
5
and turn the clamping nut
12
by
hand until locked.
– Press and hold the spindle lock and loosen the clamping
nut
12
with the open-end spanner
17
by turning it in an an-
ticlockwise direction.
– Remove the clamping nut
12
together with the collet chuck
19
.
– Insert the required collet chuck into the drive spindle
20
.
– Screw the clamping nut
12
onto the drive spindle
20
and
tighten it slightly in a clockwise direction using the open-
end spanner
17
.
Replacing the Dust Protection Cap (see figure E)
Two dust protection caps are included in the scope of deliv-
ery.
Use the dust protection cap
11
when you need a good grip for
detailed work.
Use the dust protection cap
21
when you have to work close
to the workpiece surface.
The dust protection cap largely prevents the penetration of
dust into the tool holder during operation. When inserting the
tool, pay attention that the dust protection cap is not damaged.
– Unscrew the dust protection cap used.
– Screw on the new dust protection cap and tighten it.
Dust/Chip Extraction
Dusts from materials such as lead-containing coatings,
some wood types, minerals and metal can be harmful to
one’s health. Touching or breathing-in the dusts can cause
allergic reactions and/or lead to respiratory infections of
the user or bystanders.
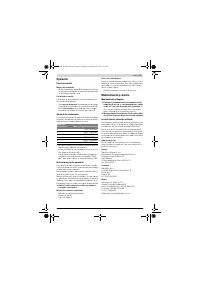
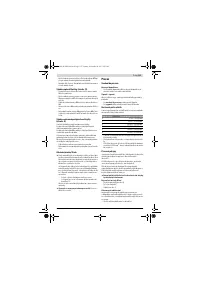
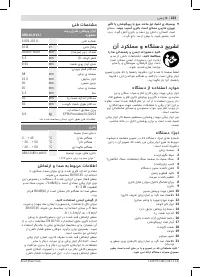
LED
Meaning
Continuous lighting
3 x green
Battery Capacity
≥
2/3
Continuous lighting
2 x green
Battery Capacity
≥
1/3
Continuous lighting
1 x green
Battery Capacity
< 1/3
Flashing light 1 x green Reserve
Continuous lighting
1 x red
Power tool has overheated!
– Switch the power tool off and al-
low it to cool down completely.
Flashing light
1 x red
Power tool has overloaded!
– Exert less pressure on the work-
piece during work.
OBJ_BUCH-2020-001.book Page 18 Tuesday, November 26, 2013 2:57 PM
Содержание
- 132 Безопасность рабочего места
- 133 Сервис
- 134 Не используйте пильные диски с зубьями.
- 135 Дополнительные предупредительные указания
- 136 Описание продукта и услуг; Применение по назначению; Пользуйтесь средствами защиты органов слуха!
- 137 Заявление о соответствии; Сборка; Зарядка аккумулятора; не прилагая чрезмерного усилия; Замена рабочего инструмента; , с наружным диаметром
- 138 Изъятие инструмента из патрона; Отсос пыли и стружки; Избегайте скопления пыли на рабочем месте.; Работа с инструментом; Включение электроинструмента; Установка аккумулятора; Установка числа оборотов; Диапазон настройки частоты
- 139 Указания по применению; Рекомендуемые методы отрезания; Техобслуживание и сервис; Техобслуживание и очистка; Россия; Транспортировка
- 140 Утилизация; Українська; Вказівки з техніки безпеки; Загальні застереження для електроприладів; Безпека на робочому місці
Характеристики

Остались вопросы?Не нашли свой ответ в руководстве или возникли другие проблемы? Задайте свой вопрос в форме ниже с подробным описанием вашей ситуации, чтобы другие люди и специалисты смогли дать на него ответ. Если вы знаете как решить проблему другого человека, пожалуйста, подскажите ему :)


