Видеокамеры JVC GR-PD1 - инструкция пользователя по применению, эксплуатации и установке на русском языке. Мы надеемся, она поможет вам решить возникшие у вас вопросы при эксплуатации техники.
Если остались вопросы, задайте их в комментариях после инструкции.
"Загружаем инструкцию", означает, что нужно подождать пока файл загрузится и можно будет его читать онлайн. Некоторые инструкции очень большие и время их появления зависит от вашей скорости интернета.
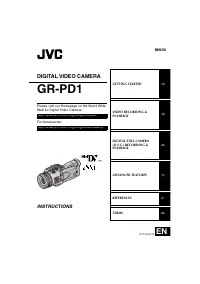


EN
61
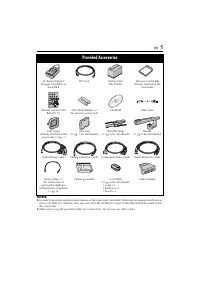
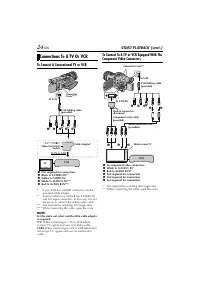
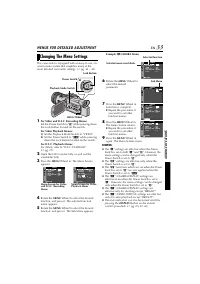
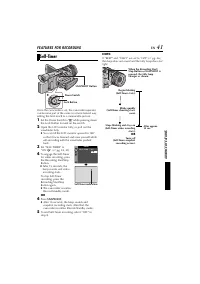
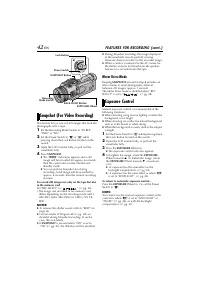
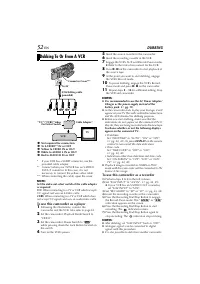
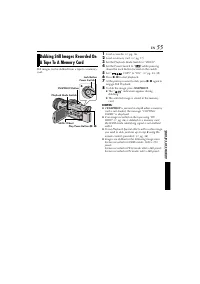
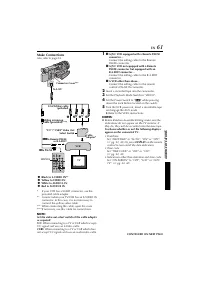
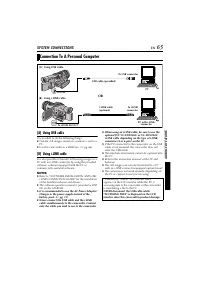
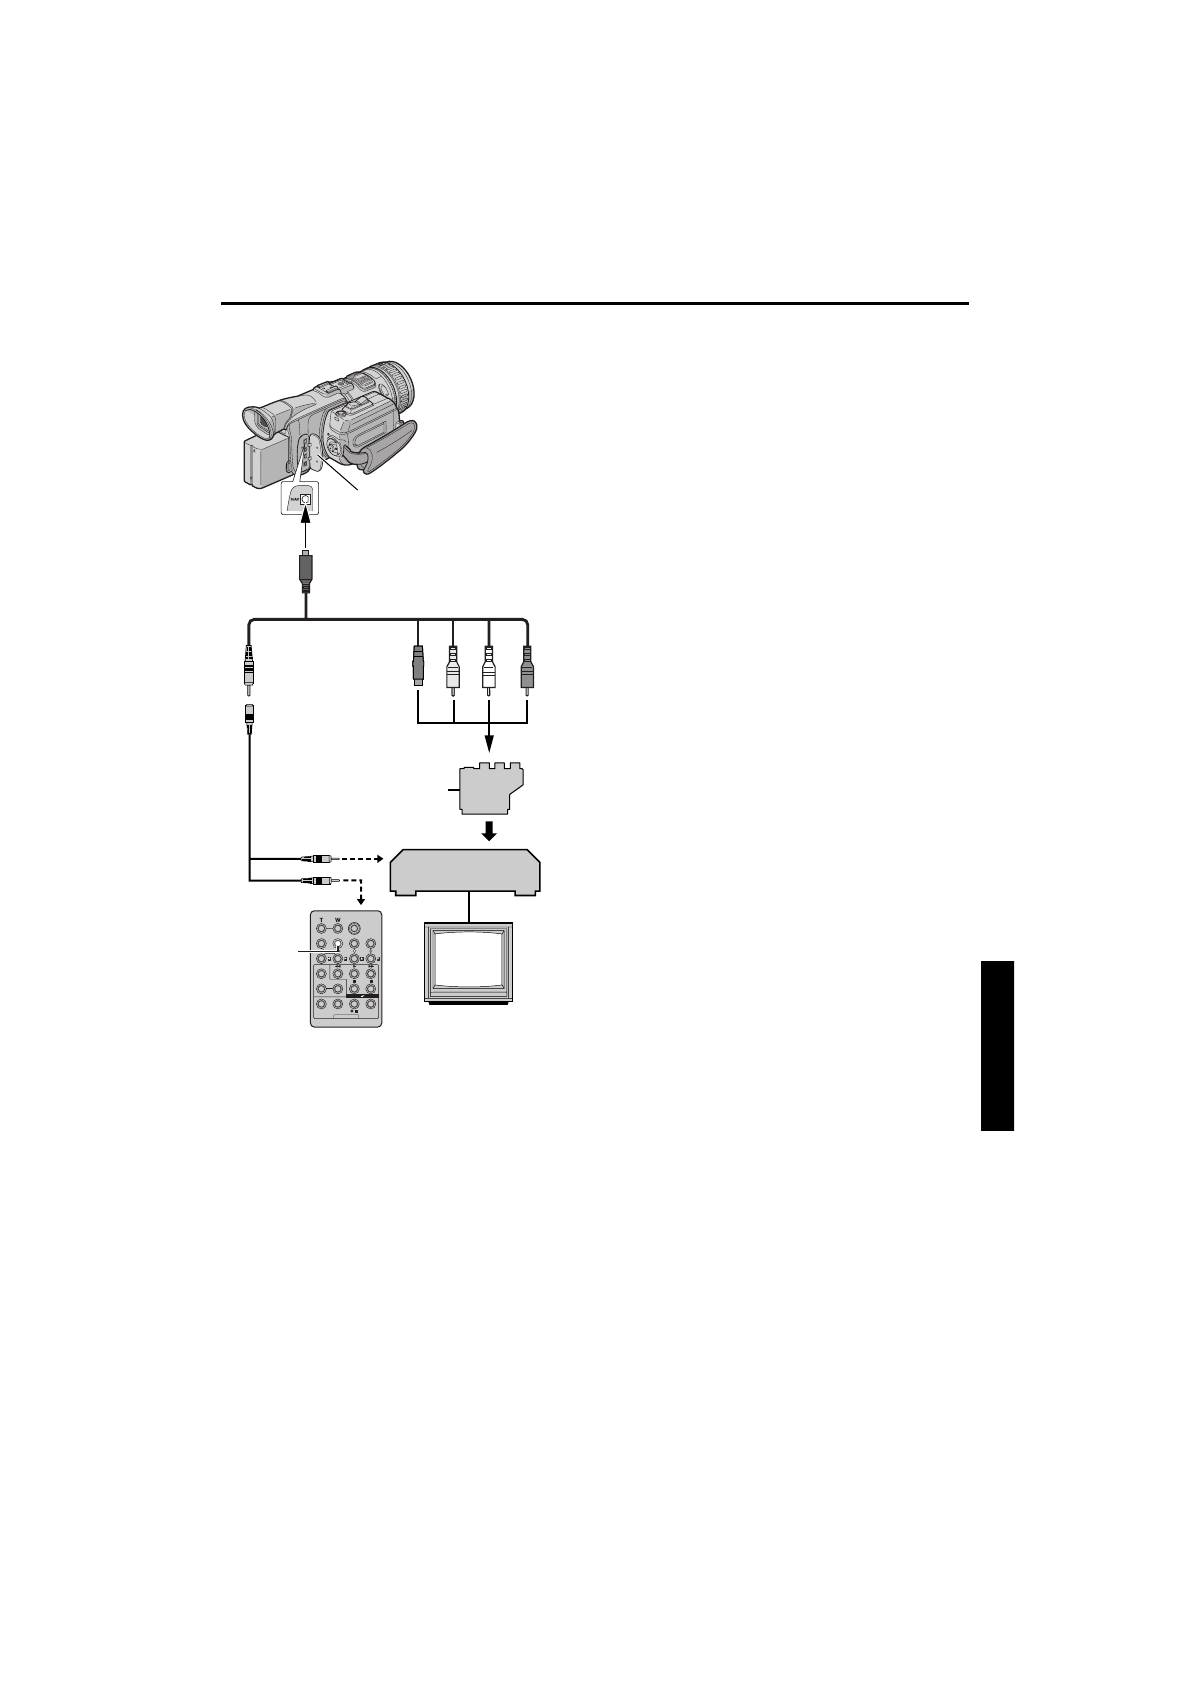
Make Connections
Also refer to page 24.
*
If your VCR has a SCART connector, use the
provided cable adapter.
** Connect when your TV/VCR has an S-VIDEO IN
connector. In this case, it is not necessary to
connect the yellow video cable.
*** When connecting the cable, open the cover.
****If necessary, use this cable for connections.
NOTE:
Set the video out select switch of the cable adapter
as required:
Y/C:
When connecting to a TV or VCR which accepts
Y/C signals and uses an S-Video cable.
CVBS:
When connecting to a TV or VCR which does
not accept Y/C signals and uses an audio/video cable.
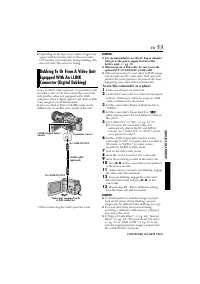
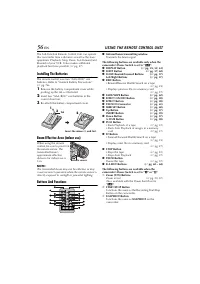
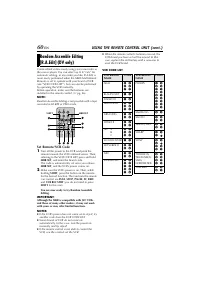
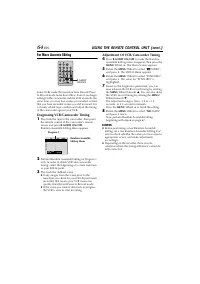
1
A
A JVC VCR equipped with a Remote PAUSE
connector…
… Connect the editing cable to the Remote
PAUSE connector.
B
A JVC VCR not equipped with a Remote
PAUSE connector but equipped with an
R.A.EDIT connector…
… Connect the editing cable to the R.A.EDIT
connector.
C
A VCR other than above…
… Connect the editing cable to the remote
control’s PAUSE IN connector.
2
Insert a recorded tape into the camcorder.
3
Set the Playback Mode Switch to “VIDEO”.
4
Set the Power Switch to “
P
” while pressing
down the Lock Button located on the switch.
5
Turn the VCR power on, insert a recordable tape
and engage the AUX mode.
●
Refer to the VCR’s instructions.
NOTES:
●
Before Random Assemble Editing, make sure the
indications do not appear on the TV monitor. If
they do, they will be recorded onto the new tape.
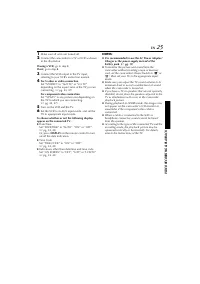
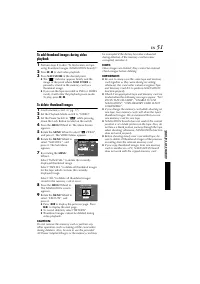
To choose whether or not the following displays
appear on the connected TV…
• Date/time
Set “DATE/TIME” to “AUTO”, “ON” or “OFF”.
(
pg. 33, 40) Or, press
DISPLAY
on the remote
control to turn on/off the date indication.
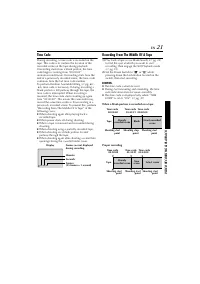
• Time code
Set “TIME CODE” to “OFF” or “ON”.
(
• Indications other than date/time and time code
Set “ON SCREEN” to “OFF”, “LCD” or “LCD/
TV”. (
DISPLAY
1
2 3
4
VCR
TV
AB
To Remote PAUSE
or R.A.EDIT
C
To PAUSE IN
Connector Cover***
S/AV/Editing cable
(provided)
To S/AV
Editing extension
cable (provided)****
A
Black to S-VIDEO IN**
B
Yellow to VIDEO IN
C
White to AUDIO L IN
D
Red to AUDIO R IN
“Y/C”/“CVBS” Video Out
Select Switch
Cable
Adapter*
CONTINUED ON NEXT PAGE


