Видеокамеры JVC GR-PD1 - инструкция пользователя по применению, эксплуатации и установке на русском языке. Мы надеемся, она поможет вам решить возникшие у вас вопросы при эксплуатации техники.
Если остались вопросы, задайте их в комментариях после инструкции.
"Загружаем инструкцию", означает, что нужно подождать пока файл загрузится и можно будет его читать онлайн. Некоторые инструкции очень большие и время их появления зависит от вашей скорости интернета.

18
EN
VIDEO
RECORDING
&
PLA
Y
B
A
CK
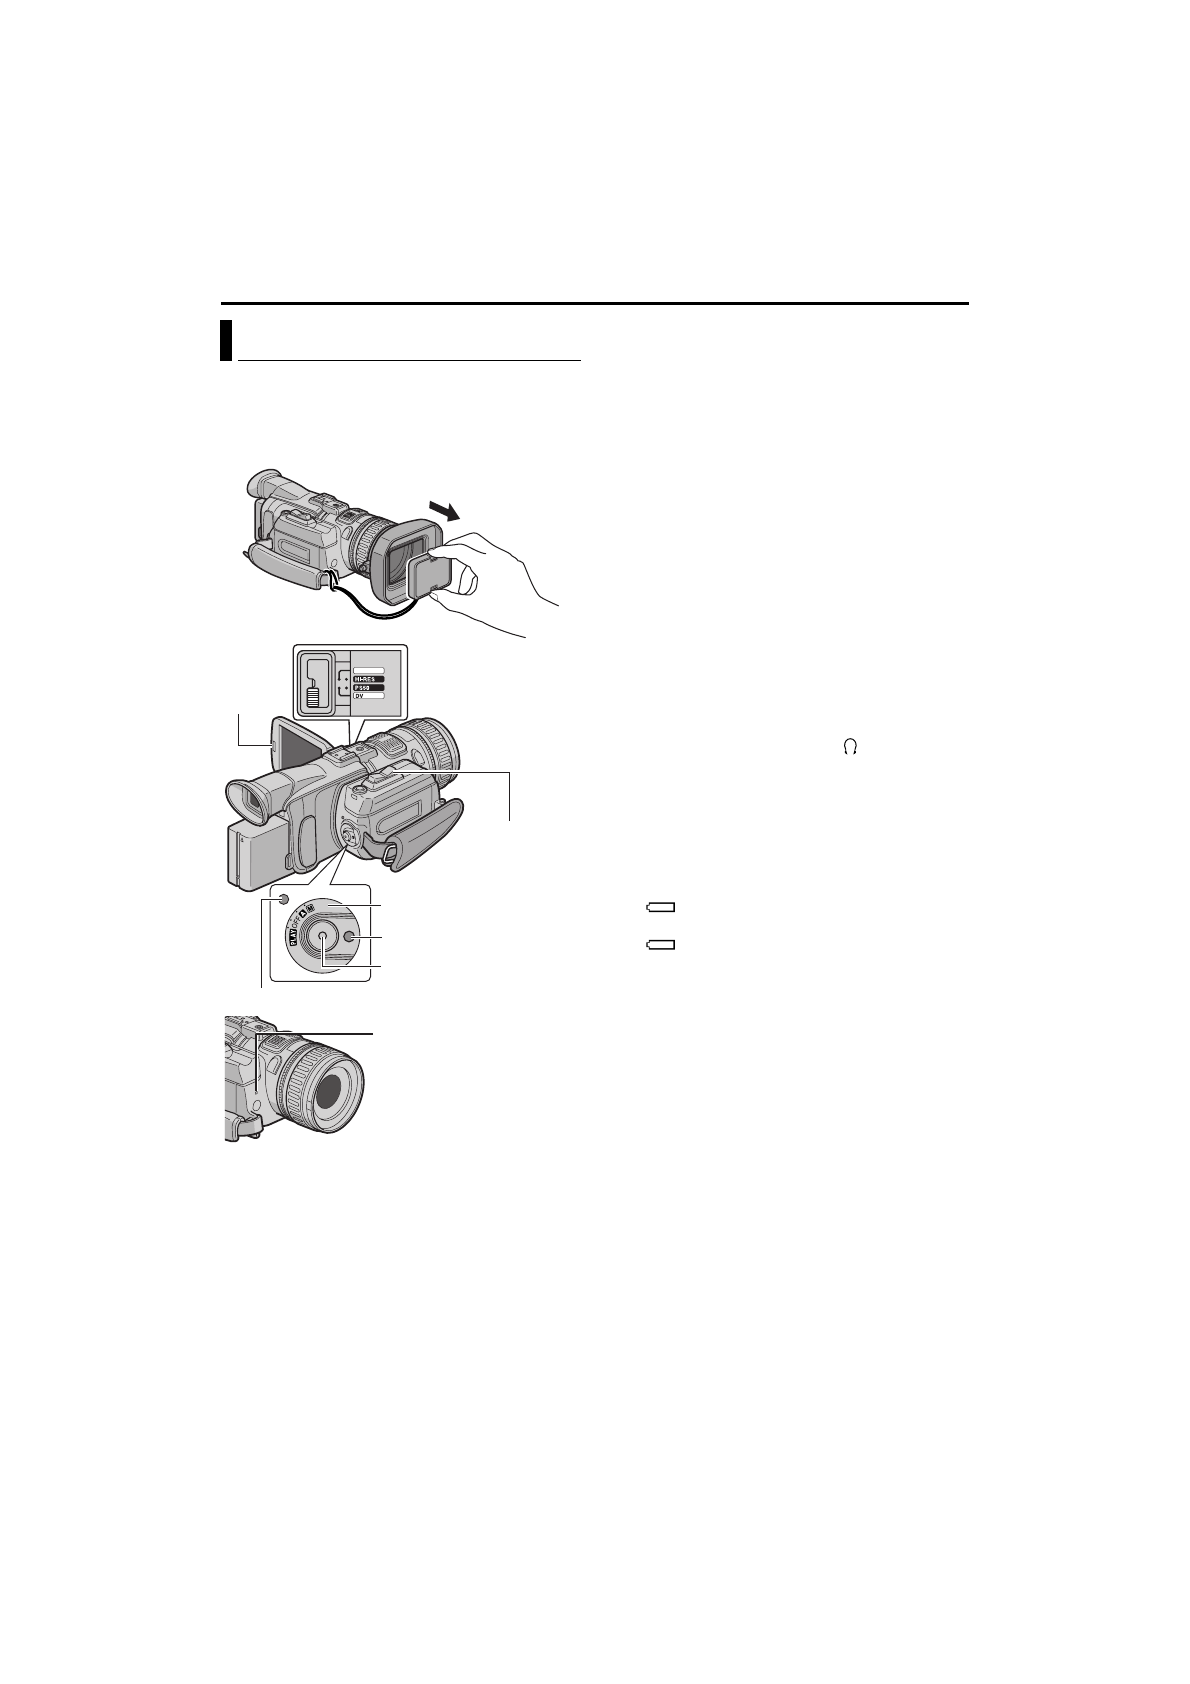
VIDEO RECORDING
NOTE:
Before continuing, perform the procedures listed
below:
●
●
Loading A Cassette (
1
Remove the lens cap.
2
Press
PUSH OPEN
and open the LCD monitor
fully, or pull out the viewfinder fully.
3
Set the Recording Mode Switch to “HI-RES”,
“PS50” or “DV”. For details, refer to “Recording
Mode” (
4
Set the Power Switch to “
A
” or “
M
” while
pressing down the Lock Button located on the
switch.
●
The power lamp lights and the camcorder
enters the Record-Standby mode. “PAUSE” is
displayed.
5
To start recording, press the Recording Start/Stop
Button. The tally lamp lights and “
T
REC”
appears on the display while recording is in
progress.
6
To stop recording, press the Recording Start/Stop
Button again. The camcorder re-enters the
Record-Standby mode.
NOTES:
●
To listen to the sound during recording, connect
the optional headphones to the (Headphones)
jack.
●
If the Record-Standby mode continues for
5 minutes, the camcorder’s power shuts off
automatically. To turn the camcorder on again,
push back and pull out the viewfinder again or
close and re-open the LCD monitor.
●
LCD monitor/viewfinder indications:
• When power is supplied from a battery: the
“
” battery indicator is displayed. (
• When power is supplied from an AC outlet: the
“
” battery indicator does not appear.
●
When a blank portion is left between recorded
scenes on the tape, the time code is interrupted
and errors may occur when editing the tape. To
avoid this, refer to “Recording From The Middle
Of A Tape” (
●
When the recording mode is set to “HI-RES” or
“PS50”, the image is not recorded for the first few
seconds on the tape.
●
To turn the tally lamp or beep sounds off,
●
To record in LP (Long Play) mode,
●
Basic Recording
MEMORY
Power Lamp
Recording Start/Stop Button
Power Switch
Lock Button
Tally Lamp
(Lights while recording is in
progress.)
Power Zoom
Switch
PUSH
OPEN
Recording Mode
Switch


