Видеокамеры JVC GR-PD1 - инструкция пользователя по применению, эксплуатации и установке на русском языке. Мы надеемся, она поможет вам решить возникшие у вас вопросы при эксплуатации техники.
Если остались вопросы, задайте их в комментариях после инструкции.
"Загружаем инструкцию", означает, что нужно подождать пока файл загрузится и можно будет его читать онлайн. Некоторые инструкции очень большие и время их появления зависит от вашей скорости интернета.


32
EN
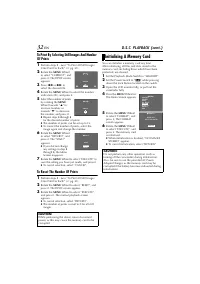
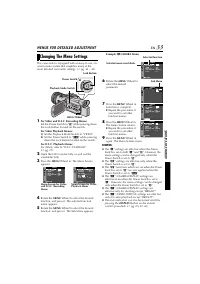
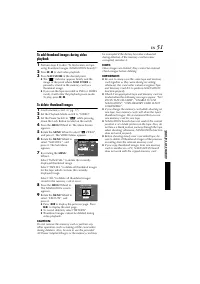
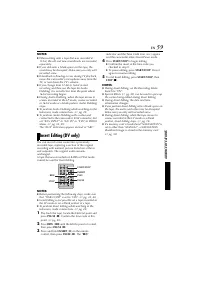
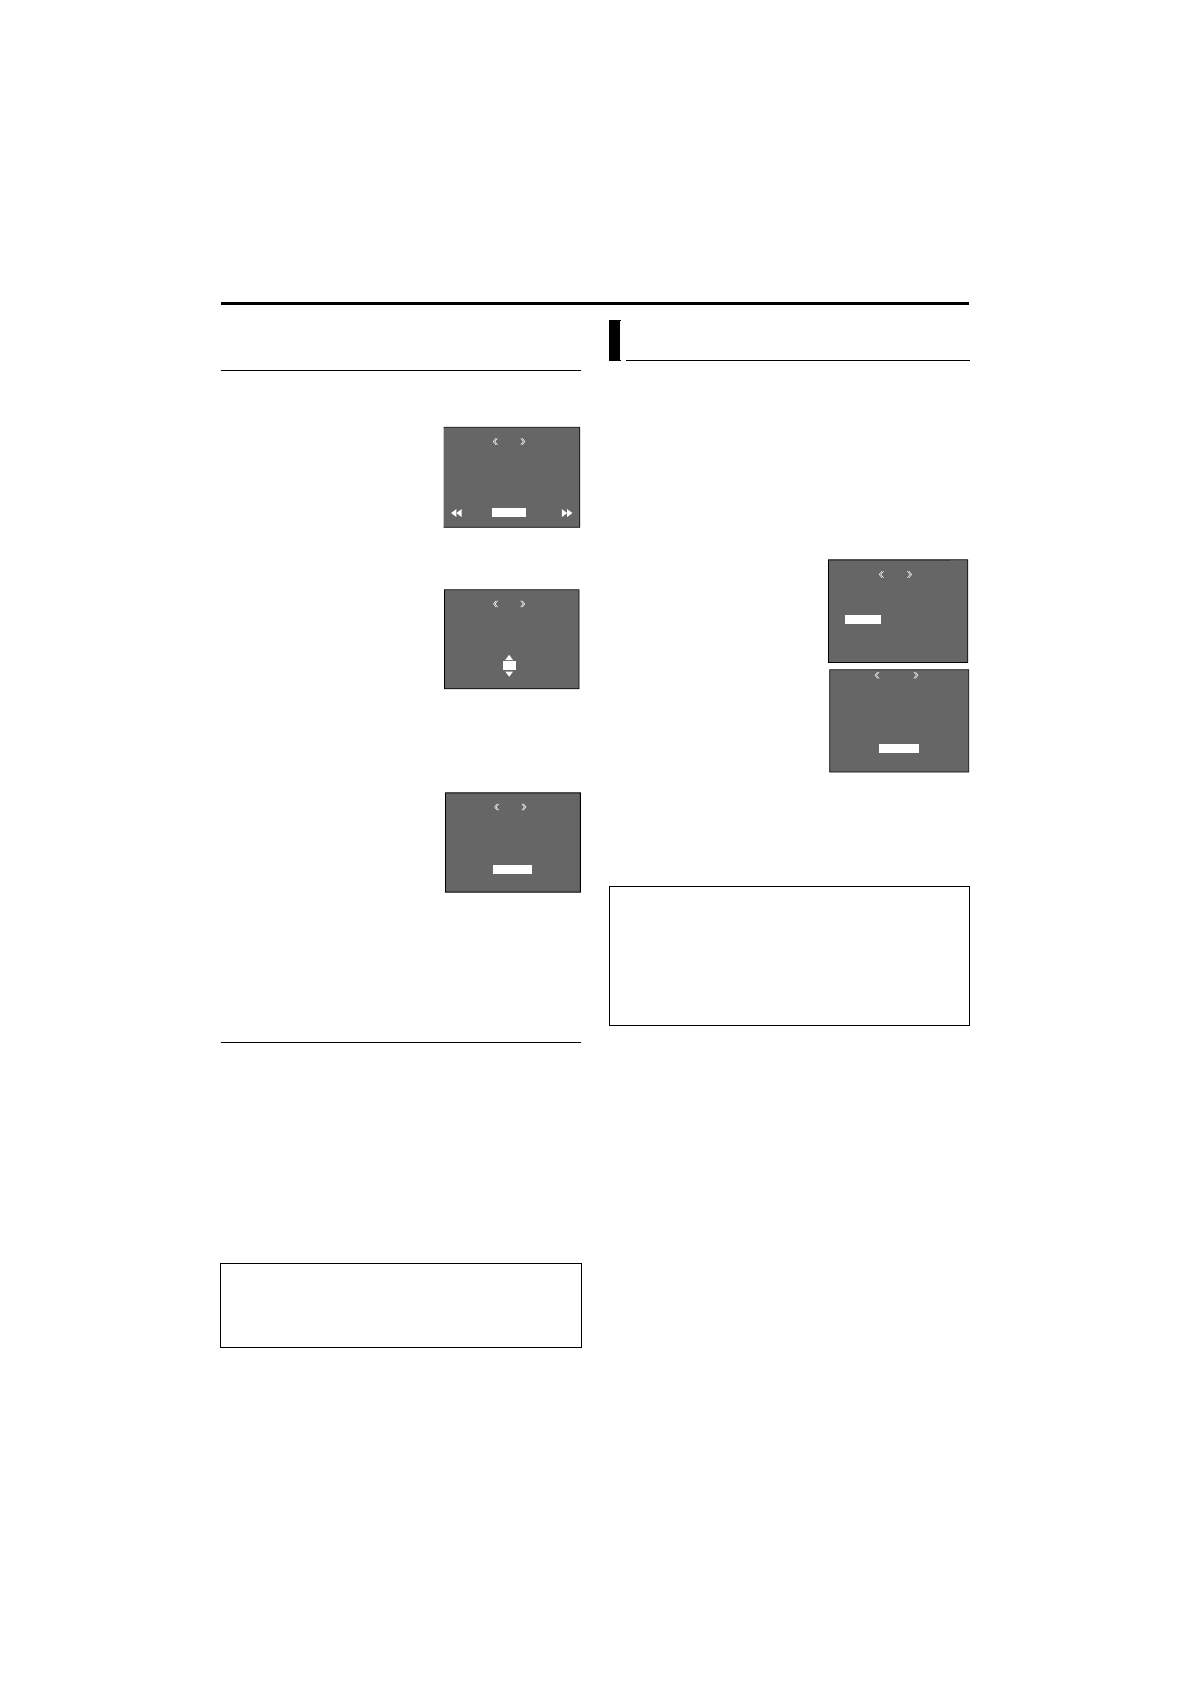
To Print By Selecting Still Images And Number
Of Prints
1
Perform steps
1
–
6
2
Rotate the
MENU
Wheel
to select “CURRENT”, and
press it. The DPOF screen
appears.
3
Press
3
or
5
to
select the desired file.
4
Rotate the
MENU
Wheel to select the number
indication (00), and press it.
5
Select the number of prints
by rotating the
MENU
Wheel towards “
R
” to
increase number, or
towards “
T
” to decrease
the number, and press it.
●
Repeat steps
3
through
5
for the desired number of prints.
●
The number of prints can be set up to 15.
●
To correct the number of prints, select the
image again and change the number.
6
Rotate the
MENU
Wheel
to select “RETURN”, and
press it. The “SAVE?”
appears.
●
If you did not change
any settings in step
3
through
5
, the Menu
Screen reappears.
7
Rotate the
MENU
Wheel to select “EXECUTE” to
save the setting you have just made, and press it.
●
To cancel selection, select “CANCEL”.
To Reset The Number Of Prints
1
Perform steps
1
–
6
2
Rotate the
MENU
Wheel to select “RESET”, and
press it. The DPOF screen appears.
3
Rotate the
MENU
Wheel to select “EXECUTE”,
and press it. The normal playback screen
appears.
●
To cancel selection, select “RETURN”.
●
The number of prints is reset to 0 for all still
images.
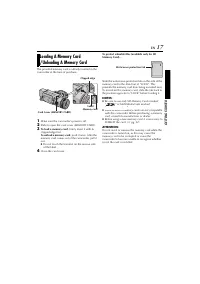
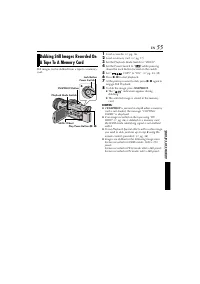
You can initialise a memory card any time.
After initialising, all files and data stored in the
memory card, including those which have been
protected, are cleared.
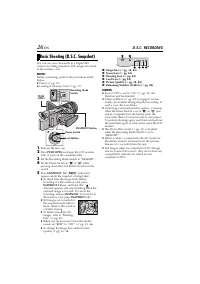
1
Set the Playback Mode Switch to “MEMORY”.
2
Set the Power Switch to “
P
” while pressing
down the Lock Button located on the switch.
3
Open the LCD monitor fully, or pull out the
viewfinder fully.
4
Press the
MENU
Wheel in.
The Menu Screen appears.
5
Rotate the
MENU
Wheel
to select “FORMAT”, and
press it. The FORMAT
screen appears.
6
Rotate the
MENU
Wheel
to select “EXECUTE”, and
press it. The memory card
is initialised.
●
When initialisation is finished, “NO IMAGES
STORED” appears.
●
To cancel initialisation, select “RETURN”.
CAUTION:
While performing the above, never disconnect
power, as this may cause the memory card to be
corrupted.
RE T URN
SHE E T S
DPOF
0 0
SHE E T S
DPOF
0 5
DPOF
E X ECU T E
SAV E ?
CANCE L
Initialising A Memory Card
CAUTION:
Do not perform any other operation (such as
turning off the camcorder) during initialisation.
Also, be sure to use the provided AC Power
Adapter/Charger, as the memory card may be
corrupted if the battery becomes exhausted during
initialisation.
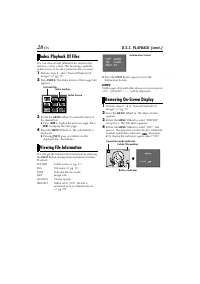
MENU
D I S P L AY
BR I GH T
END
PROT EC T
DE L E T E
DPOF
NO . RE S E T
FORMA T
ORMA T
F
E X ECU T E
DA T A ?
E X I S T I NG
ERAS E A L L
RE T URN


