
Триммеры Hitachi CG25EUS - инструкция пользователя по применению, эксплуатации и установке на русском языке. Мы надеемся, она поможет вам решить возникшие у вас вопросы при эксплуатации техники.
Если остались вопросы, задайте их в комментариях после инструкции.
"Загружаем инструкцию", означает, что нужно подождать пока файл загрузится и можно будет его читать онлайн. Некоторые инструкции очень большие и время их появления зависит от вашей скорости интернета.


9
English
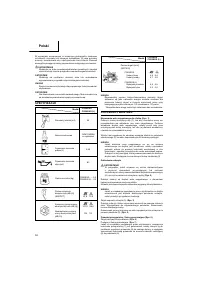
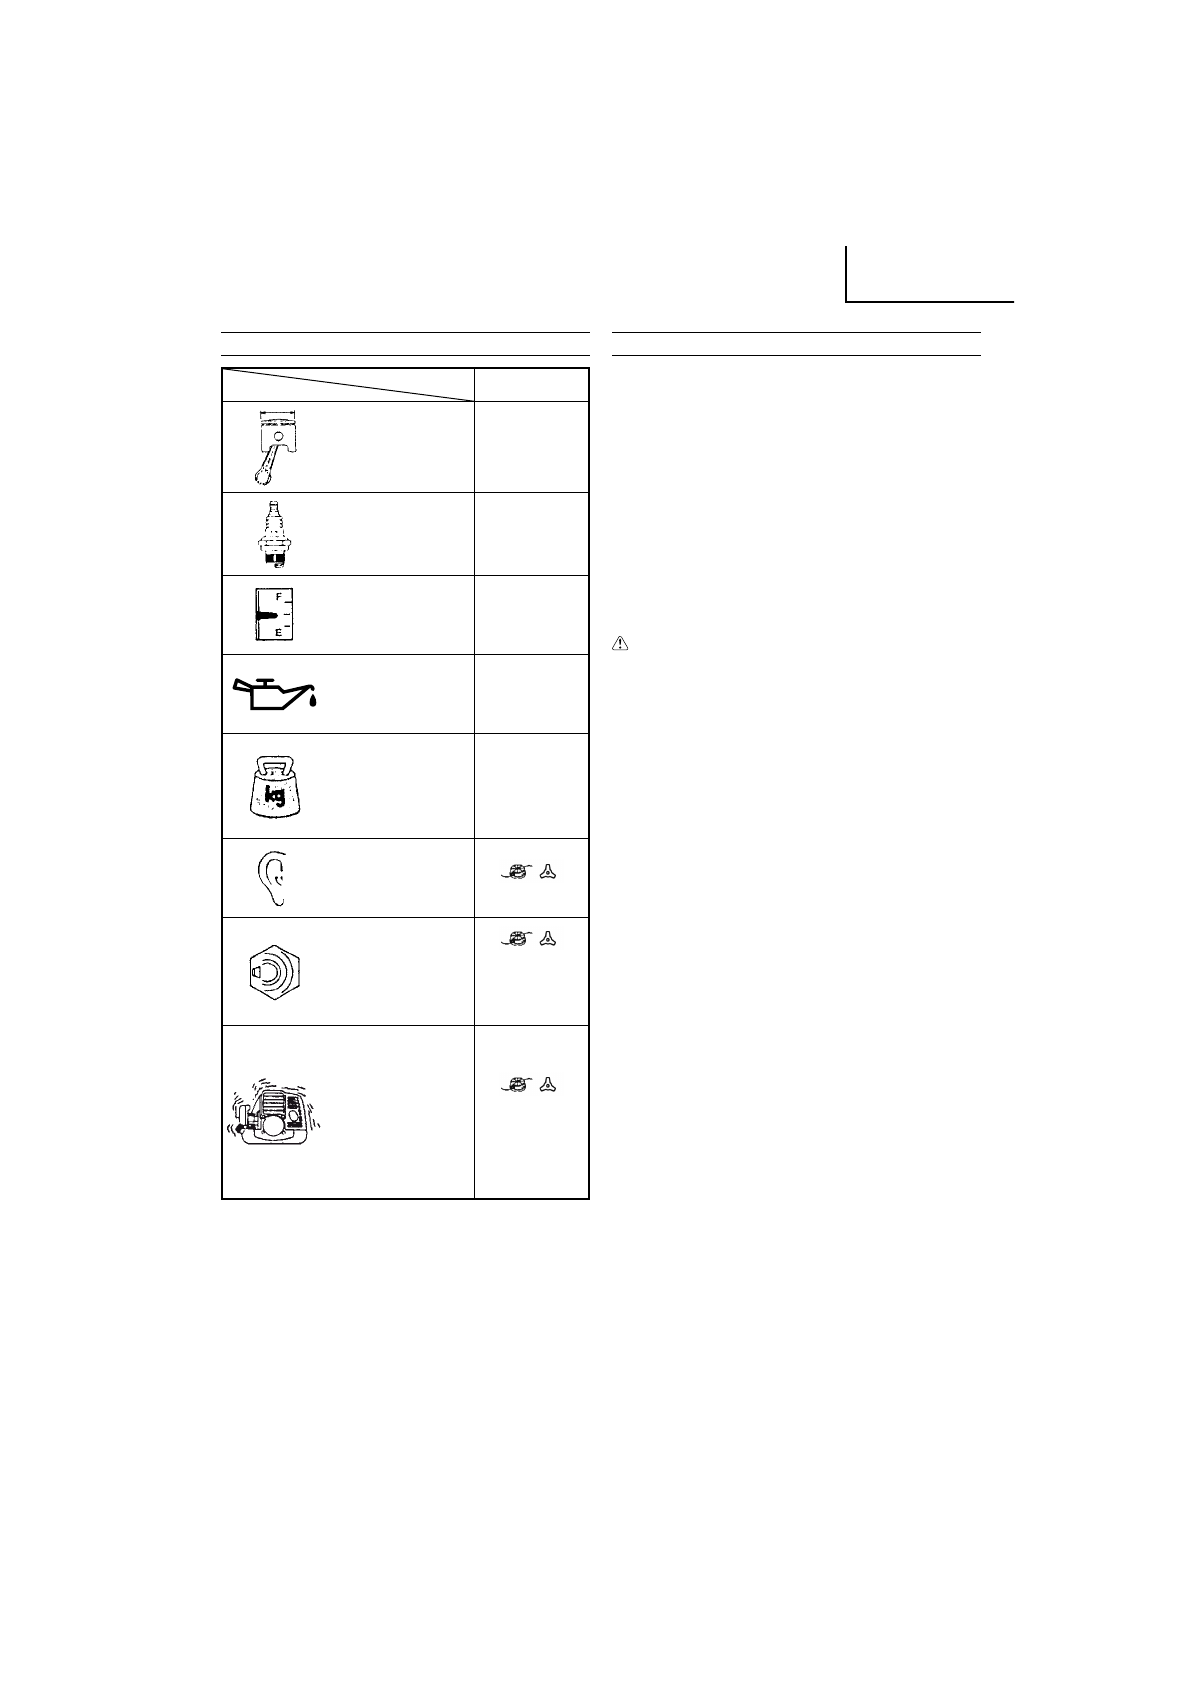
SPECIFICATIONS
Model
CG25EUS
CG25EUS
(
L
)
Engine Size (m
ℓ
)
25
Spark Plug
NGK CMR5H
or equivalent
Fuel Tank Capacity (
ℓ
)
0.55
Engine Oil Capacity (m
ℓ
)
80
Dr y Weight (kg)
CG25EUS ......... 5.2
CG25EUS (L) ... 5.0
Sound pressure level
LpA (dB (A))
(EN27917)
81.8 78.6
Measured sound power
level LwA (dB (A))
Guaranteed sound
power level LwA (dB (A))
101.8 98.6
104 101
Vibration level (m/s
2
)
(ISO7916)
CG25EUS
Left handle
Right handle
CG25EUS (L)
Front handle
Rear handle
4.8 5.4
4.7 4.8
4.8 4.5
3.2 4.6
NOTE
Equivalent noise level/vibration level are calculated as the time-
weighted energy total for noise/vibration levels under various
working conditions with the following time distribution: 1/2 Idle,
1/2 racing.
* All data subject to change without notice.
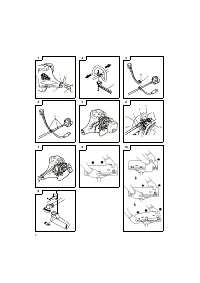
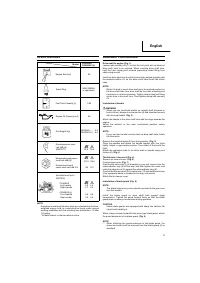
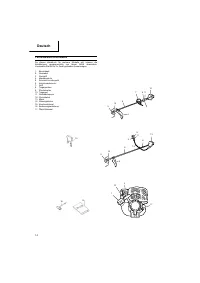
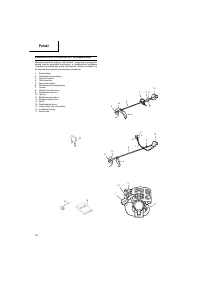
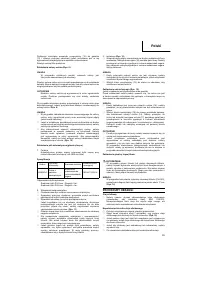
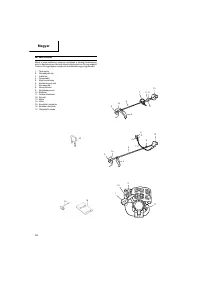
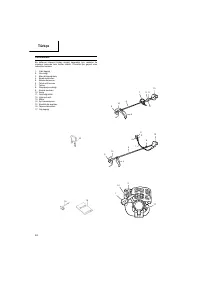
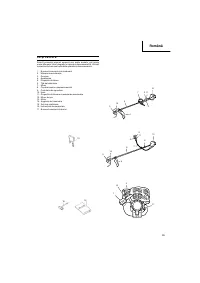
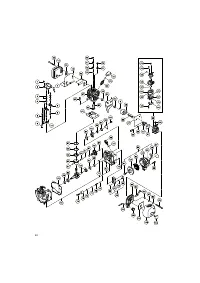
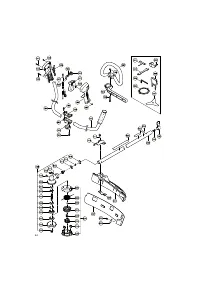
ASSEMBLY
PROCEDURES
Drive
shaft
to
engine
(
Fig.
1
)
Loosen tube locking bolt (1) so that the bolt point will not obstruct
drive shaft tube to be inser ted. When inser ting drive shaft tube,
hold the tube locking bolt outward preventing inside
fi
tting from
obstructing as well.
Inser t the drive shaft into the clutch case of the engine properly until
the marked position (2) on the drive shaft tube meets the clutch
case.
NOTE
When it is hard to inser t drive shaft up to the marked position on
the drive shaft tube, turn drive shaft by the cutter mounting end
clockwise or counter-clockwise. Tighten tube locking bolt lining
up the hole in the shaft tube. Then tighten clamp bolt securely
(3).
Installation
of
handle
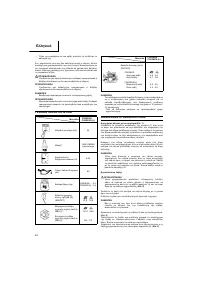
WARNING
When you use steel/rigid blades on straight shaft trimmers or
brush cutters, always use a barrier bar (4) and shoulder harness
with the loop handle. (
Fig.
2
)
Attach the handle to the drive shaft tube with the angle towards the
engine.
Adjust the location to the most comfor table position before
operation.
NOTE
If your unit has handle location label on drive shaft tube, follow
the illustration.
Remove the handle bracket (5) from the assembly. (
Fig.
3
)
Place the handles and attach the handle bracket with four bolts
lightly. Adjust to appropriate position. Then attach it
fi
rmly with the
bolts.
Attach the protection tube to the drive shaft or handle using cord
clamps (6). (
Fig.
4
)
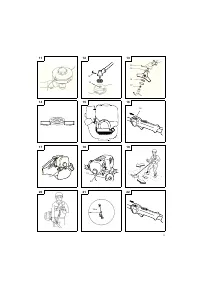
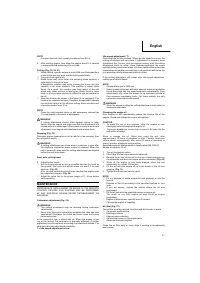
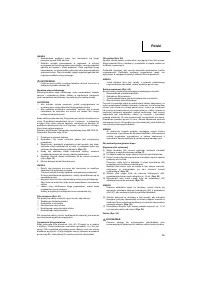
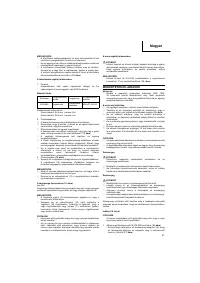
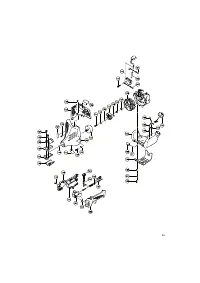
Throttle
wire
/
stop
cord
(
Fig.
6
)
Remove air cleaner cover. (
Fig.
5
)
Connect stop cords. (
Fig.
7
)
If the throttle outer end (7) is threaded on your unit, screw it into the
cable adjuster stay (8) all the way, and then tighten this cable end
using the adjuster nut (9) against the cable adjuster stay (8).
Connect throttle wire end (10) to carburetor (11) and install swivel cap
(if so equipped) where is included in tool bag, onto swivel.
Attach the air cleaner cover.
Installation
of
blade
guard
(
Fig.
8
)
NOTE
The guard bracket may come already mounted to the gear case
on some models.
Install the blade guard on drive shaft tube against angle
transmission. Tighten the guard bracket
fi
rmly so that the blade
guard does not swing or move down during operation.
CAUTION
Some blade guards are equipped with sharp line limiters. Be
careful with handling it.
When using a trimmer head with two piece type blade guard, attach
the guard extension to the blade guard. (
Fig.
9
)
NOTE
○
When attaching the guard extension to the blade guard, the
sharp line limiter must be removed from the blade guard, (if so
installed).
000Book̲CG25EUS̲EE.indb 9
000Book̲CG25EUS̲EE.indb 9
2009/12/26 9:26:19
2009/12/26 9:26:19


