Мультиварки Redmond RMC-210 - инструкция пользователя по применению, эксплуатации и установке на русском языке. Мы надеемся, она поможет вам решить возникшие у вас вопросы при эксплуатации техники.
Если остались вопросы, задайте их в комментариях после инструкции.
"Загружаем инструкцию", означает, что нужно подождать пока файл загрузится и можно будет его читать онлайн. Некоторые инструкции очень большие и время их появления зависит от вашей скорости интернета.


60
“ХЛЕБ” Program
This program is recommended for baking different kinds of bread. The program
includes 2 cycles: proofing and baking. Default time is 3 hours. Cooking time
can be manually adjusted from 10 minutes to 6 hours in 5 minute intervals.
Knead the dough following recommendations given in the recipe. Place the
dough into the bowl. Put the bowl inside the device. Do not fill the unit over
“1/3” full. Follow steps 2–10 of “Standard Operating Procedure for Automatic
Program”. Do not open the lid until the cooking program is complete.
Avoid using “Delayed Start” function because it may affect the quality of the
baked goods. For best results follow recommendations given in the cookbook
provided when baking bread.
“ЖАРКА” Programs
These programs are recommended for frying meat, fish, seafood, and vegetables.
Default time depends on the subprogram selected (use “Выбор продукта” button
to select): “МЯСО” (“MEAT”) – 18 minutes, “ПТИЦА” (“POULTRY”) – 17 minutes,
“РЫБА” (“FISH”) – 15 minutes, “ОВОЩИ” (“VEGETABLES”) – 16 minutes. Cooking
time can be manually adjusted from 5 minutes to 2 hours in 1 minute intervals.
“Delayed Start” function is not available in these programs. Frying with an open
lid is allowed.
“МОЛОЧНАЯ КАША / КРУПЫ” Program
This program is recommended for cooking various porridges using low fat milk,
and for cooking grain side dishes. Default time is 35 minutes. Cooking time can
be manually adjusted from 5 minutes to 4 hours in 1 minute intervals.
Tips for Cooking Porridges in Multicooker
To avoid milk boiling away, we recommend you do the following:
•
rinse grain thoroughly before cooking;
•
grease the sides of the bowl with butter;
•
follow proportions suggested in the recipe book. Increase or reduce amount
of ingredients proportionally;
•
using whole milk dilute it by half with water.
Cooking results may vary depending on the place of origin and the manufac-
turer of the products used.
If you did not manage to achieve the desired result, use the multifunctional
program “МУЛЬТИПОВАР”. For best result set the temperature of 95°C. Follow
the proportions and cooking time recommendations given in the recipe.
“ТУШЕНИЕ/ХОЛОДЕЦ” Programs
These programs are recommended for making meat, fish, and vegetable stews,
jellied meat, and other slow cooked dishes. Default time depends on the sub-
program selected (use “Выбор продукта” button to select): “МЯСО” (“MEAT”)
– 1 hour, “ПТИЦА” (“POULTRY”) – 50 minutes, “РЫБА” (“FISH”) – 35 minutes,
“ОВОЩИ” (“VEGETABLES”) – 45 minutes. Cooking time can be manually ad
-
justed from 10 minutes to 12 hours in 5 minute intervals.
“ВАРКА/БОБОВЫЕ” Program
This program is recommended for cooking meat, fish, vegetables, and legumes.
Default time depends on the subprogram selected (use “Выбор продукта”
button to select): “МЯСО” (“MEAT”) – 1 hour, “ПТИЦА” (“POULTRY”) – 50 minutes,
“РЫБА” (“FISH”) – 35 minutes, “ОВОЩИ” (“VEGETABLES”) – 45 minutes. Cooking
time can be manually adjusted from 5 minutes to 8 hours in 5 minute intervals.
When cooking legumes, increase the default cooking time according to the
recipe recommendations.
“ЙОГУРТ/ТЕСТО” Program
This program is recommended for making yogurts and proofing dough. Default
time is 8 hours. Cooking time can be manually adjusted from 10 minutes to 12
hours in 5 minute intervals. “Keep Warm” function is not available in this program.
I I I. C L E A N I N G A N D G E N E R A L M A I N
-
T E N A N C E G U I D E L I N E S
•
Before you start cleaning the device, make sure that it is unplugged and
has cooled down.
• Use soft cloth and mild soap to clean. We recommend cleaning the appli
-
ance after each use.
Caution! Do not use a sponge with a hard or abrasive surface; solvent and
abrasive cleaning methods are not allowed. Do not immerse the device in
water or wash it under running water.
• Prior to first use or in order to remove the odor, boil half a lemon using
“НА ПАРУ – РЫБА” program. Use default time.
•
Wash the bowl and aluminum lid* after each use. The bowl is dishwasher
safe. By the end of cleaning, wipe the bowl dry.
•
The steam valve needs to be cleaned after each use. To remove the steam
valve regulator turn it into “0” position. Remove the lower part of the steam
valve holding it by the ledge located in the cavity of the lid by pulling it
up and towards yourself. Rinse the valve parts under running water and
allow to dry. Place back the lower part of the valve, then its upper part.
Turn the steam valve regulator into “I”–”III” position to secure the upper
part.
• Condensation may accumulate in the special cavity around the bowl. Use
cloth or tissue to remove.
•
Clean the heating chamber of the device only when visibly dirty. Clean
inner walls of the main unit, the surface of the heating disk and the
temperature sensor housing located in the middle of the disk with damp
(not wet!) sponge or napkin. Remove any traces of soap or detergent if
using any. If the surface of the heating disk needs to be cleaned, use a
medium hard sponge or synthetic brush to clean. If there is a foreign
object in the cavity around the temperature sensor carefully remove it
using tweezers, without pressing on the sensor housing.
*To remove the inner aluminum lid pull 2 plastic holders located on its lower
part towards yourself and up. After cleaning, insert the ledge located on the
upper part of the removable lid into the slot, overlapping it with the main
lid and press the lower part until it clicks into place. Inner aluminum lid
should fit tightly.
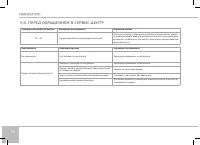
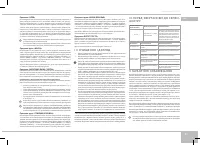
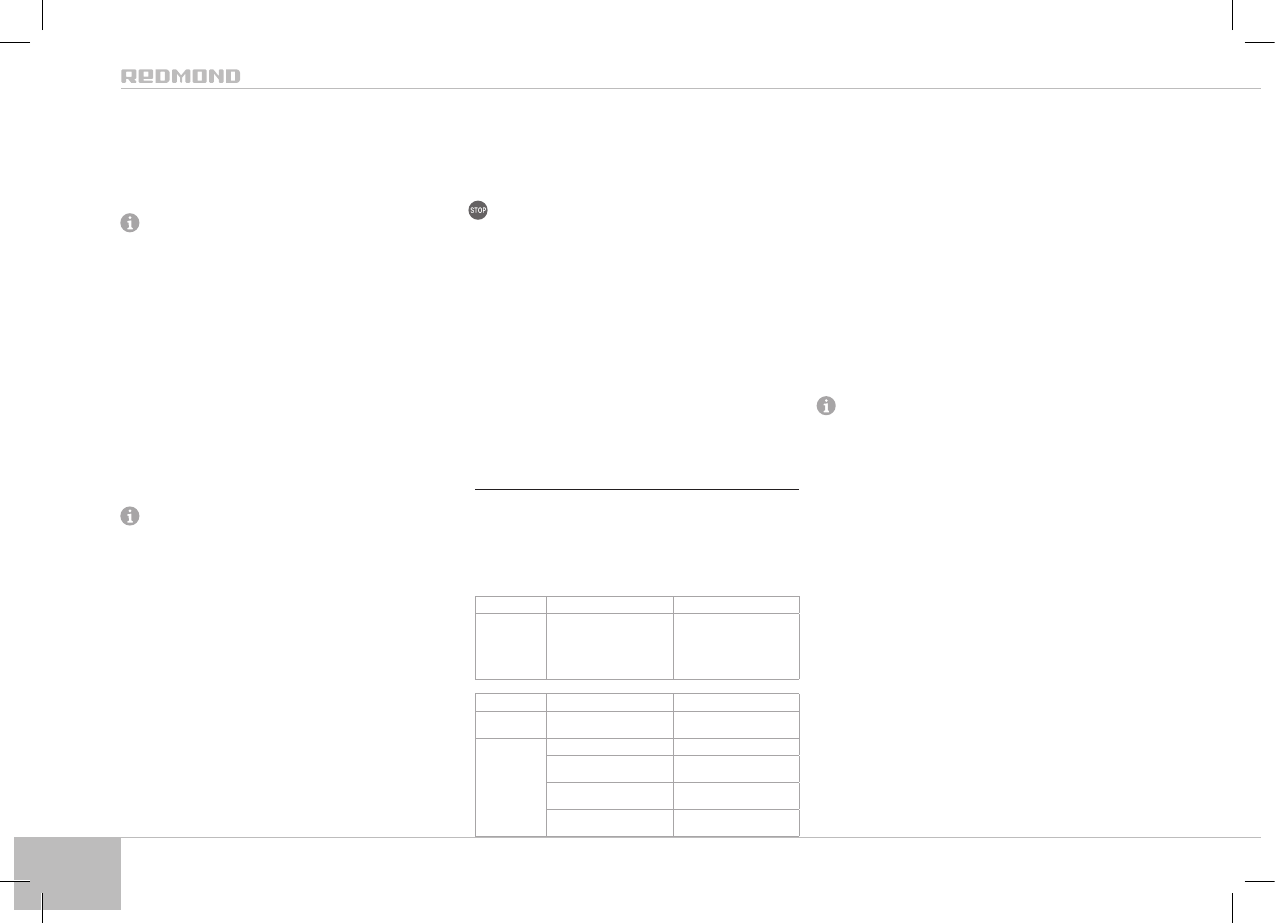
I V. B E F O R E C A L L I N G F O R S E RV I C E
Error code
Error description
Error handling
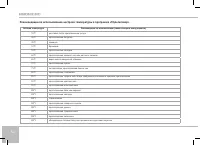
Е1 – E5
Temperature sensor malfunction
Unplug the unit and let it cool
down. Close the lid tightly. Switch
the unit back on. If this does not
eliminate the error, address an
authorized service center.
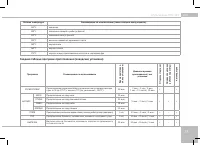
Problem
Possible cause
Solving the problem
The device does
not switch on.
Voltage supply failure.
Check the voltage supply.
The dish is taking
too long to cook.
Voltage supply interruption.
Check the voltage supply.
There is a foreign object between
the bowl and the heating element.
Remove the foreign object.
The bowl was installed with distor-
tion.
Install the bowl evenly, without any
distortion.
The heating element is dirty.
Unplug the device and let it cool
down. Clean the heating element.
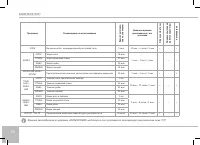
V. P RO D U C T W A R R A N T Y
We warrant this product to be free from defects for a period of 25 months from
the date of purchase. If the appliance fails to operate properly within the war-
ranty period and is found to be defective in material or workmanship, we will
repair or replace it free of charge. This warranty comes into force only in case
an original warranty service coupon with a serial article number and an accurate
impress of the company of the seller proves the purchase date. This limited
warranty does not cover damage caused by the failure to use this product for
its normal purpose or in accordance with the instructions on the proper use
and maintenance of the product or any kind of repair works. Do not try to disas-
semble the device and keep all package contents. This warranty does not
cover normal wear of the device and its parts (filters, bulbs, ceramic coating,
rubber parts etc.).
Service life and the applicable product warranty period start on the date of
purchase or the date of manufacture (if the purchase date cannot be established).
You can determine manufacture date by serial number, located on the identifi
-
cation label on the housing of the device. The serial number consists of 13
digits. 6th and 7th digits of the serial number identify the month, 8th digit the
year of manufacture.
Service life of the product, established by the manufacturer is 5 years from the
date of purchase, provided that the unit is used and maintained in accordance
with the user manual and applicable technical standards.
The packaging, user manual and the device itself may not be treated as house-
hold waste. Instead, it shall be taken to the applicable collection point for the
recycling of electrical and electronic equipment.
Содержание
- 4 С ОД Е Р Ж А Н И Е
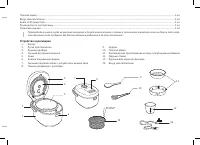
- 6 Технические характеристики; Автоматические программы; Комплектация
- 7 Устройство мультиварки
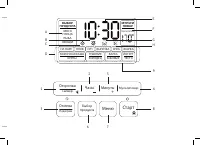
- 9 Отмена; Меню; Старт; Подогрев; Выбор; Часы; Минуты; Мультиповар; Отсрочка; Таймер; МУЛЬТИ; ВЫБОР
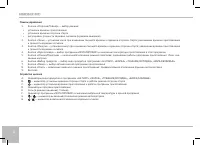
- 10 I. П Е Р Е Д Н АЧ А Л О М И С П О Л Ь З О В А Н И Я; Меры безопасности; замыканию или возгоранию кабеля.
- 11 Перед первым включением; ной тканью. Промойте чашу, тщательно просушите
- 12 I I. Э К С П Л УАТА Ц И Я М УЛ ЬТ И В А Р К И; Перед началом эксплуатации; режим ожидания
- 13 RUS; Регулировка громкости и отключение звуковых сигналов; III; Установка времени приготовления
- 14 Функция отсрочки старта программы; «Меню»; Поддержание температуры готовых блюд (автоподогрев)
- 15 Предварительное отключение автоподогрева; «Старт»; Функция разогрева блюд; Нажмите и удерживайте кнопку; Общие рекомендации по приготовлению
- 16 Программа «МУЛЬТИПОВАР»
- 17 Программа «МЯСО НА ПАРУ»
- 18 Программа «ПТИЦА НА ПАРУ»
- 19 Программа «РЫБА НА ПАРУ»
- 20 Программа «ОВОЩИ НА ПАРУ»
- 21 Программа «ПЛОВ»
- 22 Программа «СУП»
- 23 Программа «ВЫПЕЧКА»
- 24 Программа «ХЛЕБ»
- 25 Программа «ЖАРКА МЯСА»
- 26 Программа «ЖАРКА ПТИЦЫ»
- 27 Программа «ЖАРКА РЫБЫ»
- 28 Программа «ЖАРКА ОВОЩЕЙ»; товление с открытой крышкой мультиварки.
- 29 Программа «МОЛОЧНАЯ КАША / КРУПЫ»; готовления устанавливайте согласно рецепту.
- 30 Программа «ТУШЕНИЕ МЯСА»
- 31 Программа «ТУШЕНИЕ ПТИЦЫ»
- 32 Программа «ТУШЕНИЕ РЫБЫ»
- 33 Программа «ТУШЕНИЕ ОВОЩЕЙ»
- 34 Программа «ВАРКА МЯСА»
- 35 Программа «ВАРКА ПТИЦЫ»
- 36 Программа «ВАРКА РЫБЫ»
- 37 Программа «ВАРКА ОВОЩЕЙ»
- 38 Программа «ЙОГУРТ / ТЕСТО»
- 39 I I I. Д О П О Л Н И Т Е Л Ь Н Ы Е В О З М О Ж Н О С Т И; Приготовление фондю; Французское слово; Использование корзины для жарки во фритюре; в чашу с разогретым маслом. Будьте осторожны: масло очень горячее!
- 40 на результатах приготовления.
- 41 I V. В П О М О Щ Ь М А М Е; Приготовление детского питания; Возраст ребенка; • Однокомпонентные соки.
- 42 Пастеризация; Объем; Стерилизация
- 44 Подогрев детского питания; «Мультиповар»
- 45 V. У Х ОД З А М УЛ ЬТ И В А Р К О Й; Общие правила и рекомендации; мягкую ткань и деликатные средства для мытья посуды.; Очистка корпуса; закрыть крышку и включить функцию разогрева на 30–40 минут
- 46 Удаление конденсата
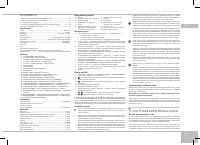
- 48 V I. С О В Е Т Ы П О П Р И Г ОТО В Л Е Н И Ю; Ошибки при приготовлении и способы их устранения; причины и пути решения.; Блюдо не приготовилось до конца
- 49 Возможные причины
- 51 Рекомендуемое время приготовления различных продуктов на пару
- 53 Сводная таблица программ приготовления (заводские установки)
- 55 V I I. Д О П О Л Н И Т Е Л Ь Н Ы Е А К С Е С С УА Р Ы; либо в магазинах официальных дилеров.; RAM-CL1 — щипцы для чаши; Возможно использование с мультиварками других брендов.; RAM-FB1 — корзина для жарки во фритюре
- 56 V I I I. П Е Р Е Д О Б РА Щ Е Н И Е М В С Е Р В И С-Ц Е Н Т Р
- 57 I X. ГА РА Н Т И Й Н Ы Е О Б Я З АТ Е Л Ь С Т В А


