Кондиционеры Daikin ATXC25B/ARXC25B 104363 - инструкция пользователя по применению, эксплуатации и установке на русском языке. Мы надеемся, она поможет вам решить возникшие у вас вопросы при эксплуатации техники.
Если остались вопросы, задайте их в комментариях после инструкции.
"Загружаем инструкцию", означает, что нужно подождать пока файл загрузится и можно будет его читать онлайн. Некоторые инструкции очень большие и время их появления зависит от вашей скорости интернета.

1-13
English
2
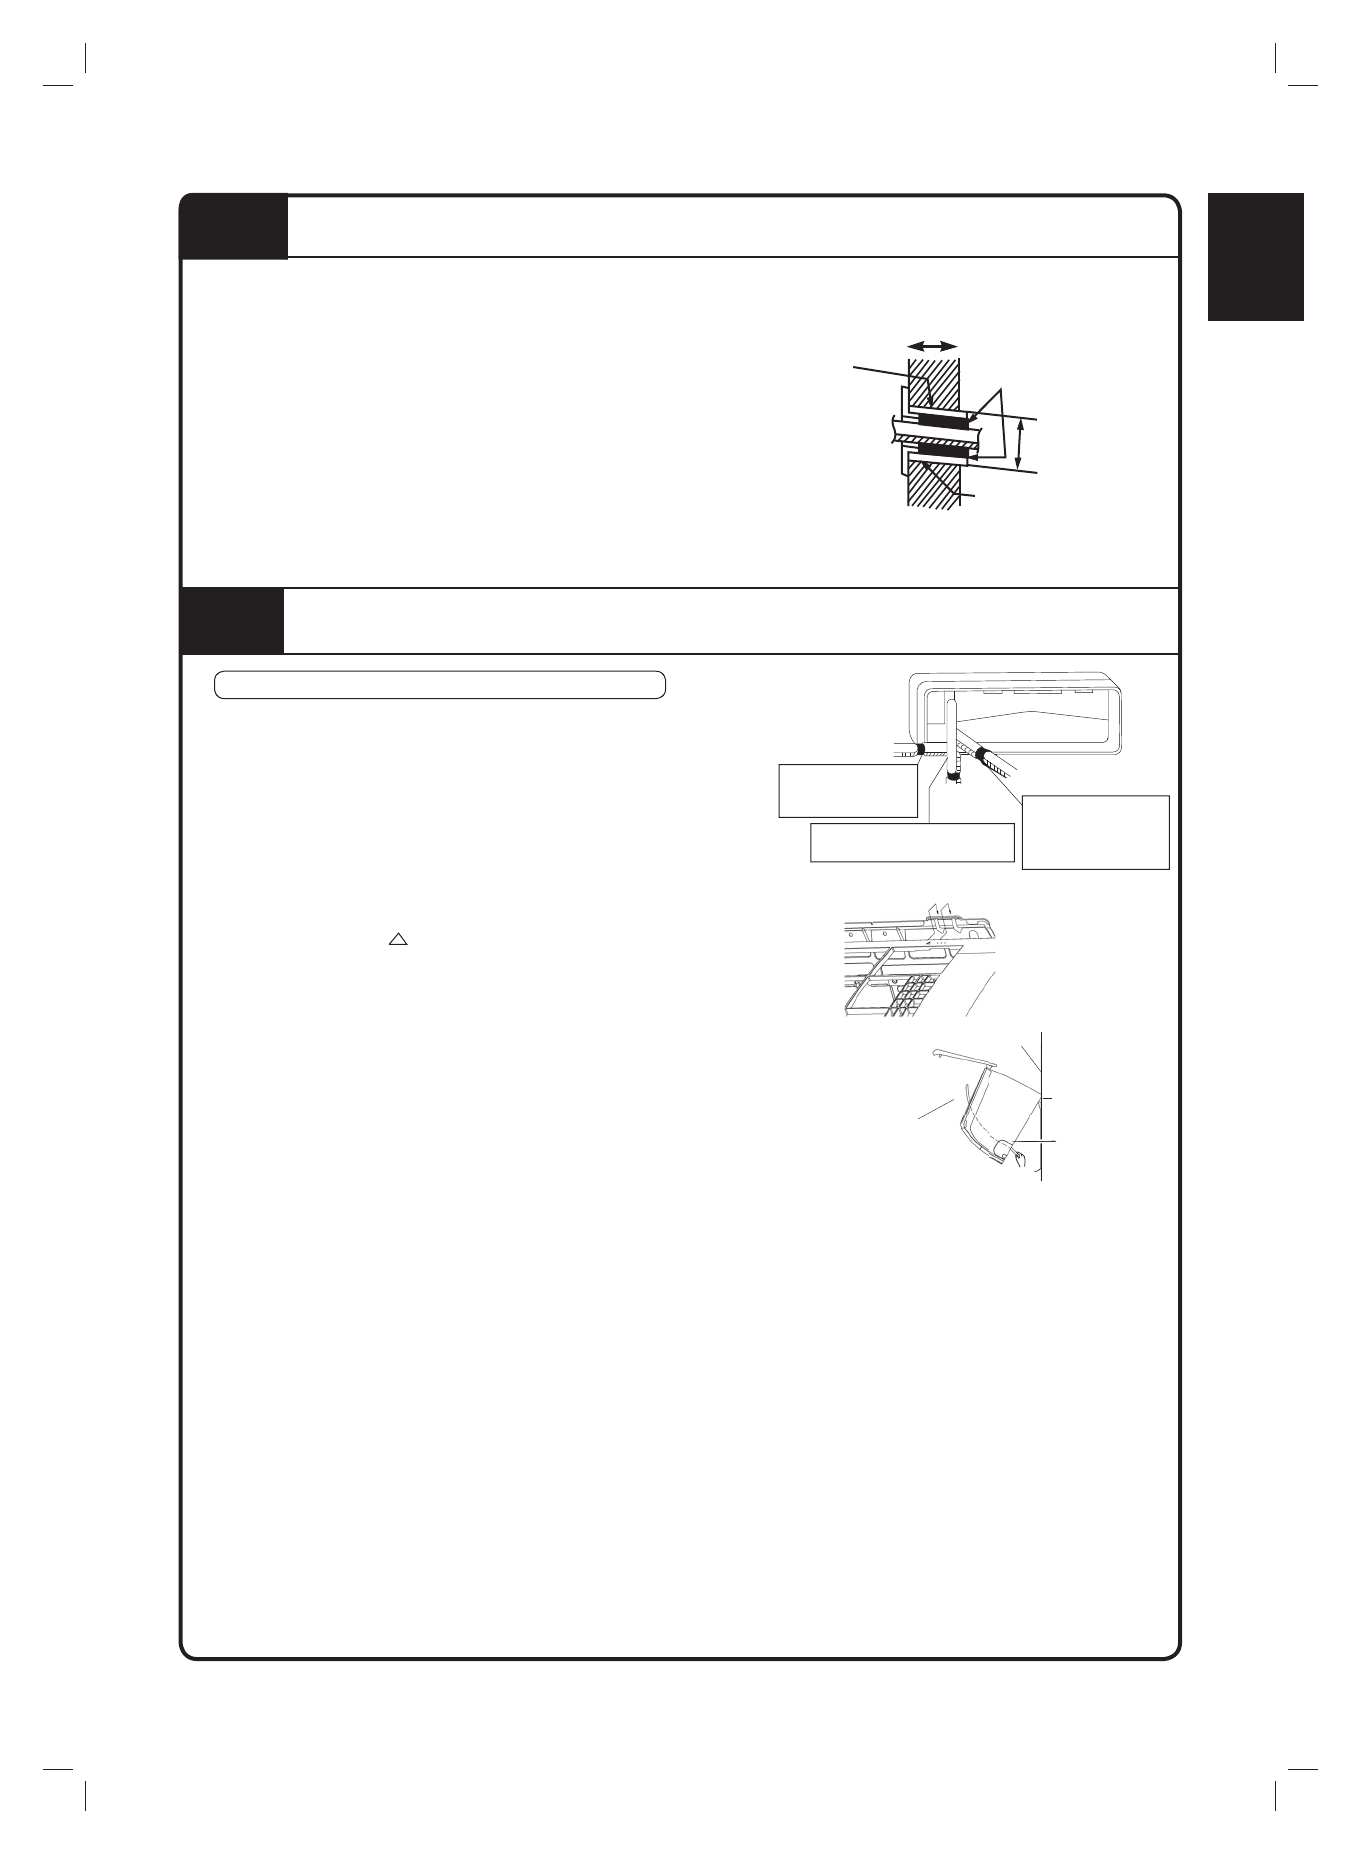
DRILLING A WALL HOLE AND INSTALLING WALL EMBEDDED PIPE
• For walls containing metal frame or metal board, be sure to use a wall embedded pipe and wall
cover in the feed-through hole to prevent possible heat, electrical shock, or
fi
re.
• Be sure to caulk the gaps around the pipes with caulking
material to prevent water leakage.
1) Drill a feed-through hole of 65mm in the wall so it has
a down slope toward the outside.
2) Insert a wall pipe into the hole.
3) Insert a wall cover into wall pipe.
4) After completing refrigerant piping, wiring, and drain
piping, caulk pipe hole gap with putty.
Wall embedded pipe
(Field supply)
Caulking (Putty)
(Field supply)
Inside
Outside
Wall embedded
pipe (Field supply)
Ø 65
Wall hole cover
(Field supply)
3
INSTALLING INDOOR UNIT
Right-side, right-back, or right-bottom piping.
1) Attach the drain hose to the underside of the refrigerant
pipes with adhesive vinyl tape.
2) Wrap the refrigerant pipes and drain hose together with
insulation tape.
3) Pass the drain hose and refrigerant pipes through the wall
hole, then set the indoor unit on the
mounting plate
hooks by using the markings at the top of the indoor unit as a guide.
4) Open the front panel, then open the service lid. (Refer to installation tips.)
5) Pass the inter-unit wire from the outdoor unit through the
feed-through wall hole and then through the back of the indoor unit.
Pull them through the front side. Bend the ends of tie wires
upward for easier work in advance. (If the inter-unit wire ends are
to be stripped
fi
rst, bundle wire ends with adhesive tape.)
6) Press the bottom frame of the indoor unit with both hands to
set it on the
mounting plate hooks. Make sure the wires
do not catch on the edge of the indoor unit.
Right-back piping
Mounting plate
Mounting
plate
Hang indoor unit’s hook here.
Inter-unit
wire
Wire guide
When stripping the
ends of inter-unit
wire in advance,
bundle ends of
wires with
insulation tape.
Right-side piping
Right-bottom
piping
Bind refrigerant
pipe and drain hose
together with
insulation tape.
Remove pipe port cover
here for right-bottom piping
Remove pipe port
cover here for
right-side piping


