
Компрессоры Stanley D 211/8/24 100546056 - инструкция пользователя по применению, эксплуатации и установке на русском языке. Мы надеемся, она поможет вам решить возникшие у вас вопросы при эксплуатации техники.
Если остались вопросы, задайте их в комментариях после инструкции.
"Загружаем инструкцию", означает, что нужно подождать пока файл загрузится и можно будет его читать онлайн. Некоторые инструкции очень большие и время их появления зависит от вашей скорости интернета.


23
G
B
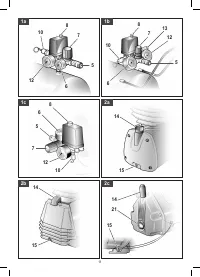
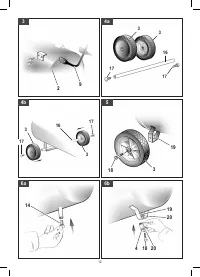
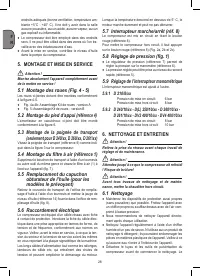
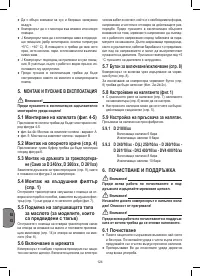
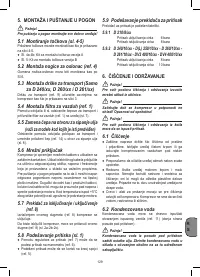
5.2 Fitting the supporting foot (ref. 4)
Fit the supplied rubber stopper as shown in Fig. 6.
5.3 Fitting the transport handle (only
for D 240/xx, D 260/xx, D 261/xx)
Screw the transport handle (ref. 9) to the compressor
as shown in Fig. 3.
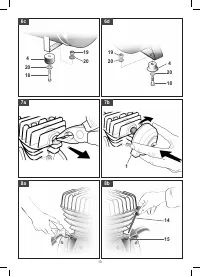
5.4 Fitting the air filter (ref. 1)
Remove the transportation stop with a screwdriver or
similar and screw the air filter (ref. 1) securely to the
equipment (Fig. 7).
5.5 Replacing the oil sealing plug
(for models envisaging this)
Remove the transportation cover from the oil filler
opening with a screwdriver and insert the supplied oil
dipstick (ref. 14) into the oil filler opening (Fig. 8).
5.6 Voltage
The compressor is equipped with a mains cable with earth
wire. Insert the plug of the electric cable in a socket of suit
-
able shape, voltage and frequency complying with current
regulations. Before you use the machine, make sure that
the mains voltage complies with the specifications on the
rating plate. Long supply cables, extensions, cable reels
etc. cause a drop in voltage and can impede motor start-
up. In the case of low temperatures below +5°C, motor
start-up is jeopardized as a result of stiffness.
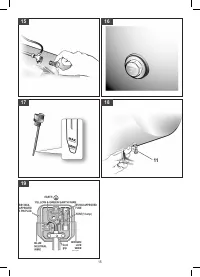
5.6.1 Connection of the mains plug (electrical
information for the BS plug)
Important!
The wires in the mains lead fitted to this product are
coloured in accordance with the code shown in fig. 19.
● The 3 pin plug must comply to BS1363/A.
● Fuse must comply to BS1362.
If for any reason the 13 amp plug fitted to this product
requires replacement it must be wired in accordance
with the following instruction:
Do not connect the brown (live) or blue (neutral)
to the earth pin marked ‘E’ on the 3 pin plug.
Connect the Blue wire to the terminal marked Neutral
(N). Connect the Brown wire to the terminal marked Live
(L). Connect the Yellow & Green wire to the terminal
marked Earth (E). Ensure that the outer insulation is
gripped by the cord grip and that the wires are not
trapped when replacing the plug cover. The mains lead
on this product is fitted with a 13 amp (BS1363/A) plug.
A 13 amp (BS1362) fuse must be fitted in the plug.
If in doubt consult a qualified electrician
There are no user serviceable parts inside this product
except those referred to in the manual. Always refer
servicing to qualified service personnel. Never remove
any part of the casing unless qualified to do so; this unit
contains dangerous voltages.
Warning!
For your protection if this product is to be used outdoors
it should not be exposed to rain or used in damp
locations. Do not place the product on damp surfaces,
use a workbench if available. For added protection use
a suitable residual current device (R.C.D.) at the socket
outlet.
Note:
If the mains cable requires replacing it must be
replaced with an identical one and fitted by a
qualified person.
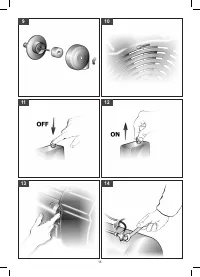
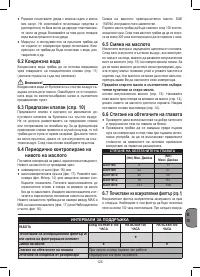
5.7 On/Off switch (8)
To switch on the compressor, pull out the red knob (ref. 8).
To switch off the compressor, press the red knob (8) in
again (Fig. 2a, 2b & 2c).
5.8 Adjusting the pressure (Fig. 1)
●
You can adjust the pressure on the pressure gauge
(ref. 6) using the pressure regulator (ref. 7).
●
The set pressure can be taken from the quicklock
coupling (ref. 5).
5.9 Setting the pressure switch
The pressure switch is set at the factory.
5.9.1 D 210/8/xx
Switch-on pressure
:
6 bar
Switch-off pressure
:
8 bar
5.9.2 D 240/10/xx - D(L) 250/10/xx - D 260/10/xx -
D 261/10/xx - DV2 400/10/xx - DV4 400/10/xx
Switch-on pressure
:
8 bar
Switch-off pressure
:
10 bar
6. CLEANING AND MAINTENANCE
Warning!
Pull the power plug before doing any cleaning and
maintenance work on the appliance.
Warning!
Wait until the compressor has completely cooled
down. Risk of burns!
Warning!
Always depressurize the tank before carrying out
any cleaning and maintenance work.


