
Пылесос Dyson SV10 V8 Absolute + - инструкция пользователя по применению, эксплуатации и установке на русском языке. Мы надеемся, она поможет вам решить возникшие у вас вопросы при эксплуатации техники.
Если остались вопросы, задайте их в комментариях после инструкции.
"Загружаем инструкцию", означает, что нужно подождать пока файл загрузится и можно будет его читать онлайн. Некоторые инструкции очень большие и время их появления зависит от вашей скорости интернета.


38
EN
USING YOUR DYSON M ACHINE
PLE ASE RE AD THE ‘IMPORTANT SAFET Y INSTRUCTIONS’ IN YOUR DYSON USER
M ANUAL BEFORE PROCEEDING.
INSTALLING YOUR DOCKING STATION
•
Use appropriate mounting hardware for your wall t ype and ensure that the docking
station is mounted securely. Ensure no pipe work (gas, water, air) or electrical
cables, wires or duct work are located directly behind the mounting area. The
docking station must be mounted in accordance with regulations and applicable
codes/standards (state and local laws may apply). Dyson recommends the use of
protective clothing, eyeware and materials when installing the docking station.
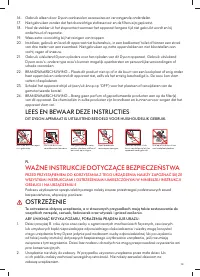
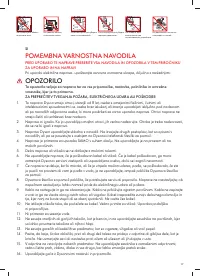
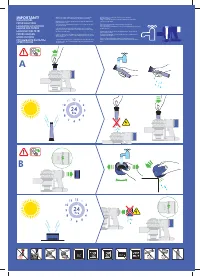
OPER ATION
•
Do not use outdoors or on wet sur faces or to vacuum water or other liquids –
electric shock could occur.
•
Ensure the appliance remains upright in use and in storage. Dir t and debris may be
released if it is turned upside down.
•
Do not operate while checking for blockages.
•
For domestic indoor and car use only. Do not use it whilst the car is in motion or
while driving.
•
To operate the Max mode, locate the switch on the top of the appliance. Slide the
switch to the Max mode position.
•
To switch of f Max mode, slide the switch back to the Power ful suction
mode position.
•
Your machine has carbon fibre brushes. Take care if coming into contact with
them, as they may cause minor skin irritation. Wash your hands af ter handling
the brushes.
USING YOUR M ACHINE
•
Do not use without the clear bin and filter(s) in place.
•
Fine dir t such as flour should only be vacuumed in ver y small amounts.
•
Do not use the appliance to pick up sharp hard objects, small toys, pins, paper
clips, etc. They may damage the appliance.
•
When vacuuming, cer tain carpets may generate small static charges in the clear
bin or wand. These are harmless and are not associated with the mains electricit y
supply. To minimise any ef fect from this, do not put your hand or inser t any object
into the clear bin unless you have first emptied it. Clean the clear bin with a damp
cloth only. (See ‘Cleaning the clear bin’.)
•
Use ex tra care when cleaning on stairs.
•
Do not rest the appliance on chairs, tables, etc.
•
Do not press down on the nozzle with excessive force when using the appliance as
this may cause damage.
•
Do not leave the cleaner head in one place on delicate floors.
•
On waxed floors, the movement of the cleaner head may create an uneven lustre.
If this happens, wipe with a damp cloth, polish the area with wax, and wait for it
to dr y.
CARPETS OR HARD FLOORS
•
Before vacuuming your flooring, rugs and carpets, check the manufacturer’s
recommended cleaning instructions.
•
The brush bar on the machine can damage cer tain carpet t ypes and floors. Some
carpets will fuzz if a rotating brush bar is used when vacuuming. If this happens, we
recommend vacuuming without the motorised floor tool and consulting with your
flooring manufacturer.
•
Before vacuuming highly polished floors, such as wood or lino, first check that the
underside of the floor tool and its brushes are free from foreign objects that could
cause marking.
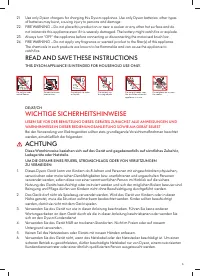
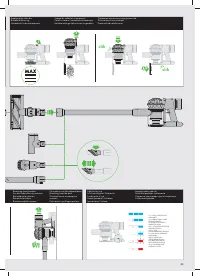
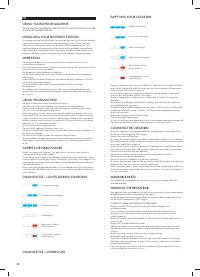
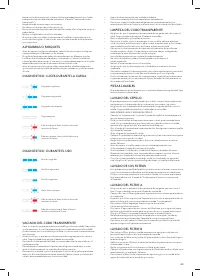
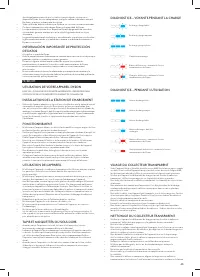
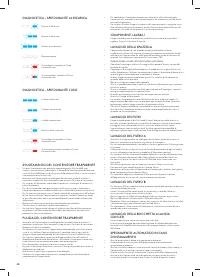
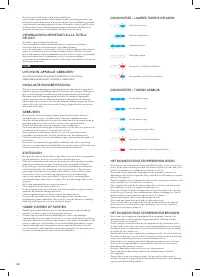
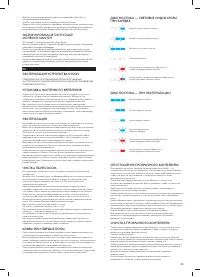
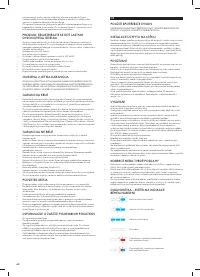
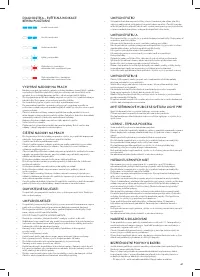
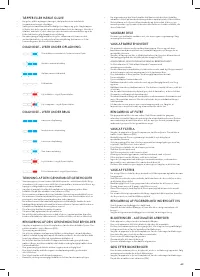
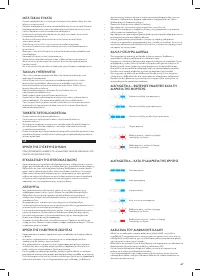
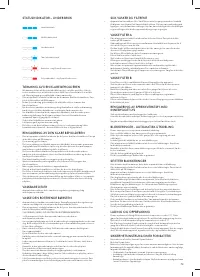
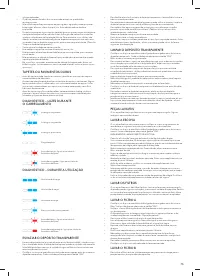
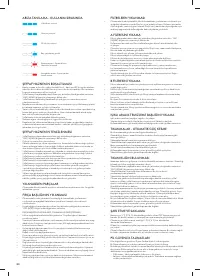
DIAGNOSTICS – LIGHTS DURING CHARGING
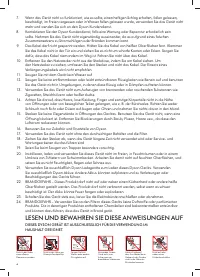
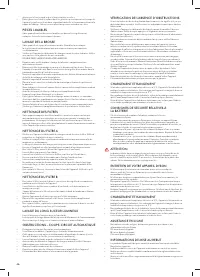
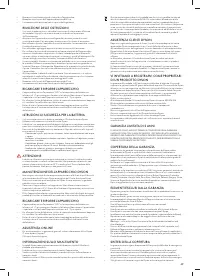
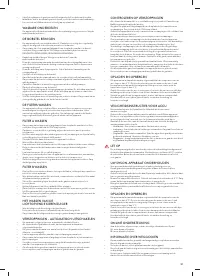
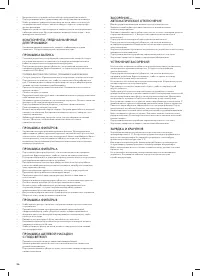
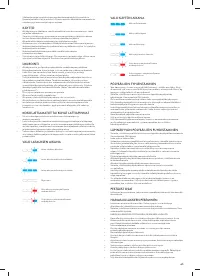
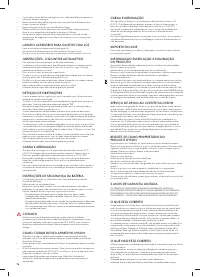
DIAGNOSTICS – DURING USE
EMPT YING YOUR CLEAR BIN
•
Empt y as soon as the dir t reaches the M A X level – don' t over fill. Using the machine
when the dir t is above the M A X line may cause the dir t to reach the filter and more
frequent maintenance will be required.
•
Ensure that the appliance is disconnected from the charger before empt ying the
clear bin. Be careful not to pull the 'ON' trigger.
•
To make empt ying the clear bin easier, it is advisable to remove the wand and
floor tool.
•
To minimise dust/allergen contact when empt ying, cover the clear bin tightly in a
dust proof bag while you empt y.
•
To release the dir t, hold the appliance by the handle, pull the red lever back and lif t
upwards to release the cyclone. Continue until the bin base automatically opens
and releases the dir t.
•
Remove the clear bin carefully from the bag.
•
Seal the bag tightly and dispose.
•
To close, push the cyclone downwards until it is in the normal position and manually
close the base of the bin – the base will click when it is securely in place.
CLEANING THE CLEAR BIN
•
Ensure the appliance is disconnected from the charger before removing the clear
bin. Be careful not to pull the ‘ON’ trigger.
•
Remove the wand and floor tool.
•
To remove the cyclone, hold the appliance by the handle, pull the red lever towards
you and lif t upwards until the bin opens, then push in the red button located behind
the cyclone and lif t the cyclone out.
•
To detach the clear bin from the appliance, pull back on the red catch located at the
base, slide the clear bin down and carefully remove for wards from the main body.
•
Clean the clear bin with a damp cloth only.
•
Do not use detergents, polishes or air fresheners to clean the clear bin.
•
Do not put the clear bin in a dishwasher.
•
Ensure the clear bin is completely dr y before replacing.
•
To replace the clear bin, align the tabs on the clear bin with the grooves on the main
body and slide upwards into place until the catch clicks.
•
Slide the cyclone into the grooves of the main body and push downwards until it is in
its normal position and manually close the base of the bin – the base will click when
it is securely in place.
WASHABLE PARTS
Your machine has washable par ts, which require regular cleaning. Follow the
instructions below.
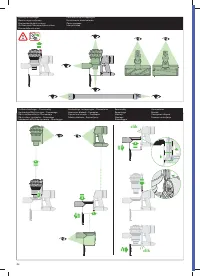
WASHING THE BRUSH BAR
•
Your appliance has a washable brush bar, check and wash it regularly according to
the following instructions to maintain per formance.
•
Ensure the appliance is disconnected from the charger before removing the brush
bar. Be careful not to pull the ‘ON’ trigger.
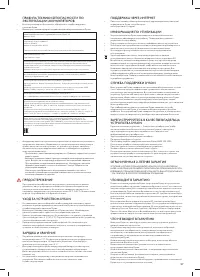
TO REMOVE, WASH AND REPL ACE THE BRUSH BAR:
•
Please refer to the ' Washing the brush bar' illustrations alongside the
instructions below.
•
Turn the cleaner head upside down so the underside of the cleaner head is
facing you. Use a coin to turn the fastener one quar ter anti-clockwise to the
unlocked position.
•
Rotate the end cap to the open position. Gently slide the brush bar away from the
cleaner head.
•
Remove the end cap from the brush bar.
•
Hold the brush bar under running water and gently rub to remove any lint or dir t.
•
Stand the brush bar upright as shown. Leave to dr y completely for a minimum of
24 hours.
•
Before replacing, check that the brush bar is completely dr y.
•
Reattach the end cap to the brush bar.
•
Slide the brush bar back onto the cleaner head, around the motor. The end cap
should be in the open position as shown. Once in place, rotate the end cap back
into the closed position.
•
Close the fastener by turning a quar ter turn clockwise. Ensure that the fastener is
fully turned and the brush bar is secure.
Charging, low charge.
Charging, nearly full.
Charger fault – call the
Dyson Helpline.
Charging, medium charge.
Fully charged.
Bat ter y fault – call the
Dyson Helpline.
High level of charge.
Low level of charge.
Bat ter y fault – call the
Dyson Helpline.
Medium level of charge.
Empt y, needs recharging.
Main body fault – call the
Dyson Helpine.


