Кондиционеры Ardesto ACM-12P-R290 - инструкция пользователя по применению, эксплуатации и установке на русском языке. Мы надеемся, она поможет вам решить возникшие у вас вопросы при эксплуатации техники.
Если остались вопросы, задайте их в комментариях после инструкции.
"Загружаем инструкцию", означает, что нужно подождать пока файл загрузится и можно будет его читать онлайн. Некоторые инструкции очень большие и время их появления зависит от вашей скорости интернета.


134
EN
power management feature. The compressor and fan motor stop.
When the ambient temperature is higher than the setting temperature,
the unit will be automatically quit the power management feature. The
compressor and (or) fan motor run.
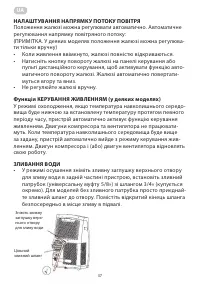
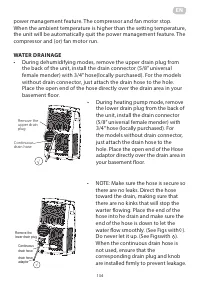
WATER DRAINAGE
• During dehumidifying modes, remove the upper drain plug from
the back of the unit, install the drain connector (5/8’’ universal
female mender) with 3/4’’ hose(locally purchased). For the models
without drain connector, just attach the drain hose to the hole.
Place the open end of the hose directly over the drain area in your
basement floor.
Page 20
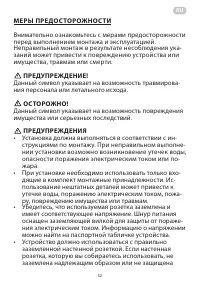
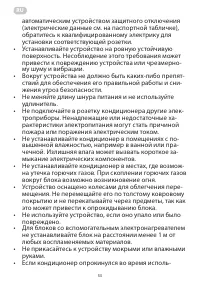
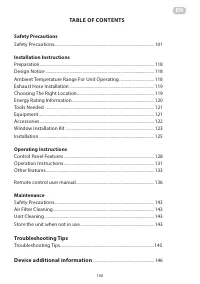
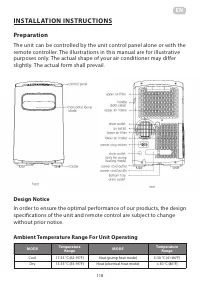
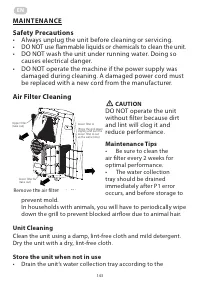
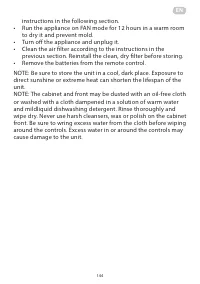
Safety Precautions
Maintenance
· Always unplug the unit before cleaning or servicing.
· DO NOT use flammable liquids or chemicals to clean the unit.
· DO NOT wash the unit under running water. Doing so causes electrical danger.
· DO NOT operate the machine if the power supply was damaged during cleaning. A damaged
power cord must be replaced with a new cord from the manufacturer.
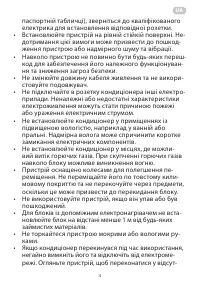
Maintenance
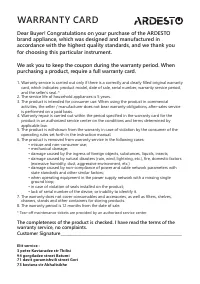
· During heating pump mode, remove the lower drain
plug from the back of the unit, install the drain
connector(5/8"universal female mender) with 3/4"
hose(locally purchased). For the models without
drain connector, just attach the drain hose to the
hole. Place the open end of the Hose adaptor directly
over the drain area in your basement floor.
Press the power
cord buckle into
the rear cover.
√
delivery lift <1.8m
drain hose
adaptor
drain hose
adaptor
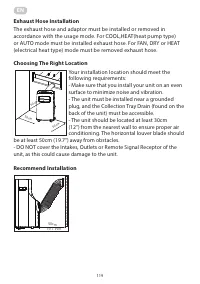
NOTE: Make sure the hose is secure so there are no
leaks. Direct the hose toward the drain, making sure
that there are no kinks that will stop the warter flowing.
Place the end of the hose into he drain and make sure
the end of the hose is down to let the water flow
smoothly.(See Figs with . Do never let it up.(See Figs
with ).When the continuous drain hose is not used,
ensure that the corresponding drain plug and knob are
installed firmly to prevent leakage.
√
X
X
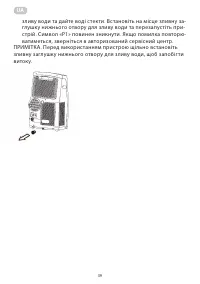
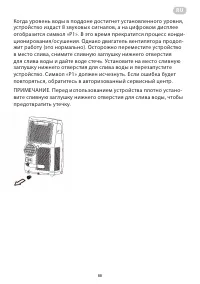
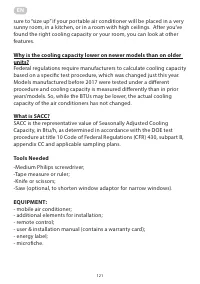
plug and let the water drain away. Reinstall the
bottom drain plug and restart the machine until the
"P1" symbol disappears. If the error repeats, call for
service.
· When the water level of the bottom tray reaches a
predetermined level, the unit beeps 8 times, the
digital display area shows "P1" . At this time the air
conditioning/dehumidification process will
immediately stop. However, the fan motor will
continue to operate(this is normal). Carefully move
the unit to a drain location, remove the bottom drain
NOTE: Be sure to reinstall
the bottom drain plug
firmly to prevent leakage
before using the unit.
Remove the
upper drain
plug
√
Continuous
drain hose
√
drain hose
adaptor
Continuous
drain hose
Remove the
lower drain plug
Page 20
Safety Precautions
Maintenance
· Always unplug the unit before cleaning or servicing.
· DO NOT use flammable liquids or chemicals to clean the unit.
· DO NOT wash the unit under running water. Doing so causes electrical danger.
· DO NOT operate the machine if the power supply was damaged during cleaning. A damaged
power cord must be replaced with a new cord from the manufacturer.
Maintenance
· During heating pump mode, remove the lower drain
plug from the back of the unit, install the drain
connector(5/8"universal female mender) with 3/4"
hose(locally purchased). For the models without
drain connector, just attach the drain hose to the
hole. Place the open end of the Hose adaptor directly
over the drain area in your basement floor.
Press the power
cord buckle into
the rear cover.
√
delivery lift <1.8m
drain hose
adaptor
drain hose
adaptor
NOTE: Make sure the hose is secure so there are no
leaks. Direct the hose toward the drain, making sure
that there are no kinks that will stop the warter flowing.
Place the end of the hose into he drain and make sure
the end of the hose is down to let the water flow
smoothly.(See Figs with . Do never let it up.(See Figs
with ).When the continuous drain hose is not used,
ensure that the corresponding drain plug and knob are
installed firmly to prevent leakage.
√
X
X
plug and let the water drain away. Reinstall the
bottom drain plug and restart the machine until the
"P1" symbol disappears. If the error repeats, call for
service.
· When the water level of the bottom tray reaches a
predetermined level, the unit beeps 8 times, the
digital display area shows "P1" . At this time the air
conditioning/dehumidification process will
immediately stop. However, the fan motor will
continue to operate(this is normal). Carefully move
the unit to a drain location, remove the bottom drain
NOTE: Be sure to reinstall
the bottom drain plug
firmly to prevent leakage
before using the unit.
Remove the
upper drain
plug
√
Continuous
drain hose
√
drain hose
adaptor
Continuous
drain hose
Remove the
lower drain plug
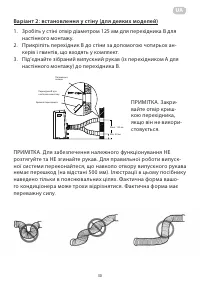
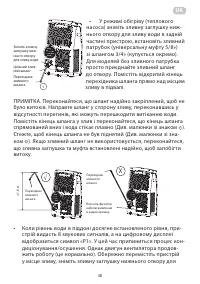
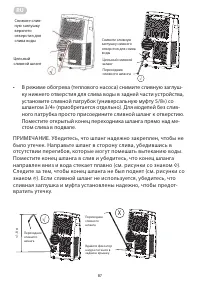
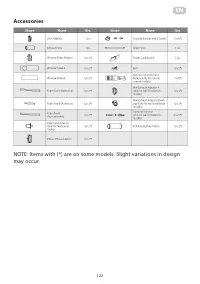
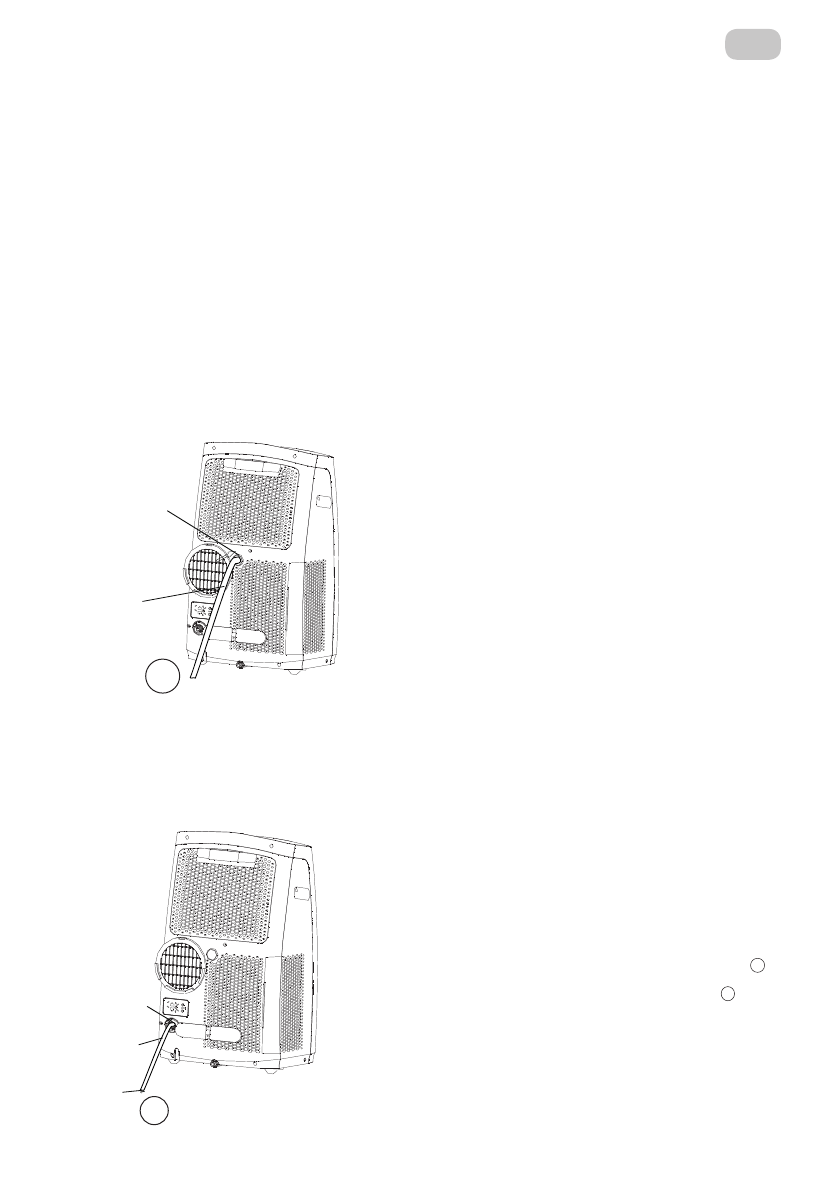
• During heating pump mode, remove
the lower drain plug from the back of
the unit, install the drain connector
(5/8’’ universal female mender) with
3/4’’ hose (locally purchased). For
the models without drain connector,
just attach the drain hose to the
hole. Place the open end of the Hose
adaptor directly over the drain area in
your basement floor.
• NOTE: Make sure the hose is secure so
there are no leaks. Direct the hose
toward the drain, making sure that
there are no kinks that will stop the
warter flowing. Place the end of the
hose into he drain and make sure the
end of the hose is down to let the
water flow smoothly. (See Figs with
Page 20
Safety Precautions
· Always unplug the unit before cleaning or servicing.
· DO NOT use flammable liquids or chemicals to clean the unit.
· DO NOT wash the unit under running water. Doing so causes electrical danger.
· DO NOT operate the machine if the power supply was damaged during cleaning. A damaged
power cord must be replaced with a new cord from the manufacturer.
√
√
X
√
√
).
Do never let it up. (See Figswith
Page 20
Safety Precautions
· Always unplug the unit before cleaning or servicing.
· DO NOT use flammable liquids or chemicals to clean the unit.
· DO NOT wash the unit under running water. Doing so causes electrical danger.
· DO NOT operate the machine if the power supply was damaged during cleaning. A damaged
power cord must be replaced with a new cord from the manufacturer.
√
√
X
√
√
).
When the continuous drain hose is
not used, ensure that the
corresponding drain plug and knob
are installed firmly to prevent leakage.
Содержание
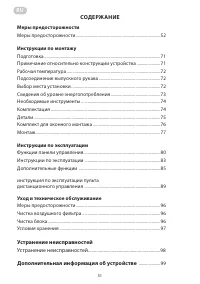
- 51 СОДЕРЖАНИЕ; Меры предосторожности; инструкция по эксплуатации пульта; Уход и техническое обслуживание; Устранение неисправностей
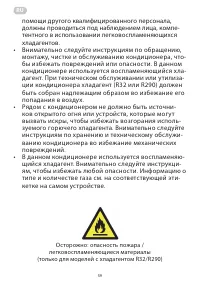
- 57 ПРЕДУПРЕЖДЕНИЕ: использование хладагента
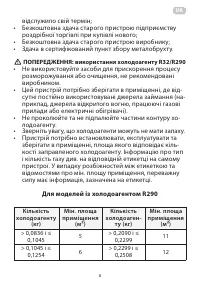
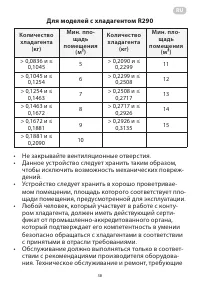
- 58 Для моделей с хладагентом R290
- 59 легковоспламеняющиеся материалы
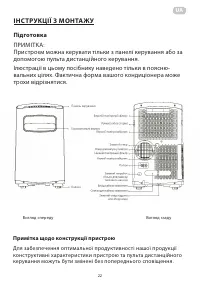
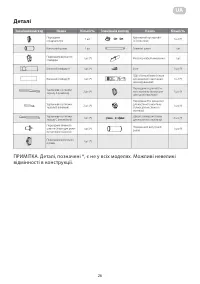
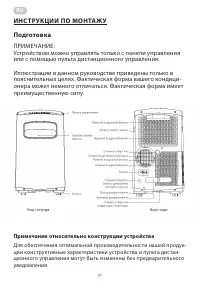
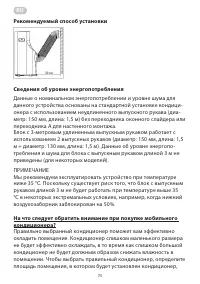
- 71 Примечание относительно конструкции устройства; Для обеспечения оптимальной производительности нашей продук-
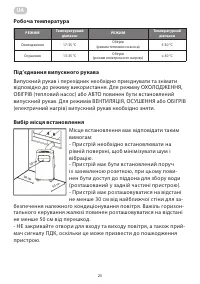
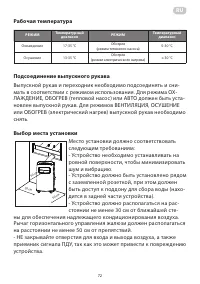
- 72 Рабочая температура
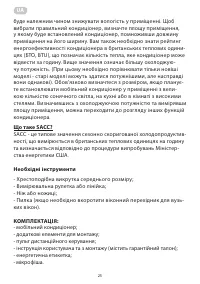
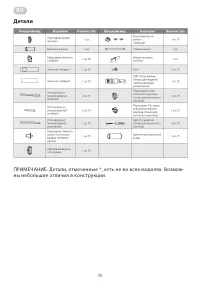
- 74 Необходимые инструменты
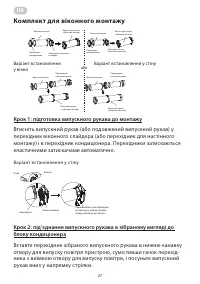
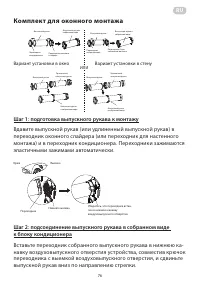
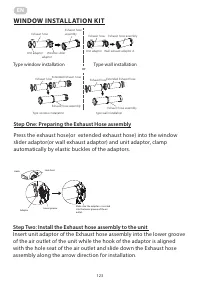
- 76 Комплект для оконного монтажа; Шаг 1: подготовка выпускного рукава к монтажу; Вариант установки в окно
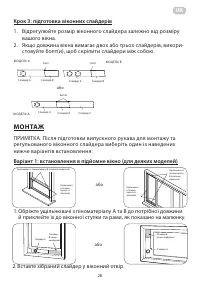
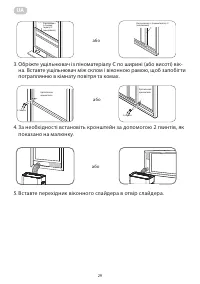
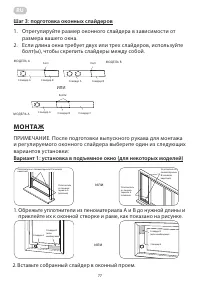
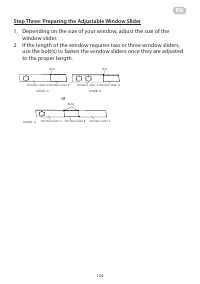
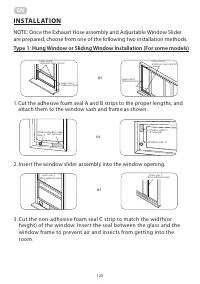
- 77 Шаг 3: подготовка оконных слайдеров; или; Вариант 1: установка в подъемное окно (для некоторых моделей)
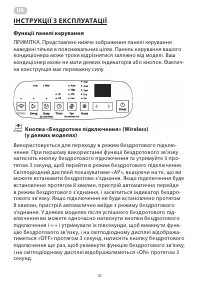
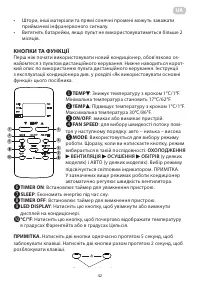
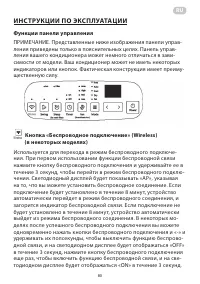
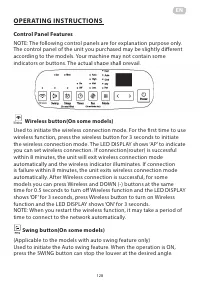
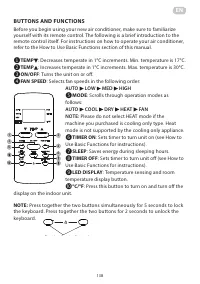
- 80 ИНС ТРУКЦИИ ПО ЭКСПЛУАТАЦИИ; Функции панели управления; Кнопка «Беспроводное подключение» (Wireless)
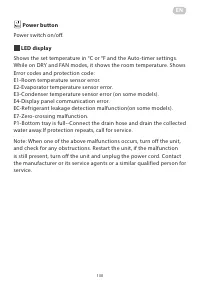
- 82 Кнопка питания
- 83 Инструкции по эксплуатации
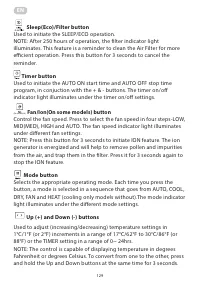
- 85 Дополнительные функции; Функция «Следуй за мной / Температурная чувствительность»
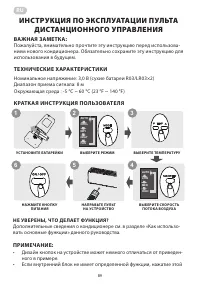
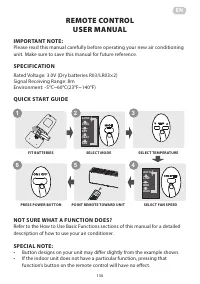
- 89 использования в будущем.; ТЕХНИЧЕСКИЕ ХАРАКТЕРИСТИКИ; Диапазон приема сигнала: 8 м; КРАТКАЯ ИНСТРУКЦИЯ ПОЛЬЗОВАТЕЛЯ; вать основные функции» данного руководства.
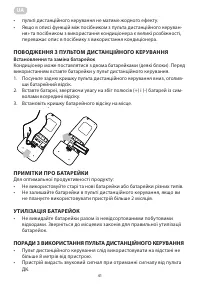
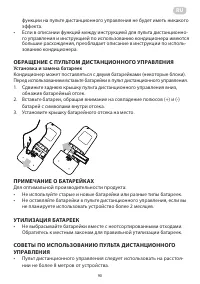
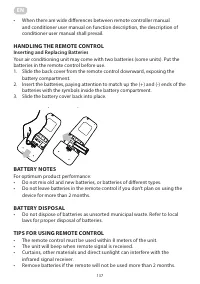
- 90 ПРИМЕЧАНИЕ О БАТАРЕЙКАХ; Установка и замена батареек
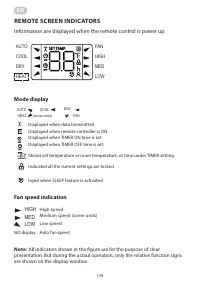
- 92 ИНДИКАТОРЫ ДИСПЛЕЯ ПУЛЬТА ДИСТАНЦИОННОГО УПРАВЛЕНИЯ; Информация отображается, когда пульт дистанционного управле-; Отображение режимов; Отображается, когда включена функция SLEEP.; Все индикаторы, показанные на рисунке, предназначены; НЕ отображается – автоматическая скорость
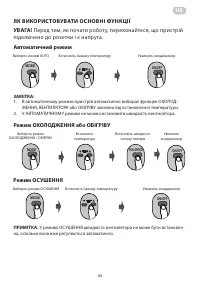
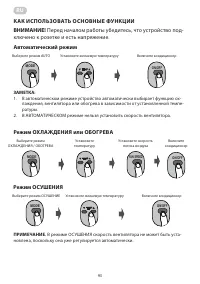
- 93 Перед началом работы убедитесь, что устройство под-; В режиме ОСУШЕНИЯ скорость вентилятора не может быть уста-
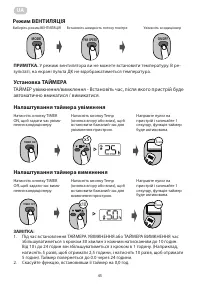
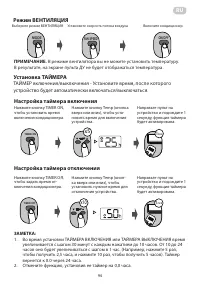
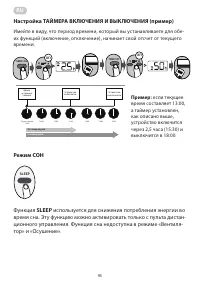
- 94 В режиме вентилятора вы не можете установить температуру.; Режим ВЕНТИЛЯЦИЯ; ТАЙМЕР включения/выключения - Установите время, после которого
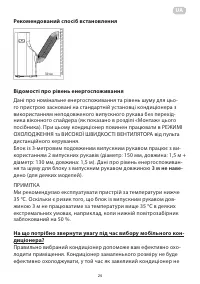
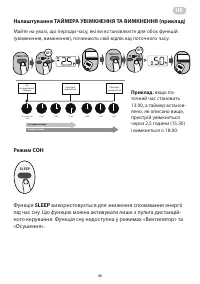
- 95 если текущее; Функция; используется для снижения потребления энергии во
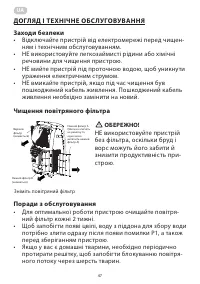
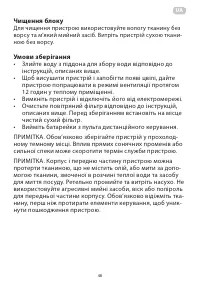
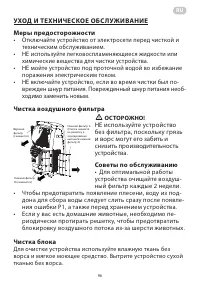
- 96 Для очистки устройства используйте влажную ткань без
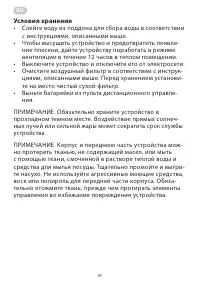
- 97 Условия хранения
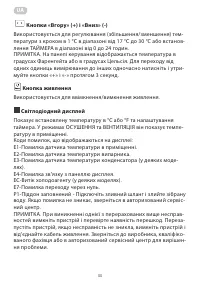
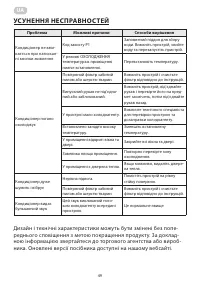
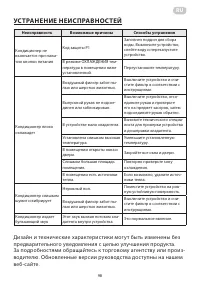
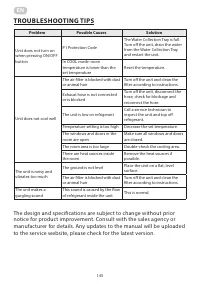
- 98 УСТРАНЕНИЕ НЕИСПРАВНОСТЕЙ; Неисправность; Дизайн и технические характеристики могут быть изменены без
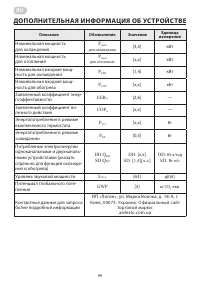
- 99 ДОПОЛНИТЕЛЬНАЯ ИНФОРМАЦИЯ ОБ УСТРОЙСТВЕ; Описание
- 149 ГАРАНТИЙНЫЙ ТА ЛОН; Уважаемый Покупатель! Поздравляем Вас с приобретением при
- 151 Warranty card/Гарантійний талон/Гарантийный талон
Характеристики

Остались вопросы?Не нашли свой ответ в руководстве или возникли другие проблемы? Задайте свой вопрос в форме ниже с подробным описанием вашей ситуации, чтобы другие люди и специалисты смогли дать на него ответ. Если вы знаете как решить проблему другого человека, пожалуйста, подскажите ему :)
