Кондиционеры Ardesto ACM-12P-R290 - инструкция пользователя по применению, эксплуатации и установке на русском языке. Мы надеемся, она поможет вам решить возникшие у вас вопросы при эксплуатации техники.
Если остались вопросы, задайте их в комментариях после инструкции.
"Загружаем инструкцию", означает, что нужно подождать пока файл загрузится и можно будет его читать онлайн. Некоторые инструкции очень большие и время их появления зависит от вашей скорости интернета.


129
EN
Page 17
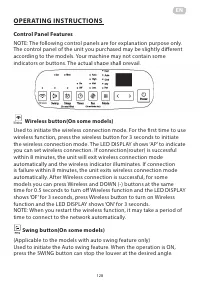
Operating Instructions
Control Panel Features
Wireless
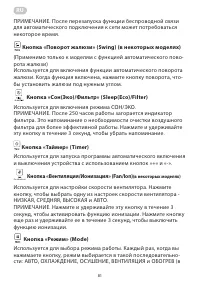
Swing button(On some models)
(Applicable to the models with auto swing feature
only)
Used to initiate the Auto swing feature. When the
operation is ON, press the SWING button can stop the
louver at the desired angle.
NOTE: When you restart the wireless function, it
may take a period of time to connect to the network
automatically.
Wireless
(3s activate ion)
Sleep(Eco)/Filter button
Used to initiate the SLEEP/ECO operation.
Mode button
Selects the appropriate operating mode. Each
time you press the button, a mode is selected
in a sequence that goes from AUTO, COOL,
DRY, FAN and HEAT (cooling only models
without).The mode indicator light illuminates
under the different mode settings.
Sleep(Eco)/Filter button
Used to initiate the SLEEP/ECO operation.
NOTE: After 250 hours of operation, the filter indicator light
illuminates. This feature is a reminder to clean the Air Filter for more
efficient operation. Press this button for 3 seconds to cancel the
reminder.
Page 17
Operating Instructions
Control Panel Features
Wireless
Swing button(On some models)
(Applicable to the models with auto swing feature
only)
Used to initiate the Auto swing feature. When the
operation is ON, press the SWING button can stop the
louver at the desired angle.
NOTE: When you restart the wireless function, it
may take a period of time to connect to the network
automatically.
Wireless
(3s activate ion)
Sleep(Eco)/Filter button
Used to initiate the SLEEP/ECO operation.
Mode button
Selects the appropriate operating mode. Each
time you press the button, a mode is selected
in a sequence that goes from AUTO, COOL,
DRY, FAN and HEAT (cooling only models
without).The mode indicator light illuminates
under the different mode settings.
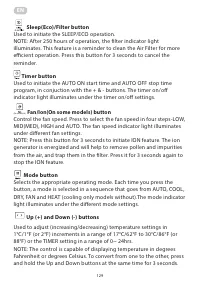
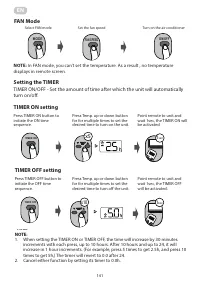
Timer button
Used to initiate the AUTO ON start time and AUTO OFF stop time
program, in conjuction with the + & - buttons. The timer on/off
indicator light illuminates under the timer on/off settings.
Page 17
Operating Instructions
Control Panel Features
Wireless
Swing button(On some models)
(Applicable to the models with auto swing feature
only)
Used to initiate the Auto swing feature. When the
operation is ON, press the SWING button can stop the
louver at the desired angle.
NOTE: When you restart the wireless function, it
may take a period of time to connect to the network
automatically.
Wireless
(3s activate ion)
Sleep(Eco)/Filter button
Used to initiate the SLEEP/ECO operation.
Mode button
Selects the appropriate operating mode. Each
time you press the button, a mode is selected
in a sequence that goes from AUTO, COOL,
DRY, FAN and HEAT (cooling only models
without).The mode indicator light illuminates
under the different mode settings.
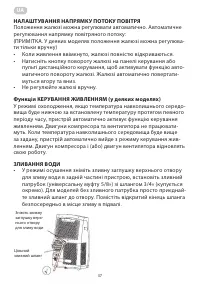
Fan/Ion(On some models) button
Control the fan speed. Press to select the fan speed in four steps-LOW,
MID(MED), HIGH and AUTO. The fan speed indicator light illuminates
under different fan settings.
NOTE: Press this button for 3 seconds to initiate ION feature. The ion
generator is energized and will help to remove pollen and impurities
from the air, and trap them in the filter. Press it for 3 seconds again to
stop the ION feature.
Page 17
Operating Instructions
Control Panel Features
Wireless
Swing button(On some models)
(Applicable to the models with auto swing feature
only)
Used to initiate the Auto swing feature. When the
operation is ON, press the SWING button can stop the
louver at the desired angle.
NOTE: When you restart the wireless function, it
may take a period of time to connect to the network
automatically.
Wireless
(3s activate ion)
Sleep(Eco)/Filter button
Used to initiate the SLEEP/ECO operation.
Mode button
Selects the appropriate operating mode. Each
time you press the button, a mode is selected
in a sequence that goes from AUTO, COOL,
DRY, FAN and HEAT (cooling only models
without).The mode indicator light illuminates
under the different mode settings.
Mode button
Selects the appropriate operating mode. Each time you press the
button, a mode is selected in a sequence that goes from AUTO, COOL,
DRY, FAN and HEAT (cooling only models without).The mode indicator
light illuminates under the different mode settings.
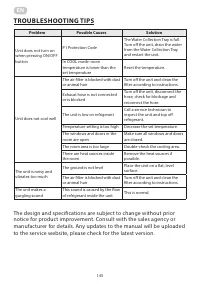
Page 18
Operation Instructions
Operating
Instructions
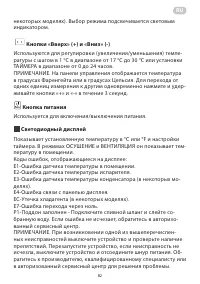
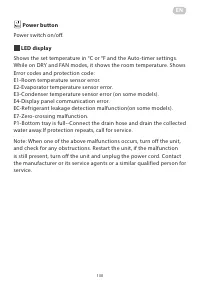
Power button
Power switch on/off.
Up (+) and Down (-) buttons
Used to adjust (increasing/decreasing)
temperature settings in 1°C/1°F (or 2°F)
increments in a range of 17°C/62°F to 30°C/86°F
(or 88°F) or the TIMER setting in a range of 0~
24hrs.
NOTE: The control is capable of displaying
temperature in degrees Fahrenheit or degrees
Celsius. To convert from one to the other, press
and hold the Up and Down buttons at the same
time for 3 seconds.
LED display
Shows the set temperature in °C or °F and the
Auto-timer settings. While on DRY and FAN
modes, it shows the room temperature.
Shows Error codes and protection code:
E1-Room temperature sensor error.
E2-Evaporator temperature sensor error.
E3-Condenser temperature sensor error (on some
models).
E4-Display panel communication error.
EC-Refrigerant leakage detection malfunction(on
some models).
E7-Zero-crossing malfunction.
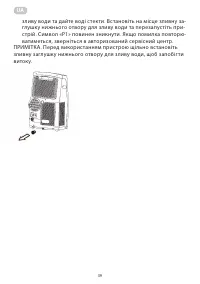
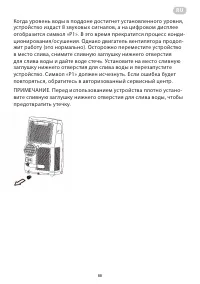
P1-Bottom tray is full--Connect the drain hose and
drain the collected water away.If protection
repeats, call for service.
Note: When one of the above malfunctions occurs, turn
off the unit, and check for any obstructions. Restart the
unit, if the malfunction is still present, turn off the unit
and unplug the power cord. Contact the manufacturer
or its service agents or a similar qualified person for
service.
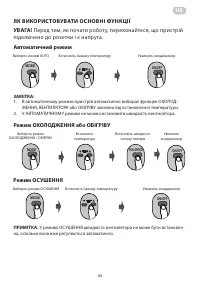
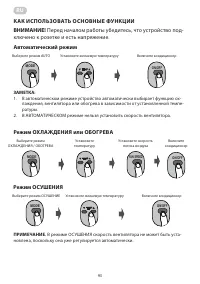
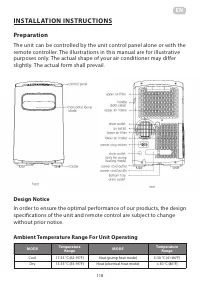
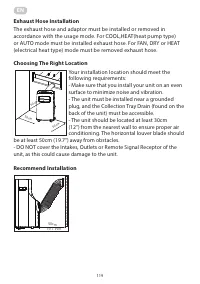
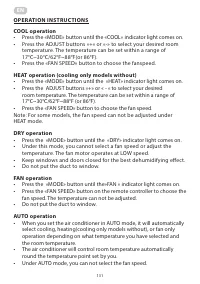
COOL operation
· Press the "MODE" button until the "COOL" indicator
light comes on.
· Press the ADJUST buttons "+" or "-" to select your
desired room temperature. The temperature can be
set within a range of 17°C~30°C/62°F~88°F(or 86°F).
· Press the "FAN SPEED" button to choose the fanspeed.
HEAT operation(cooling only models without)
· Press the "MODE" button until the "HEAT" indicator
light comes on.
· Press the ADJUST buttons "+" or " - " to select your
desired room temperature. The temperature can be
set within a range of 17°C~30°C/62°F~88°F (or 86°F).
· Press the "FAN SPEED" button to choose the fan
speed.
Note: For some models, the fan speed can not be
adjusted under HEAT mode.
DRY operation
· Press the "MODE" button until the "DRY" indicator
light comes on.
· Under this mode, you cannot select a fan speed or
adjust the temperature. The fan motor operates at
LOW speed.
· Keep windows and doors closed for the best
dehumidifying effect.
· Do not put the duct to window.
AUTO operation
· When you set the air conditioner in AUTO mode, it
will automatically select cooling, heating(cooling
only models without), or fan only operation
depending on what temperature you have selected
and the room temperature.
· The air conditioner will control room temperature
automatically round the temperature point set by you.
· Under AUTO mode, you can not select the fan speed.
NOTE: Under AUTO mode, both the AUTO mode and
the actual operation mode indicator lights illuminate
for some models.
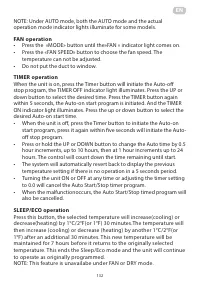
FAN operation
· Press the "MODE" button until the"FAN " indicator
light comes on.
· Press the "FAN SPEED" button to choose the fan
speed. The temperature can not be adjusted.
· Do not put the duct to window.
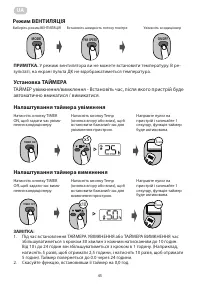
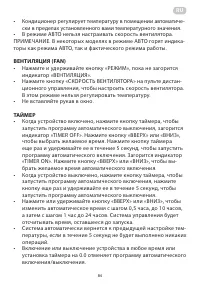
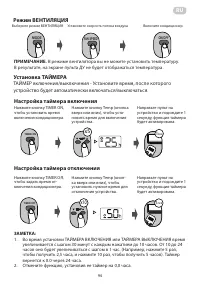
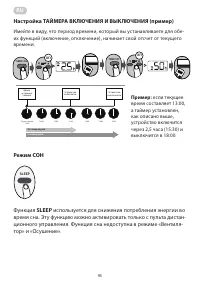
TIMER operation
· When the unit is on, press the Timer button will
initiate the Auto-off stop program, the TIMER OFF
indicator light illuminates. Press the UP or down
button to select the desired time. Press the TIMER
button again within 5 seconds, the Auto-on start
program is initiated. And the TIMER ON indicator
Up (+) and Down (-) buttons
Used to adjust (increasing/decreasing) temperature settings in
1°C/1°F (or 2°F) increments in a range of 17°C/62°F to 30°C/86°F (or
88°F) or the TIMER setting in a range of 0~ 24hrs.
NOTE: The control is capable of displaying temperature in degrees
Fahrenheit or degrees Celsius. To convert from one to the other, press
and hold the Up and Down buttons at the same time for 3 seconds.
Содержание
- 51 СОДЕРЖАНИЕ; Меры предосторожности; инструкция по эксплуатации пульта; Уход и техническое обслуживание; Устранение неисправностей
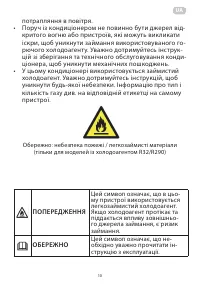
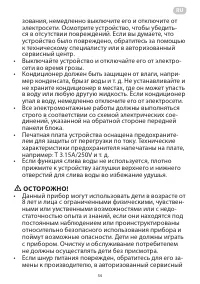
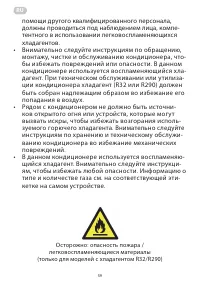
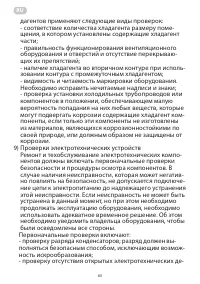
- 57 ПРЕДУПРЕЖДЕНИЕ: использование хладагента
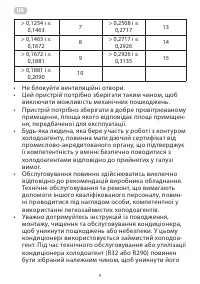
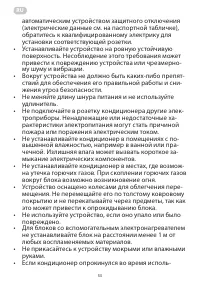
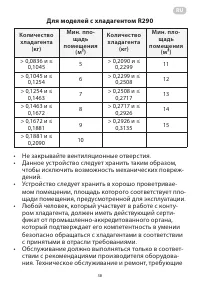
- 58 Для моделей с хладагентом R290
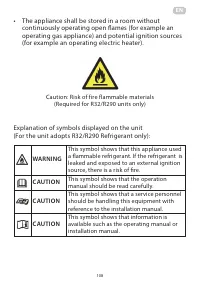
- 59 легковоспламеняющиеся материалы
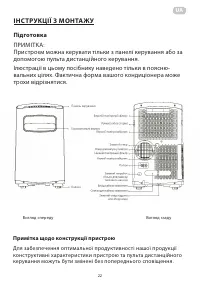
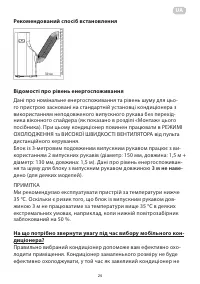
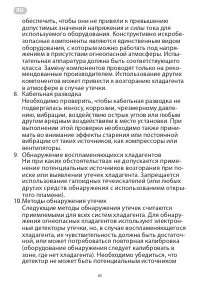
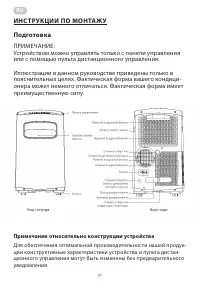
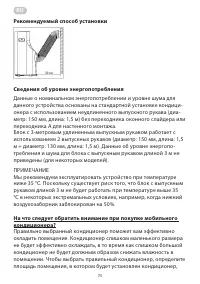
- 71 Примечание относительно конструкции устройства; Для обеспечения оптимальной производительности нашей продук-
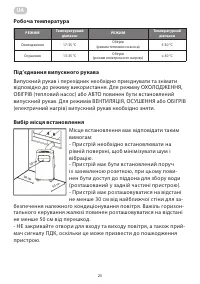
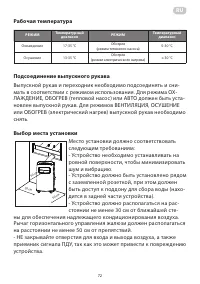
- 72 Рабочая температура
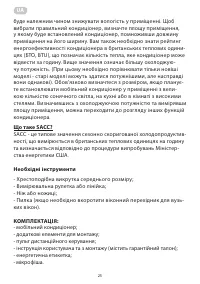
- 74 Необходимые инструменты
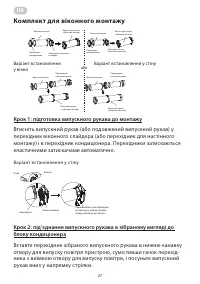
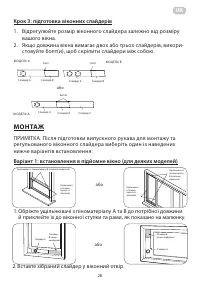
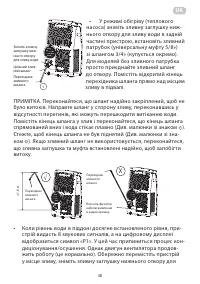
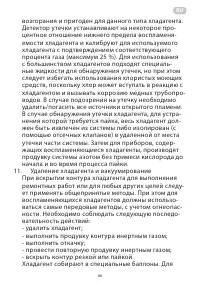
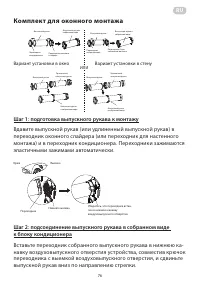
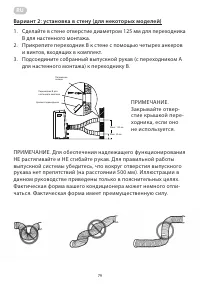
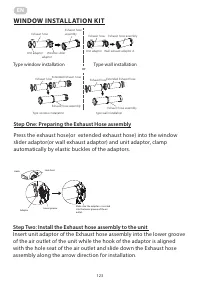
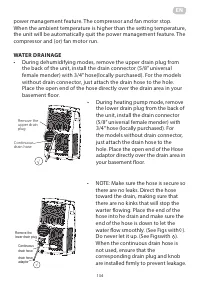
- 76 Комплект для оконного монтажа; Шаг 1: подготовка выпускного рукава к монтажу; Вариант установки в окно
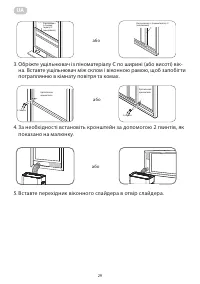
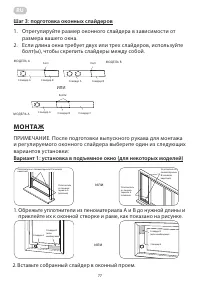
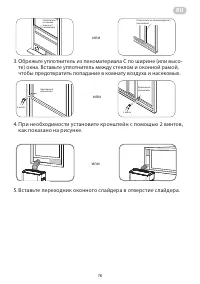
- 77 Шаг 3: подготовка оконных слайдеров; или; Вариант 1: установка в подъемное окно (для некоторых моделей)
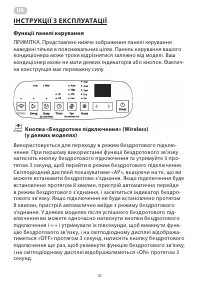
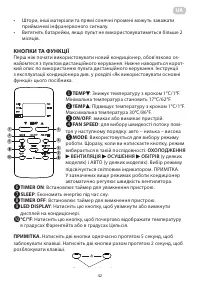
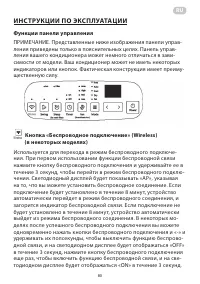
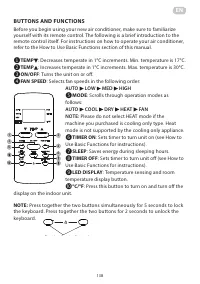
- 80 ИНС ТРУКЦИИ ПО ЭКСПЛУАТАЦИИ; Функции панели управления; Кнопка «Беспроводное подключение» (Wireless)
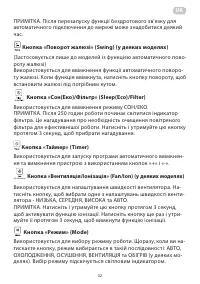
- 82 Кнопка питания
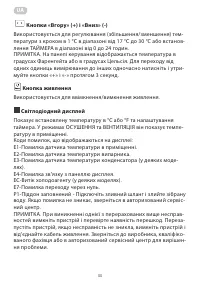
- 83 Инструкции по эксплуатации
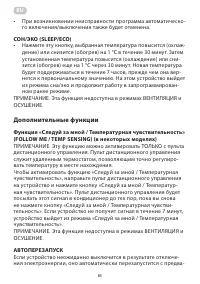
- 85 Дополнительные функции; Функция «Следуй за мной / Температурная чувствительность»
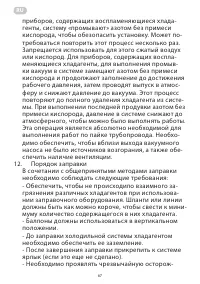
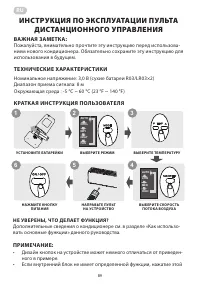
- 89 использования в будущем.; ТЕХНИЧЕСКИЕ ХАРАКТЕРИСТИКИ; Диапазон приема сигнала: 8 м; КРАТКАЯ ИНСТРУКЦИЯ ПОЛЬЗОВАТЕЛЯ; вать основные функции» данного руководства.
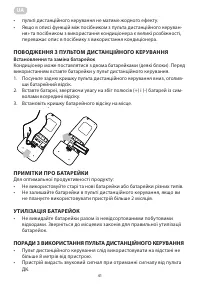
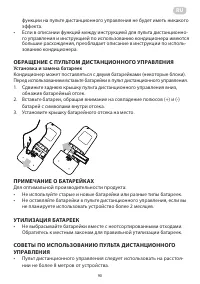
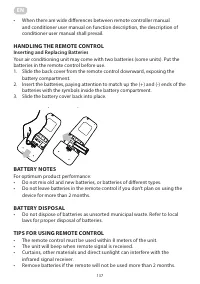
- 90 ПРИМЕЧАНИЕ О БАТАРЕЙКАХ; Установка и замена батареек
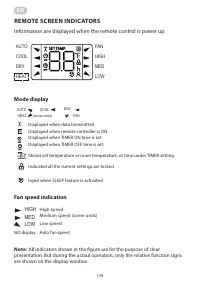
- 92 ИНДИКАТОРЫ ДИСПЛЕЯ ПУЛЬТА ДИСТАНЦИОННОГО УПРАВЛЕНИЯ; Информация отображается, когда пульт дистанционного управле-; Отображение режимов; Отображается, когда включена функция SLEEP.; Все индикаторы, показанные на рисунке, предназначены; НЕ отображается – автоматическая скорость
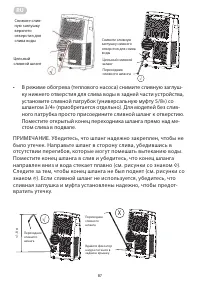
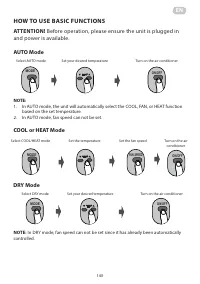
- 93 Перед началом работы убедитесь, что устройство под-; В режиме ОСУШЕНИЯ скорость вентилятора не может быть уста-
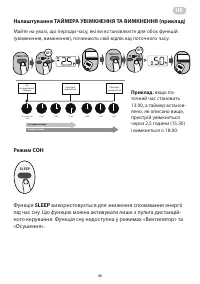
- 94 В режиме вентилятора вы не можете установить температуру.; Режим ВЕНТИЛЯЦИЯ; ТАЙМЕР включения/выключения - Установите время, после которого
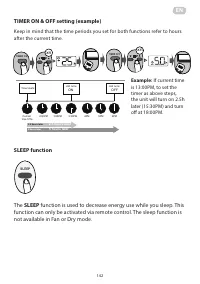
- 95 если текущее; Функция; используется для снижения потребления энергии во
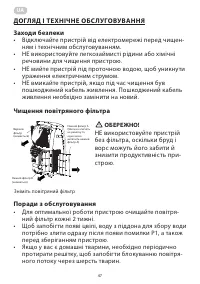
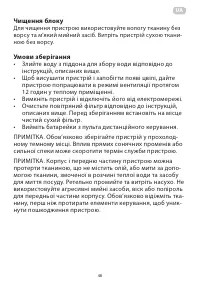
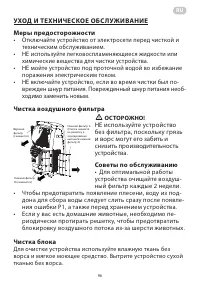
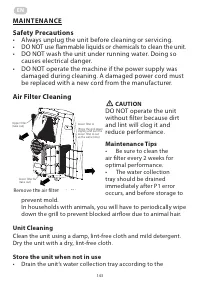
- 96 Для очистки устройства используйте влажную ткань без
- 97 Условия хранения
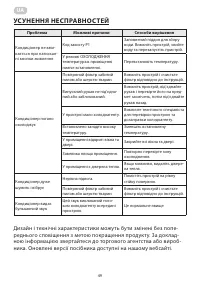
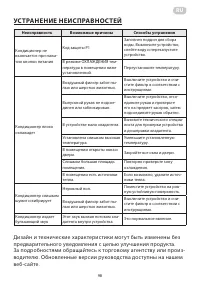
- 98 УСТРАНЕНИЕ НЕИСПРАВНОСТЕЙ; Неисправность; Дизайн и технические характеристики могут быть изменены без
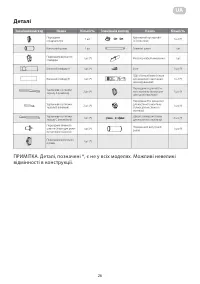
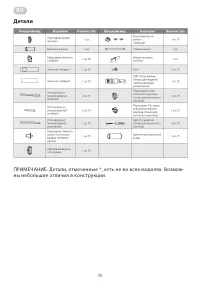
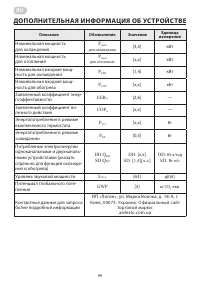
- 99 ДОПОЛНИТЕЛЬНАЯ ИНФОРМАЦИЯ ОБ УСТРОЙСТВЕ; Описание
- 149 ГАРАНТИЙНЫЙ ТА ЛОН; Уважаемый Покупатель! Поздравляем Вас с приобретением при
- 151 Warranty card/Гарантійний талон/Гарантийный талон
Характеристики

Остались вопросы?Не нашли свой ответ в руководстве или возникли другие проблемы? Задайте свой вопрос в форме ниже с подробным описанием вашей ситуации, чтобы другие люди и специалисты смогли дать на него ответ. Если вы знаете как решить проблему другого человека, пожалуйста, подскажите ему :)
