Бензопилы Bosch AKE 35-19 S - инструкция пользователя по применению, эксплуатации и установке на русском языке. Мы надеемся, она поможет вам решить возникшие у вас вопросы при эксплуатации техники.
Если остались вопросы, задайте их в комментариях после инструкции.
"Загружаем инструкцию", означает, что нужно подождать пока файл загрузится и можно будет его читать онлайн. Некоторые инструкции очень большие и время их появления зависит от вашей скорости интернета.


22
| English
F 016 L81 142 | (7.12.16)
Bosch Power Tools
For products
not sold in GB
:
WARNING:
For your safety, it is required that the plug
24
at-
tached to the machine is connected with the extension cord
25
as shown. The coupling of the extension cord must be pro-
tected against splash water, be made of rubber or coated with
rubber. The extension cord must be used with a cable strain
relief.
The connection lead must be inspected for signs of damage at
regular intervals and may only be used if in perfect condition.
If the supply cable on the product is damaged, it must only be
replaced by a Bosch Service Centre.
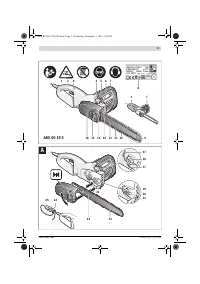
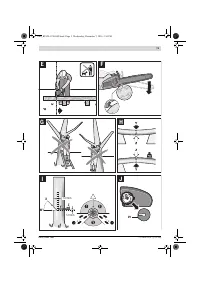
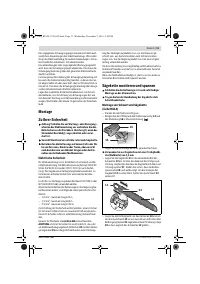
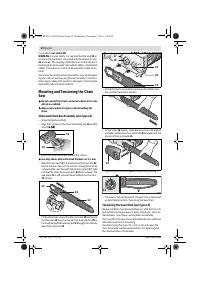
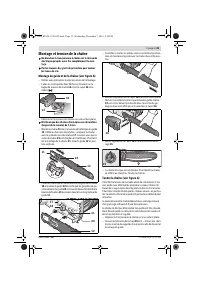
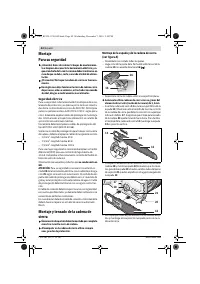
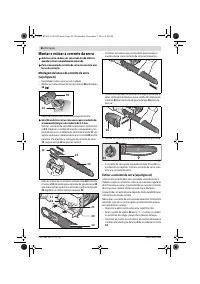
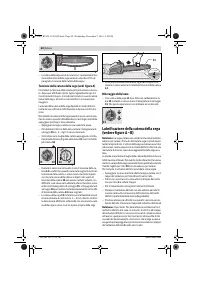
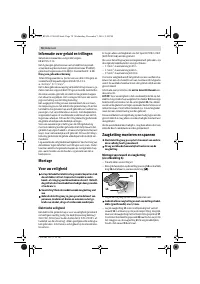
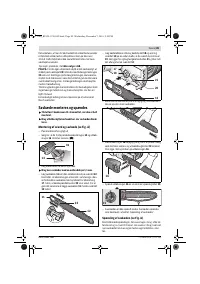
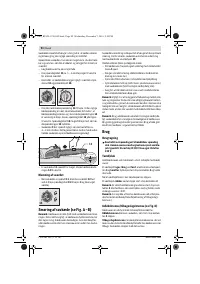
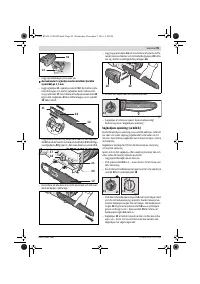
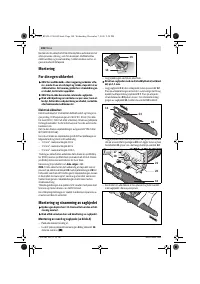
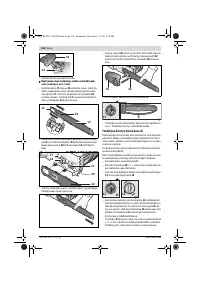
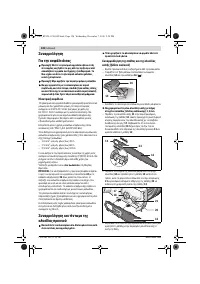
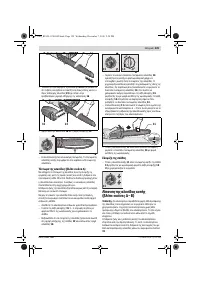
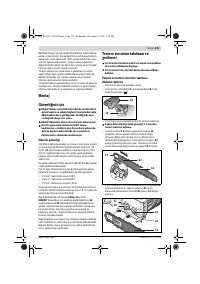
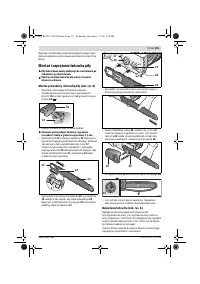
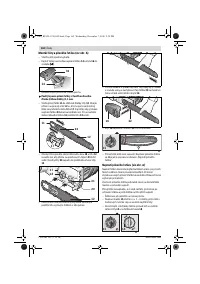
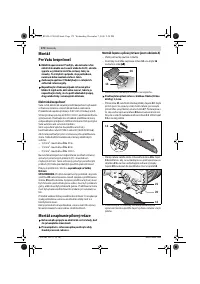
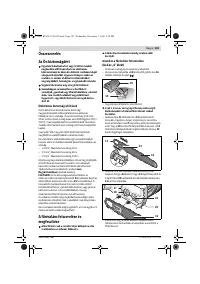
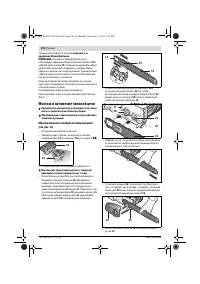
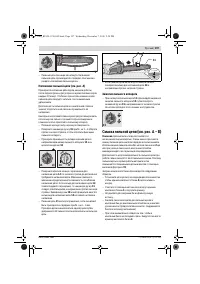
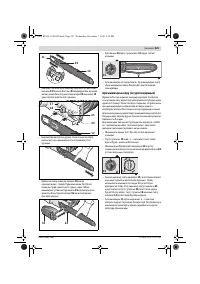
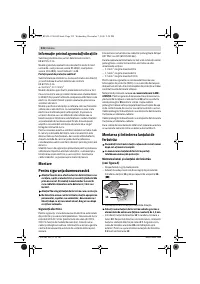
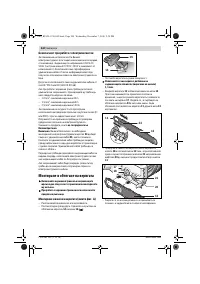
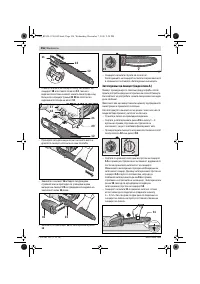
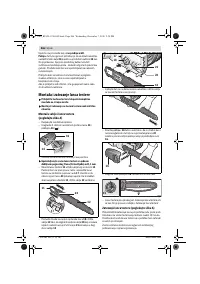
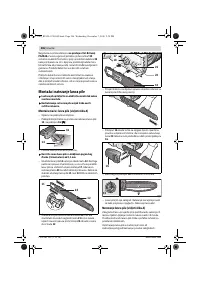
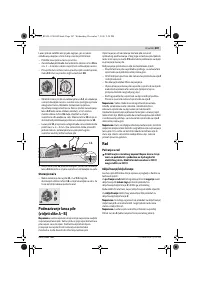
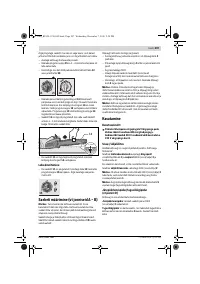
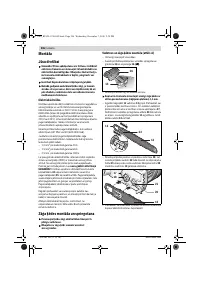
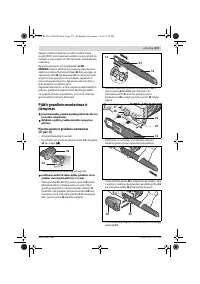
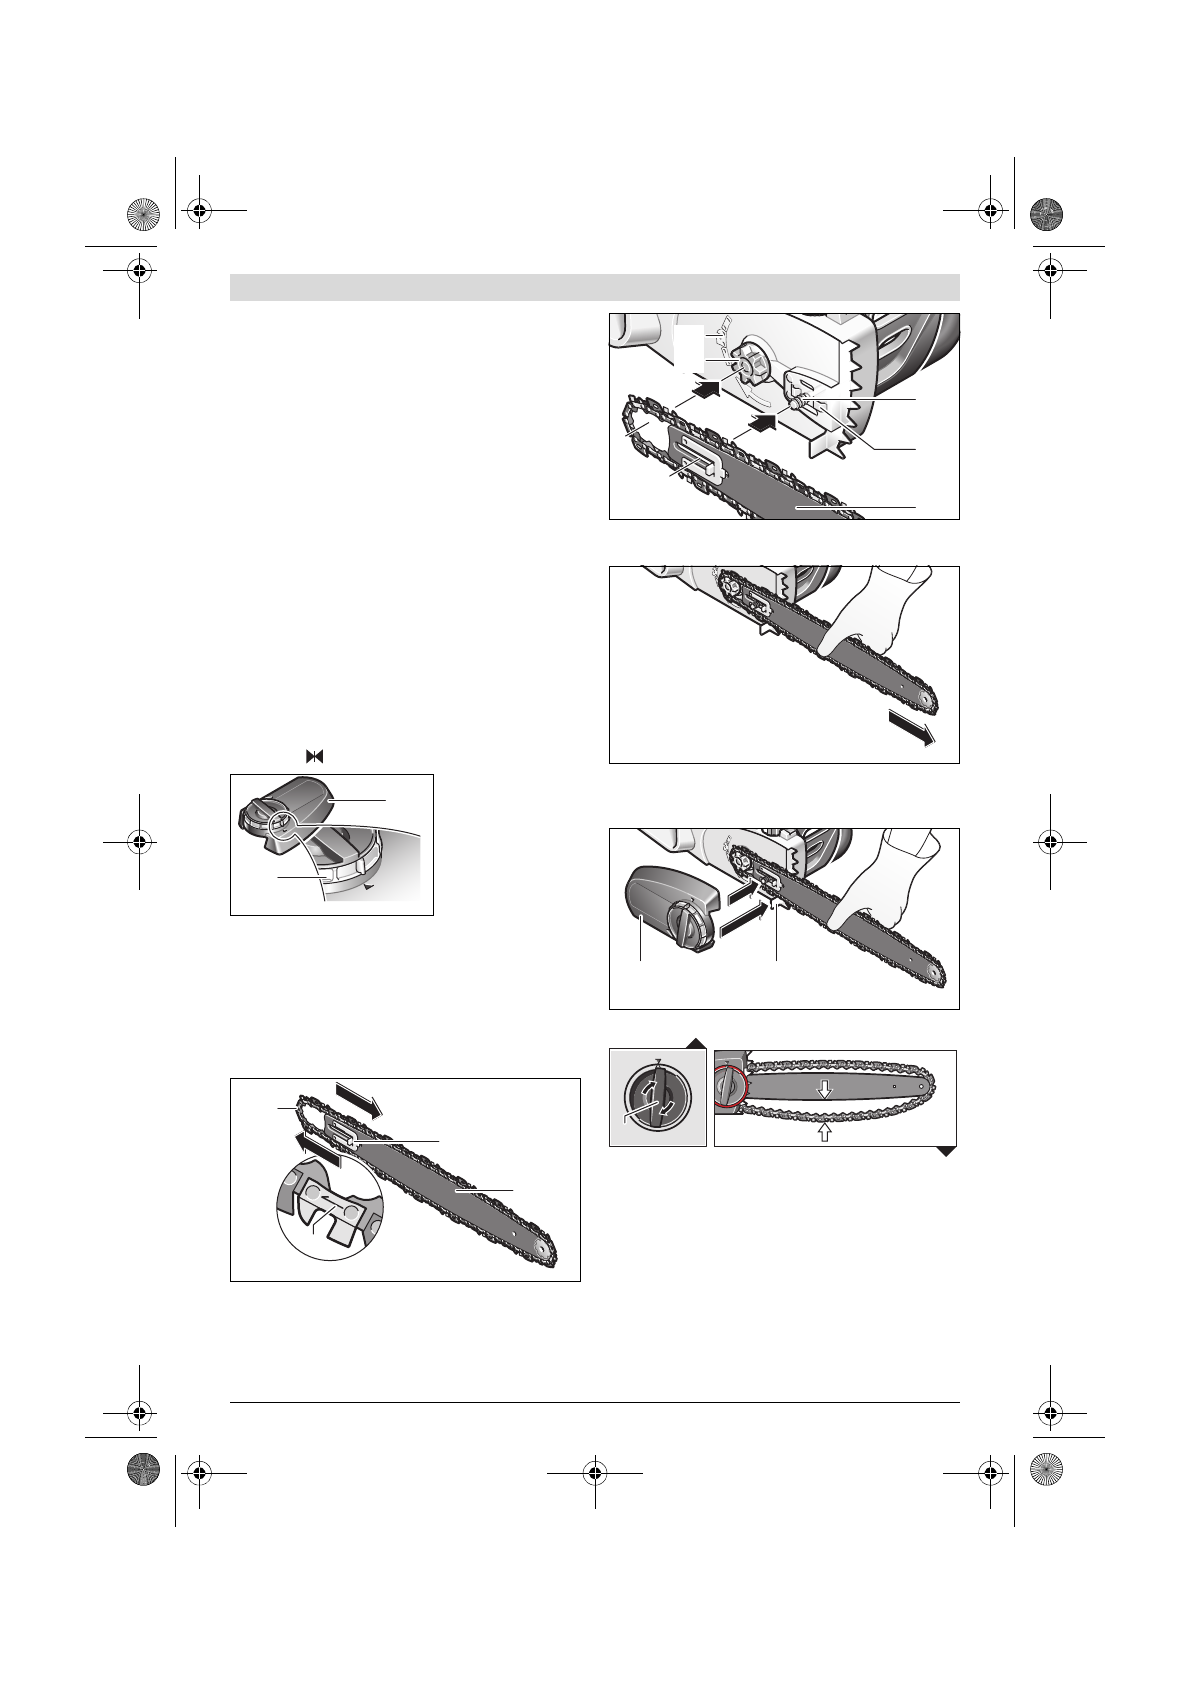
Mounting and Tensioning the Chain
Saw
Do not connect the chain saw to mains before it is com-
pletely assembled.
Always wear protective gloves when handling the
chain.
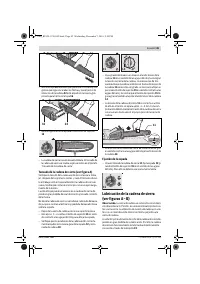
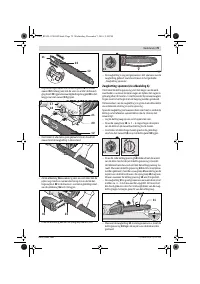
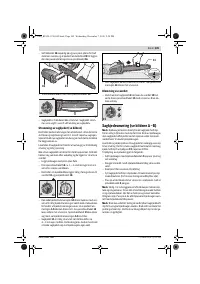
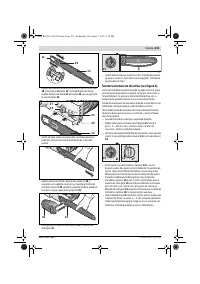
Chain and Chain Bar Assembly (see figure A)
– Unpack all parts carefully.
– Align the 2 arrows on the chain-tensioning ring
14
and the
cover
16
(
).
– Place the chain saw on any suitable flat surface.
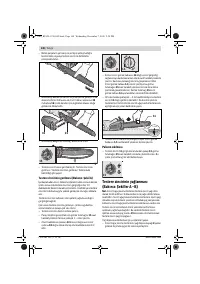
Use only chains with a drive link thickness of 1.1 mm.
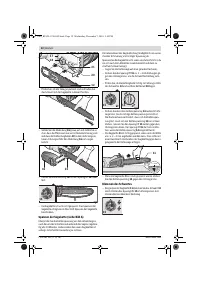
– Slide the saw chain
11
in the slot around the chain bar
12
.
Ensure the saw chain is in the correct running direction by
comparing the saw chain with the rotation symbol
17
. Take
care that the chain tensioning catch
23
faces outward. The
saw chain
11
is slid on easier when holding the chain bar
12
vertical.
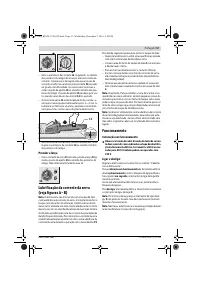
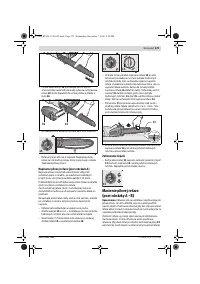
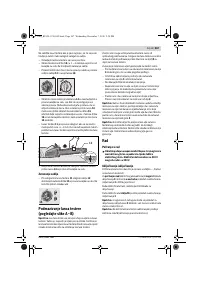
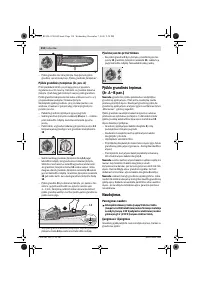
– Fit the chain links around the drive sprocket
18
and mount
the chain bar
12
in such a manner that the guide fins
20
in
front and behind the fastening bolt
21
engage into the key-
way of the chain bar
12
.
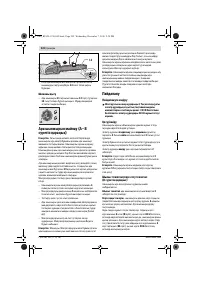
– Check if all parts are seated properly and hold the chain
bar and the chain in this position.
– Fit the cover
16
exactly, check that arrows are still aligned
and take care that the chain catch bolt
22
engages into the
groove of the cover plate
16
.
– Lightly tighten the cover
16
with the locking knob
15
.
– The chain is not yet tensioned. The saw chain is tensioned
as described in section “Tensioning the Saw Chain”.
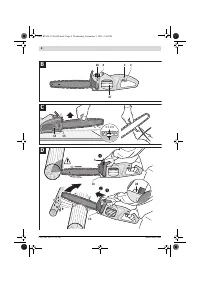
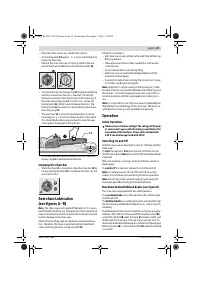
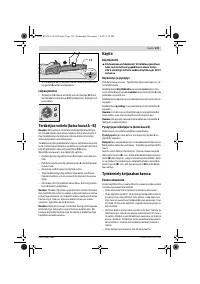
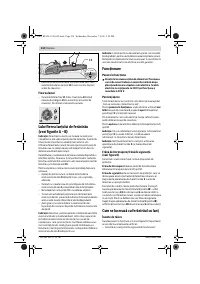
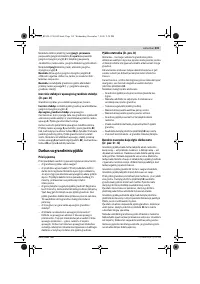
Tensioning the Saw Chain (see figure A)
Always check the chain tension before use, after the first cuts
and regularly during use approx. every 10 minutes. Upon ini-
tial operation, new chains can lengthen considerably.
The chain life of the saw chain mainly depends upon sufficient
lubrication and correct tensioning.
Avoid tensioning the chain if it is hot, as this will cause the
chain to become overtensioned and face too tightly against
the chain bar when it cools down.
16
14
12
23
11
17
17
18
20
12
21
22
16
15
OBJ_BUCH-1238-002.book Page 22 Wednesday, December 7, 2016 2:54 PM
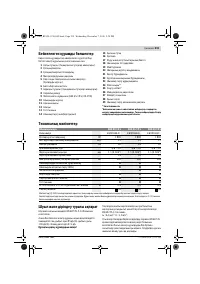
Содержание
- 191 Безопасность рабочего места; Безопасность людей
- 192 Сервис
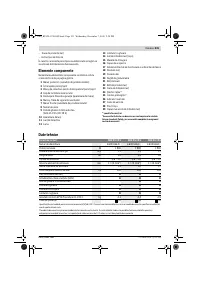
- 194 Описание продукта и услуг
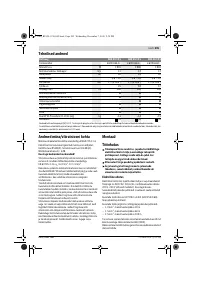
- 195 Данные по шуму и вибрации; Электробезопасность
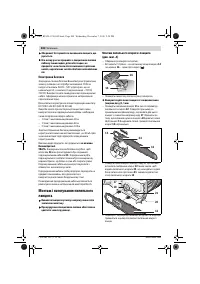
- 196 Монтаж и натяжение пильной цепи
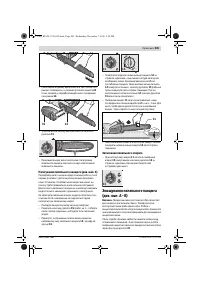
- 197 Зажатие пильного аппарата
- 198 Работа с инструментом; Эксплуатация; Работа с цепной пилой; Перед пилением
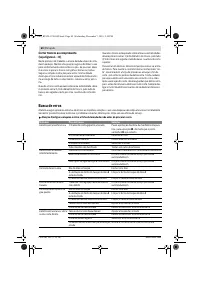
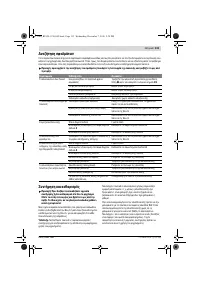
- 201 Поиск неисправностей
- 202 Затачивание пильной цепи; Принадлежности; Очистка
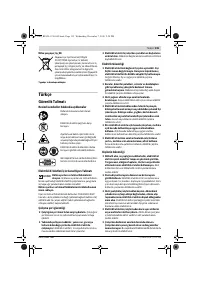
- 203 Утилизация; Українська; Вказівки з техніки безпеки; Пояснення щодо символів
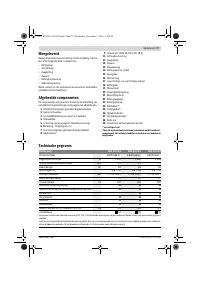
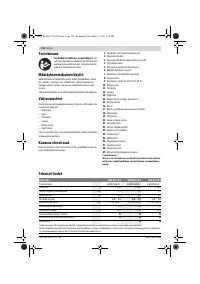
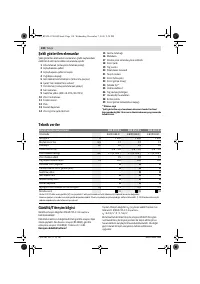
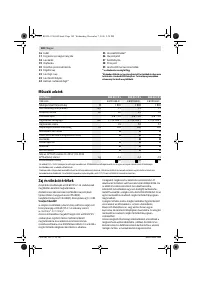
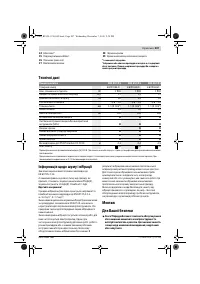
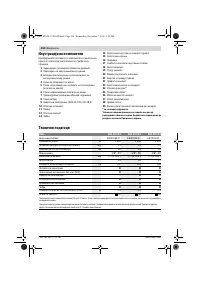
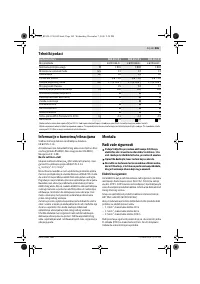
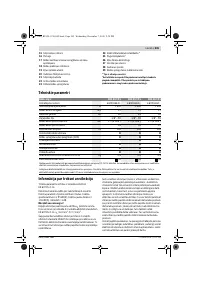
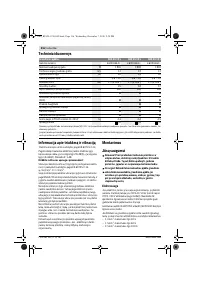
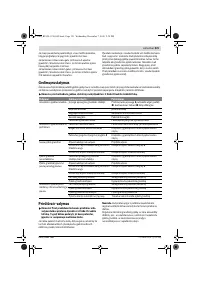
Характеристики

Остались вопросы?Не нашли свой ответ в руководстве или возникли другие проблемы? Задайте свой вопрос в форме ниже с подробным описанием вашей ситуации, чтобы другие люди и специалисты смогли дать на него ответ. Если вы знаете как решить проблему другого человека, пожалуйста, подскажите ему :)


