Веб-камеры Vaddio (999-99950) - инструкция пользователя по применению, эксплуатации и установке на русском языке. Мы надеемся, она поможет вам решить возникшие у вас вопросы при эксплуатации техники.
Если остались вопросы, задайте их в комментариях после инструкции.
"Загружаем инструкцию", означает, что нужно подождать пока файл загрузится и можно будет его читать онлайн. Некоторые инструкции очень большие и время их появления зависит от вашей скорости интернета.

Manual Access and Initial Device Set-Up
To complete the initial device set-up from the web interface, you will need to do these things:
n
Discover the device's IP address.
n
Browse to the device's IP address using HTTPS. This will generate warnings from your browser.
n
Complete the initial device set-up.
Getting the Camera's IP Address for Access via Browser
If you are not using the Vaddio Deployment Tool or the Vaddio Device Controller to locate and work with
the camera, you will need to know its IP address so you can browse to it.
If you know that your network does not automatically assign IP addresses,
skip this section: The
camera's address is 169.254.1.1. You will need to connect your computer's network port to the camera's
network port to do the initial device configuration and network configuration.
If you are not sure, or you know that your network automatically assigns IP addresses, you will need to be
able to view the camera's USB stream to get the IP address.
To get the camera's IP address:
1. Connect the camera to the network, and connect the camera's USB cable to your computer. Then
power up the camera. If necessary, your computer loads the appropriate USB driver.
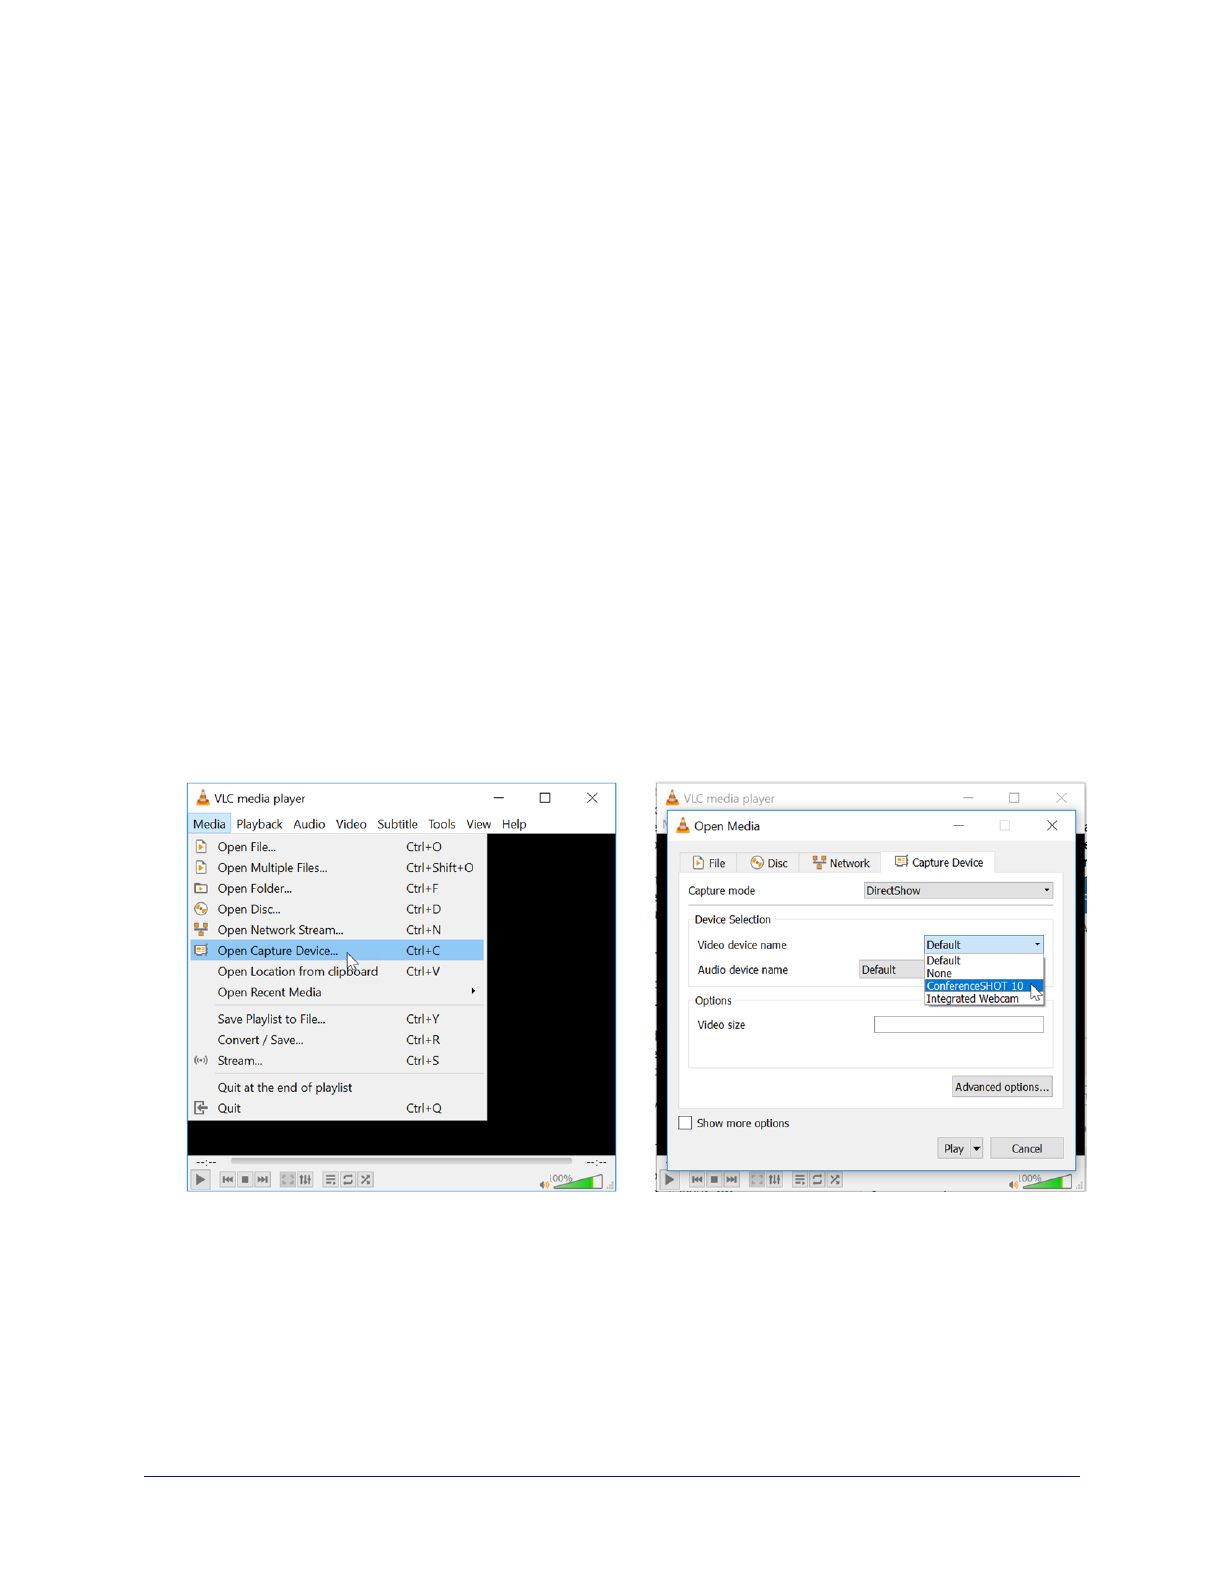
2. Open a media player such as VLC Media Player and view the USB stream (If you use VLC Media
Player, this is the "Open Capture Device" option under Media.). The camera is available as a video
capture device; the device name is ConferenceSHOT AV.
The screen shots below show how you would access the USB stream using VLC Media Player. In this
example, the capture device is a ConferenceSHOT 10 camera. The steps are the same for the
ConferenceSHOT AV camera; only the video device name differs.
3. Point the remote at the camera and press the Data Screen button. The camera overlays its IP address
and MAC address on the video output.
4. Press the button again to dismiss the information display.
18
Complete Manual for the ConferenceSHOT AV Enterprise-Class Conferencing System
Характеристики
Остались вопросы?Не нашли свой ответ в руководстве или возникли другие проблемы? Задайте свой вопрос в форме ниже с подробным описанием вашей ситуации, чтобы другие люди и специалисты смогли дать на него ответ. Если вы знаете как решить проблему другого человека, пожалуйста, подскажите ему :)


