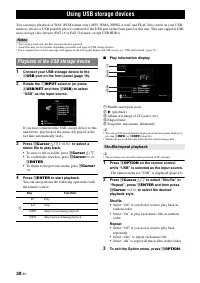
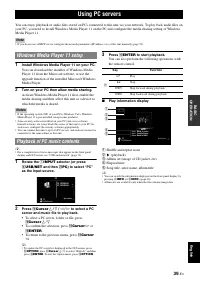
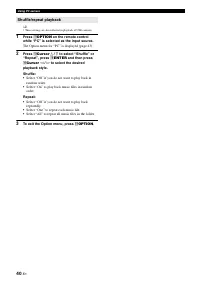
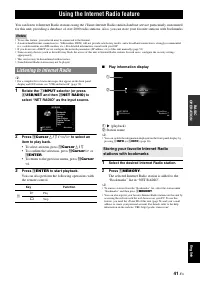
Усилители Yamaha RX-V2065 - инструкция пользователя по применению, эксплуатации и установке на русском языке. Мы надеемся, она поможет вам решить возникшие у вас вопросы при эксплуатации техники.
Если остались вопросы, задайте их в комментариях после инструкции.
"Загружаем инструкцию", означает, что нужно подождать пока файл загрузится и можно будет его читать онлайн. Некоторые инструкции очень большие и время их появления зависит от вашей скорости интернета.


22
En
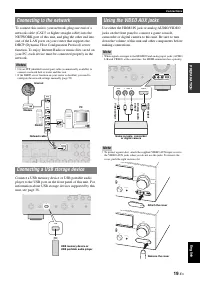
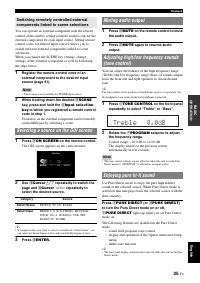
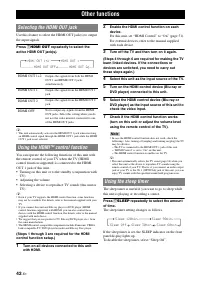
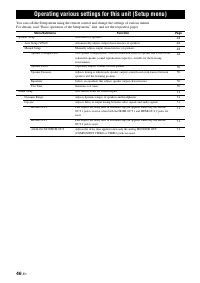
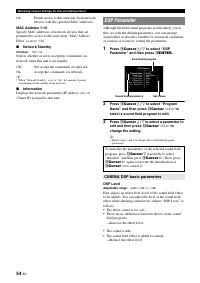
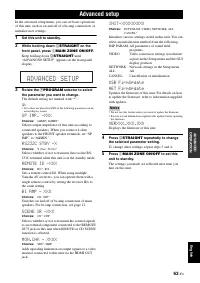
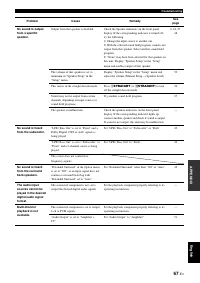
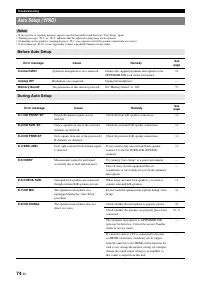
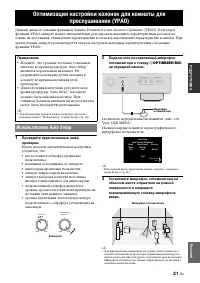
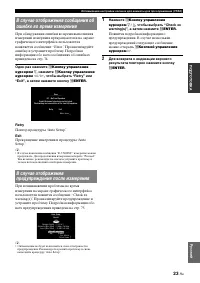
Optimizing the speaker setting for your listening room (YPAO)
4
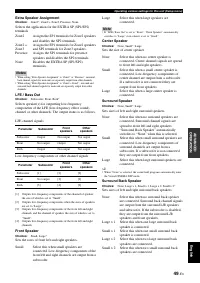
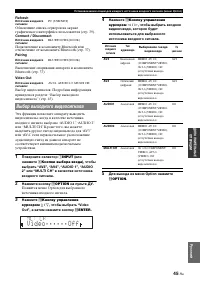
When the speakers are connected to EXTRA
SP terminals, press
j
Cursor
k
repeatedly
to select “Extra Speaker Assignment” and
then press
j
Cursor
l
/
h
to select how to
use EXTRA SP terminals from “Zone2”,
“Zone2+Zone3”, “Presence” or “None”.
If this unit does not work when you press
j
Cursor
,
press
i
ON SCREEN
once and then operate this
unit.
5
To select sound characteristics for
adjustment, press
j
Cursor
n
to select “EQ
Type” and then press
j
Cursor
l
/
h
.
If this unit does not work when you press
j
Cursor
,
press
i
ON SCREEN
once and then operate this
unit.
This unit has a parametric equalizer that adjusts the
output levels for each frequency range. The equalizer
is adjusted to produce a cohesive sound field based on
automatically measured speaker characteristics.
In “EQ Type”, you can select the following
parametric equalizer characteristics suitable for the
desired sound characteristics.
Flat
This adjusts each speaker to obtain the same
characteristics. Select this if your speakers have
similar qualities.
Front
This adjusts each speaker to obtain the same
characteristics as the front left and right speakers.
Select this if your front left and right speakers have
significantly better qualities than the other speakers.
Natural
This adjusts all speakers to achieve natural sound.
Select this if sounds in the high frequency range seem
too strong when “EQ Type” is set to “Flat”.
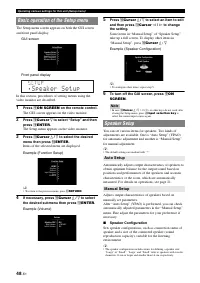
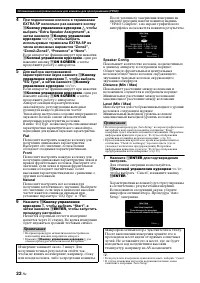
6
Press
j
Cursor
n
to select “Start” and then
press
j
ENTER
to start the setup procedure.
A countdown starts and a measurement starts in 10
seconds. A loud test tone is output during
measurement.
Notes
•
During the automatic setup procedure, do not perform any
operation on this unit.
•
Press
j
Cursor
k
to cancel the automatic setup procedure.
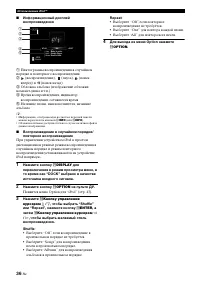
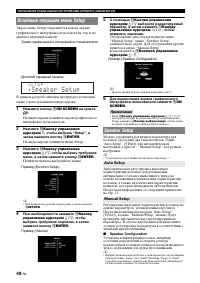
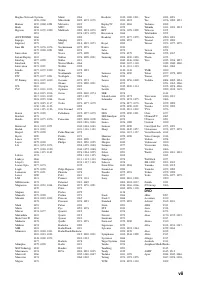
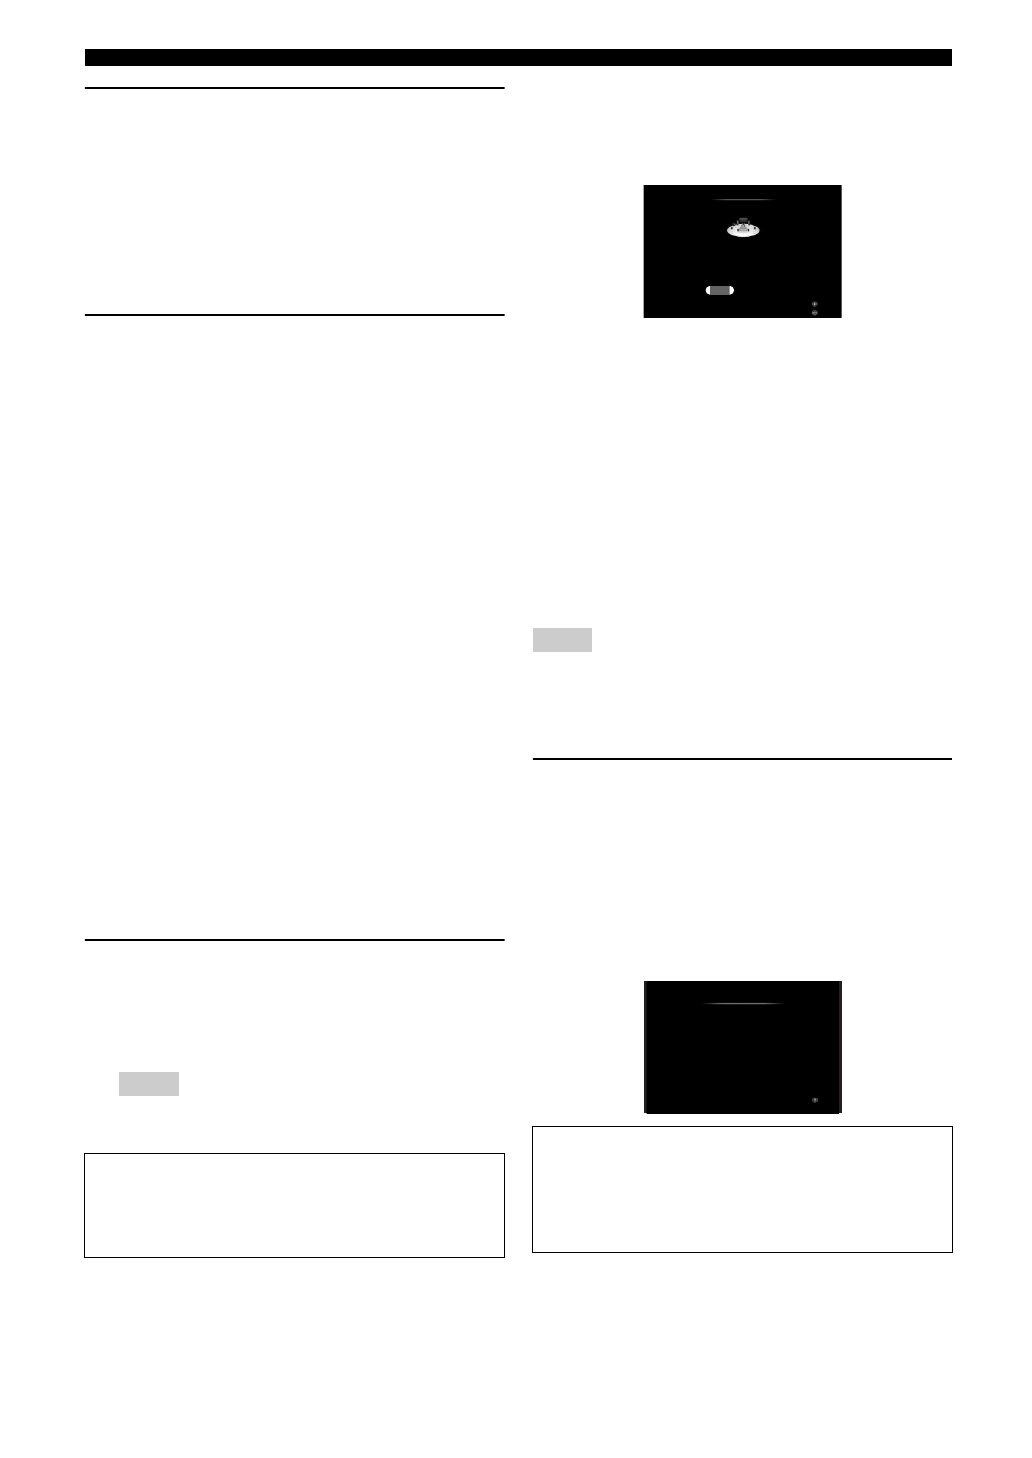
When measurement is successfully completed,
“YPAO Complete” appears on the front panel display
and the measurement result appears on the GUI
screen.
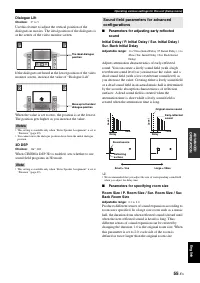
Speaker Config
Displays the number of speakers connected to this unit in
the following order:
Total of Front and Center/Total of Surround and Surround
Back/Subwoofer
Distance (Min / Max)
Displays the speaker distance from the listening position
in the following order:
Closest speaker distance/Farthest speaker distance
Level (Min / Max)
Displays the speaker output levels in the following order:
Lowest speaker output level/Highest speaker output level
Notes
•
If “Error” appears on the GUI screen during “Auto Setup”, measurement
is canceled and the type of error is displayed. For details, see “When an
error message is displayed during measurement” (page 23).
•
If problems occur during measurement, “Check xx warning(s)” (xx
indicates the number of warnings) appears in red. For details, see “When
a warning message is displayed after measurement” (page 23).
7
Press
j
ENTER
to confirm the settings.
To cancel the operation, press
j
Cursor
l
/
h
to
select “Cancel” and press
j
ENTER
.
The speaker characteristics are adjusted according to
measurement results.
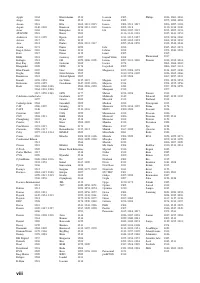
When the following screen appears, remove the
optimizer microphone. “Auto Setup” is now
complete.
y
•
If you do not want to apply the measurement results, select “Cancel”.
•
Perform “Auto Setup” again if you change the number or positions of
speakers.
Measurement takes about 3 minutes. To obtain precise
results, stay where you will not disturb the
measurement, such as to the side of or behind the
speakers or outside the room.
The optimizer microphone is sensitive to heat. Store it
in a cool place and away from direct sunlight after
measurement. Do not leave it in a place where it will be
subjected to high temperatures such on an AV
component.
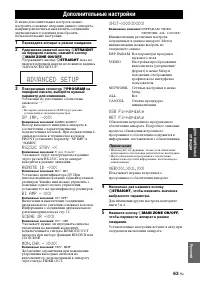
3 /4 / 0.1
3.00m / 10.50m
-3.5dB / +4.5dB
Auto Setup
Speaker Config :
Distance (Min / Max) :
Level (Min / Max) :
Result
Set
Cancel
Finish
Select items
Auto Setup
Please disconnect the micorphone
(Then this screen will automatically disappear)
Return
Auto Setup Completed !
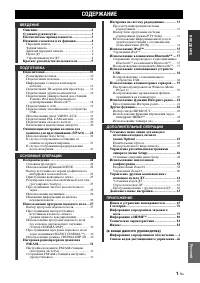
Содержание
- 87 ВВЕДЕ; СОДЕРЖАНИЕ; ВВЕДЕНИЕ
- 88 Описание
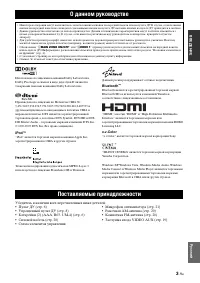
- 89 АЯ; Bluetooth; Убедитесь в наличии всех перечисленных ниже деталей.; О данном руководстве; Поставляемые принадлежности
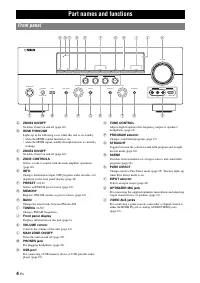
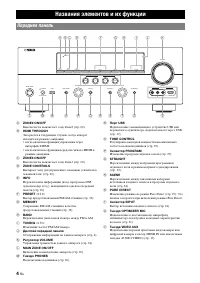
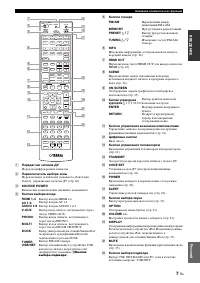
- 90 Названия элементов и их функции; Передняя панель
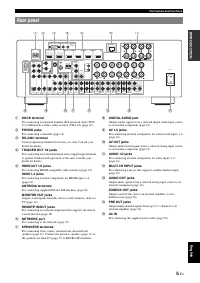
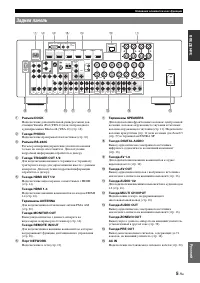
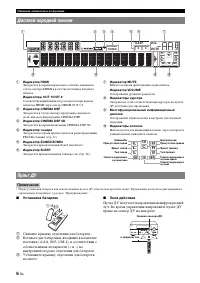
- 91 Задняя панель
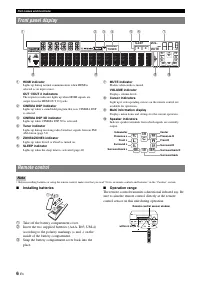
- 92 Примечание; Установка батареек; Снимите крышку отделения для батареек.; Зона действия; Дисплей передней панели; Пульт ДУ
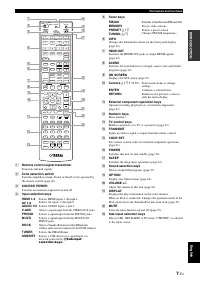
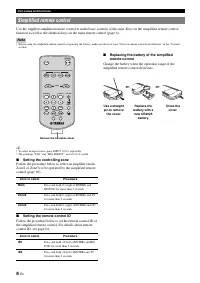
- 94 Установка зоны управления; Упрощенный пульт ДУ
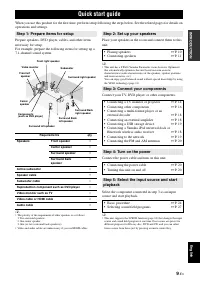
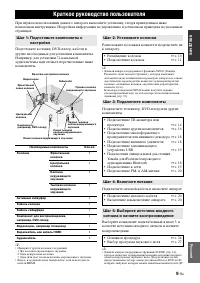
- 95 Краткое руководство пользователя; Шаг 1: Подготовьте компоненты к
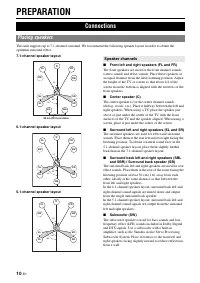
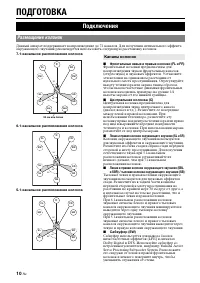
- 96 ПОДГОТОВКА; Фронтальные левые и правые колонки (FL и FR); Подключения; Размещение колонок; Каналы колонок
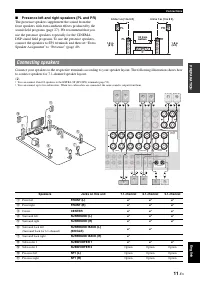
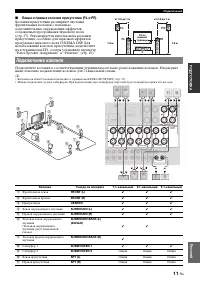
- 97 Подключение колонок
- 98 Подключение кабелей колонок; Предупреждение
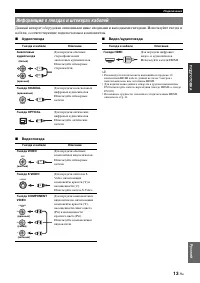
- 99 Информация о гнездах и штекерах кабелей
- 100 Подключение ТВ-экрана или проектора
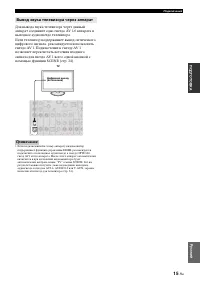
- 101 Вывод звука телевизора через аппарат
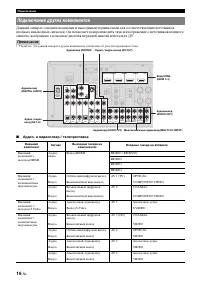
- 102 Подключение других компонентов
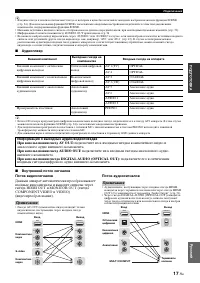
- 103 Поток аудиосигналов; Примечания; Информация о выходных аудио/видеогнездах
- 104 Подключение внешнего усилителя; Передача/прием сигналов дистанционного управления
- 105 Подключение к сети; Использование гнезд VIDEO AUX
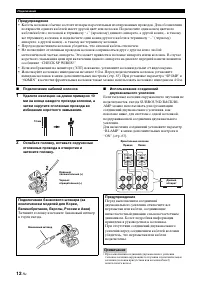
- 106 Подключение силового кабеля
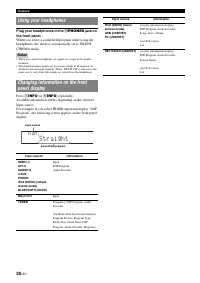
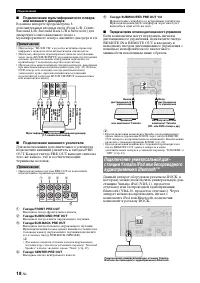
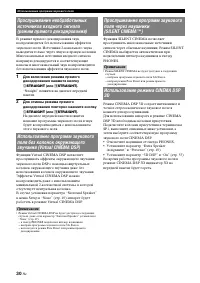
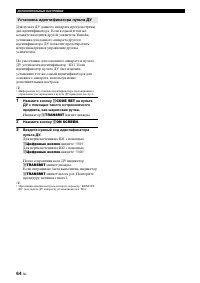
- 107 ДОПОЛНИТЕЛЬН; наушники отсоединены от аппарата; Оптимизация настройки колонок для комнаты для; Использование Auto Setup
- 109 Повтор процедуры “Auto Setup”.
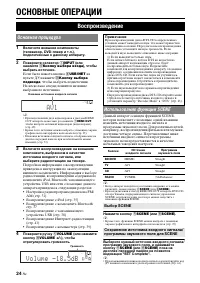
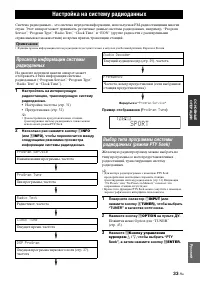
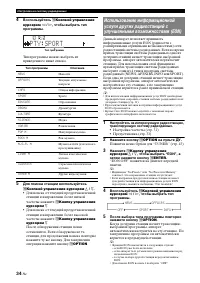
- 110 ОСНОВНЫЕ ОПЕРАЦИИ; Воспроизведение; Основная процедура; Использование функции SCENE; Выбор SCENE
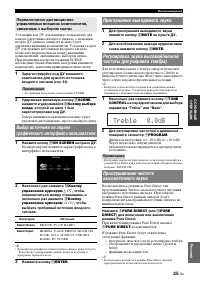
- 111 Приглушение выводимого звука
- 112 Вставьте наушники в гнездо; на; Несколько раз нажмите кнопку; Использование наушников
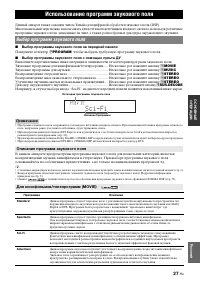
- 113 Поверните селектор; Выбор программы звукового поля с помощью пульта ДУ; Использование программ звукового поля; Выбор программ звукового поля; Описание программ звукового поля
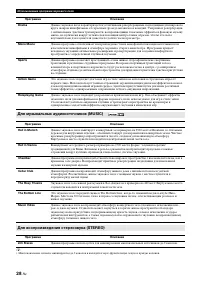
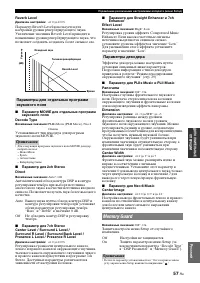
- 115 Для воспроизведения многоканального стереозвука (STEREO)
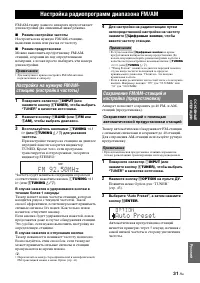
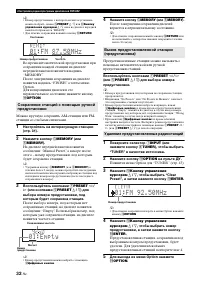
- 117 Настройка радиопрограмм диапазона FM/AM
- 118 Удаление предустановленных радиостанций
- 119 Настройка на систему радиоданных; Наименование программы, частота
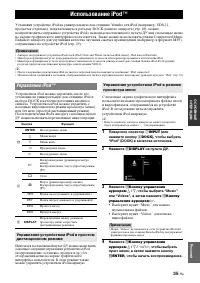
- 121 Использование iPodTM; Управление iPodTM
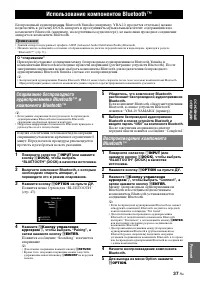
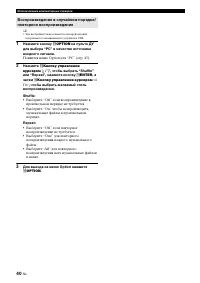
- 123 Использование компонентов BluetoothTM
- 124 Использование запоминающих устройств USB
- 125 Использование компьютерных серверов
- 127 Использование функции Интернет-радио; Прослушивание Интерне-радио
- 128 чтобы установить временной промежуток.; Другие функции; Выбор гнезда HDMI OUT; Использование таймера сна
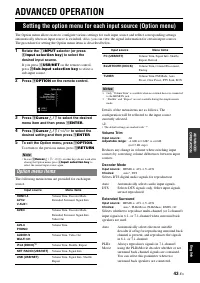
- 129 ДОПОЛНИТЕЛЬНЫЕ ОПЕРАЦИИ; Пункты меню Option
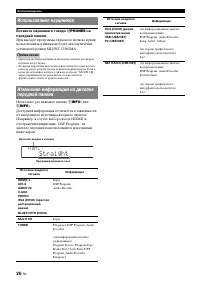
- 130 Кнопки управления курсором
- 131 Обновление списка серверов на экране; Выбор выходного видеосигнала
- 132 Управление различными настройками аппарата (меню Setup)
- 134 Экран графического интерфейса пользователя; Основные операции меню Setup
- 136 Кнопку управления
- 138 Volume
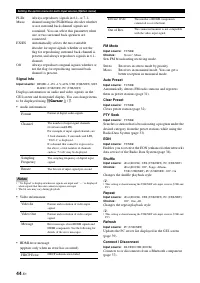
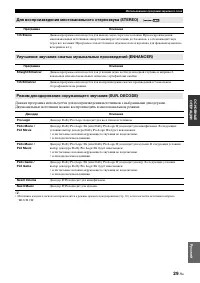
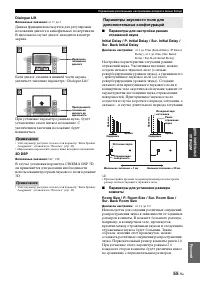
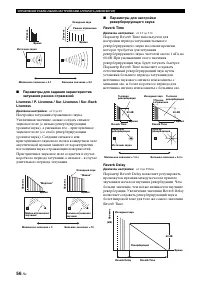
- 140 Основные параметры CINEMA DSP
- 142 Reverb Time
- 143 Параметры декодера
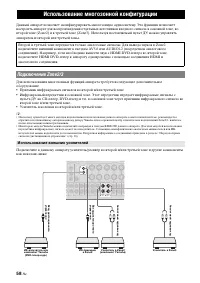
- 144 Приемник инфракрасных сигналов во второй и/или третьей зоне.; Использование многозонной конфигурации; Использование внешних усилителей
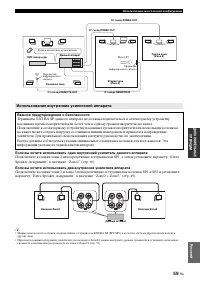
- 145 Использование внутренних усилителей аппарата; Важное предупреждение о безопасности
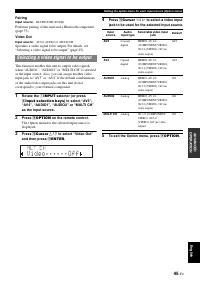
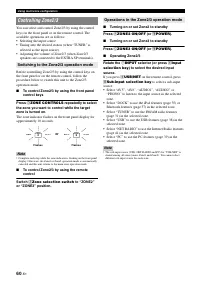
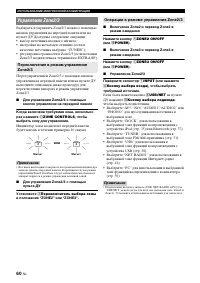
- 146 выбор источника входного сигнала; Если была нажата кнопка; Операции в режиме управления Zone2/3
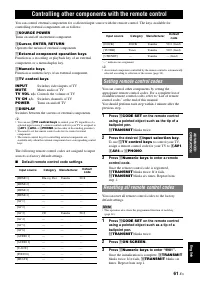
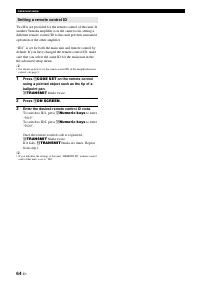
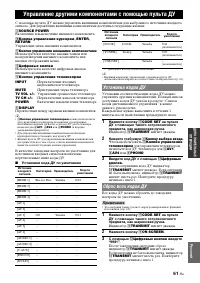
- 147 Управление другими компонентами с помощью пульта ДУ; Установка кодов ДУ
- 148 Программирование с других пультов ДУ
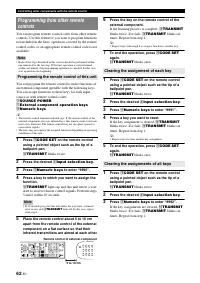
- 149 Дополнительные настройки
- 150 Нажмите кнопку; Установка идентификатора пульта ДУ
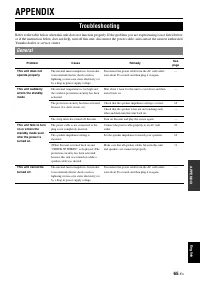
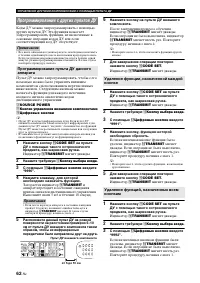
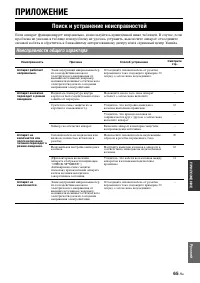
- 151 ÏÎÄÃÎÒÎÂÊÀ; ПРИЛОЖЕНИЕ; Поиск и устранение неисправностей; Неисправности общего характера
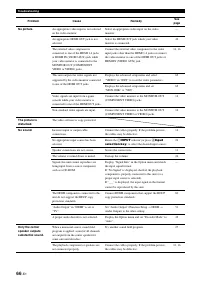
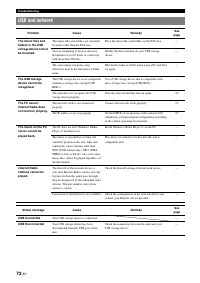
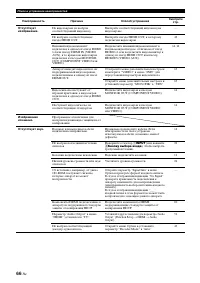
- 158 USB и сеть
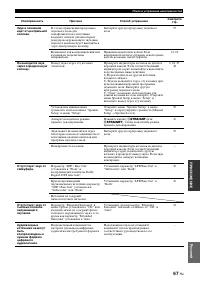
- 160 Перед выполнением процедуры Auto Setup
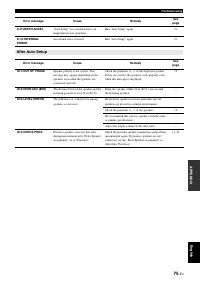
- 161 После Auto Setup
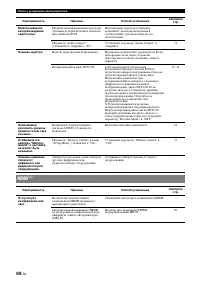
- 162 Глоссарий
- 164 Частота выборки и глубина квантования
- 165 Информация о программах звукового поля
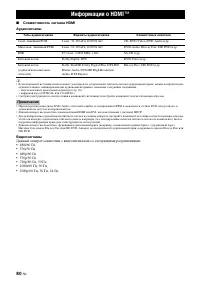
- 166 Совместимость сигнала HDMI; Видеосигналы; Информация о HDMITM
- 167 Технические характеристики
- 168 Индекс
- 169 PRE


