Магнитолы Pioneer MVH-X560BT - инструкция пользователя по применению, эксплуатации и установке на русском языке. Мы надеемся, она поможет вам решить возникшие у вас вопросы при эксплуатации техники.
Если остались вопросы, задайте их в комментариях после инструкции.
"Загружаем инструкцию", означает, что нужно подождать пока файл загрузится и можно будет его читать онлайн. Некоторые инструкции очень большие и время их появления зависит от вашей скорости интернета.


3
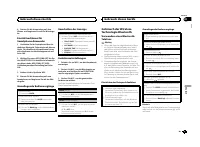
Turn M.C. to select the illumination func-
tion.
Once selected, the following audio functions
can be adjusted.
KEY COLOUR
(key section color setting)
You can select desired colors for the keys of this
unit.
1
Press
M.C.
to display the setting mode.
2
Turn
M.C.
to select the illumination color.
!
Preset colors (ranging from
WHITE
to
BLUE
)
!
SCAN
(cycle through a variety of colors au-
tomatically)
!
CUSTOM
(customized illumination color)
DISP COLOUR
(display section color setting)
You can select the desired colors for the display of
this unit.
1
Press
M.C.
to display the setting mode.
2
Turn
M.C.
to select the illumination color.
!
Preset colors (ranging from
WHITE
to
BLUE
)
!
SCAN
(cycle through a variety of colors au-
tomatically)
!
CUSTOM
(customized illumination color)
BOTH COLOUR
(key and display color setting)
You can select the desired colors for the keys and
display of this unit.
1
Press
M.C.
to display the setting mode.
2
Turn
M.C.
to select the illumination color.
!
Preset colors (ranging from
WHITE
to
BLUE
)
!
SCAN
(cycle through a variety of colors au-
tomatically)
PHONE COLOUR
(phone color setting)
Selecting the key colors displayed when a call is
received
1
Press
M.C.
to display the setting mode.
2
Turn
M.C.
to select the illumination color.
!
FLASHING
–
The color selected from
KEY
COLOUR
flashes.
!
FLASH MODE1
to
FLASH MODE6
–
The
system automatically cycles through all
available key colors for this unit. Select the
desired mode.
!
OFF
–
No change in key color made when
incoming calls are received.
ILLUMI FX
(illumination effect mode)
When this mode is enabled, an illumination effect
with lights that slowly fade in and out in a set pat-
tern will appear on the display and keys to signify
changes.
1
Press
M.C.
to turn
ILLUMI FX
on or off.
!
The illumination effect will flash momentarily
when the ignition is turned ON/OFF, regardless
of whether the
ILLUMI FX
setting is on or off.
Notes
!
When
CUSTOM
is selected, the customized
color saved is selected.
!
CUSTOM
can be set separately from the
DIMMER
on/off setting.
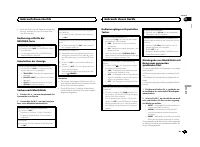
Customizing the illumination color
You can create custom illumination colors for
both
KEY COLOUR
and
DISP COLOUR
.
1
Press M.C. to display the main menu.
2
Turn M.C. to display ILLUMI and press to
select.
3
Turn M.C. to display KEY COLOUR or
DISP COLOUR. Press to select.
4
Press M.C. and hold until the customizing
illumination color setting appears in the dis-
play.
5
Press M.C. to select the primary color.
R
(red)
—
G
(green)
—
B
(blue)
6
Turn M.C. to adjust the brightness level.
Adjustment range:
0
to
60
#
You cannot select a level below
20
for all three of
R
(red),
G
(green), and
B
(blue) at the same time.
#
You can also perform the same operation on
other colors.
Note
You cannot create a custom illumination color
while
SCAN
is selected.
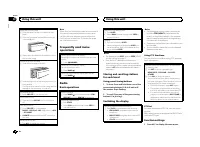
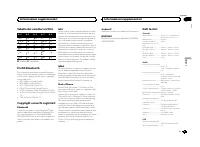
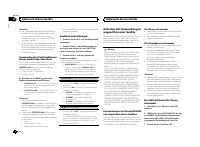
About MIXTRAX
MIXTRAX technology is used to insert a variety
of sound effects in between songs, allowing you
to experience your music as a nonstop mix com-
plete with visual effects.
Notes
!
Depending on the file/song, sound effects
may not be available.
!
Turn MIXTRAX off if the visual effects it pro-
duces have adverse effects on driving. Refer
to
Operations using the MIXTRAX button
MIXTRAX menu
1
Press M.C. to display the main menu.
2
Turn M.C. to change the menu option
and press to select MIXTRAX.
3
Turn M.C. to select the MIXTRAX func-
tion.
Once selected, the following MIXTRAX functions
can be adjusted. The function is enabled when
MIXTRAX is on.
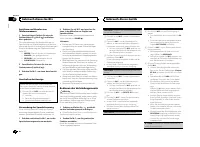
SHORT PLAYBCK
(short playback mode)
You can select the length of the playback time.
1
Press
M.C.
to display the setting mode.
2
Turn
M.C.
to select the desired setting.
1.0 MIN
(1.0 minute)
—
1.5 MIN
(1.5 minutes)
—
2.0 MIN
(2.0 minutes)
—
2.5 MIN
(2.5 minutes)
—
3.0 MIN
(3.0 minutes)
—
OFF
(off)
FLASH AREA
(flash area)
You can select areas for flashing colors.
1
Press
M.C.
to display the setting mode.
2
Turn
M.C.
to select the desired setting.
KEY/DISPLAY
(key and display)
—
KEY
(key)
—
OFF
(off)
!
When
OFF
is selected, the color set under
IL-
LUMI
is used as the display color.
FLASH PATTERN
(flash pattern)
The flashing color and MIXTRAX special effects
display change with changes in the sound and
bass levels.
1
Press
M.C.
to display the setting mode.
2
Turn
M.C.
to select the desired setting.
!
SOUND LEVEL 1
to
SOUND LEVEL 6
–
The
flash pattern changes according to the
sound level. Select a desired mode.
!
LOW PASS 1
to
LOW PASS 6
–
The flash
pattern changes according to the bass
level. Select a desired mode.
!
RANDOM 1
–
The flash pattern changes
randomly according to the sound level
mode and low pass mode.
!
RANDOM 2
–
The flash pattern changes
randomly according to the sound level
mode.
!
RANDOM 3
–
The flash pattern changes
randomly according to the low pass mode.
English
Using this unit
13
Section
Using this unit
En
02
Содержание
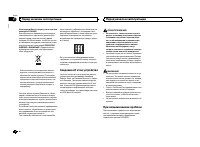
- 138 Благодарим Вас; PIONEER; Держите данное; Сведения об этом устройстве; RDS; ПРЕДУПРЕЖДЕНИЕ; Pioneer CarStereo-Pass; При возникновении проблем; Перед началом эксплуатации
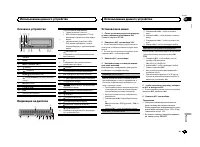
- 139 Установочное меню; SET UP; YES; Меню системы; SRC; Использование данного устройства
- 140 Радиоприемник; Основные операции; SEEK; AF; AF; FREQUENCY; Использование функций
- 141 PTY; Настройка функций; FUNCTION; Запоминающее устройство; Подключение по протоколу
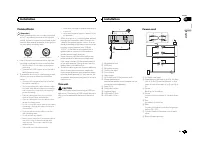
- 142 Функции кнопки
- 144 CONTROL iPod; Для пользователей
- 145 Для пользователей смартфонов; iPhone; Настройки для громкой связи
- 146 Использование меню соединения
- 147 DEL DEVICE; Использование меню телефона; Нажмите
- 148 Функции и их назначение; аудио; Настройка
- 149 Регулировки параметров звука; AUDIO
- 150 PW SAVE; DIMMER
- 151 Выбор цвета подсветки; Меню функции подсветки; Настройка цвета подсветки
- 152 Меню; Стартовое меню
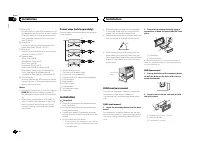
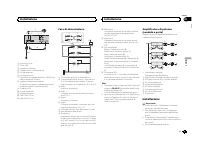
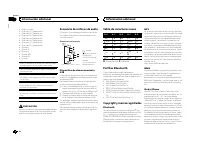
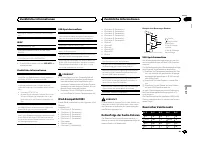
- 153 Меню систе; AUX; Соединения; Установка
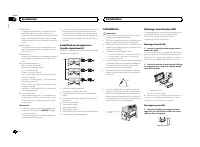
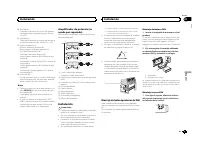
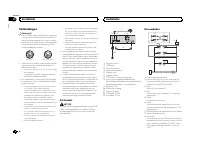
- 154 Данное устройство; ВНИМАНИЕ; Шнур питания; Примечания; на; Усилитель мощности
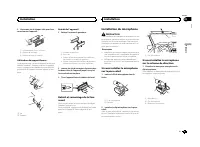
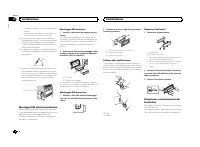
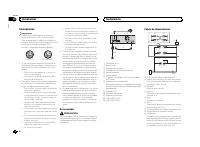
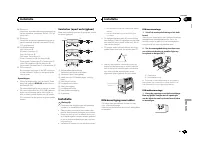
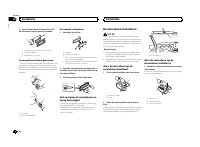
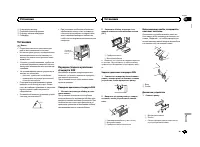
- 155 Переднее; DIN
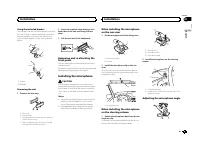
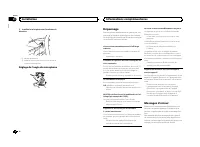
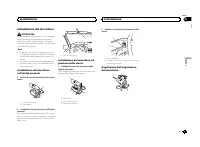
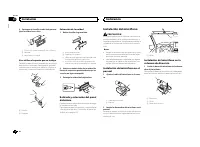
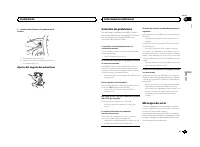
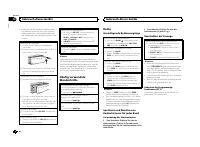
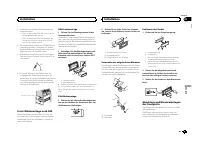
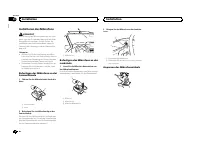
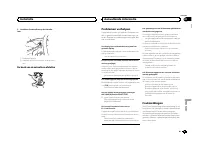
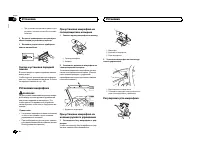
- 156 Установка микрофона; Регулировка угла микрофона
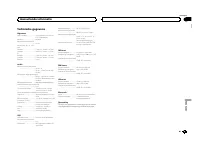
- 157 Общие; Дополнительная информация
- 159 Поддержка
- 160 Профили
- 162 Примечание


